
How to Grow Ginger: Expert Tips & Techniques
How to Grow Ginger: Expert Tips & Techniques
There’s something deeply satisfying about growing your own ginger at home. Unlike many herbs and vegetables that demand constant attention, ginger is refreshingly low-maintenance once you understand its preferences. Whether you’re a seasoned gardener looking to expand your root vegetable collection or a beginner eager to try something different, cultivating ginger opens up a world of culinary possibilities right in your backyard or kitchen.
The beauty of growing ginger lies in its forgiving nature and impressive yield. A single rhizome planted in spring can multiply into several harvestable pieces by fall, giving you fresh ginger for cooking, tea, and wellness remedies. Plus, the process requires minimal special equipment—just patience, the right soil conditions, and a bit of horticultural know-how.
In this comprehensive guide, we’ll walk you through everything you need to know about cultivating ginger successfully, from selecting quality rhizomes to harvesting your bounty. You’ll discover why this humble root vegetable deserves a spot in your garden and how to troubleshoot common issues before they derail your growing season.
Choosing Quality Ginger Rhizomes
The foundation of successful ginger cultivation starts with selecting the right planting material. Not all ginger found in grocery stores will sprout reliably—many are treated with growth inhibitors to extend shelf life. Your best bet is sourcing rhizomes from reputable seed suppliers or specialty nurseries that specifically prepare ginger for planting.
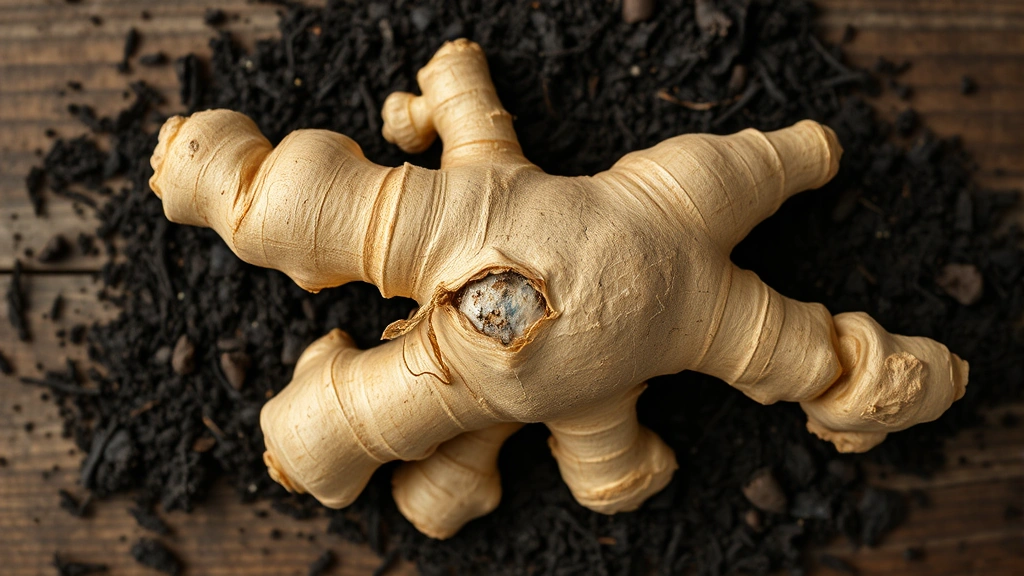
Look for rhizomes that are firm, plump, and free from soft spots or mold. Ideally, you want pieces that are at least two to three inches long and show visible growth buds (those small bumpy protrusions that indicate dormant eyes). These buds are crucial—they’re where your new shoots will emerge. A single large rhizome can be divided into smaller pieces before planting, as long as each section contains at least one visible bud.
The color should be light tan to golden, with no signs of disease or rot. If you’re purchasing from a grocery store out of necessity, choose organic ginger when possible and soak the rhizomes in warm water for 24 hours before planting to help break dormancy. Some gardeners report success with this method, though nursery-sourced rhizomes typically have higher germination rates.
Timing matters too. Ginger prefers warm soil, so plan your purchase for late winter or early spring when you’re ready to plant. Storing rhizomes in cool, slightly moist conditions until planting day helps maintain their viability without encouraging premature sprouting.
Soil Preparation and Container Setup
Ginger thrives in loose, well-draining soil rich in organic matter. Unlike some plants that tolerate compacted earth, ginger demands soil that allows its rhizomes to expand freely without resistance. This becomes especially important when you’re growing ginger in containers, where drainage directly impacts success.
Create a custom potting mix by combining equal parts high-quality potting soil, coconut coir or peat moss, and perlite or coarse sand. This mixture provides excellent drainage while retaining enough moisture for steady growth. Add a generous handful of compost to each container to boost nutrient content—ginger appreciates organic matter but isn’t a heavy feeder like tomatoes or corn.
Container selection is straightforward but important. Choose a pot at least 12 inches deep and 18 inches wide for a single rhizome, or go larger if you’re planting multiple pieces. Terracotta offers excellent drainage but dries quickly, while plastic retains moisture longer. Ensure your container has drainage holes—non-negotiable for preventing root rot.
If you’re planting in garden beds rather than containers, amend your native soil with 3-4 inches of compost and work it in thoroughly to a depth of 12 inches. Ginger prefers slightly acidic soil with a pH between 5.5 and 6.5. A simple soil test kit from your local garden center can confirm whether your garden’s pH needs adjustment.
The Planting Process
Spring is your window for planting ginger—specifically, when soil temperatures consistently reach 65°F or warmer. In cooler climates, wait until late April or May. In tropical or subtropical regions, you can plant year-round, though spring and early summer typically yield the best results.
Fill your prepared container with moist potting mix, leaving about 4 inches of space at the top. Place your rhizome pieces about 2 inches below the soil surface, positioning them horizontally with the growth buds facing upward. Space multiple rhizomes at least 8-10 inches apart to prevent crowding as they expand.
Water thoroughly after planting, then maintain consistently moist (not waterlogged) soil. Place your container in a warm location—ideally between 70-85°F—with bright, indirect light. A sheltered patio, greenhouse, or south-facing windowsill works wonderfully. Avoid direct afternoon sun, which can scorch emerging shoots.
Patience is essential during the germination phase. Ginger is notoriously slow to sprout, often taking 3-4 weeks before you see any green shoots emerging. Resist the temptation to dig up your rhizomes to check on progress—this disturbs the soil and can damage fragile developing roots. Trust the process and maintain consistent moisture.
If you’re familiar with plant propagation techniques, you’ll recognize some similarities in patience and environmental control. Like other plants you might propagate at home, ginger rewards consistency with robust growth.
Watering and General Care
Once your ginger shoots emerge and establish themselves above soil, your watering strategy becomes crucial. Ginger likes consistent moisture but despises waterlogged conditions. The goal is soil that feels like a wrung-out sponge—moist throughout but never soggy.
Water when the top inch of soil feels dry to the touch. During hot summer months, this might mean daily watering for container plants. In cooler seasons, reduce frequency accordingly. Always water at soil level rather than overhead to minimize fungal issues and keep foliage dry.
Feeding ginger is optional but beneficial. Once shoots are 6-8 inches tall, apply a balanced liquid fertilizer (like a 10-10-10 formula) every 3-4 weeks. Alternatively, side-dress with compost in mid-summer for a gentler nutrient boost. Don’t over-fertilize—excess nitrogen encourages lush foliage at the expense of rhizome development.
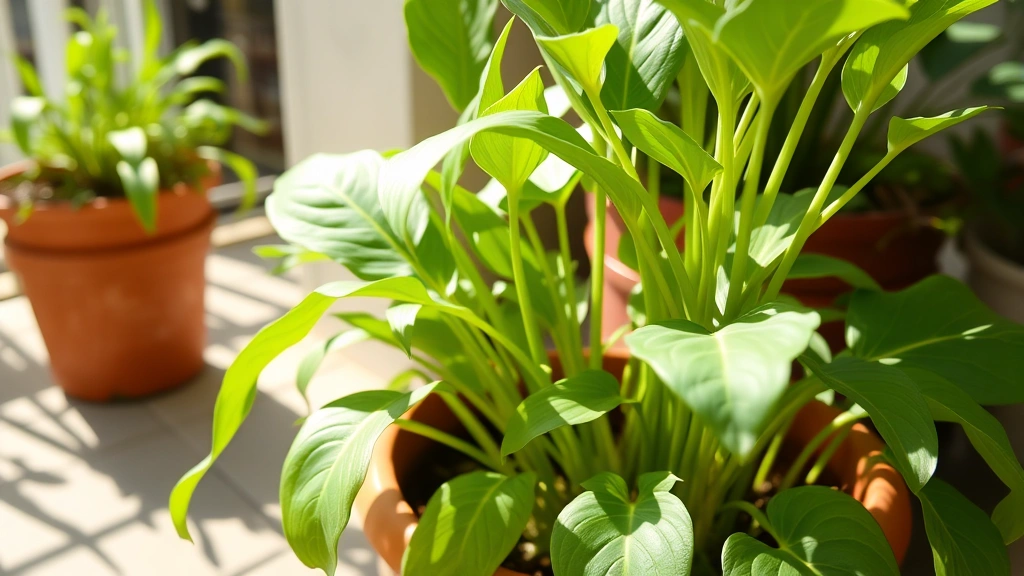
Light requirements are moderate. Ginger grows well in dappled shade or with 4-6 hours of morning sun daily. It tolerates lower light better than most edible plants, making it ideal for patios or partially shaded garden spots. If growing indoors, a bright window or grow light set to 12-14 hours daily supports healthy development.
Temperature consistency matters more than absolute warmth. Ginger sulks when exposed to cold drafts or sudden temperature drops below 60°F. If you’re growing in containers, bring them inside during any unexpected cold snaps. Mulching around outdoor plants with 2-3 inches of straw or wood chips helps insulate soil and regulate temperature fluctuations.
Managing Pests and Diseases
The good news: ginger is remarkably pest-resistant compared to many vegetables. The bad news: when problems do occur, they’re usually serious. The most common issue is root rot, typically caused by overwatering or poor drainage. Prevention is far simpler than treatment—this is why soil composition and container drainage are non-negotiable.
If you notice yellowing leaves, wilting despite moist soil, or a foul smell emanating from the soil, root rot is likely present. Unfortunately, there’s no reliable cure once established. Your best option is to carefully remove the plant, inspect the rhizome for soft, blackened areas, and if damage is minimal, repot in fresh, well-draining soil. Severely affected plants should be discarded to prevent spreading the issue to other containers.
Spider mites occasionally trouble indoor ginger, particularly in dry conditions. Increase humidity by misting foliage or placing containers on pebble trays filled with water. If infestation is severe, spray affected plants with neem oil or insecticidal soap following product instructions.
Fungal leaf spots appear as brown or yellow patches on foliage. These are usually cosmetic rather than life-threatening but can be minimized by improving air circulation, avoiding overhead watering, and removing affected leaves promptly. For significant infestations, apply a copper fungicide according to label directions.
Scale insects and mealybugs can infest ginger, particularly in warm indoor environments. Check the undersides of leaves regularly for small brown bumps (scales) or white cottony clusters (mealybugs). Isolate affected plants immediately and treat with neem oil or horticultural soap weekly until the problem resolves.
Growing ginger alongside garlic and onions can provide some natural pest deterrence through their pungent compounds. If you’re building a comprehensive kitchen garden, these complementary crops share similar growing needs and storage requirements.
Harvesting Your Ginger
The moment of truth arrives after 8-10 months of patient cultivation. Ginger is ready to harvest when foliage yellows and begins dying back, typically in late fall or early winter. At this point, your rhizomes have matured and developed their full flavor profile and medicinal potency.
To harvest, carefully tip the container on its side and gently work the soil away from the rhizome with your hands or a small trowel. Avoid stabbing or cutting the rhizome itself, which creates entry points for rot during storage. Once exposed, lift the entire rhizome cluster from the soil.
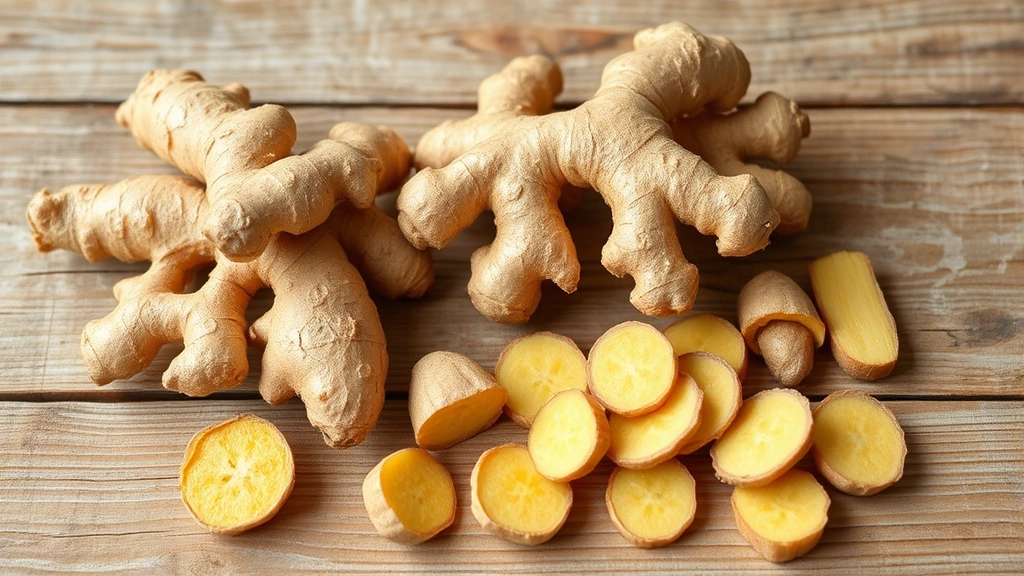
Rinse the rhizome thoroughly under cool running water to remove clinging soil. Examine it carefully—you’ll likely see multiple connected pieces that naturally separate. Gently break apart the clusters, keeping small side rhizomes (called “nubs”) attached to larger sections when possible.
For “young ginger” harvesting (done 3-4 months after planting), you can harvest earlier when rhizomes are smaller and more tender. Simply lift the entire plant, take what you need, and replant the remainder to continue growing. This method provides fresh, milder ginger perfect for pickles or stir-fries.
If you’re considering how to store ginger after harvesting, proper curing and storage conditions dramatically extend shelf life. Fresh ginger keeps for weeks in the refrigerator and months in proper storage conditions.
Storage and Preservation
Freshly harvested ginger needs curing before long-term storage. Spread cleaned rhizomes in a single layer on newspaper in a warm, dry, well-ventilated space for 1-2 weeks. This process hardens the skin and extends storage life considerably. You’ll notice the skin darkening and becoming papery—this is exactly what you want.
For short-term storage (2-3 weeks), keep ginger in the crisper drawer of your refrigerator in a paper bag or wrapped in paper towels. Avoid plastic bags, which trap moisture and encourage rot. For longer storage, keep cured ginger in a cool, dark, well-ventilated location—ideally 50-65°F with 65-70% humidity. A basement corner, root cellar, or dark kitchen cabinet works beautifully.
Alternatively, peel and slice fresh ginger, then freeze it in airtight containers for up to six months. Frozen ginger is perfect for teas, cooking, and smoothies. Some gardeners prefer this method as it’s convenient and maintains quality well.
For maximum preservation, dehydrate sliced ginger in a low oven (150°F) for 3-4 hours until completely dry, then store in airtight jars. Dried ginger develops concentrated flavor and lasts for years. Ground dried ginger is fantastic for baking and wellness applications.
Pickling is another excellent preservation method. Slice young ginger thinly, pack into sterilized jars with vinegar, sugar, and salt, then refrigerate. Pickled ginger keeps for months and adds a delightful zing to Asian dishes and grain bowls.
Growing complementary root vegetables like carrots alongside ginger means you can coordinate harvesting and storage efforts. Many root crops benefit from similar cool storage conditions, making preservation more efficient.
Frequently Asked Questions
Can I grow ginger indoors year-round?
Yes, absolutely. Indoor cultivation works wonderfully, especially in cooler climates. Provide bright, indirect light for 12-14 hours daily using a grow light if natural light is limited. Maintain consistent temperatures between 70-80°F and monitor humidity levels. Container growing indoors offers excellent control over growing conditions and allows you to harvest on your schedule rather than being limited by outdoor seasons.
How many rhizomes should I plant in one container?
A 12×18-inch container comfortably accommodates one mature rhizome. If you’re using larger containers, space rhizomes 8-10 inches apart. Overcrowding leads to stunted growth and increased disease pressure. It’s better to use multiple containers than to cram plants together, giving each rhizome adequate space to expand and develop properly.
Why isn’t my ginger sprouting after two months?
Several factors could delay sprouting. Most commonly, soil temperature is too cool—ginger needs consistent warmth above 65°F, ideally 70-75°F. Check that your rhizome came from a reliable source; grocery store ginger often has inhibitors. Ensure you’re maintaining consistent moisture without waterlogging. If the rhizome feels soft or smells foul, root rot has likely occurred. Sometimes patience is simply required—some rhizomes take 4-6 weeks to sprout even under ideal conditions.
Can I divide a large rhizome before planting?
Yes, you can divide large rhizomes into smaller pieces, but each piece must have at least one visible growth bud. Use a sharp, sterile knife to make clean cuts. Allow cut surfaces to air-dry for 24 hours before planting to minimize rot risk. Smaller pieces may take slightly longer to establish but will eventually produce full-sized plants.
What’s the difference between culinary and medicinal ginger varieties?
Most ginger grown at home is culinary ginger, suitable for cooking and tea. Some specialty nurseries offer varieties bred specifically for medicinal properties, which may have different active compound concentrations. For home gardeners, standard culinary ginger serves both purposes beautifully. The growing requirements are essentially identical.
How much ginger will one rhizome produce?
A single mature rhizome typically produces 5-10 ounces of usable ginger after a full growing season. This might not sound like much, but it translates to several weeks’ worth of fresh ginger for cooking and tea. Multiple rhizomes planted together can yield pounds of ginger by harvest time, making container gardening surprisingly productive.
Can I regrow ginger from store-bought pieces?
You can try, but success rates are lower than with nursery-sourced rhizomes. Store-bought ginger is often treated with growth inhibitors to prevent sprouting on store shelves. Soaking in warm water for 24 hours before planting may help break dormancy. Organic ginger has slightly better success rates. Plant in ideal conditions and be patient—even untreated store ginger sometimes sprouts, though it’s less reliable than cultivated planting stock.
Is ginger truly low-maintenance?
Compared to many vegetables, yes. Once established, ginger requires minimal intervention—just consistent moisture, warmth, and occasional feeding. It’s not particularly fussy about light, tolerates shade well, and rarely faces serious pest or disease issues when grown in proper conditions. The main challenge is simply waiting for germination and growth; the actual care requirements are refreshingly straightforward.
Related Posts

How Long to Boil Lobster Tails: Cooking Guide

How Long to Fly from New York to London? Travel Times
