

Remove Nail Glue: Expert Tips for Safe Cleaning
How to Get Nail Glue Off: Expert Tips for Safe Cleaning
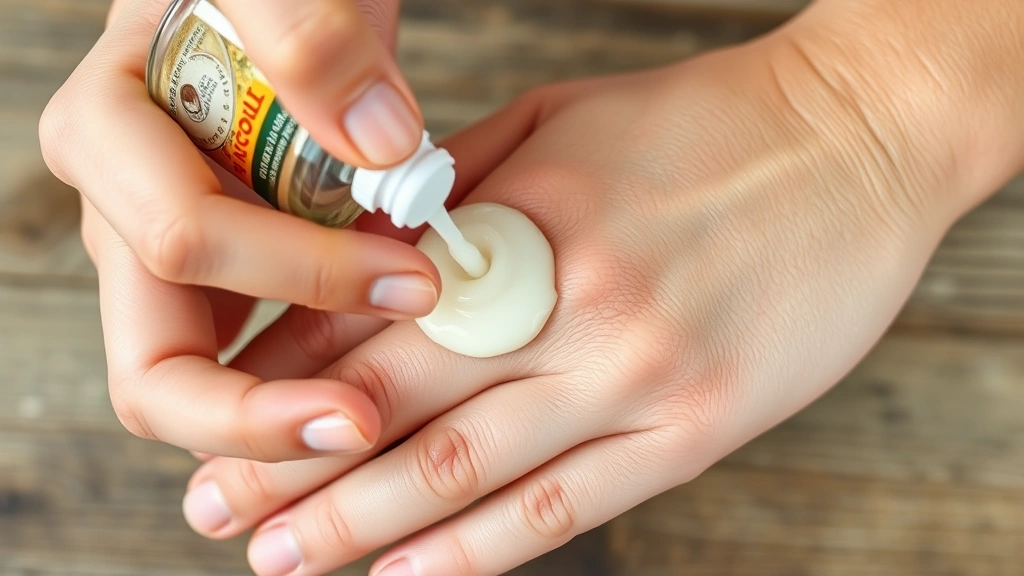
Nail glue accidents happen to the best of us. Whether you’re applying press-on nails, working on a DIY nail art project, or simply had an unfortunate mishap, getting nail glue stuck on your skin, fingers, or surfaces can be frustrating. Unlike regular adhesives, nail glue (cyanoacrylate) bonds almost instantly and requires specific removal techniques to avoid skin damage or leaving residue behind.
The good news is that nail glue removal doesn’t have to be complicated. With the right approach and materials, you can safely dissolve and remove nail glue without harsh scrubbing or injury. This comprehensive guide covers proven methods, safety precautions, and preventative strategies that professional nail technicians and dermatologists recommend.
Understanding Nail Glue Composition
Before diving into removal methods, it’s helpful to understand what you’re dealing with. Nail glue is a cyanoacrylate-based adhesive, the same chemical compound found in super glue products. This type of adhesive works by reacting with moisture, which causes it to cure and harden within seconds.
The reason nail glue is so effective—and so stubborn—is that it creates an almost instantaneous chemical bond. Once it contacts skin moisture, the polymerization process begins, making it incredibly difficult to separate without the right approach. Understanding this chemistry helps explain why certain removal methods work better than others.
Most commercial nail glues contain cyanoacrylate (typically 90-99%), along with stabilizers and thickening agents. Some brands add ingredients to make them slightly more flexible or easier to remove, but the core removal principles remain consistent across products.
Safety Precautions Before Starting
Never attempt to force separated glued skin apart. This is the most important rule when dealing with nail glue accidents. Forcing the bond can cause painful skin tears, bleeding, and potential infection. Instead, be patient and let your chosen removal method dissolve the adhesive naturally.
Here are critical safety steps:
- Assess the situation first: Determine if skin is bonded to itself, to another object, or to a nail. This affects your approach.
- Keep the area clean: Wash around the glued area with regular soap and water, but avoid getting water directly on fresh nail glue initially.
- Avoid harsh chemicals: Never use bleach, strong solvents, or industrial cleaners on skin-bonded glue.
- Ventilate properly: If using acetone or other solvents, work in a well-ventilated area to avoid inhaling fumes.
- Patch test: If you have sensitive skin, test any solution on a small area first to check for allergic reactions.
- Protect surrounding skin: Apply petroleum jelly around the glued area to protect unaffected skin from drying out.
If you experience severe pain, excessive swelling, or signs of infection after glue removal, consult a healthcare professional. For information on general safety during home improvement projects, check out our FixWiseHub Blog for comprehensive guides.
Method 1: Acetone Soak Technique
Acetone is the most effective solvent for dissolving cyanoacrylate adhesive. This method works best for glue on fingers and hands where you can safely soak the affected area.
What You’ll Need:
- Pure acetone (nail polish remover with 100% acetone)
- Small bowl or container
- Warm water
- Soft cloth or cotton pads
- Petroleum jelly
- Nail file or soft brush
Step-by-Step Process:
- Prepare the area: Wash your hands with mild soap and water. Apply petroleum jelly around the glued area to protect surrounding skin from acetone’s drying effects.
- Fill your container: Pour acetone into a bowl—enough to submerge your finger or affected area completely.
- Soak gradually: Start by dipping the glued area into the acetone for 30 seconds. Remove and gently rub the glue with a soft cloth. Repeat this process every minute for 5-10 minutes rather than soaking continuously.
- Increase soak time: After initial sessions, you can soak for longer periods (3-5 minutes at a time) as the glue begins to soften.
- Gently work the glue: As the adhesive softens, use a soft nail brush or cloth to gently work at the edges. Never force or pick aggressively.
- Rinse thoroughly: Once the glue has dissolved, wash your hands with soap and warm water multiple times to remove all acetone residue.
- Moisturize: Apply hand lotion or cuticle oil to restore moisture that acetone removes from your skin.
This method typically takes 10-20 minutes depending on glue thickness. The acetone dissolves the polymer chains in the cyanoacrylate, making it easier to rub away gently.
Method 2: Warm Soapy Water
For minor glue spots or if you prefer avoiding harsh chemicals, warm soapy water can work, though it takes longer than acetone. This gentler method suits sensitive skin or small children.
What You’ll Need:
- Warm (not hot) water
- Mild dish soap or hand soap
- Bowl
- Soft cloth
- Pumice stone (optional)
Process:
- Create soapy solution: Mix warm water with a generous amount of mild dish soap in a bowl.
- Soak the area: Submerge your finger for 15-20 minutes. The soap helps break down the adhesive bond gradually.
- Gently rub: After soaking, use a soft cloth to gently rub the glued area in circular motions.
- Repeat soaking: If glue remains, soak for another 10-15 minutes and repeat the gentle rubbing.
- Use pumice stone carefully: For stubborn spots on skin, you can gently use a pumice stone, but be extremely cautious not to create raw patches.
- Dry and moisturize: Pat dry and apply moisturizer immediately.
This method may take 30-60 minutes total, but it’s safer for delicate skin. The soap acts as a mild lubricant and helps moisture penetrate the glue layer.
Method 3: Oil-Based Solutions
Oils are excellent for dissolving cyanoacrylate because they break down the polymer structure while being gentle on skin. Multiple oil options work effectively.
Best Oils to Use:
- Coconut oil: Has natural solvating properties and smells pleasant
- Olive oil: Effective and commonly available in kitchens
- Cuticle oil: Specifically formulated for nail care and skin
- Mineral oil: Pure and non-comedogenic
- Cooking oil: Any vegetable-based oil works in a pinch
Application Method:
- Apply generously: Coat the glued area completely with your chosen oil, ensuring it saturates all visible glue.
- Let it penetrate: Wait 5-10 minutes for the oil to break down the adhesive bonds.
- Gently massage: Using your other hand or a soft cloth, gently massage the area in circular motions.
- Roll and separate: As the glue softens, try gently rolling the skin or peeling away loosened edges.
- Reapply as needed: If the glue hasn’t fully released, reapply oil and repeat the process.
- Clean thoroughly: Wash with soap and warm water to remove all oil residue.
Oil-based removal typically takes 15-30 minutes and is excellent for maintaining skin health during the process. This method is particularly safe for children and people with acetone sensitivity.

Method 4: Mechanical Removal
For glue that’s already partially dried or loosened, mechanical methods can help speed up the process. These techniques work best in combination with chemical methods rather than alone.
Tools and Techniques:
- Soft nail brush: Gently brush the glue in one direction to encourage peeling
- Nail file: Use the gentlest side to carefully file away dried glue edges
- Wooden stick: Cuticle pushers or popsicle sticks can gently lift glue edges without scratching skin
- Soft cloth: Microfiber cloths work better than paper towels for gentle friction
- Pumice stone: Use only for callused areas, never on sensitive skin
Important Guidelines:
- Always soften glue with liquid methods first
- Work slowly and patiently—rushing causes skin damage
- Stop if you feel pain or see skin redness
- Never use sharp objects or aggressive scrubbing
- Combine mechanical methods with chemical softening for best results
The key to mechanical removal is patience. Let your chosen solvent do most of the work, and use mechanical methods only to help along the process.
Removing Glue from Surfaces
Nail glue accidents often affect surfaces beyond skin—furniture, countertops, and other materials need careful attention. Different surfaces require different approaches.
Removing Glue from Plastic:
Acetone can damage some plastics, so test first. Try warm soapy water or rubbing alcohol initially. If those don’t work, use acetone sparingly on a hidden area to test compatibility before treating visible spots.
Removing Glue from Wood:
Avoid acetone on finished wood surfaces as it can damage stains or varnish. Use warm soapy water first, then try rubbing alcohol. For stubborn spots, mechanical removal with a plastic scraper works better than chemicals. When in doubt, consult This Old House for specific wood finishing advice.
Removing Glue from Fabric:
Never use acetone on fabric. Start with warm soapy water and gentle rubbing. Once the glue hardens completely, you may be able to carefully pick it away. If staining occurs, treat with appropriate fabric stain removers.
Removing Glue from Glass or Tile:
These non-porous surfaces are easiest to clean. Acetone works excellently—apply, wait a few minutes, then scrape with a plastic scraper. Warm soapy water is a gentler alternative that also works well.
Removing Glue from Metal:
Acetone is safe for most metal surfaces. Apply and let sit for a few minutes, then gently scrape. For valuable metals, test on an inconspicuous area first.
Aftercare and Skin Recovery
Proper aftercare prevents complications and promotes healing after nail glue removal. Your skin has been through stress and requires attention to restore its natural state.
Immediate Aftercare (First 24 Hours):
- Moisturize heavily: Apply hand cream, lotion, or cuticle oil immediately after removal. Repeat every 2-3 hours.
- Avoid water: Try to keep hands dry for at least 2-3 hours after removal to allow skin to stabilize.
- Wear soft gloves: If possible, wear soft cotton gloves to protect the area and maintain moisture.
- Monitor for irritation: Watch for excessive redness, swelling, or blistering. These are normal in minor cases but should improve within hours.
- Avoid makeup and products: Don’t apply nail polish or other products to the affected area for at least 24 hours.
Extended Care (Following Days):
- Continue moisturizing: Use hand cream regularly to restore skin’s natural moisture barrier.
- Gentle cleansing: Wash with mild soap only; avoid harsh scrubbing.
- Cuticle care: Apply cuticle oil or hand cream to nails and surrounding skin daily.
- Protect during activities: Wear gloves while doing dishes or cleaning to protect healing skin.
- Avoid sun exposure: Keep the area out of direct sunlight for a few days.
When to Seek Medical Attention:
Contact a healthcare provider if you experience:
- Severe pain that doesn’t improve within hours
- Excessive swelling or blistering
- Signs of infection (warmth, pus, increasing redness)
- Skin that doesn’t return to normal within 2-3 days
- Allergic reactions such as widespread rash or difficulty breathing
Most minor nail glue incidents resolve completely within 24-48 hours with proper care. Severe reactions are rare but warrant professional attention.
Prevention Tips for Future Incidents
The best approach to nail glue removal is preventing accidents in the first place. These strategies reduce the likelihood of bonding incidents significantly.
Application Best Practices:
- Use minimal amounts: Apply only a tiny drop to nails; excess increases accident risk
- Keep caps secure: Always recap nail glue immediately after use to prevent accidental contact
- Work on clean, dry surfaces: Moisture triggers curing, so ensure your work area is completely dry
- Wear protective gloves: Latex or nitrile gloves provide a barrier between skin and glue
- Have supplies ready: Gather all materials before opening glue to minimize handling time
- Work slowly: Rushing increases accident likelihood; take your time with applications
Storage and Safety:
- Store nail glue in a cool, dry place away from moisture
- Keep out of reach of children and pets
- Check expiration dates—old glue may cure unpredictably
- Never leave glue open or unattended
- Have acetone or oil readily available as emergency removal solutions
For more home maintenance and safety tips, visit Family Handyman, which offers comprehensive guides on household care and safety.
FAQ
Can I use nail polish remover instead of pure acetone?
Pure acetone works best, but regular nail polish remover containing acetone can work if it’s concentrated enough (check the label for percentage). However, it may contain oils and other ingredients that slow the process. For fastest results, use 100% acetone.
How long does it take to remove nail glue?
Removal time varies by method: acetone soak (10-20 minutes), warm soapy water (30-60 minutes), and oil-based methods (15-30 minutes). Stubborn glue may require multiple applications of any method.
Is it normal for skin to turn white or wrinkled during acetone soaking?
Yes, this is completely normal and temporary. Acetone removes moisture from skin, causing temporary whitening and wrinkling. This reverses within hours once you moisturize. This is why aftercare is crucial.
What if glue is stuck between two fingers?
This is trickier because you can’t soak both fingers simultaneously. Apply acetone or oil around the bonded area and let it penetrate, then gently work the fingers apart using the methods described. Never force them apart suddenly.
Can I use super glue remover products?
Most commercial super glue removers are acetone-based, so they work similarly to pure acetone. Some brands add conditioning ingredients. They’re effective but often more expensive than pure acetone or household oils.
Is nail glue removal safe during pregnancy?
Oil-based and warm soapy water methods are completely safe. If using acetone, ensure good ventilation and limit exposure time. Acetone fumes in large quantities may cause concern during pregnancy, so consult your healthcare provider if you’re uncertain.
What causes nail glue to bond skin accidentally?
Nail glue bonds skin when moisture from your skin triggers the cyanoacrylate polymerization process. Even tiny amounts of skin oil or moisture can cause bonding. This is why keeping hands dry and working quickly is important.
Can I prevent scarring from a glue accident?
Proper removal technique and immediate aftercare minimize scarring risk. Avoid forcing separation, follow gentle removal methods, and moisturize thoroughly afterward. Most minor glue incidents don’t cause lasting marks.
How should I store nail glue to prevent accidental opening?
Keep nail glue in its original container with the cap tightly sealed. Store in a cool, dark place (like a drawer or cabinet) away from moisture. Some people store it in airtight containers for extra security. Keep it away from heat sources and direct sunlight.
Can children safely use nail glue?
Children can use nail glue with adult supervision. Teach them to use minimal amounts, work slowly, and keep hands dry. Keep acetone or oil nearby for emergency removal. Consider waiting until they’re older before allowing independent use, as accidents are more likely.
Related Posts

Superscript in Google Docs: Expert Tips

Strikethrough in Excel: Easy Steps for Beginners
