

How to Freeze Green Beans: Step-by-Step Guide
How to Freeze Green Beans: Step-by-Step Guide
There’s something deeply satisfying about preserving the bounty of summer into the colder months. Green beans, with their crisp texture and vibrant color, are one of the easiest vegetables to freeze successfully—yet so many people get it wrong. Whether you’re dealing with an overflowing harvest from your garden or a bulk haul from the farmers market, knowing how to freeze green beans properly means you’ll have restaurant-quality vegetables at your fingertips year-round, not the mushy disappointment that lands on many dinner tables.
The secret isn’t complicated, but it does require attention to detail. Blanching, cooling, and proper storage are the holy trinity of vegetable preservation. Master these steps, and you’ll transform fresh green beans into a pantry staple that tastes nearly as good as the day you picked them.
Why Freeze Green Beans?
Freezing green beans isn’t just about having vegetables available in December. It’s about preserving nutrition, flavor, and texture at their peak. Unlike canning, which requires special equipment and knowledge of pressure processing, freezing is straightforward and maintains more of the vegetable’s nutritional content. Green beans frozen at their prime actually retain more vitamin C and other nutrients than those sitting in your refrigerator for a week.
Beyond nutrition, there’s the practical matter of cost and convenience. When green beans are in season, they’re inexpensive. Buying in bulk and freezing means you avoid the premium prices charged during off-season months. You also eliminate food waste—no more tossing wilted beans because you didn’t get to them in time.
What You’ll Need
Before you begin, gather your supplies. You don’t need fancy equipment, but having the right tools makes the process infinitely smoother:
- A large pot for blanching (at least 4-quart capacity)
- A colander or strainer for draining
- A sharp knife or kitchen scissors for trimming
- A cutting board
- Ice bath container (a large bowl works fine)
- Paper towels or clean kitchen towels for drying
- Freezer bags or airtight containers (flat freezer bags work best for space efficiency)
- A marker for labeling dates
- Optional: a vacuum sealer for extended storage
Selecting and Preparing Your Beans
The quality of your frozen product starts with the quality of your fresh beans. Look for beans that are bright green, firm, and snap when you bend them. Avoid any that are yellowing, limp, or showing signs of browning. The fresher your beans when you start the process, the better your end result.
Once you’ve selected your beans, rinse them thoroughly under cool running water. This removes dirt and any debris. Trim both ends using a sharp knife or kitchen scissors—remove about a quarter-inch from each end. You can leave them whole or cut them into 1 to 2-inch pieces, depending on your preference and how you plan to use them later.
If you’re processing a large quantity, consider doing this prep work in batches. It’s tedious work, but worth the effort. Some people find it meditative; others prefer to queue up a podcast and power through.
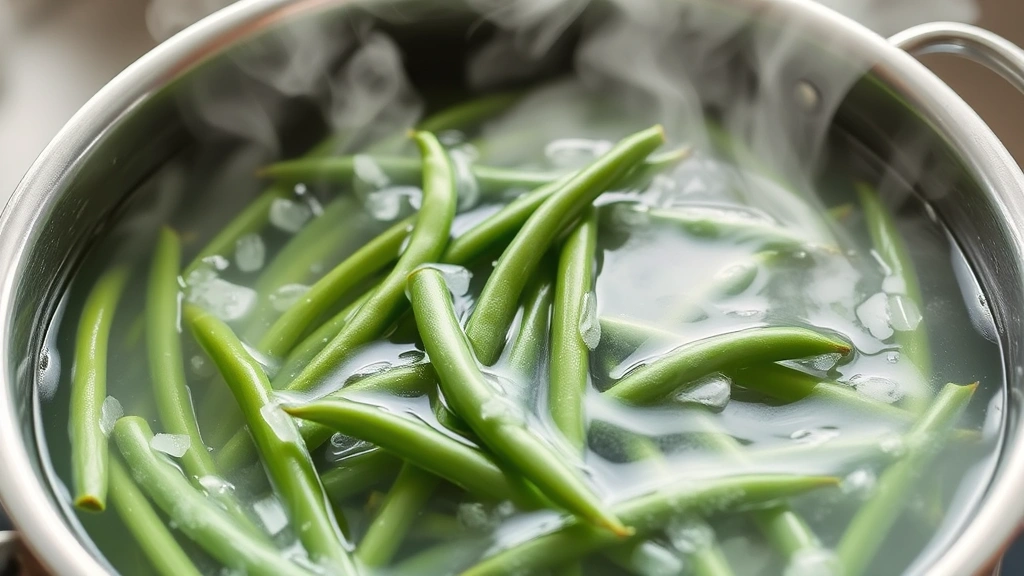
The Blanching Process
This is where many home freezers stumble, but it’s absolutely crucial. Blanching green beans stops enzymatic action that causes deterioration, loss of color, and nutrient loss during storage. Without this step, your beans will develop an off-color and mushy texture within a few months.
Fill your pot with water and bring it to a rolling boil. You’ll want enough water that the beans won’t significantly cool it when added—generally a ratio of about 1 pound of beans per gallon of water works well. Once the water is at a full boil, add your prepared green beans.
The timing depends on bean size. For whole or large pieces, blanch for 3 to 4 minutes. For smaller cut pieces, 2 to 3 minutes is sufficient. If you’re uncertain about how long to boil green beans for your specific batch, start at the lower end of the range. You want the beans to be heated through but still slightly crisp—they’ll continue cooking slightly during the cooling process.
A helpful tip: if you’re processing multiple batches, keep your blanching water at a consistent temperature by using a high-heat setting and waiting for it to return to a full boil between batches. Some people add a pinch of salt to the water, though it’s not necessary.
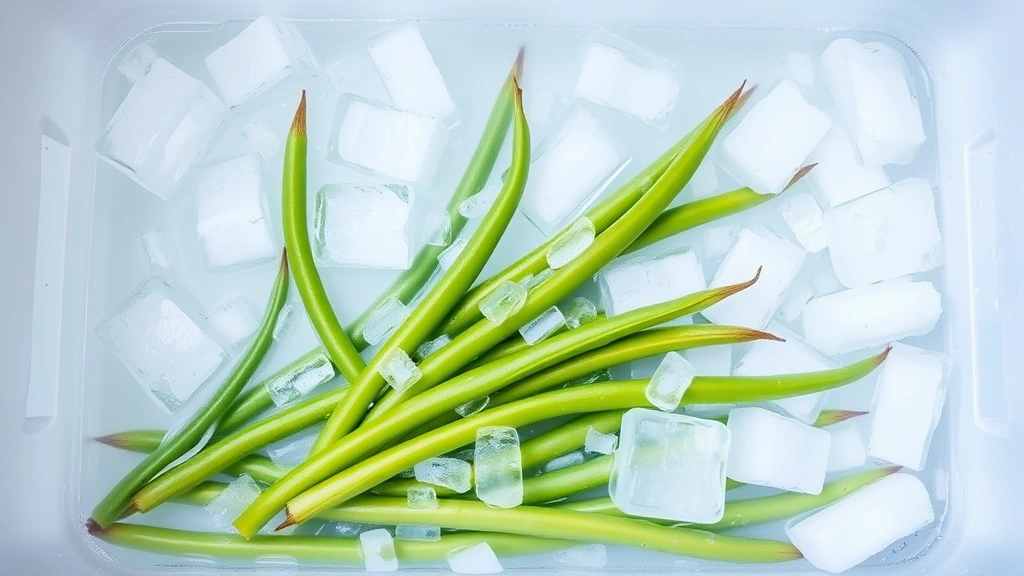
Cooling and Drying
The moment your beans finish blanching, they need to stop cooking immediately. This is where your ice bath comes in. Have a large bowl or container filled with ice water ready before you start blanching. Using a slotted spoon or strainer, transfer the hot beans directly into the ice bath.
Let them cool completely—this typically takes 3 to 5 minutes. Stir them occasionally to ensure even cooling. Once they’re cool, drain them thoroughly using a colander. This is important: excess water will cause freezer burn and ice crystal formation.
Spread your cooled, drained beans on paper towels or clean kitchen towels. Pat them dry gently but thoroughly. The drier they are before freezing, the better they’ll freeze and the longer they’ll maintain quality. Some people use a salad spinner for this step, which works remarkably well for smaller batches.
Freezing and Storage
Now comes the actual freezing. You have two main options: tray freezing or direct-to-bag freezing.
Tray Freezing Method: Arrange your dried beans in a single layer on a baking sheet or tray. Place this in your freezer for 2 to 3 hours until the beans are completely frozen solid. Then transfer them to your freezer bags or containers. This method prevents the beans from clumping together, making it easier to use just what you need later.
Direct-to-Bag Method: Place your dried beans directly into freezer bags, removing as much air as possible before sealing. This is faster and uses less freezer space initially, though the beans may stick together somewhat.
Whichever method you choose, here’s the critical part: label everything with the date. Green beans will maintain peak quality for about 8 months in the freezer, though they’ll remain safe to eat for longer. Use a permanent marker to write the date directly on the bag or container.
Store your beans in the coldest part of your freezer, ideally at 0°F or below. Keep them away from the door, where temperature fluctuations occur. If you have space, consider how you might organize similar items together—grouping all your frozen vegetables makes meal planning easier.
Using Your Frozen Green Beans
The beauty of properly frozen green beans is their versatility. You can use them in stir-fries, soups, casseroles, or as a simple side dish. In most cases, you don’t need to thaw them first—just add them directly to your cooking process. They’ll thaw and cook as part of your recipe.
For a simple side dish, steam or boil your frozen beans for 4 to 6 minutes, depending on thickness and how tender you prefer them. They cook faster than fresh beans since they’ve already been partially cooked during blanching. Toss with butter, garlic, and a squeeze of lemon juice for a quick, restaurant-quality side.
If you’re using them in casseroles or baked dishes, add them toward the end of cooking to prevent overcooking. In soups and stews, they can go in earlier, but add them after the heartier vegetables are nearly tender.
The same freezing techniques work beautifully for other vegetables too. If you enjoy preserving seasonal produce, you might also explore how to freeze corn on the cob for another summer staple, or learn proper methods for how to store onions for year-round availability.
Troubleshooting Common Issues
Beans turned dark or discolored: This typically indicates insufficient blanching or exposure to air. Ensure you’re blanching for the full recommended time and removing air from your freezer bags before sealing.
Mushy texture after freezing: Either the beans were over-blanched initially, or they’ve been stored for too long. Start with slightly shorter blanching times and use beans within 6 to 8 months for best texture.
Beans taste bland: This is less about the freezing process and more about seasoning during cooking. Frozen beans are a blank canvas—season them generously when preparing.
Ice crystals forming on beans: This indicates excess moisture before freezing. Ensure beans are completely dry before freezing, and remove as much air as possible from storage bags.
Freezer burn appearance: While still safe to eat, this indicates oxidation and loss of quality. Prevent this by ensuring airtight storage and keeping beans in the coldest part of your freezer.
Frequently Asked Questions
Can I freeze green beans without blanching?
Technically, yes, but you shouldn’t. Unblanched beans will deteriorate much faster, losing color, texture, and nutrients within a few months. The small effort of blanching pays huge dividends in quality.
How long do frozen green beans last?
Properly frozen green beans maintain peak quality for 8 to 12 months. They remain safe to eat beyond this, but quality gradually declines. For best results, use them within this timeframe.
Can I use a microwave to blanch green beans?
While you can blanch small quantities in the microwave, boiling water is more reliable for larger batches. If using a microwave, place beans in a microwave-safe container with a small amount of water, cover, and microwave on high for 2 to 3 minutes, depending on quantity.
Do I need to thaw frozen green beans before cooking?
No. In most recipes, you can add frozen beans directly to your cooking process. They’ll thaw and cook as part of your recipe, often in 4 to 6 minutes depending on the cooking method.
What’s the difference between flash freezing and regular freezing?
Flash freezing (the tray method) freezes items individually before storage, preventing clumping. Regular freezing goes directly into bags. Flash freezing is preferable for green beans because it allows you to use just what you need.
Can I freeze green beans that are already cooked?
Yes, but blanched-then-frozen beans are preferable because they maintain better texture and quality. Fully cooked beans can become mushy when thawed and reheated.
Should I add salt when blanching?
It’s optional. A pinch of salt in the blanching water can help preserve color and flavor, but it’s not essential. If you do add salt, use about a teaspoon per gallon of water.
Can I freeze fresh green beans with the ends still on?
You can, but trimming them first is recommended. Untrimmed beans take up more freezer space and the ends can develop off-flavors during storage.
Related Posts

How Long to Boil Lobster Tails: Cooking Guide

How Long to Fly from New York to London? Travel Times
