
Freeze Fresh Green Beans? Expert Tips Inside
How to Freeze Fresh Green Beans: Expert Tips for Year-Round Freshness
Green beans are a nutritious staple that deserves a place in your freezer during off-season months. Whether you’ve harvested them from your garden or picked up a bulk batch at the farmer’s market, knowing how to freeze fresh green beans properly ensures you’ll enjoy that garden-fresh taste long after the growing season ends. This comprehensive guide walks you through every step of the freezing process, from selection to storage, so you can preserve your bounty with confidence.
Freezing green beans is simpler than you might think, and it’s one of the most effective preservation methods available. Unlike canning, which requires specialized equipment and knowledge, freezing follows straightforward steps that anyone can master. The key lies in understanding why each step matters and how to execute them properly for maximum flavor and nutrition retention.
Why Freeze Green Beans?
Freezing is the gold standard for preserving green beans because it halts enzymatic activity and microbial growth without requiring heat processing that can diminish nutritional value. When done correctly, frozen green beans retain approximately 90% of their original vitamins, minerals, and antioxidants. This makes freezing superior to many other preservation methods when you’re concerned about maintaining nutritional integrity.
Beyond nutrition, freezing offers practical advantages. You’ll save money by buying green beans at peak season when prices are lowest, then enjoy them year-round without waste. Frozen beans take up minimal space compared to canned alternatives, and they thaw quickly for meal preparation. Whether you’re planning weeknight stir-fries, casseroles, or side dishes, having quality frozen green beans on hand provides flexibility and convenience.
The process also allows you to freeze beans at their absolute peak ripeness. Unlike store-bought frozen beans that may have traveled long distances, your home-frozen beans were processed within hours of harvest, preserving maximum flavor and texture.
Selecting and Preparing Your Green Beans
Success begins with selecting the right beans. Choose young, tender green beans that snap when bent—this indicates freshness and optimal maturity. Avoid beans that are yellowing, limp, or showing signs of blemishes or disease. The ideal bean is bright green, firm, and approximately pencil-thin in diameter. Larger, more mature beans tend to become woody and develop a stringy texture that doesn’t improve with freezing.
Timing matters tremendously. Freeze your beans within 24 hours of harvest or purchase for best results. The longer you wait, the more enzymes break down cell structures and quality deteriorates. If you can’t freeze immediately, store beans in the refrigerator’s crisper drawer in a perforated plastic bag.
Before processing, wash your beans thoroughly under cool running water to remove dirt, debris, and any potential pesticide residue. Pat them dry with clean kitchen towels or paper towels—excess moisture can lead to ice crystal formation and freezer burn. Once dry, trim both ends of each bean using a sharp knife or kitchen shears. This step removes the stem end and blossom end, which contain fibers that don’t soften during cooking.
For large batches, consider setting up an assembly line. Place trimmed beans in a colander and keep them ready for the next step. Organization streamlines the process and prevents beans from sitting around losing quality.
The Blanching Process Explained
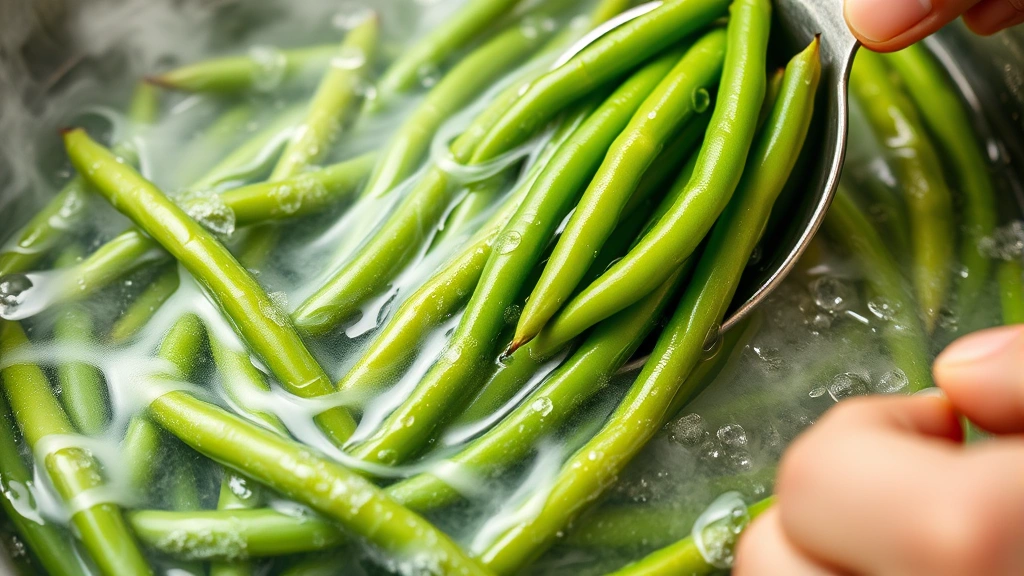
Blanching is the critical step that many home processors overlook, yet it’s essential for quality preservation. Blanching involves briefly immersing beans in boiling water, then immediately stopping the cooking process with ice water. This technique inactivates enzymes that cause deterioration in flavor, texture, color, and nutritional value during frozen storage.
To blanch properly, fill a large pot with water—approximately one gallon per pound of beans. Bring the water to a rolling boil over high heat. Once boiling, carefully add your prepared beans in batches, ensuring the water returns to a boil within one minute. Overcrowding the pot will drop the water temperature too much and result in incomplete blanching.
The blanching time depends on bean size. For small to medium beans (the most common type), blanch for exactly three minutes. Larger beans may require up to four minutes. Set a timer to ensure accuracy—both under-blanching and over-blanching produce inferior results. Under-blanching leaves enzymes active, while over-blanching softens the beans excessively and destroys heat-sensitive vitamins.
The moment your timer sounds, use a slotted spoon or mesh strainer to transfer the beans directly into a bowl filled with ice water. The ice bath must be cold enough to stop the cooking immediately. Work quickly—allow no more than one minute in ice water before proceeding. This brief chill halts the cooking process without leaching nutrients into the water.
Cooling and Draining Techniques
Proper drainage is crucial because excess water on your beans will freeze into ice crystals, degrading texture and creating freezer burn. After the ice bath, transfer your cooled beans to a colander and let them drain thoroughly. Don’t rush this step—allow at least 15-20 minutes for complete drainage, stirring occasionally to ensure even moisture removal.
For extra insurance against excess moisture, spread drained beans on clean kitchen towels or paper towels and gently pat them dry. Some processors prefer using a salad spinner to remove surface moisture quickly and efficiently. Take time with this step; it directly impacts the quality of your frozen product.
Once beans are completely dry to the touch, they’re ready for freezing. Handle them gently to avoid bruising, which can create dark spots and accelerate deterioration during storage. Think of them as delicate produce that deserves careful treatment even though they’re destined for the freezer.
Freezing Methods and Packaging
You have two primary freezing approaches: flash freezing and direct packaging. Flash freezing prevents beans from clumping together, making it easier to use portions later without thawing the entire package.
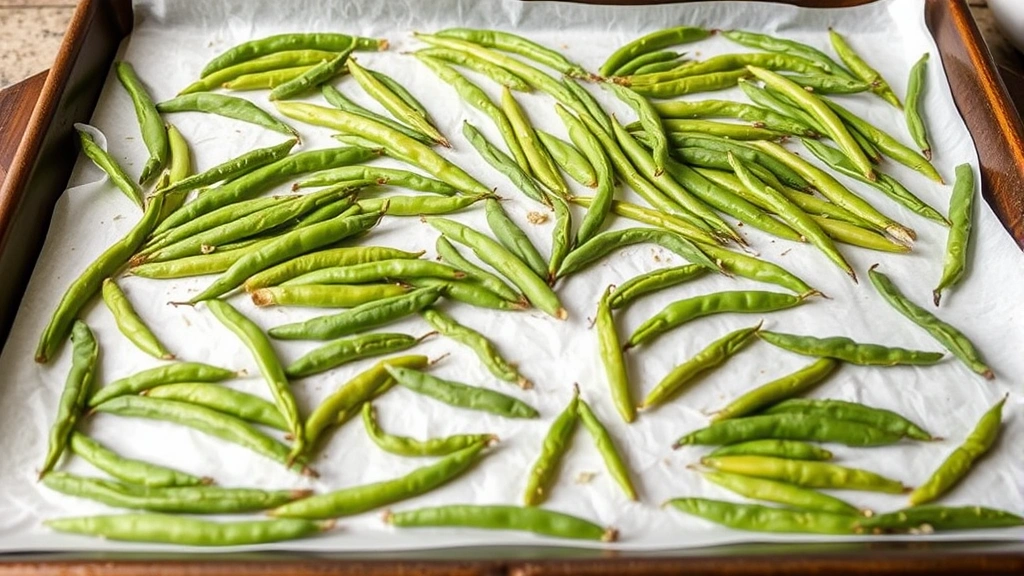
Flash Freezing Method: Spread your dried beans in a single layer on a baking sheet lined with parchment paper. Place the sheet in your freezer for 3-4 hours until beans are completely frozen solid. Once frozen, transfer them to freezer bags or containers. This method allows you to grab exactly the amount you need without dealing with frozen clumps.
Direct Packaging Method: If you lack freezer space for a baking sheet, you can package beans directly. This method works fine, though you’ll have more difficulty portioning later. Pack beans tightly into freezer bags or airtight containers, removing as much air as possible. Oxygen exposure accelerates quality degradation and freezer burn.
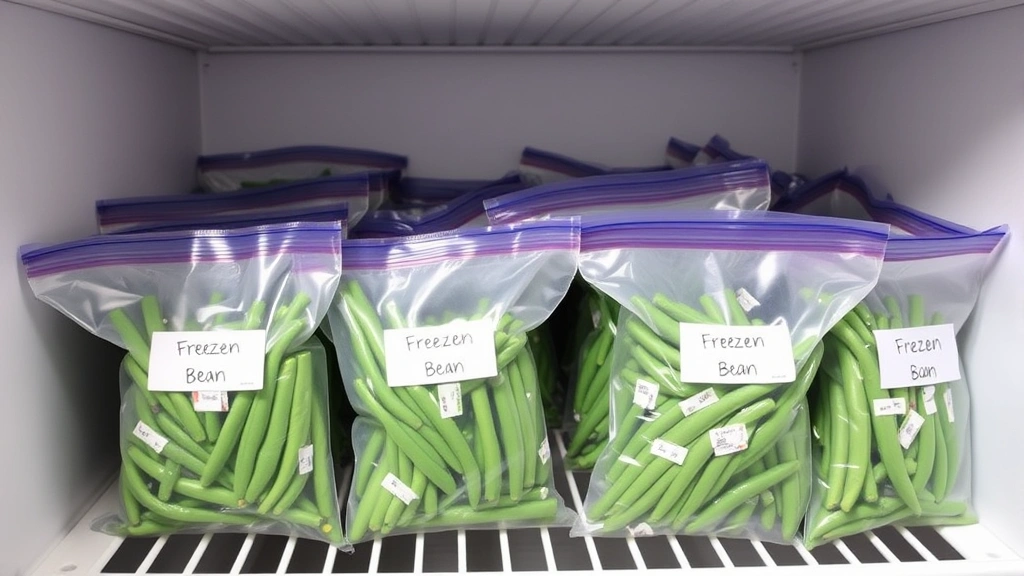
Container selection matters. High-quality freezer bags designed specifically for freezing offer excellent protection when properly sealed. Remove air by either using a vacuum sealer or the manual displacement method: partially seal the bag, insert a straw, suck out air, and quickly seal. For long-term storage exceeding three months, consider rigid plastic containers or glass containers designed for freezing—they provide superior protection against freezer burn compared to bags.
Label everything with the contents and freezing date using a permanent marker. This simple step prevents mystery packages and helps you rotate stock using the first-in, first-out principle. Proper organization of your freezer ensures you use beans before quality declines.
Storage and Shelf Life
Maintain your freezer at 0°F (-18°C) or below for optimal results. At this temperature, properly frozen green beans maintain quality for 8-12 months. However, they remain safe to eat indefinitely if kept frozen solid. Quality simply declines over time due to enzyme activity, moisture loss, and oxidation—even in frozen conditions.
Storage location within your freezer matters. Keep beans away from the door, where temperature fluctuates with each opening. Store them in the coldest section of your freezer, typically the back or bottom shelves. Temperature stability prevents the freeze-thaw cycles that create large ice crystals and cause freezer burn.
Don’t refreeze thawed beans unless they’ve been cooked. If you accidentally thaw beans, use them immediately in a cooked dish rather than refreezing raw. Thawing and refreezing damages cell structure and creates ideal conditions for bacterial growth.
Using Your Frozen Green Beans
One advantage of properly frozen green beans is their versatility. You can cook them directly from frozen without thawing—no preparation time lost to defrosting. This convenience makes weeknight meal preparation faster and easier.
For boiling, place frozen beans directly into salted boiling water and cook for 5-7 minutes until tender-crisp. They’ll cook slightly faster than fresh beans because the blanching process has already softened them partially. For stir-frying, thaw beans first to remove excess water that would create steam instead of the desired sear. For casseroles and soups, add frozen beans directly to your cooking liquid; they’ll thaw and cook as the dish simmers.
Roasting frozen green beans creates delicious caramelized results. Thaw them first, pat dry, then toss with olive oil, garlic, and seasonings before roasting at 400°F for 15-20 minutes. The high heat creates crispy edges while maintaining tender interiors.
If you’re following home preparation guides for meal planning, frozen green beans fit seamlessly into weekly prep routines. Cook a batch and portion into containers for grab-and-go side dishes throughout the week.
FAQ
Can I freeze green beans without blanching?
Technically yes, but blanched beans maintain superior quality. Non-blanched beans develop off-flavors, discoloration, and mushy texture within 2-3 months. Blanching takes minimal time and dramatically improves results, making it worth the extra step.
How do I know if frozen green beans have gone bad?
Look for excessive ice crystals, discoloration, or off-odors when thawed. Properly stored beans should appear bright green with minimal ice formation. If beans smell sour or have mushy texture when thawed, discard them.
Can I freeze canned green beans?
Canned beans contain added sodium and have already been heat-processed. While technically freezable, they lose quality quickly and texture becomes very soft. It’s better to use canned beans fresh rather than freezing them.
What’s the difference between blanching times for different bean sizes?
Smaller beans (pencil-thin) need 3 minutes, medium beans need 3-4 minutes, and larger beans need up to 5 minutes. The blanching time allows heat to penetrate to the center while deactivating enzymes throughout the bean.
Can I blanch green beans in a microwave instead of boiling?
Microwave blanching is unreliable because heat distribution is uneven. Some beans may over-blanch while others under-blanch. Stick with the traditional boiling method for consistent results.
How much do green beans shrink when frozen?
Properly processed beans shrink minimally—perhaps 5-10% by volume. Excessive shrinkage indicates over-blanching or poor drainage. This is why the drying step matters so much.
Related Posts

Superscript in Google Docs: Expert Tips

Strikethrough in Excel: Easy Steps for Beginners
