

Find & Replace in Word: Expert Tips & Tricks
Microsoft Word’s Find & Replace feature is one of the most powerful yet underutilized tools available to writers, editors, and professionals who work with documents daily. Whether you’re managing a lengthy report, editing a manuscript, or standardizing formatting across multiple pages, mastering this feature can save you hours of manual work. The Find & Replace function goes far beyond simple text substitution—it offers advanced capabilities like wildcard searches, regular expressions, and formatting-based replacements that can transform your document management workflow.
In this comprehensive guide, we’ll explore everything from basic Find & Replace operations to expert-level techniques that will elevate your Word skills. You’ll discover how to use this feature efficiently, avoid common mistakes, and leverage advanced options that most users never even know exist. By the end, you’ll be equipped with practical strategies to handle complex document editing tasks with confidence and precision.
Understanding the Basics of Find & Replace
The Find & Replace feature in Microsoft Word operates on a simple principle: locate specific text or formatting patterns and systematically replace them with alternatives. This functionality is invaluable when you need to update terminology, correct repeated errors, or standardize formatting throughout a document. Unlike manually scrolling through pages and making individual changes, Find & Replace accomplishes these tasks in seconds.
At its core, Find & Replace consists of two main components: the search criteria (what you want to find) and the replacement text (what you want to replace it with). However, the depth of what you can search for extends far beyond simple words. You can search for specific formatting attributes, paragraph marks, special characters, and even complex text patterns using advanced search operators.
Understanding when and how to use Find & Replace appropriately is crucial for document professionals. It’s particularly useful for tasks like changing a company name throughout a document, correcting common misspellings, updating date formats, or standardizing spacing and indentation. The key advantage is consistency—when you use Find & Replace, you eliminate the risk of missing instances or making inconsistent corrections.
Opening and Navigating the Find & Replace Dialog
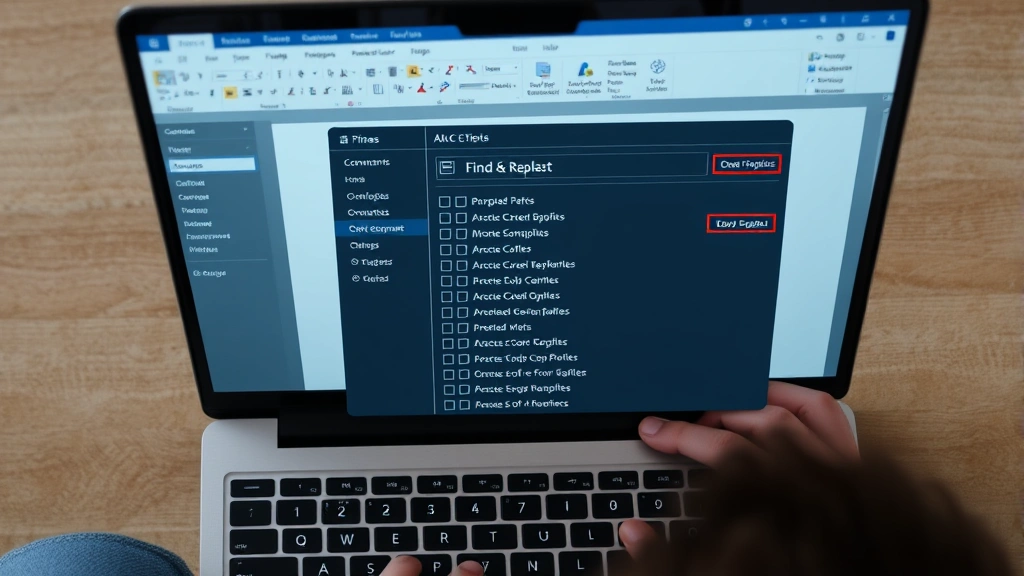
Accessing the Find & Replace dialog is straightforward and can be done in multiple ways. The quickest method is using the keyboard shortcut Ctrl+H on Windows or Command+H on Mac, which instantly opens the Find & Replace pane. Alternatively, you can navigate through the menu by clicking the Home tab, then selecting Find & Replace in the Editing group. You can also access it through File > Options > Advanced for more granular settings.
Once the dialog opens, you’ll see several key sections. The Find what: field is where you enter your search criteria. Below that, the Replace with: field holds your replacement text. To the right of these fields, you’ll find the Replace button (replaces one instance), Replace All button (replaces all instances), and Find All button (locates all instances without replacing). Additional options expand when you click More, revealing advanced search parameters.
The expanded options panel includes critical settings like Match case, Find whole words only, Use wildcards, and Regular expressions. Understanding these options is essential for executing precise searches. Take time to familiarize yourself with each option’s purpose, as selecting the wrong combination can produce unexpected results. Many users overlook these options and end up with incomplete or incorrect replacements.
Simple Text Replacements and Best Practices
For basic Find & Replace tasks, the process is remarkably simple. Suppose you’ve written a document repeatedly using “e-mail” but your organization’s style guide now requires “email.” Open Find & Replace with Ctrl+H, type “e-mail” in the Find field, type “email” in the Replace field, and click Replace All. Word instantly updates every instance throughout your document.
However, simple replacements require careful consideration. Always verify your search terms won’t accidentally match unintended text. For example, searching for “mail” would also replace it within words like “email” or “mailbox,” creating errors. This is why using the Find whole words only option is essential for most basic replacements. This checkbox ensures Word matches only standalone words, not partial matches within larger words.
Best practices for simple replacements include:
- Preview before replacing: Use Find All first to see all matches highlighted in your document. This allows you to verify the search is working correctly before making irreversible changes.
- Use Find whole words only: Enable this option to prevent accidental partial matches that could corrupt your text.
- Match case when appropriate: If you’re replacing a proper noun or term with specific capitalization, enable Match case to avoid changing unrelated words.
- Keep a backup: Before performing large-scale replacements, save a backup copy of your document. This provides a safety net if something goes wrong.
- Test with Replace first: Instead of immediately clicking Replace All, click Replace once to verify the replacement works as intended before applying it document-wide.
These practices might seem time-consuming initially, but they prevent the frustration of discovering mistakes after replacing hundreds of instances.
Using Wildcards for Advanced Searches
Wildcards are special characters that represent unknown or variable text, enabling you to search for patterns rather than exact strings. This is where Find & Replace becomes genuinely powerful. To use wildcards, you must first enable the Use wildcards option in the expanded dialog.
The most common wildcards are:
- * (asterisk): Matches any sequence of characters. For example, searching for “test*” would find “test,” “testing,” “tested,” and “tester.”
- ? (question mark): Matches any single character. Searching for “h?t” would find “hat,” “hit,” “hot,” and “hut.”
- ^ (caret): Matches the beginning of a paragraph.
- $ (dollar sign): Matches the end of a paragraph.
- [ ] (brackets): Matches any single character within the brackets. “[aeiou]” matches any vowel.
- [!] (negation): Matches any character except those in brackets. “[!aeiou]” matches any consonant.
A practical example: suppose you want to find all hyphenated words and remove the hyphens. Search for “(*)(*?)” with wildcards enabled, and replace with “\1 \2.” This captures text before and after hyphens, then replaces with those captured groups separated by a space instead.
Wildcards are particularly useful for standardizing formatting. If your document contains inconsistent spacing around dashes, you can search for ” – ” (multiple spaces) and replace with ” – ” (single spaces). This ensures consistent formatting throughout.
Formatting-Based Find and Replace
Beyond text content, Word allows you to search for and replace based on formatting attributes. This is invaluable for standardizing document appearance. To search by formatting, open Find & Replace and click Format at the bottom of the dialog (you may need to click More first to reveal this button).
From the Format menu, you can specify:
- Font: Search for specific font names, sizes, colors, or styles (bold, italic, underline).
- Paragraph: Find paragraphs with specific alignment, spacing, or indentation.
- Tabs: Locate specific tab stop configurations.
- Language: Find text marked with particular language settings.
- Style: Search for specific paragraph or character styles.
A practical example: your document contains multiple paragraphs formatted in Arial 10pt that should be Times New Roman 12pt. Instead of manually selecting and reformatting each paragraph, use Find & Replace. Search for text formatted as Arial 10pt, and replace it with the same text formatted as Times New Roman 12pt. Word accomplishes this without changing the actual text content.
Style-based replacement is particularly powerful. If your document uses inconsistent heading styles—some as Heading 1, others as custom formatting—you can standardize them all to official Heading 1 style. This ensures consistency and makes your document compatible with automatic table of contents generation and outline view functionality.
Working with Regular Expressions
Regular expressions (regex) represent the most advanced Find & Replace capability in Word. They’re pattern-matching sequences that allow searching for complex text patterns. To use regular expressions, enable the Use regular expressions option in the Find & Replace dialog (this option appears when you click More).
Common regular expression patterns include:
- . (period): Matches any single character.
- * (asterisk): Matches zero or more of the preceding character.
- + (plus): Matches one or more of the preceding character.
- ^ (caret): Matches the start of a line.
- $ (dollar sign): Matches the end of a line.
- ( ) (parentheses): Creates a group that can be referenced in the replacement.
- \d: Matches any digit.
- \w: Matches any word character (letters, digits, underscore).
A practical example: suppose you have dates formatted inconsistently as “12/25/2023” and “12-25-2023” but need them all as “December 25, 2023.” Using regular expressions, you could search for patterns matching date formats and replace them with properly formatted dates. While this requires more complex regex knowledge, it’s incredibly powerful for data standardization.
Word’s regular expression support doesn’t include all standard regex features found in programming languages, but it covers most common use cases. When working with regular expressions, test your pattern on a small portion of your document first, as mistakes can produce unexpected results across your entire document.
Advanced Techniques for Professional Documents
Professionals working with technical documentation, legal contracts, or lengthy reports often need sophisticated Find & Replace strategies. One advanced technique involves using special characters and codes that Word recognizes.
Special codes include:
- ^p: Paragraph break
- ^t: Tab character
- ^n: Line break (manual break within a paragraph)
- ^d: Revision mark (tracked changes)
- ^?: Any single character
- ^&: The contents of the Find field (useful in replacements)
A practical scenario: you’re editing a document with inconsistent paragraph spacing. Some paragraphs have double line breaks (^p^p) between them, while others have single breaks. To standardize, search for “^p^p” and replace with “^p” to remove extra spacing. This is much faster than manually adjusting each paragraph.
Another advanced technique involves combining Find & Replace with the FixWiseHub Blog resources to develop comprehensive document management workflows. When working on complex projects, consider creating a checklist of Find & Replace operations to perform in sequence, ensuring consistent document preparation.
For documents with tracked changes, you can use Find & Replace to locate specific revision types. This is particularly useful in collaborative environments where you need to find all deletions made by a particular reviewer or all insertions from a specific date range.
Professional users often create and save custom Find & Replace operations as macros. If you perform the same replacement sequence regularly, recording a macro automates the entire process. Access this through View > Macros > Record Macro, perform your Find & Replace operations, then save the macro for future use.
Common Mistakes and How to Avoid Them
Even experienced users make Find & Replace mistakes. Understanding common pitfalls helps you avoid costly errors:
Mistake 1: Not enabling “Find whole words only” when needed. Searching for “read” without this option enabled will also match “thread,” “bread,” and “spread.” Always consider whether partial matches could occur and enable this option accordingly.
Mistake 2: Forgetting to disable case sensitivity. If you search for “The” with Match case enabled, you’ll miss instances of “the” at the beginning of sentences. Conversely, if you need case-sensitive matching and forget to enable it, your replacements will be inconsistent.
Mistake 3: Using Replace All without verification. The temptation to click Replace All immediately is strong, but it’s risky. Always click Find All first to preview all matches and ensure your search criteria is correct.
Mistake 4: Accidentally replacing in headers, footers, or other document sections. By default, Find & Replace searches your entire document including headers, footers, and text boxes. If you only want to search the main document body, you must explicitly restrict the search scope.
Mistake 5: Not understanding wildcard vs. regular expression differences. These are separate features with different syntax. Enabling both simultaneously can produce unexpected results. Choose one or the other based on your specific needs.
Mistake 6: Losing track of what you’ve replaced. When performing multiple replacements, it’s easy to lose track of changes. Use Ctrl+Z to undo recent replacements if you need to revert changes, or maintain detailed notes of what replacements you’ve performed.
To avoid these mistakes, develop a systematic approach: preview first, verify your search parameters, test with a single replacement, then proceed with Replace All only when confident.
When working on important documents, consider how your Find & Replace skills complement other document preparation techniques. Just as you might learn how to find a stud without a stud finder by understanding fundamental principles, mastering Find & Replace requires understanding its underlying logic and capabilities.
FAQ
What’s the keyboard shortcut for Find & Replace in Word?
The keyboard shortcut is Ctrl+H on Windows and Command+H on Mac. This instantly opens the Find & Replace dialog without navigating through menus.
Can I use Find & Replace to remove formatting?
Yes. Open Find & Replace, specify the formatting you want to remove in the “Find what” field, leave the “Replace with” field empty with no formatting specified, then click Replace All. This removes the formatting while preserving the text.
How do I search for special characters like asterisks or question marks?
If you’re not using wildcards, simply type the character normally. If you have wildcards enabled and need to search for a literal asterisk or question mark, precede it with a backslash: \* or \?
Can Find & Replace work across multiple documents?
Not directly within a single Find & Replace operation. However, you can use Word’s “Find in” feature to search multiple documents, then perform replacements individually. Alternatively, use macros or third-party tools for batch operations across multiple files.
What’s the difference between Find and Replace in Word versus other applications?
Word’s Find & Replace is particularly powerful because it integrates with formatting options, styles, and special codes. The ability to search for and replace based on formatting attributes, combined with wildcard and regular expression support, makes it more sophisticated than many other applications.
Is there a limit to how many replacements Find & Replace can perform?
No practical limit exists. Word can perform Find & Replace operations on documents containing thousands or even millions of words. However, very large operations may take several seconds to complete.
Can I undo a Replace All operation?
Yes. Press Ctrl+Z immediately after a Replace All operation to undo all replacements at once. However, if you’ve performed other actions after the replacement, you may need to undo multiple times or use the Undo History panel.
How do I replace text only in specific sections of my document?
First, select the specific section where you want replacements to occur, then open Find & Replace. The operation will only affect your selected text. This is useful when you want to replace terminology in one section but not throughout the entire document.
Related Posts

Superscript in Google Docs: Expert Tips

Strikethrough in Excel: Easy Steps for Beginners
