
How to Curl Hair: Expert Styling Guide
How to Curl Hair: Expert Styling Guide for Effortless Waves and Bouncy Curls
There’s something undeniably transformative about mastering the art of curling your hair. Whether you’re prepping for a special occasion or simply want to switch up your everyday look, knowing how to curl hair opens up a world of styling possibilities. The beauty of learning this skill is that it doesn’t require expensive salon visits or professional-grade equipment—just the right technique, a bit of patience, and the tools that work best for your hair type.
The challenge many people face isn’t lack of desire; it’s confusion about which method to use, what products to apply, and how to make curls actually last. Walk into any beauty supply store and you’ll find curling irons, hot rollers, waving wands, and a dozen other contraptions, each promising salon-quality results. But here’s the truth: the best curling method for you depends entirely on your hair texture, length, and the type of curl you’re after.
This guide breaks down everything you need to know about achieving gorgeous curls at home, from preparation and product selection to step-by-step techniques that actually work. We’ll explore multiple methods, troubleshoot common problems, and give you the confidence to experiment until you find your perfect curl.
Why Preparation Matters More Than You Think
Before you even think about picking up a curling iron, your hair’s foundation determines whether your curls will be stunning or disappointing. Preparation isn’t glamorous, but it’s absolutely essential. Think of it like tuning an instrument—just as you’d learn how to tune a guitar before performing, your hair needs proper conditioning before styling.
Start with clean, dry hair. Freshly washed hair works best because product buildup from previous styling can interfere with curl formation. However, hair that’s completely freshly washed can be too slippery to hold curls well. The sweet spot is hair that’s been washed the day before or even two days prior—this gives your natural oils time to settle back in, providing grip for the curls.
Moisture is your friend here. Dry, damaged hair won’t hold curls effectively and will look frizzy rather than polished. Deep condition your hair the night before if possible. Focus on the mid-lengths and ends, where hair tends to be driest. When you’re ready to style, apply a lightweight leave-in conditioner or heat protectant spray to damp hair before blow-drying.
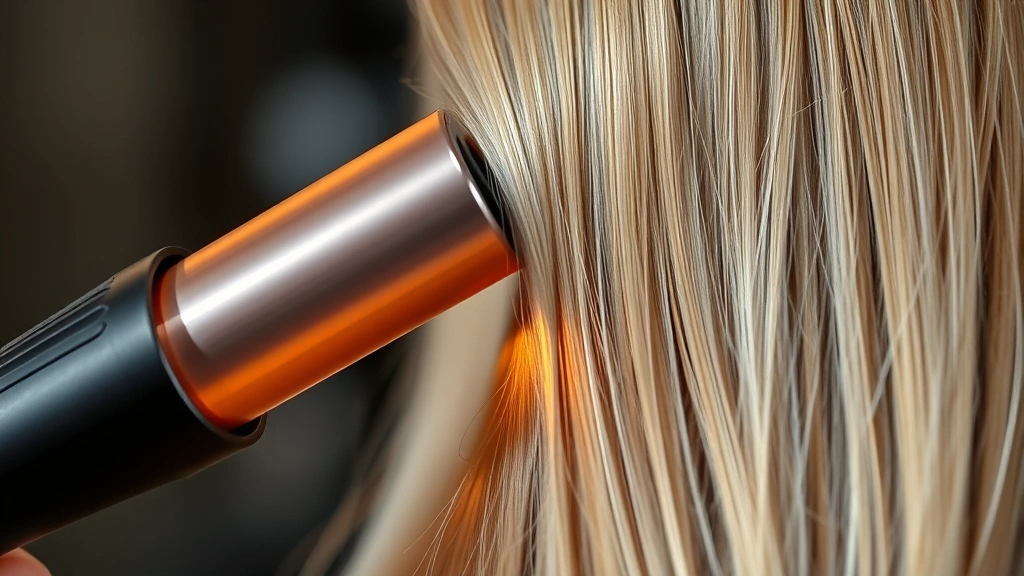
Blow-drying is non-negotiable for lasting curls. Completely dry hair takes heat from the curling tool more effectively and sets the curl shape faster. Use a blow dryer on medium heat with a concentrator nozzle, directing air downward to smooth the hair cuticle. This creates a sleeker base that holds curls better and looks shinier.
Temperature matters significantly. Your hair’s structure responds to heat by temporarily reshaping. Once cooled, it holds that new shape. This is why professional stylists cool curls after creating them—the cooling process literally sets the curl into place. Don’t rush this step; give each curl at least 30 seconds to cool before moving on.
Understanding Your Curling Tools
The market offers several curling options, each producing different results. Understanding the differences helps you choose the right tool for your desired outcome.
Curling Irons (Traditional) are the most common and versatile option. They feature a heated barrel with a clamp, allowing you to wrap hair around the barrel and secure it while heat sets the curl. Barrel sizes range from 0.5 inches (tight curls) to 2 inches (loose waves). For most people, a 1-1.25 inch barrel offers the most versatility.
Curling Wands lack the clamp mechanism found on traditional irons. Instead, you manually wrap hair around the barrel and hold it. This takes more practice but offers more control and generally creates more natural-looking curls without the flat crease that clamps sometimes leave.
Hot Rollers are cylindrical heated tools that you roll into sections of hair. They’re excellent for creating voluminous curls with minimal effort. You set them and let them cool while you do other things. The larger the roller, the looser the curl.
Waving Irons (Crimpers) create textured waves rather than defined curls. These are fantastic for adding grip and volume to hair before using another curling method, or as a standalone styling tool for beachy waves.
Temperature settings vary by tool and hair type. Fine or damaged hair typically needs 250-300°F, while thick, coarse hair can handle 350-400°F. Most quality curling tools have adjustable temperature settings—this is worth the investment because it protects your hair while still achieving results.
Matching Methods to Your Hair Type
Not every curling method works equally well for every hair type. Understanding your hair helps you choose the approach most likely to succeed.
Fine Hair: Fine hair holds curls well but can look damaged quickly if exposed to excessive heat. Use lower temperature settings (250-300°F) and shorter exposure times. Smaller barrel sizes (0.75-1 inch) create more defined curls that appear fuller. Hot rollers work beautifully for fine hair because they distribute heat more gently. Avoid heavy products that weigh curls down; instead, use lightweight volumizing sprays.
Thick, Coarse Hair: This hair type needs higher heat and thicker barrel sizes to curl effectively. Use 350-400°F temperatures and don’t rush the process—hold each section longer to ensure the heat penetrates. Larger barrels (1.5-2 inches) prevent curls from appearing too tight or kinky. Products that add moisture and shine are essential; this hair type benefits from serums and oils that prevent frizz.
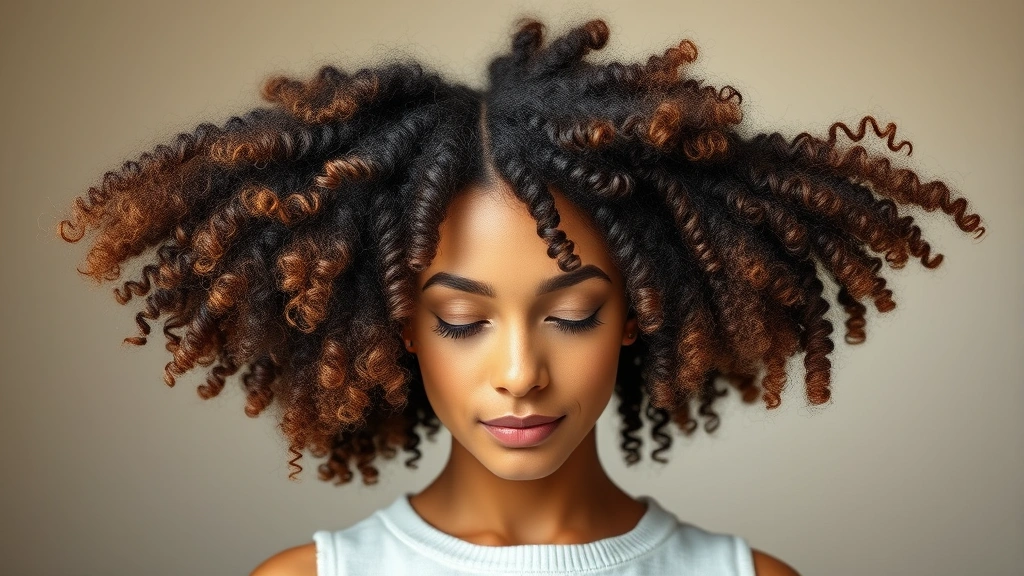
Curly or Textured Hair: If you already have natural texture, you’re not creating curls from scratch—you’re enhancing what’s there. Use lower heat settings and focus on defining existing curls rather than forming new ones. Many people with textured hair find that curling irons can disrupt their natural pattern. Instead, try roller sets or finger-coiling with styling creams.
Straight Hair: Straight hair actually holds curls quite well because there’s no competing texture. You have flexibility with tool choices and can experiment freely. Just ensure you’re using enough product to maintain the curl’s grip.
Combination Hair: If your hair is oily at roots but dry at ends, focus heat styling on mid-lengths and ends. Apply volumizing products at roots and moisturizing products at ends. This prevents the curls from looking limp at the scalp while maintaining shine and definition at the ends.
Step-by-Step Curling Techniques
Method 1: Classic Curling Iron Technique
- Section your hair: Divide hair into 4-6 sections using clips. Smaller sections create tighter curls; larger sections create looser waves. Start with a section that’s about the width of your curling iron barrel.
- Check temperature: Ensure your iron is at the appropriate temperature for your hair type. Wait until it’s fully heated—most irons signal readiness with a light indicator.
- Clamp and wrap: Clamp the hair section near the roots, then twist the iron away from your face (or toward it, depending on the curl direction you want). Wrap the hair around the barrel smoothly, working toward the ends.
- Hold and heat: Keep the section wrapped around the barrel for 8-15 seconds, depending on hair thickness and desired curl tightness. Fine hair needs less time; thick hair needs more.
- Cool in place: This is crucial. After removing the iron, immediately wrap the warm curl around your finger or a roller to cool. This sets the curl shape. Hold for at least 30 seconds.
- Release and repeat: Once cooled, gently release the curl. Move to the next section and repeat the process.
- Set with hairspray: Once all curls are complete and cooled, apply medium-hold hairspray. Avoid heavy products that weigh curls down.
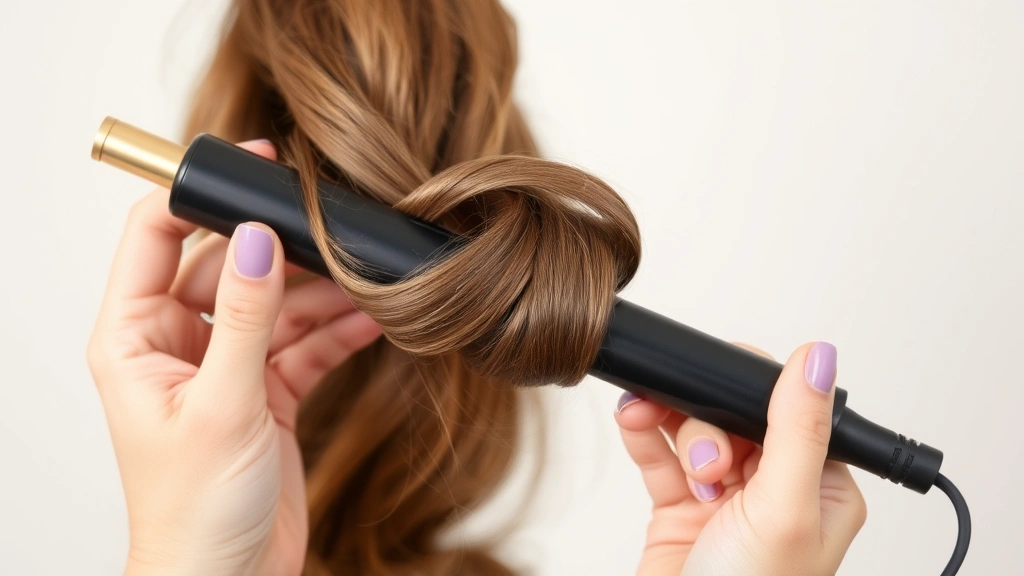
Method 2: Wand Curling for Natural-Looking Waves
Wand curling differs from traditional iron use because you manually wrap hair rather than clamping it. This requires more dexterity but produces beautifully natural-looking curls.
- Hold the wand vertically: Unlike traditional irons, wands are typically held vertically for this method.
- Wrap from mid-length: Take a section of hair and wrap it around the wand, starting from about mid-length rather than the roots. This creates a more textured, less uniform look.
- Vary the direction: Wrap some sections away from your face, others toward your face, and some in between. This variation creates movement and prevents a costume-y appearance.
- Leave ends loose: Don’t wrap all the way to the ends. Leaving the last inch or so unwrapped creates a softer, more modern wave rather than a tight, retro curl.
- Hold and cool: Keep each section on the wand for 10-12 seconds, then allow it to cool before unwrapping.
Method 3: Hot Roller Setting
Hot rollers are fantastic for achieving voluminous curls with minimal effort and heat damage.
- Choose roller size: Larger rollers create looser waves; smaller rollers create tighter curls. For volume, go larger.
- Section hair: Divide hair into sections, making sure each section isn’t larger than the roller width.
- Roll upward: Starting at the ends, roll hair up the roller toward the roots, keeping tension even. Secure with the pin provided.
- Let cool: Allow rollers to cool completely—at least 20-30 minutes. You can speed this by using cool air from a blow dryer, or simply wait while you do your makeup.
- Release gently: Carefully unroll each roller, supporting the curl as it unrolls to prevent it from falling flat.
- Finger-comb for shape: Use your fingers to gently separate and shape curls. This creates a softer, more intentional look than using a brush, which can disrupt the curl pattern.
Products That Actually Make Curls Last
The right products make the difference between curls that last all day and curls that fall flat by noon. You don’t need an arsenal—just strategic choices at key steps.
Heat Protectant Spray: Apply this before any heat styling. It creates a barrier between your hair and the curling tool, reducing damage and helping curls hold better. Look for lightweight formulas that don’t leave residue.
Volumizing Mousse: Applied to damp roots before blow-drying, mousse creates texture and grip that helps curls hold their shape. It’s particularly effective for fine hair or anyone struggling with limp curls.
Texturizing Spray: This product creates microscopic texture that helps curls grip. Apply it to dry hair before curling. It’s like giving your hair better traction for the curls to hold onto.
Light Hold Hairspray: Applied after curling, hairspray sets the style. However, heavy-hold sprays can weigh curls down. Look for light to medium hold formulas. Spray from about 8-10 inches away in short bursts rather than soaking your hair.
Curl-Defining Cream: For added definition and to combat frizz, apply a small amount to curls after they’ve cooled. This is especially helpful in humid conditions.
A common mistake is applying too much product too early. More product doesn’t equal longer-lasting curls; it usually means weighted-down, limp curls. Use products strategically and sparingly.
Common Curling Mistakes and Fixes
Problem: Curls Fall Out Immediately
Cause: Usually inadequate cooling time or not enough product grip. Your hair might also be too slippery from excess conditioner.
Solution: Always allow curls to cool completely before moving on. Reduce the amount of leave-in conditioner you’re using. Add a texturizing spray before curling to create grip. Consider using smaller sections so the heat penetrates more thoroughly.
Problem: Curls Look Frizzy
Cause: Frizz typically indicates moisture from humidity or damage to the hair cuticle. It can also result from over-curling or using too much product.
Solution: Use a smoothing serum or anti-frizz cream on damp hair before blow-drying. Ensure your hair is completely dry before curling. If curls are still frizzy after styling, use a light hairspray or anti-frizz spray designed for finished curls. In humid weather, consider using a humidity-resistant hairspray.
Problem: Only Half Your Hair Curls
Cause: Temperature inconsistency, inadequate heat contact, or different hair thickness in different sections.
Solution: Make sure your curling iron is fully heated before starting. Ensure each section is wrapped smoothly around the barrel with no gaps. Hold finer sections longer than thick sections. If some sections consistently resist curling, apply a bit of texturizing spray to those areas.
Problem: Curls Look Unnatural or Costume-Like
Cause: Usually from using uniform curl direction, identical section sizes, or too-tight curls throughout.
Solution: Vary your curl direction—some away from face, some toward, some neutral. Use sections of different sizes. Leave some pieces slightly uncurled or loosely curled. Use a wand rather than a traditional iron for a more natural appearance. Once curls cool, gently finger-comb to soften the look.
Problem: Curls Feel Crunchy or Stiff
Cause: Too much hairspray or product buildup.
Solution: Use less hairspray in lighter applications rather than heavy coverage. Consider switching to a lighter-hold formula. If you’ve built up product over several days, do a clarifying wash to start fresh.
Just as knowing how to remove gel polish properly protects your nails, understanding how to care for your curls protects your hair while maintaining your style.
Frequently Asked Questions
How long should curls last?
With proper technique and products, curls typically last 24-48 hours. Fine hair may see curls drop after 12-24 hours, while thick hair can maintain curls for several days. Sleeping on a silk or satin pillowcase extends curl longevity by reducing friction. You can refresh curls the next day using a curling iron on lower heat for just a few seconds per curl, or by using a curling spray designed to revive existing waves.
Can I curl my hair daily without damage?
Daily curling with high heat will eventually damage your hair. However, you can minimize damage by using lower temperatures appropriate for your hair type, always using heat protectant products, ensuring your hair is in good condition with regular deep conditioning, and giving your hair heat-free days when possible. Consider alternating curling methods—use a curling iron one day and hot rollers the next to vary the type of heat exposure.
What’s the difference between curls and waves?
Curls are typically defined, spiral-shaped formations, while waves are softer, more undulating patterns. Curls usually result from wrapping hair around a barrel completely, while waves often come from partial wrapping, using a wand with looser technique, or using larger barrel sizes. The distinction is somewhat subjective—what one person calls a wave, another might call a curl.
Should I curl wet or dry hair?
Always curl completely dry hair. Wet or damp hair won’t hold curls because water disrupts the temporary reshaping that heat creates. Additionally, using heat styling tools on wet hair can cause damage and steam-related frizz. However, you can apply lightweight styling products to damp hair before blow-drying completely.
How do I make curls last longer?
Several strategies extend curl longevity: use a texturizing spray before curling to create grip, apply light-hold hairspray after curling, sleep on a silk pillowcase to reduce friction, and avoid touching your curls excessively throughout the day. You can also use a curling spray designed to hold waves, or try braiding your hair loosely before bed and releasing it in the morning for a second day of curls.
Is it better to curl from roots or mid-length?
For most people, starting from mid-length creates a more natural appearance while still providing volume at the roots. Curling from the roots creates tighter, more defined curls throughout. For added volume without tight curls, try curling only the mid-lengths and ends, leaving the roots straight or just slightly wavy. This technique works particularly well for fine hair that looks limp when curled entirely.
What if my hair won’t hold a curl?
Several factors could prevent curls from holding: your hair might be too slippery (reduce conditioner, add texturizing spray), not enough heat is being applied (check temperature, ensure full contact with barrel, hold longer), you’re not allowing adequate cooling time (hold curls while cooling), or you need more product grip (add mousse or texturizing spray). Some hair types naturally resist curling; if this is persistent, try a different method like hot rollers or a wand.
Can I curl color-treated or damaged hair?
Yes, but with extra care. Color-treated and damaged hair is more fragile and prone to breakage. Use lower heat settings, apply a quality heat protectant, deep condition regularly, and consider using gentler curling methods like hot rollers or braiding overnight. Trim regularly to remove damaged ends. If your hair is severely damaged, consider getting a professional treatment to restore health before attempting heat styling.
Do I need multiple curling tools?
Not necessarily. A single quality curling iron with adjustable temperature and a 1-1.25 inch barrel handles most curling needs. However, many people eventually invest in a wand for different curl types or hot rollers for volume. Start with one tool and invest in others only if you find you want different results that tool can’t provide.
What’s the best way to curl very long hair?
Long hair requires patience and strategic sectioning. Divide hair into more sections than you would for shorter hair—perhaps 8-10 instead of 4-6. Smaller sections ensure the heat reaches all the way through. Start curling from the bottom layers and work upward. Use larger barrel sizes to prevent curls from looking too tight or kinky. Consider using hot rollers, which distribute heat more evenly through long hair. You might also try overnight braiding methods for gentle waves without heat.
Whether you’re preparing for a special event or simply wanting to refresh your everyday look, learning to make a bow with your hair through these curling techniques gives you styling versatility that goes beyond basic styling. The skills you develop—understanding your tools, knowing your hair type, and practicing proper technique—translate into confidence in your appearance.
For additional guidance on heat styling, check out This Old House’s home and lifestyle resources, which often includes beauty and personal care tips. Family Handyman also provides practical how-to guides that can help with understanding tools and techniques. For product recommendations and professional insights, Home Depot’s beauty and personal care section offers quality styling tools. Additionally, Sally Beauty provides comprehensive guides on hair styling products and techniques, and Beauty Counter offers science-backed information on safe beauty practices.
The journey to mastering curls isn’t about achieving perfection on your first try—it’s about understanding your hair, experimenting with techniques, and building skills that evolve as your hair changes. Start with the method that feels most approachable, practice consistently, and don’t hesitate to adjust based on results. Before long, you’ll have the knowledge and confidence to curl your hair beautifully whenever you want.
Related Posts

How Long to Boil Lobster Tails: Cooking Guide

How Long to Fly from New York to London? Travel Times
