
Cross Stitch Basics: A Beginner’s Guide
Cross Stitch Basics: A Beginner’s Guide
Cross stitching is one of the most accessible and rewarding needlework crafts you can learn. Whether you’re looking for a relaxing hobby, a creative outlet, or a way to create personalized gifts, cross stitch offers endless possibilities for crafters of all skill levels. This ancient technique, which dates back centuries, combines simple repetitive stitches to create beautiful patterns and images on fabric.
Unlike more complex embroidery techniques, cross stitch requires minimal equipment and a straightforward learning curve. With just a needle, thread, fabric, and a pattern, you can begin creating stunning pieces within hours. The meditative nature of the craft makes it perfect for stress relief, and the tangible results provide immediate satisfaction. Whether you want to stitch decorative home accents, personalized keepsakes, or intricate artwork, understanding the fundamentals will set you up for success.
Essential Materials and Tools
Before you begin your cross stitch journey, gather the necessary supplies. The good news is that starting costs are minimal compared to many other crafts. At your local craft store or through craft retailers, you’ll find starter kits that bundle most essentials together, making it convenient for beginners.
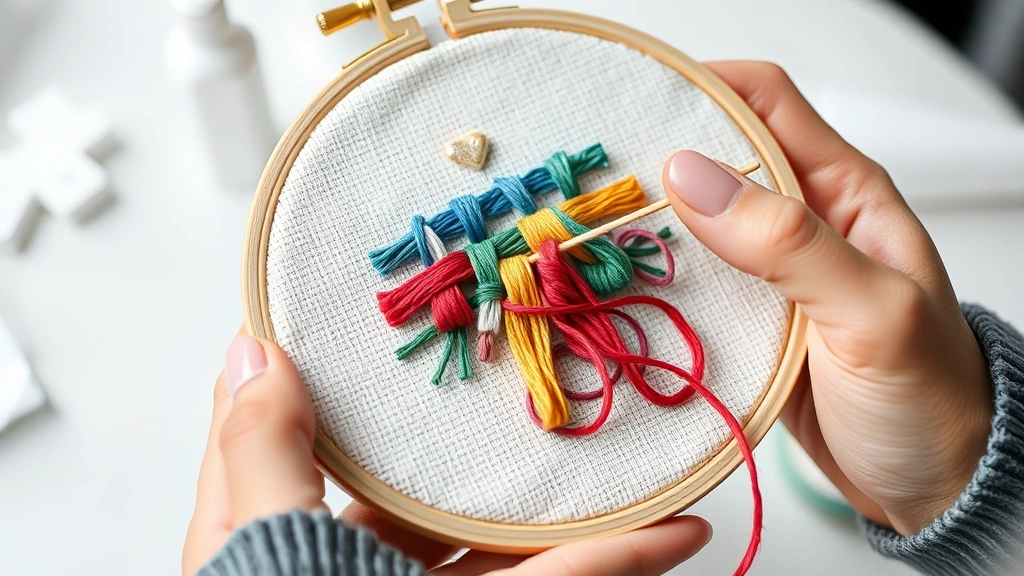
The needle is your primary tool. Cross stitch needles have a blunt tip and a larger eye to accommodate embroidery floss. Common sizes range from 24 to 28, with size 24 being ideal for beginners due to its easier threading. Blunt needles prevent splitting the fabric fibers, which would create uneven stitches.
Embroidery floss is the thread you’ll use, typically made of six-strand cotton. Most patterns call for separating these strands to control thread thickness and achieve proper stitch coverage. Brands like DMC and Anchor offer hundreds of colors, allowing you to match any pattern precisely.
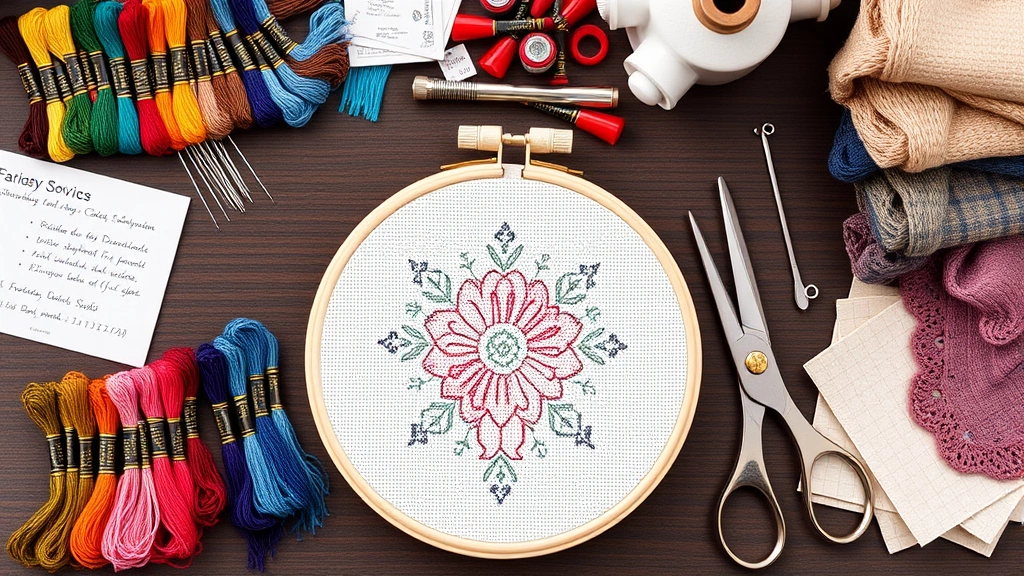
Fabric is where your stitches live. Aida cloth is the most beginner-friendly option, with its clear grid structure making it easy to place stitches accurately. Count refers to the number of stitches per inch—14-count Aida is standard for beginners. Linen and evenweave fabrics offer more refined finishes for experienced stitchers.
Additional tools include embroidery hoops (to keep fabric taut), scissors (sharp ones for precise cuts), an organizing system for your floss, and a pattern or chart. Many crafters also use a project organizer to keep threads sorted and prevent tangling.
Understanding Fabric Types
Selecting the right fabric is crucial for your project’s success. Different fabrics offer various benefits, and your choice depends on your skill level, project size, and desired final appearance.
Aida cloth remains the most popular choice for beginners. Its distinctive woven grid creates natural squares where you place each stitch. The fabric is available in various counts: 11-count offers larger squares for quick projects, 14-count provides a standard balance, and 18-count creates finer details. The open weave makes it forgiving for mistakes and ideal when learning proper tension.
Linen fabric appeals to experienced stitchers seeking sophisticated results. Its tighter weave creates more delicate finished pieces, but requires more precision. Linen stitches are typically worked over two threads, making it less intuitive for beginners. However, linen’s natural beauty and professional appearance make it worth mastering.
Evenweave fabrics like lugana and cashel linen offer middle ground. They have a regular weave without the pronounced grid of Aida, creating elegant projects with less bulk than traditional Aida. These work well once you’ve mastered basic techniques.
When selecting fabric, consider your project’s purpose. Decorative pieces benefit from higher-count fabrics for finer details, while quick projects or gifts work perfectly with 11-count Aida. Always purchase slightly more fabric than your pattern requires—approximately 2-3 inches beyond all edges prevents running short.
Reading Cross Stitch Patterns
Cross stitch patterns are essentially maps showing exactly where each stitch belongs. Learning to read patterns fluently is essential before beginning any project. Most patterns use a grid system where each square represents one cross stitch on your fabric.
Color coding is the pattern’s language. Each color appears as a different symbol or shade in the chart. A legend or key shows which thread color corresponds to each symbol. Professional patterns include DMC color numbers for accuracy when purchasing floss.
Pattern layout typically shows the entire design with marked sections. Many patterns include arrows indicating the center point—starting from the center ensures even distribution on your fabric. Grid lines, usually marked every tenth stitch, help you track your position and prevent getting lost in large projects.
Backstitch information appears separately in most patterns. These outline stitches add definition and detail after the main cross stitches are complete. Backstitches use a thinner thread or different color to create crisp lines and shadows.
When examining a pattern, identify the fabric count, finished size, and thread requirements. Calculate how much floss you’ll need—one skein typically covers about 250 stitches. For complex projects, create a checklist of colors and mark them off as you complete sections, preventing color confusion.
Mastering the Basic Cross Stitch
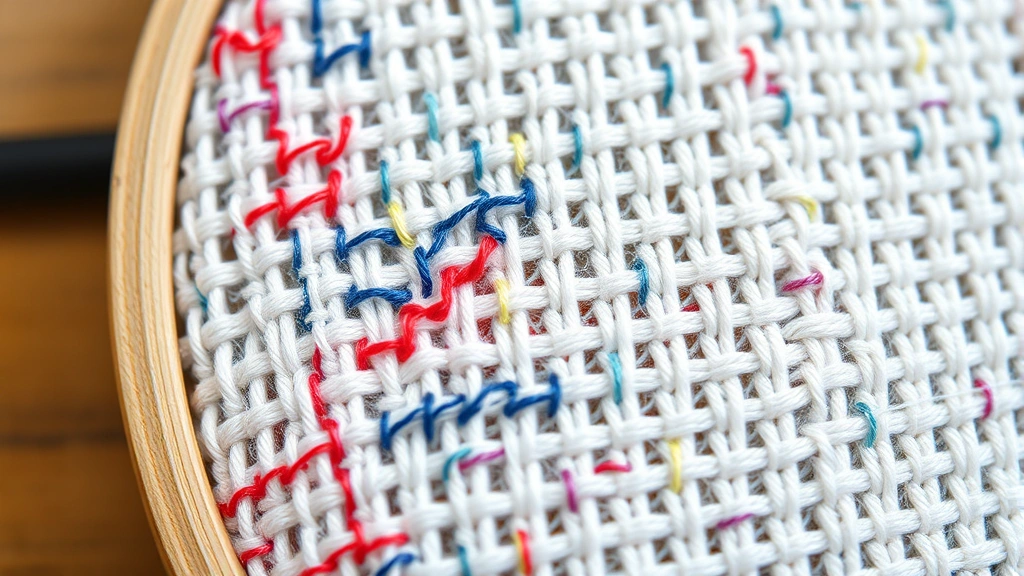
The cross stitch itself is remarkably simple—it’s merely two diagonal lines crossing each other. However, mastering proper technique ensures professional-looking results and prevents common issues like uneven tension or misaligned stitches.
The fundamental motion involves four steps. First, bring your needle up through the bottom-left corner of your fabric square. Second, insert it diagonally through the top-right corner. Third, bring the needle back up through the bottom-right corner. Fourth, insert it through the top-left corner, completing your cross.
Consistency matters tremendously. All diagonal stitches should slant the same direction—typically from bottom-left to top-right on the first pass. When working rows, you can optimize efficiency by stitching half-crosses in one direction across the entire row, then returning with the complementary diagonal. This method, called the “fast method,” creates uniform stitches quickly.
Thread tension affects your final appearance. Stitches should be snug enough to maintain shape but not so tight they pucker the fabric or distort the underlying weave. Loose stitches look sloppy, while overly tight stitches create an unnatural, bunched appearance. Practice finding the sweet spot—your stitches should lie flat against the fabric with gentle tension.
Stitch size consistency comes naturally with practice. All your crosses should be approximately the same size, creating an even, professional appearance. Inconsistent stitch sizes create a chaotic look despite using the correct colors.
Threading and Starting Your Project
Proper preparation prevents frustration and ensures smooth stitching. Before threading a single needle, prepare your workspace and materials thoroughly.
Thread preparation is crucial. Cut an 18-24 inch length of floss—longer strands tangle and fray. Separate the six strands by holding the bundle and gently pulling one strand away from the others. Most patterns use two or three strands for cross stitches, creating proper coverage without excessive bulk. Separate your floss into individual strands, then recombine the required number smoothly.
Threading the needle is easier than many beginners assume. Fold your separated floss in half, insert the loop through the needle’s eye, then pull the thread ends through the loop. This creates a secure, knot-free setup. Alternatively, use a thread threader—an inexpensive tool that makes threading effortless.
Starting your stitches without knots prevents bumpy backs and improves your finished piece’s appearance. Begin by bringing your needle up through the fabric, leaving a small loop on the back. Stitch over this loop with your first few stitches, securing the thread. Alternatively, run your needle under several existing stitches on the back to anchor new thread.
Securing your fabric in an embroidery hoop keeps tension even and prevents puckering. Loosen the hoop’s outer ring, place the inner ring on a flat surface, position your fabric over it, then press the outer ring down firmly. Tighten the screw gradually, ensuring the fabric is evenly taut without excessive tension that might distort it.
Start from your pattern’s center point when possible. This ensures balanced placement on your fabric and prevents running out of space. Use a pencil to lightly mark the center of your fabric if needed, then count carefully from your pattern’s center to begin stitching.
Common Mistakes to Avoid
Even experienced stitchers encounter challenges. Understanding common pitfalls helps you sidestep frustration and maintain quality throughout your project.
Inconsistent tension is perhaps the most frequent beginner mistake. Varying how tightly you pull thread creates uneven stitches that look unprofessional. Consciously maintain consistent pressure with every stitch. Record your tension preference—some stitchers find a gentle, relaxed pull produces the best results, while others prefer slightly firmer tension.
Crossing stitches in different directions creates a chaotic, amateurish appearance. Establish a rule for yourself: all top diagonals should consistently run the same direction. This uniformity dramatically improves your finished piece’s professional quality.
Using excessive thread causes bulk and poor stitch definition. Stick to your pattern’s recommendations—typically two or three strands for standard cross stitches. Too much thread obscures your fabric’s grid and creates lumpy stitches.
Skipping stitches or miscounting throws off your entire design. Count carefully, especially when starting new sections. Double-check your position relative to the pattern frequently. One miscounted stitch early on compounds across the entire project.
Neglecting fabric preparation leads to puckering and distortion. Always use an embroidery hoop and maintain even tension. Wash and dry your hands before stitching—oils and dirt accumulate on the fabric, affecting its appearance.
Poor lighting conditions cause eye strain and inaccurate stitch placement. Work in bright, natural light when possible, or invest in a quality task lamp that illuminates your work without creating shadows.
Finishing and Framing Your Work
The final steps transform your stitched piece into a polished, display-ready creation. Proper finishing techniques protect your work and enhance its appearance.
Backstitch details add definition and sophistication. After completing all cross stitches, add backstitches following your pattern’s instructions. These outline stitches use thinner thread and create crisp lines that define shapes and add shadows. Work backstitches carefully—they’re more visible than cross stitches and should be perfectly placed.
Washing your finished piece removes dust and sizing. Use cool water with gentle soap designed for delicate fabrics. Soak for 10-15 minutes, then rinse thoroughly until water runs clear. Gently squeeze out excess water without wringing. Lay flat to dry, or hang with clothespins to prevent distortion.
Pressing your work removes wrinkles and flattens stitches. Once completely dry, place a clean cloth over your piece and press gently with a warm iron. Avoid pressing directly on stitches—the cloth protects them from heat damage.
Framing options range from simple to elaborate. Basic shadowbox frames display your work beautifully while protecting it. For a professional appearance, have your piece professionally framed, though this increases cost. Alternatively, mount your piece on cardboard and display in an inexpensive frame.
Storage considerations matter for unframed pieces. Store completed projects in acid-free tissue paper away from direct sunlight, which fades colors over time. Avoid plastic storage that traps moisture. Keep pieces in a cool, dry location protected from insects and dust.
Your finished cross stitch represents hours of focused effort and creativity. Proper finishing ensures it remains beautiful for years, whether displayed proudly or gifted to a loved one. Consider documenting your work with photos—they serve as inspiration for future projects and preserve memories of your creative journey.
FAQ
How long does a cross stitch project typically take?
Project duration depends on size, complexity, and your stitching speed. Small projects (2×2 inches) might take 5-10 hours, while larger pieces can require 40+ hours. Most beginners complete a medium project in 15-20 hours of stitching. Your speed increases significantly with practice.
Can I use regular sewing thread for cross stitch?
No—regular sewing thread is too thin and lacks the sheen and durability of embroidery floss. It won’t provide adequate fabric coverage and produces an inferior finished appearance. Always use proper embroidery floss designed specifically for cross stitch work.
What’s the best way to organize my floss collection?
Many stitchers use thread organizers with numbered slots corresponding to DMC color numbers. Others prefer plastic bobbins wound with individual colors and stored in boxes. Choose a system that works for your collection size and personal preference. Label everything clearly to prevent color confusion.
Is it possible to fix mistakes in cross stitch?
Yes, though difficulty depends on how many stitches are involved. Small mistakes can be corrected by carefully removing incorrect stitches with a seam ripper and re-stitching. For significant errors, it’s often better to restart that section. This is why counting carefully and checking your work frequently prevents frustration.
Can beginners use patterns designed for experienced stitchers?
While possible, it’s not recommended. Complex patterns with many colors, fine details, and high stitch counts frustrate beginners and may result in abandoned projects. Start with simple patterns featuring 5-10 colors and manageable stitch counts. Progress to complex designs as your skills develop.
What’s the difference between cross stitch and embroidery?
Cross stitch is a specific embroidery technique using only cross stitches and backstitches. Embroidery encompasses many techniques including satin stitch, chain stitch, French knots, and others. Cross stitch’s simplicity makes it ideal for beginners, while embroidery offers more variety for experienced needleworkers.
How do I prevent thread tangling while stitching?
Keep thread lengths to 18-24 inches maximum—longer strands tangle easily. Occasionally let your needle hang freely to untwist the thread. Store organized floss properly between stitching sessions. Consider using a thread conditioner that reduces tangling.
Should I wash my cross stitch before framing?
Yes, a gentle wash removes dust, sizing, and oils accumulated during stitching. This ensures your finished piece looks fresh and bright. Use cool water and gentle soap, then dry completely before pressing and framing.
Related Posts

Superscript in Google Docs: Expert Tips

Strikethrough in Excel: Easy Steps for Beginners
