
Check Your Engine Oil Like a Pro and Avoid Costly Repairs
Regular engine oil maintenance is one of the most critical aspects of vehicle care, yet many drivers overlook this simple task until it’s too late. Learning how to check engine oil properly can save you thousands of dollars in repair costs and extend your vehicle’s lifespan significantly. Engine oil serves as the lifeblood of your car’s engine, lubricating moving parts, reducing friction, and preventing catastrophic damage that could leave you stranded on the roadside.
Whether you’re a seasoned car enthusiast or a new driver, mastering the art of checking your engine oil is an essential skill that takes just a few minutes but provides invaluable peace of mind. This comprehensive guide will walk you through every step of the process, from understanding when to check your oil to interpreting what the dipstick tells you about your engine’s health.
Understanding Engine Oil and Its Importance
Engine oil performs multiple critical functions that keep your vehicle running smoothly. It lubricates the hundreds of moving parts within your engine, creating a protective film that prevents metal-on-metal contact. This lubrication reduces friction and heat, which could otherwise cause severe engine damage within minutes of operation.
Beyond lubrication, engine oil acts as a coolant, helping to dissipate heat from critical engine components. It also serves as a cleaning agent, picking up dirt, debris, and combustion byproducts that could clog engine passages. Modern engine oils contain sophisticated additives that neutralize acids, prevent corrosion, and maintain optimal viscosity across a wide temperature range.
The Environmental Protection Agency emphasizes that proper oil maintenance not only protects your engine but also reduces harmful emissions and improves fuel efficiency. Understanding these functions helps you appreciate why regular oil checks are so crucial for your vehicle’s longevity.

When to Check Your Engine Oil
Timing is everything when it comes to checking your engine oil accurately. The best time to check your oil is when the engine is cold, preferably after the vehicle has been parked for at least 10-15 minutes. This allows the oil to settle back into the oil pan, giving you the most accurate reading possible.
Checking oil immediately after driving can provide misleading results because much of the oil is still circulating through the engine or coating internal components. Hot oil also expands, which can make levels appear higher than they actually are when the engine cools down.
For optimal maintenance, check your oil at least once a month, and always before long trips. Many automotive experts recommend checking oil every time you fill up with gas, making it part of your regular routine. This frequency ensures you’ll catch potential problems early, before they become expensive repairs.
Preparation Steps Before Checking
Before diving under the hood, gather the necessary tools and ensure you’re prepared for the task. You’ll need a clean cloth or paper towels, and potentially a funnel and fresh oil if you discover the level is low. Park your vehicle on level ground – slopes or inclines can give false readings that might lead to overfilling or underfilling your engine.
Turn off the engine and engage the parking brake for safety. Allow the engine to cool for at least 10-15 minutes, giving the oil time to drain back into the pan. This waiting period is crucial for accuracy and prevents burns from hot engine components.
Open the hood and locate the dipstick, which typically has a bright-colored handle (often yellow, orange, or red) and may be labeled “Engine Oil.” Some newer vehicles have electronic oil monitoring systems, but most still include a traditional dipstick for manual checking. Familiarize yourself with your specific vehicle’s layout by consulting the owner’s manual if needed.
Step-by-Step Guide to Checking Engine Oil
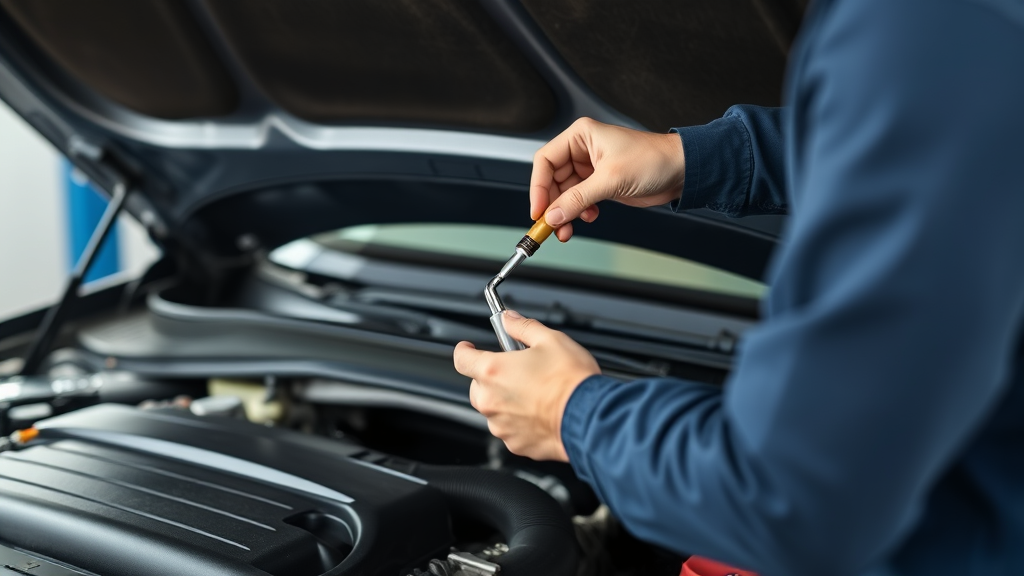
Begin by pulling the dipstick straight out of its tube with a firm, steady motion. The dipstick may be several feet long, so be prepared to pull it completely free from the engine. Wipe the entire length of the dipstick clean with a lint-free cloth or paper towel, removing all oil residue to ensure an accurate reading.
Reinsert the dipstick fully into its tube, pushing it all the way down until it’s completely seated. This ensures the dipstick reaches the bottom of the oil pan for an accurate measurement. Wait a moment, then pull it out again to read the oil level.
The dipstick will show wet oil marks that indicate the current oil level in your engine. Look for the highest point where oil appears on the dipstick – this represents your current oil level. Compare this mark to the minimum and maximum indicators on the dipstick, which are typically marked as “MIN” and “MAX” or shown as crosshatched areas.
For more detailed automotive maintenance guidance, visit the FixWise Hub Blog for expert tips and troubleshooting advice.
Reading the Dipstick Like a Professional
Professional mechanics know that interpreting dipstick readings requires attention to detail and understanding of what different markings mean. Most dipsticks have clear minimum and maximum markings, often with a crosshatched or textured area between them indicating the optimal operating range.
The oil level should ideally fall between the minimum and maximum marks, closer to the maximum for optimal performance. If the oil level is at or below the minimum mark, you need to add oil immediately to prevent engine damage. Conversely, oil levels significantly above the maximum can cause performance issues and should be addressed by draining excess oil.
Some dipsticks use different marking systems, including notches, dimples, or colored zones. The National Highway Traffic Safety Administration recommends consulting your vehicle’s manual to understand your specific dipstick markings, as designs vary between manufacturers and models.

Analyzing Oil Condition and Quality
Checking oil level is only part of the equation – analyzing oil condition provides crucial insights into your engine’s health. Fresh oil typically appears amber or black (depending on type) and flows smoothly off the dipstick. As oil ages and accumulates contaminants, it becomes darker and thicker.
Examine the oil’s consistency by rubbing a small amount between your fingers. Healthy oil should feel smooth and relatively thin, while degraded oil may feel gritty, thick, or sticky. Gritty textures indicate contamination with metal particles or dirt, suggesting the need for immediate oil change and potentially further engine inspection.
Color changes can reveal important information about oil condition and potential problems. Very dark or black oil usually indicates it’s overdue for changing, while milky or foamy oil might suggest coolant contamination – a serious issue requiring immediate professional attention. Metallic particles visible in the oil could indicate internal engine wear and warrant immediate inspection by a qualified mechanic.
Troubleshooting Common Oil-Related Issues
Low oil levels are among the most common issues drivers encounter during oil checks. If your oil level is below the minimum mark, add small amounts of the correct oil type gradually, checking the level frequently to avoid overfilling. Never ignore low oil levels, as running an engine without adequate lubrication can cause catastrophic damage within minutes.
Consistently low oil levels despite recent changes might indicate leaks or excessive oil consumption. Look for puddles under your parked vehicle, blue smoke from the exhaust, or unusual engine noises that could suggest internal wear. These symptoms require professional diagnosis to prevent costly repairs.
Overfilling presents its own set of problems, potentially causing oil to foam, reducing its lubricating effectiveness, and creating excessive pressure in engine seals. If you discover overfilled oil, have the excess drained promptly to prevent damage to engine seals and gaskets.
Professional Maintenance Tips
Maintaining accurate records of your oil checks and changes helps identify patterns and potential issues before they become serious problems. Note the date, mileage, oil level, and condition each time you check, creating a maintenance log that can prove invaluable for troubleshooting future issues.
Keep spare oil in your garage or trunk, ensuring it matches your engine’s specifications exactly. Different engines require different oil viscosities and formulations, so always use the type recommended in your owner’s manual. MIT’s research on engine oil demonstrates the critical importance of using the correct oil specification for optimal engine protection.
Consider environmental factors that might affect oil change intervals. Severe driving conditions – including frequent short trips, stop-and-go traffic, extreme temperatures, or dusty conditions – may require more frequent oil changes than standard recommendations. Monitor your oil more closely under these conditions to ensure optimal engine protection.
Professional mechanics recommend checking oil when the engine is cold but also being aware of how oil levels change with temperature. This knowledge helps you make more informed decisions about when to add oil and when to seek professional service.
Frequently Asked Questions
How often should I check my engine oil?
Check your engine oil at least once a month, and always before long trips. Many automotive professionals recommend checking oil every time you fill up with gas, making it part of your regular maintenance routine. This frequency helps you catch potential problems early and ensures your engine always has adequate lubrication.
What should I do if my oil level is below the minimum mark?
If your oil level is at or below the minimum mark, add oil immediately using the type specified in your owner’s manual. Add small amounts at a time, checking the level frequently to avoid overfilling. If you consistently find low oil levels despite recent changes, have your vehicle inspected for leaks or excessive oil consumption.
Can I check my oil when the engine is hot?
While you can check oil when the engine is warm, it’s not recommended for the most accurate reading. Hot oil expands and much of it remains circulating through the engine, potentially giving false readings. Wait at least 10-15 minutes after turning off the engine for the most accurate measurement.
What does milky or foamy oil indicate?
Milky or foamy oil typically indicates coolant contamination, which is a serious problem that requires immediate professional attention. This condition can result from a blown head gasket, cracked engine block, or other significant internal damage. Stop driving immediately and consult a qualified mechanic.
How do I know what type of oil to use in my engine?
Always use the oil type and viscosity specified in your owner’s manual. This information is also typically found on a label under the hood or on the oil filler cap. Using the wrong oil type can reduce engine protection and potentially void your warranty, so always verify specifications before adding oil.
Is it normal for oil levels to drop between changes?
Some oil consumption is normal in most engines, especially as they accumulate mileage. However, significant oil loss between changes could indicate leaks, excessive internal wear, or other issues requiring professional diagnosis. Monitor consumption patterns and consult a mechanic if oil loss seems excessive.
What should I do if I accidentally overfill my engine with oil?
Overfilling can cause serious engine problems, so have excess oil drained promptly by a professional or carefully remove some yourself using appropriate tools. Overfilled oil can foam, reducing its lubricating properties, and create excessive pressure that damages seals and gaskets. Never ignore overfilled oil conditions.
Related Posts

How Long to Boil Lobster Tails: Cooking Guide

How Long to Fly from New York to London? Travel Times
