
Master the Art of Rolling the Perfect Joint Every Time
Rolling the perfect joint is both an art and a skill that requires patience, practice, and proper technique. Whether you’re a beginner looking to learn the fundamentals or an experienced user seeking to refine your craft, mastering this essential skill will enhance your overall experience and ensure consistent results every time.
Like many fine motor skills, learning how to roll a joint effectively takes time and dedication. The process involves several key components working together harmoniously: selecting quality materials, proper preparation, precise technique, and attention to detail. With the right guidance and consistent practice, anyone can develop the dexterity and knowledge needed to create perfectly rolled joints that burn evenly and deliver optimal results.
Essential Materials and Tools
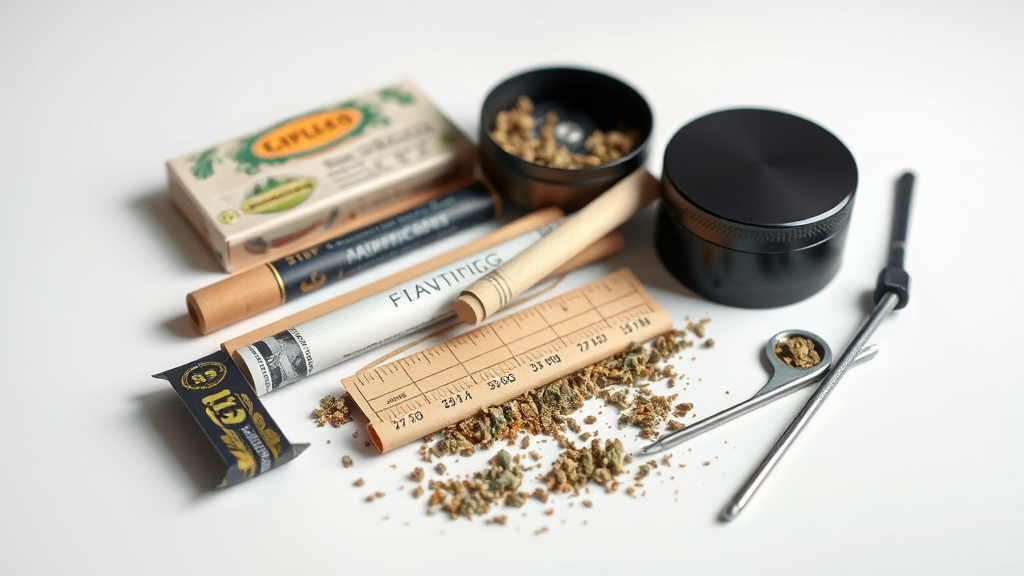
The foundation of any well-rolled joint begins with selecting the right materials and tools. Quality components make a significant difference in both the rolling process and the final product’s performance. Understanding each element’s role will help you make informed choices that contribute to better results.
Rolling papers form the cornerstone of your joint construction. These thin, lightweight papers come in various sizes, materials, and thicknesses. Hemp papers offer excellent burn characteristics and minimal flavor interference, while rice papers provide an ultra-thin option for purists. Wood pulp papers remain the most common choice, offering reliability and ease of use for beginners.
Paper size selection depends on your intended use and experience level. Standard size papers (78mm) work well for beginners, while king size papers (110mm) accommodate larger quantities and provide more room for error during the learning process. Research published by the National Center for Biotechnology Information indicates that paper composition can significantly impact combustion characteristics.
Filters, also known as tips or crutches, serve multiple purposes in joint construction. They prevent material from entering your mouth, provide structural support, improve airflow, and make handling easier. You can purchase pre-made filters or create your own using thin cardboard strips. The process of making filters shares similarities with other paper-folding techniques, much like learning how to make an envelope, requiring precision and attention to detail.
A quality grinder represents one of your most important investments. Consistent grinding ensures even burning and optimal airflow throughout your joint. Multi-chamber grinders with kief catchers offer additional benefits, while simple two-piece models provide adequate performance for basic needs. Hand-grinding remains an option, though it typically produces less consistent results.
Preparation Techniques for Optimal Results
Proper preparation significantly impacts your joint’s quality and performance. This phase requires careful attention to detail and methodical approach to ensure optimal results. Taking time during preparation pays dividends in the final product’s consistency and burning characteristics.
Grinding consistency plays a crucial role in joint performance. Material should be broken down to a fine, fluffy consistency without becoming powdery. Over-grinding creates powder that can clog airflow and cause uneven burning, while under-grinding leaves large pieces that burn inconsistently. The ideal consistency resembles coarse breadcrumbs or dried herbs used in cooking.
Moisture content affects both rolling ease and burning characteristics. Properly cured material should feel slightly sticky but not wet, with enough moisture to hold together without crumbling. If your material feels too dry, you can restore moisture using humidity packs or by storing it with a small piece of fresh citrus peel for several hours.
Temperature and humidity in your rolling environment matter more than many realize. Dry conditions can make papers brittle and difficult to handle, while excessive humidity can cause papers to stick together or become unmanageable. Room temperature conditions with moderate humidity provide the best rolling environment.
Workspace preparation contributes to rolling success. Choose a clean, flat surface with good lighting and minimal air movement. Having all materials within easy reach prevents interruptions during the rolling process. Some people find that using a rolling tray helps contain materials and provides a dedicated workspace, similar to how organizing materials helps when learning how to fold a pocket square properly.
Step-by-Step Rolling Methods
Learning how to roll a joint effectively requires understanding and practicing specific techniques. Multiple methods exist, each with its own advantages and learning curve. Starting with basic techniques and gradually progressing to more advanced methods ensures steady skill development.
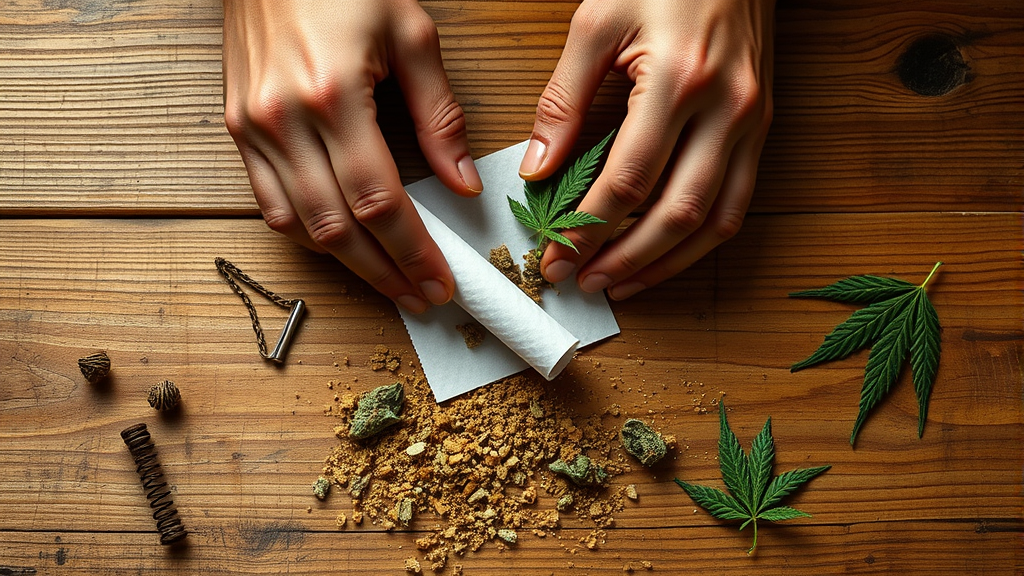
The classic rolling method remains the most fundamental technique to master. Begin by creating a crease down the center of your rolling paper, with the adhesive strip facing up and away from you. This crease serves as a guide for material placement and helps maintain symmetry throughout the rolling process.
Filter placement occurs first in most rolling methods. Position your filter at one end of the paper, typically the left side for right-handed individuals. The filter should sit snugly against the paper’s edge without extending beyond it. Proper filter placement provides a foundation for the entire joint’s structure.
Material distribution requires careful attention to achieve even burning. Place ground material along the paper’s crease, creating a slight mound that’s higher in the middle and tapers toward the ends. This distribution pattern, known as a “boat” shape, promotes even burning and prevents runs or canoes.
The rolling motion itself involves using your thumbs and index fingers to shape the joint while applying gentle pressure. Begin by rolling the paper back and forth between your fingers, gradually working the material into a cylindrical shape. This technique requires patience and practice, much like mastering the precise movements needed when learning how to tie a bow with a tie.
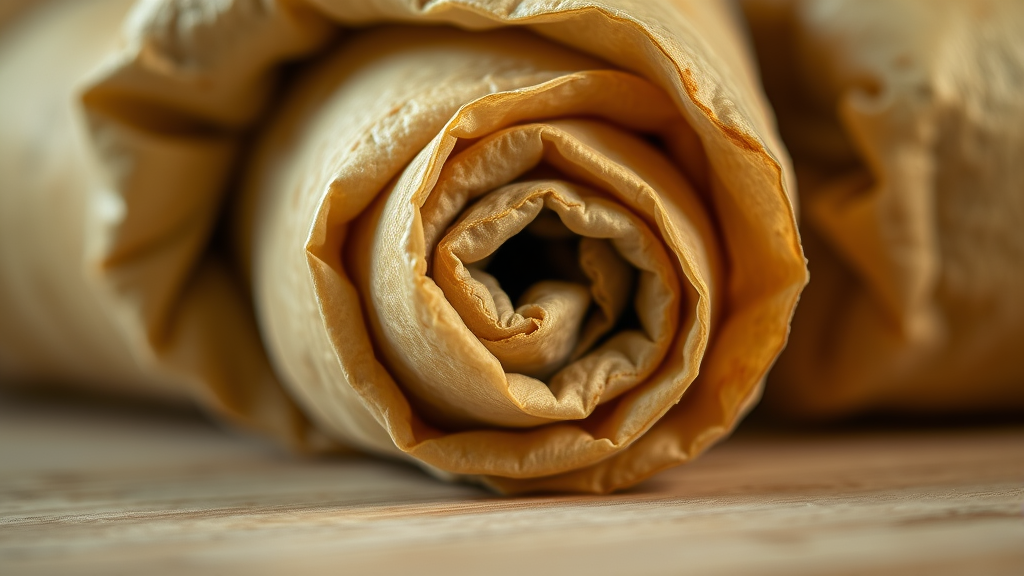
Sealing the joint properly ensures structural integrity and prevents unwrapping. Once you’ve achieved the desired shape, tuck the non-adhesive edge of the paper under the material and roll it toward the adhesive strip. Lick the adhesive strip lightly – too much moisture can cause problems – and complete the rolling motion to seal the joint.
Advanced Techniques and Tips
Once you’ve mastered basic rolling techniques, advanced methods can help you create more sophisticated joints with improved performance characteristics. These techniques require additional skill but offer enhanced results for those willing to invest the time to learn them.
The cone rolling method produces joints with a wider smoking end that tapers to a narrower tip. This shape promotes better airflow and can provide a more enjoyable experience. Creating cones requires adjusting material distribution and rolling technique to achieve the desired taper while maintaining structural integrity.
Dutch rolling, also known as European rolling, involves mixing tobacco with your primary material. This technique requires understanding proper ratios and mixing methods to achieve desired results. The tobacco provides structure and affects burning characteristics, requiring adjustments to rolling technique and material preparation.
Cross-joint construction represents an advanced technique that creates a joint with perpendicular smoking chambers. This method requires precise planning, drilling techniques, and careful assembly. While complex, cross-joints offer unique experiences and demonstrate advanced rolling skills.
Backrolling, or inside-out rolling, uses less paper by rolling with the adhesive strip facing inward. This technique reduces paper consumption and can improve flavor by minimizing paper interference. However, it requires more skill and practice to execute properly, as the rolling motion must be reversed from standard techniques.
Quality control during rolling helps identify and correct issues before they affect the final product. Look for consistent thickness throughout the joint’s length, proper filter integration, and adequate but not excessive firmness. A properly rolled joint should feel firm but not hard, with slight give when gently squeezed.
Troubleshooting Common Issues
Even experienced rollers encounter problems occasionally. Understanding common issues and their solutions helps you quickly identify and correct problems, leading to more consistent results and less frustration during the learning process.
Uneven burning, also called “canoeing” or “running,” occurs when one side of the joint burns faster than the other. This issue typically results from uneven material distribution, inconsistent grinding, or environmental factors like air currents. According to the National Institute on Drug Abuse, proper rolling technique can help ensure more consistent burning patterns.
Loose joints that fall apart or burn too quickly usually indicate insufficient material compression during rolling. The solution involves applying more pressure during the shaping phase and ensuring proper material distribution. However, avoid over-packing, which can restrict airflow and cause other problems.
Tight joints that are difficult to draw from result from excessive compression or fine grinding that creates powder. These joints may go out frequently or require significant effort to smoke. Adjusting grinding consistency and rolling pressure typically resolves this issue.
Paper tears during rolling often occur due to excessive moisture, overly aggressive handling, or defective papers. Using fresh, high-quality papers and maintaining proper moisture levels on your fingers helps prevent tears. If a tear does occur, small pieces of rolling paper can serve as patches for minor damage.
Structural weakness at the filter end indicates improper filter integration or inadequate sealing in that area. Ensuring the filter fits snugly and extending the adhesive strip around the filter area during sealing helps create stronger joints that won’t separate during use.
Storage and Preservation Methods
Proper storage techniques help maintain joint quality and prevent degradation over time. Whether storing pre-rolled joints or preparing for future rolling sessions, understanding preservation methods ensures your investment in time and materials pays off with consistent results.
Airtight containers provide the best protection against moisture loss and contamination. Glass jars with tight-fitting lids offer excellent storage properties, while specialized storage tubes designed for joints provide convenient, portable options. Avoid plastic bags for long-term storage, as they can allow moisture exchange and may impart unwanted flavors.
Temperature control plays a crucial role in preservation. Cool, stable temperatures prevent degradation and maintain potency over time. Avoid storing joints in areas subject to temperature fluctuations, such as cars or direct sunlight. Room temperature storage in dark locations provides adequate conditions for most users.
Humidity management prevents both over-drying and moisture-related problems. Relative humidity between 55-65% provides optimal storage conditions. Humidity control packs designed for this purpose can help maintain proper moisture levels in storage containers, similar to how proper technique helps when learning how to make a bow with consistent results.
Individual protection for pre-rolled joints prevents damage and contamination. Joint tubes, doob tubes, or specially designed containers protect against crushing and maintain shape during transport. For multiple joint storage, separating each joint with small pieces of parchment paper prevents sticking and damage.
Long-term storage considerations include checking stored joints periodically for signs of mold or degradation. The World Health Organization emphasizes the importance of proper storage conditions for maintaining quality over time. Properly stored joints can maintain quality for several months, though freshness gradually declines over time.
Frequently Asked Questions
What type of rolling paper is best for beginners?
Hemp or wood pulp papers in standard size (78mm) work best for beginners. These papers offer good durability, forgiveness during learning, and reasonable burn characteristics. Avoid ultra-thin papers initially, as they’re more prone to tearing and require more delicate handling. Once you’ve developed basic skills, you can experiment with different paper types to find your preferences.
How fine should I grind material for rolling joints?
Material should be ground to a consistency resembling coarse breadcrumbs – fine enough to pack evenly but not so fine that it becomes powdery. Over-grinding creates powder that can restrict airflow and cause harsh burning, while under-grinding leaves large pieces that burn unevenly. A quality grinder typically produces the ideal consistency with 8-12 turns.
Why does my joint keep going out while smoking?
Joints that frequently extinguish usually suffer from restricted airflow due to over-packing or too-fine grinding. Other causes include moisture issues, uneven material distribution, or poor rolling technique that creates dense spots. Ensure proper grinding consistency, avoid over-packing during rolling, and check that your filter isn’t clogged or too restrictive.
How can I make my joints burn more evenly?
Even burning requires consistent material distribution, proper grinding, and good rolling technique. Create a slight boat shape when distributing material, with more in the center tapering toward the ends. Ensure your grinding is uniform, avoid creating dense or loose spots during rolling, and consider the environment – wind or air currents can cause uneven burning.
What’s the ideal thickness for a well-rolled joint?
A properly rolled joint should be roughly the thickness of a pencil to a standard pen, depending on paper size and personal preference. It should feel firm when gently squeezed but not hard or overly compressed. The joint should maintain consistent thickness throughout its length, with only slight tapering toward the lit end if desired.
How long do pre-rolled joints stay fresh?
Properly stored pre-rolled joints can maintain quality for 2-3 months, though peak freshness occurs within the first few weeks. Storage in airtight containers at stable room temperature away from light provides optimal preservation. Signs of degradation include brittleness, color changes, or unusual odors. Humidity control packs can extend storage life significantly.
Can I fix a joint that’s too loose or too tight?
Loose joints can sometimes be salvaged by gently compressing the material and re-sealing if the paper isn’t damaged. For tight joints, you can try gently rolling between your fingers to loosen the material or carefully poking small holes with a thin object to improve airflow. However, prevention through proper rolling technique produces better results than attempting fixes after completion.
Related Posts

How Long to Boil Lobster Tails: Cooking Guide

How Long to Fly from New York to London? Travel Times
