
Master Perfect White Rice Every Time: Foolproof Cooking Tips
Learning how to make white rice perfectly is one of the most fundamental cooking skills every home chef should master. Despite its simplicity, many people struggle with achieving consistently fluffy, non-sticky rice that forms the perfect base for countless meals. Whether you’re preparing a side dish for perfectly boiled chicken breast or creating a foundation for international cuisines, mastering rice cooking techniques will elevate your culinary repertoire.
The key to perfect white rice lies in understanding the proper ratios, timing, and techniques that ensure consistent results every time. From choosing the right type of rice to understanding water ratios and cooking methods, this comprehensive guide will transform your rice-cooking game. You’ll discover professional tips that restaurant chefs use and learn troubleshooting techniques to fix common rice cooking problems.
Understanding Different Types of White Rice
Before diving into cooking techniques, it’s crucial to understand the different varieties of white rice and how they affect your cooking approach. Long-grain white rice, such as jasmine and basmati, produces separate, fluffy grains that don’t stick together. These varieties are ideal for pilafs, side dishes, and dishes where you want distinct grains.
Medium-grain rice, including Arborio and sushi rice, contains more starch and produces a slightly stickier texture. This type works well for risottos, sushi, and dishes where you want the grains to hold together. Short-grain rice is the stickiest variety, perfect for puddings and dishes requiring a cohesive texture.
The starch content in rice determines its final texture. According to the USDA, understanding these differences helps you choose the right variety for your intended dish. Each type requires slightly different water ratios and cooking times, which we’ll explore in detail.
Essential Equipment and Tools
Having the right equipment makes a significant difference in achieving perfect rice. A heavy-bottomed saucepan with a tight-fitting lid is essential for even heat distribution and proper steam retention. The heavy bottom prevents hot spots that can cause burning, while a tight lid ensures steam doesn’t escape during cooking.
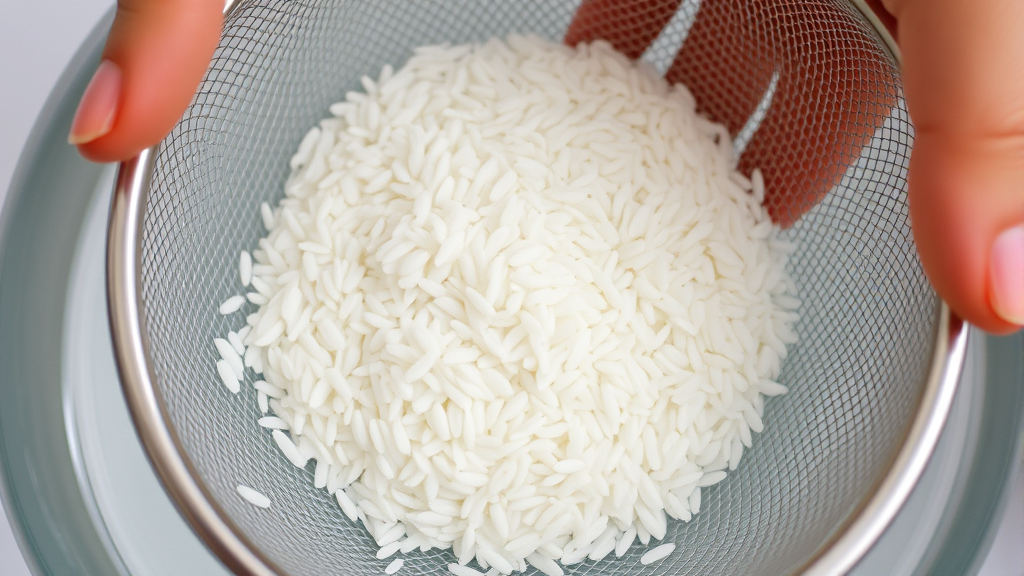
A fine-mesh strainer is crucial for rinsing rice properly, removing excess starch that can make rice gummy. Measuring cups specifically designed for rice can help maintain consistent ratios, though standard measuring cups work fine with careful attention to measurements.
Consider investing in a rice cooker if you prepare rice frequently. Modern rice cookers use fuzzy logic technology to adjust cooking times and temperatures automatically. However, mastering stovetop techniques gives you more control and understanding of the cooking process.
Perfect Water-to-Rice Ratios
The foundation of perfect rice lies in understanding proper water ratios. For long-grain white rice, the standard ratio is 1:1.5 (one cup rice to one and a half cups water). This ratio produces fluffy, separate grains that aren’t too dry or mushy.
Medium-grain rice typically requires a 1:1.25 ratio, while short-grain rice needs about 1:1.1 ratio due to its higher starch content. These ratios serve as starting points, and you may need to adjust based on your specific rice brand and personal preference.
Altitude and humidity can affect these ratios. At higher altitudes, you may need slightly more water due to lower atmospheric pressure. In very humid climates, you might need slightly less water as the rice may absorb moisture from the air.
Step-by-Step Cooking Method
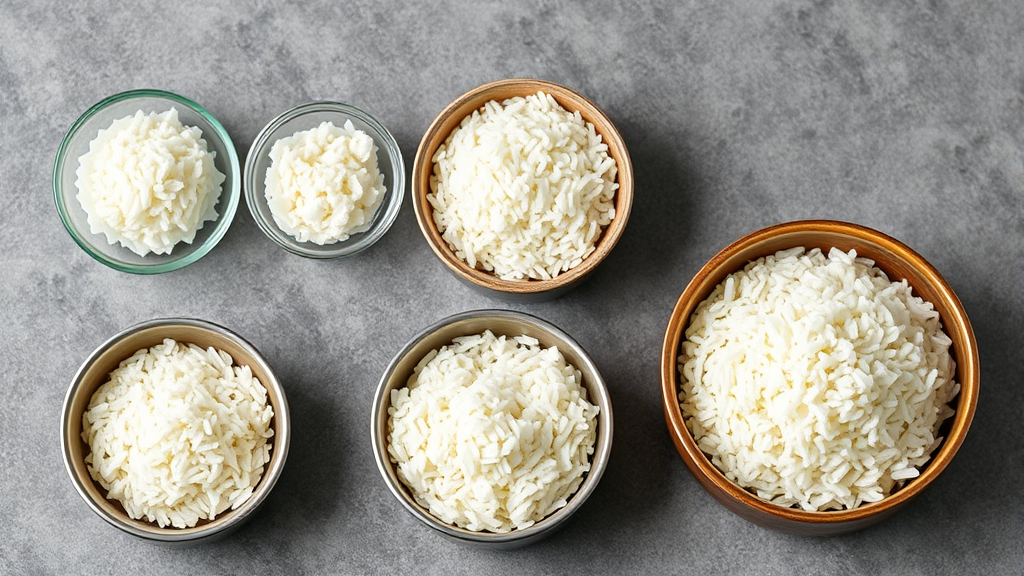
Begin by measuring your rice accurately using a standard measuring cup. One cup of uncooked rice typically serves 3-4 people as a side dish. Place the rice in a fine-mesh strainer and rinse under cold running water until the water runs clear, usually 2-3 minutes of rinsing.
This rinsing step is crucial for removing excess starch that can make rice gummy. Harvard University’s nutrition department notes that rinsing also removes any debris or impurities that might affect taste and texture.
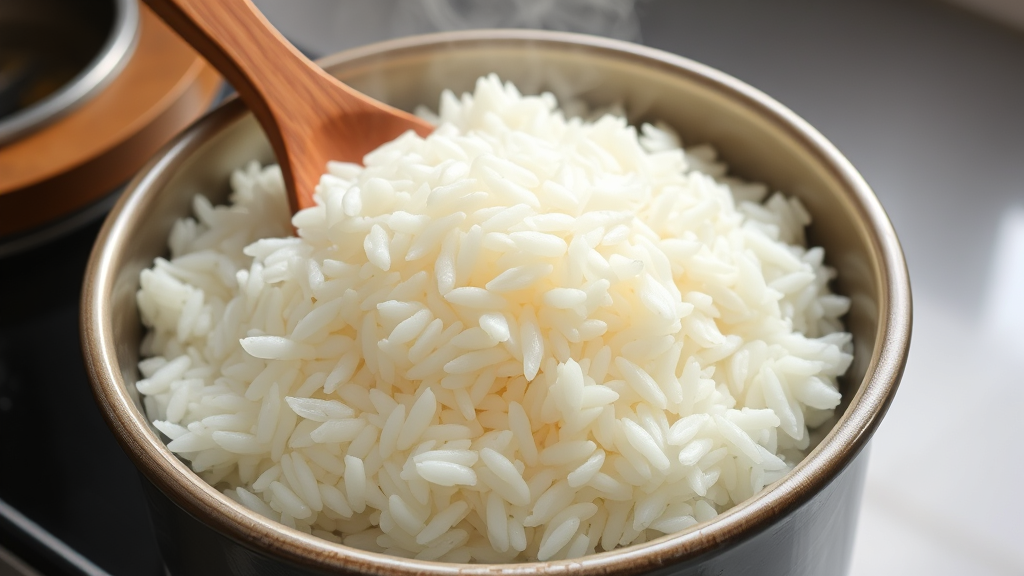
In your heavy-bottomed saucepan, combine the rinsed rice with the appropriate amount of water. Add a pinch of salt to enhance flavor, though this is optional. Bring the mixture to a boil over high heat, stirring once to prevent sticking.
Once boiling, immediately reduce heat to the lowest setting and cover with a tight-fitting lid. Cook for 18-20 minutes without lifting the lid. The steam trapped inside is essential for proper cooking, and lifting the lid releases this steam.
The Absorption Method
The absorption method is the most reliable technique for perfect rice. This method allows the rice to absorb all the cooking liquid, concentrating flavors and achieving the ideal texture. Unlike boiling pasta in excess water, rice cooking requires precise liquid measurements.
During the cooking process, the rice absorbs water while starches gelatinize, creating the characteristic texture. The initial high heat creates steam, while the reduced heat allows gentle, even cooking. This two-stage process prevents burning while ensuring complete cooking.
After the cooking time, remove the pot from heat but keep it covered. Let it rest for 5-10 minutes. This resting period allows the rice to finish cooking in residual heat while excess moisture evaporates, preventing mushy rice.
Rice Cooker Techniques
Rice cookers simplify the process while delivering consistent results. Most rice cookers use the same water ratios as stovetop methods, but always check your manufacturer’s recommendations. The key advantage is automatic temperature control and timing.
Rinse your rice thoroughly before adding it to the rice cooker. Use the measuring cup that came with your rice cooker, as these are often sized differently than standard measuring cups. Add the rice and water, then simply press the start button.
Modern rice cookers often have settings for different rice types. Use the appropriate setting for your rice variety. After cooking completes, let the rice rest for 10 minutes before opening the lid. This prevents condensation from dripping back onto the rice.
Troubleshooting Common Problems
Mushy rice typically results from too much water or overcooking. If your rice consistently turns out mushy, reduce the water slightly and check your cooking time. Conversely, if rice is too firm or crunchy, increase the water slightly and ensure adequate cooking time.
Burnt rice usually indicates too high heat or inadequate stirring at the beginning. Always start with high heat to achieve boiling, then immediately reduce to low heat. If you smell burning, remove the pot from heat immediately and transfer unburnt rice to a new pot.
Sticky rice often results from insufficient rinsing or using the wrong rice variety. Long-grain rice should produce separate, fluffy grains. If your rice is consistently sticky, increase rinsing time and ensure you’re using the correct rice type for your intended dish.
Storage and Reheating Tips
Proper storage extends rice’s usability and maintains quality. Cool cooked rice quickly to room temperature, then refrigerate within two hours of cooking. The FDA recommends storing cooked rice in the refrigerator for no more than 4-6 days.
For longer storage, freeze cooked rice in portion-sized containers or freezer bags. Frozen rice maintains quality for up to 6 months. When freezing, spread rice in a thin layer to promote quick freezing and easier reheating.
To reheat refrigerated rice, add a tablespoon of water per cup of rice and microwave in 30-second intervals, stirring between intervals. For stovetop reheating, add water and heat gently in a covered pan. Frozen rice can be reheated directly from frozen using similar methods.
Just as you might carefully prepare other cooking staples like learning how to make self rising flour or how to make heavy cream, mastering rice storage ensures you always have this versatile ingredient ready for quick meals.
Consider batch cooking rice on meal prep days. Prepare larger quantities and portion them for the week ahead. This approach saves time and ensures you always have perfectly cooked rice available for stir-fries, grain bowls, or as a side dish for steamed vegetables like properly steamed broccoli.
Rice pairs excellently with various dishes and can be enhanced with simple additions. Try cooking rice in broth instead of water for added flavor, or add herbs and spices during cooking. Some cooks add a bay leaf or cardamom pod for aromatic rice that complements international cuisines.
For those interested in expanding their cooking skills beyond rice, consider exploring other fundamental techniques. Just as perfecting rice cooking builds confidence, learning skills like how to feed sourdough starter or how to make powdered sugar creates a strong foundation for more advanced cooking projects.
Frequently Asked Questions
Should I rinse rice before cooking?
Yes, always rinse white rice before cooking. Rinsing removes excess starch that can make rice gummy and sticky. Rinse under cold water until the water runs clear, typically 2-3 minutes. This simple step dramatically improves the final texture of your rice.
Can I add salt to rice while cooking?
Adding salt while cooking rice is optional but recommended for better flavor. Use about 1/2 teaspoon of salt per cup of rice. Add it with the water before bringing to a boil. Salt enhances the natural flavor of rice and helps it taste less bland.
Why is my rice always mushy or sticky?
Mushy or sticky rice usually results from too much water, insufficient rinsing, or overcooking. Reduce water slightly, rinse rice thoroughly until water runs clear, and avoid lifting the lid during cooking. Also ensure you’re using the correct rice variety for your intended dish.
How long does cooked rice last in the refrigerator?
Cooked rice stays fresh in the refrigerator for 4-6 days when stored properly in airtight containers. Cool rice to room temperature before refrigerating, and always reheat thoroughly before serving. For longer storage, freeze rice for up to 6 months.
Can I cook rice without a rice cooker?
Absolutely! The stovetop absorption method produces excellent results and gives you more control over the cooking process. Use a heavy-bottomed pot with a tight-fitting lid, maintain proper water ratios, and follow the two-stage cooking process of boiling then simmering.
What’s the difference between jasmine and basmati rice cooking methods?
Both jasmine and basmati rice use similar cooking methods as long-grain varieties, but basmati may benefit from a brief soaking period (15-30 minutes) before cooking. Both should be rinsed thoroughly and use approximately 1:1.5 water ratios, though basmati might need slightly less water.
How do I prevent rice from burning on the bottom?
Use a heavy-bottomed pot to distribute heat evenly, keep heat at the lowest setting after bringing to a boil, and avoid stirring during cooking. If you consistently have burning issues, try using a heat diffuser or cooking rice in the oven using the same ratios but baking covered at 350°F for about 17 minutes.
Related Posts

How Long to Boil Lobster Tails: Cooking Guide

How Long to Fly from New York to London? Travel Times
