
Grow Garlic from Clove: Expert Tips Inside
How to Grow Garlic from a Clove: Expert Tips Inside
Growing garlic from a single clove is one of the most rewarding and cost-effective gardening projects you can undertake. Whether you’re a seasoned gardener or just starting your journey into home gardening and DIY projects, cultivating garlic requires minimal effort but yields maximum flavor. A single clove planted in the fall will develop into a full bulb by summer, providing you with fresh, homegrown garlic that far surpasses store-bought varieties in taste and potency.
The process of growing garlic from a clove is straightforward, but success depends on understanding the plant’s specific needs. Unlike many vegetables, garlic thrives in cool weather and requires a period of cold dormancy to develop properly. This guide will walk you through every step of the process, from selecting the right cloves to harvesting your bounty, ensuring you achieve impressive results in your first season.
Selecting and Preparing Your Garlic Cloves
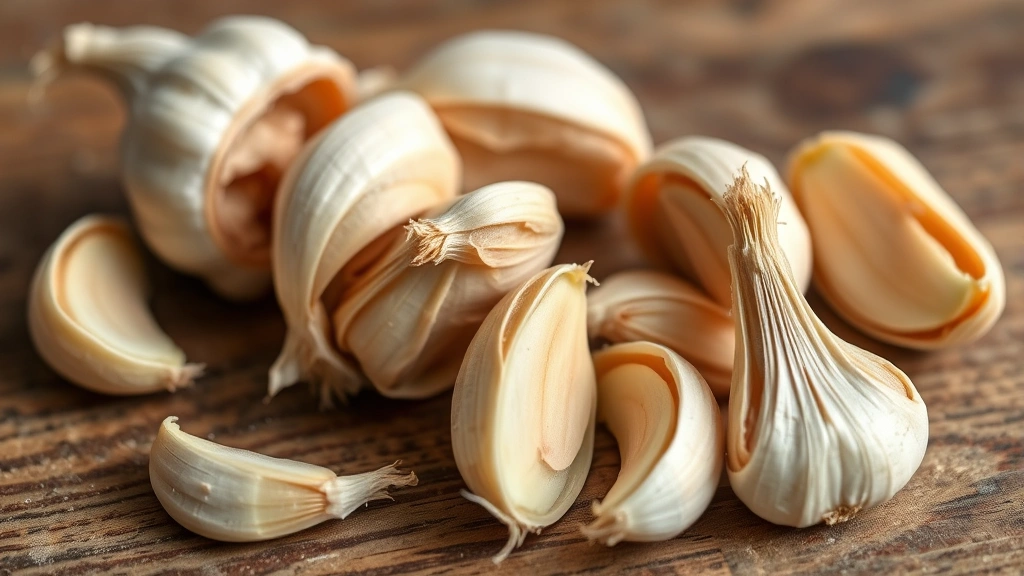
The foundation of successful garlic cultivation begins with choosing quality cloves. Never use garlic from the grocery store for planting purposes. Commercial garlic is often treated with sprout inhibitors and may carry diseases that compromise your harvest. Instead, source cloves from reputable seed suppliers or local farmers who specialize in heirloom varieties.
When selecting cloves, look for large, plump specimens without blemishes, soft spots, or signs of mold. The largest cloves will produce the largest bulbs, so prioritize size when making your selections. Each clove should have a papery skin covering and a distinct pointed end—this is the growth tip that will emerge first from the soil.
Before planting, separate your cloves from the bulb just 24 hours before you intend to plant them. This timing is crucial because removing cloves too early exposes them to air and increases the risk of drying out. Gently break apart the bulb by hand, being careful not to damage the basal plate (the flat end where roots will emerge). If the papery skin is damaged, you can leave it intact as an additional protective layer.
Understanding Garlic Varieties
Garlic comes in two primary categories: hardneck and softneck varieties. Hardneck garlic produces a flowering stalk called a scape, produces larger cloves, and stores less effectively than softneck. Hardneck varieties are ideal for cold climates and include popular types like German Extra Hardy, Rocambole, and Purple Stripe. These varieties develop 4-12 cloves per bulb and offer superior flavor profiles.
Softneck garlic doesn’t produce a scape, stores longer (up to eight months), and is better suited for warmer climates. Softneck varieties like Silverskin and Artichoke produce more cloves per bulb (12-20+) but are generally less cold-hardy. Your choice should depend on your climate zone and storage preferences.
For beginners, hardneck varieties are more forgiving and provide better feedback on plant health through their visual characteristics. If you live in a cold climate (zones 3-5), hardneck is your best choice. Warmer gardeners (zones 6-8) should consider softneck varieties, though hardneck can still succeed with proper care.
Soil Preparation and Site Selection
Garlic demands well-draining soil rich in organic matter. Before planting, conduct a soil test through your local cooperative extension office to determine pH and nutrient levels. Garlic prefers slightly acidic to neutral soil with a pH between 6.0 and 7.0.
Prepare your planting bed at least two weeks before planting by incorporating 2-3 inches of compost or well-rotted manure into the top 8-10 inches of soil. This amendment improves drainage, adds essential nutrients, and increases microbial activity that benefits garlic development. If your soil is heavy clay, add perlite or coarse sand to improve aeration.
Choose a location that receives full sun (at least 6-8 hours daily) and has excellent drainage. Garlic will not tolerate waterlogged conditions and is highly susceptible to rot in poorly draining soil. Avoid planting in areas where onions, leeks, or other alliums have grown in the previous two years to minimize disease pressure and pest populations.
If you’re working with limited space, garlic grows exceptionally well in containers. Use pots at least 8-10 inches deep with drainage holes, filled with high-quality potting soil mixed with compost. Container-grown garlic requires more frequent watering but offers flexibility in placement and protection from extreme weather.
Planting Your Garlic Cloves
Timing is critical when planting garlic. In most regions, the optimal planting window is mid-September through November, roughly 4-6 weeks before the ground freezes. This timing allows cloves to establish a root system before winter dormancy while preventing premature sprouting.
Gardeners in warmer climates (zones 8-10) can plant later, from November through December, as their soil doesn’t freeze as deeply. Conversely, those in very cold regions (zones 2-3) should plant earlier in September to ensure adequate root establishment.
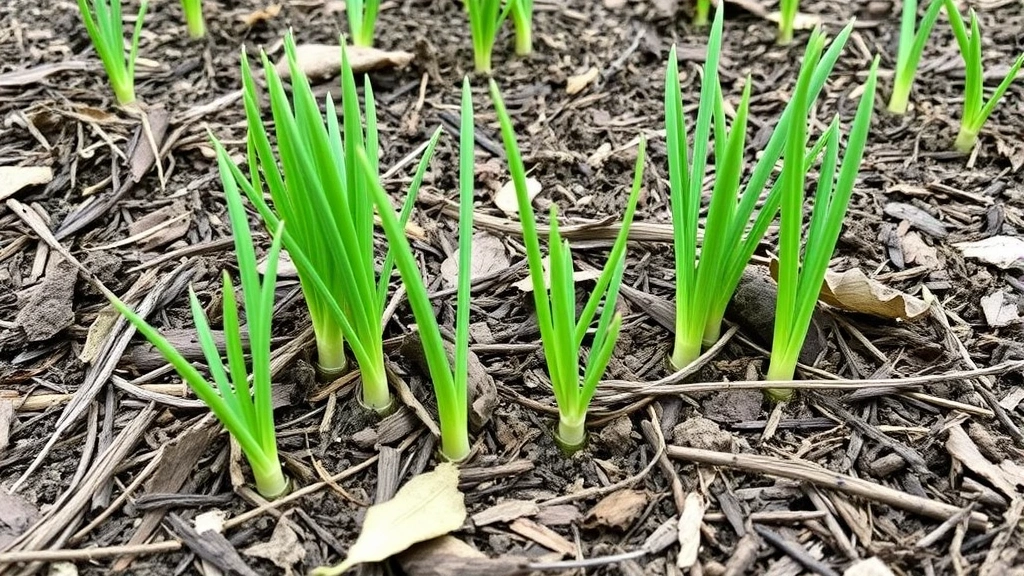
Plant cloves pointed-end up, 2 inches deep and 4-6 inches apart in rows spaced 12 inches apart. The pointed end should face upward to minimize the distance the shoot must travel through soil. Space cloves carefully—overcrowding reduces bulb size and increases disease susceptibility. If planting in containers, space cloves 3-4 inches apart for adequate room to expand.
After planting, water thoroughly to settle the soil and eliminate air pockets. Apply a 2-3 inch layer of mulch (straw, shredded leaves, or wood chips) over the planting area. This mulch insulates the soil, moderates temperature fluctuations, suppresses weeds, and retains moisture throughout winter and spring. Keep the mulch 1-2 inches away from where shoots emerge to prevent stem rot.
Watering and Maintenance
During the fall and winter months following planting, natural precipitation typically provides sufficient water. Monitor soil moisture by inserting your finger 2 inches into the soil—it should feel slightly moist but never soggy. If your region experiences a particularly dry fall or warm winter, water deeply once weekly.
As spring arrives and temperatures warm, increase watering frequency. Garlic requires consistent moisture during active growth, particularly from March through May. Aim for 1-1.5 inches of water weekly, either from rainfall or supplemental irrigation. Water deeply and infrequently rather than shallow, daily watering to encourage deep root development.
In spring, apply a balanced fertilizer (such as 10-10-10) or nitrogen-rich amendment when shoots emerge. For organic growers, fish emulsion or compost tea provides excellent results. Apply fertilizer every 4-6 weeks through April to support leaf and bulb development. Stop fertilizing after late April to avoid excessive vegetative growth at the expense of bulb size.
If you’re growing hardneck garlic, remove the flowering scape when it emerges in late spring. Scapes are edible and delicious—you can harvest them for culinary use or sell them at farmers markets. Removing scapes redirects the plant’s energy toward bulb development, resulting in larger, better-formed bulbs. Softneck varieties don’t produce scapes, eliminating this maintenance step.
Managing Pests and Diseases
Garlic is remarkably pest-resistant compared to many vegetables, but several issues can compromise your harvest. Garlic white rot is the most serious fungal disease, causing yellowing leaves and soft, rotting bulbs. Prevention is essential since no cure exists once infection occurs. Practice crop rotation, avoid planting in previously affected soil, and purchase disease-free cloves from certified suppliers.
Onion maggots and thrips occasionally attack garlic, particularly in warm climates. Row covers applied immediately after planting prevent adult insects from laying eggs. If pest pressure becomes severe, organic insecticidal soap or neem oil can manage infestations while maintaining organic growing standards.
Rust, a fungal disease characterized by orange pustules on leaves, typically appears in humid conditions. Improve air circulation through proper spacing, avoid overhead watering, and water only at soil level during early morning hours. Remove affected leaves promptly to slow disease progression.
Downy mildew causes gray, fuzzy growth on leaves and thrives in cool, wet conditions. Again, improving drainage and air circulation through spacing and pruning lower leaves helps prevent this disease. Sulfur-based fungicides provide effective organic control if preventive measures fail.
Harvesting and Curing Your Garlic
Harvest timing directly impacts bulb size and storage longevity. Garlic is ready to harvest when the bottom 2-3 leaves turn brown and the upper leaves remain green, typically in late June or early July depending on your climate. Don’t wait until all leaves are brown, as this indicates over-maturity and bulb quality deterioration.
Carefully dig around each bulb with a garden fork, working from the side to avoid damaging the bulb. Gently loosen the soil, then pull the plant from the ground, keeping the stalk attached. Brush away excess soil gently—don’t wash the bulbs, as excess moisture complicates curing.
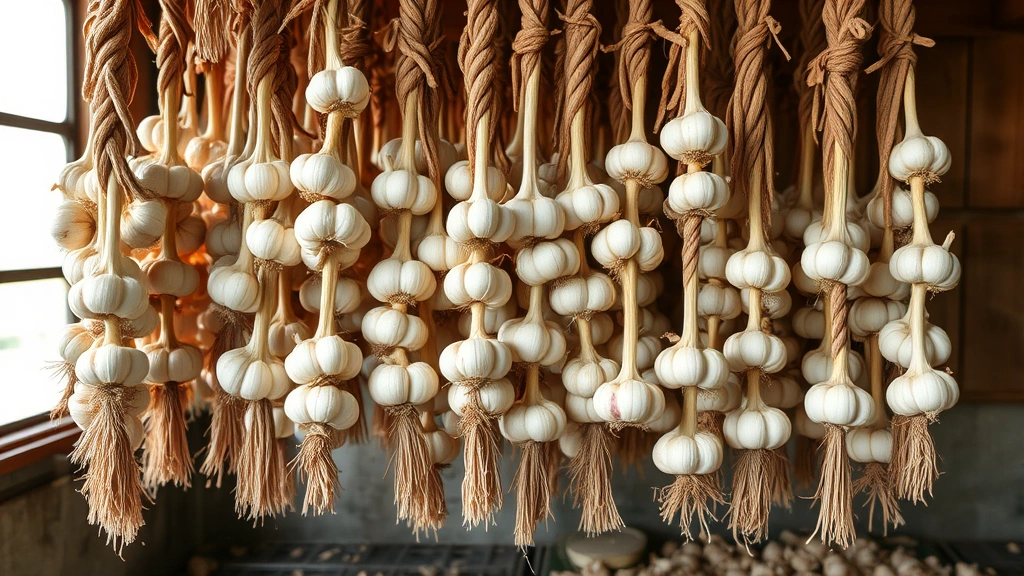
Curing is essential for storage and flavor development. Lay harvested bulbs in a warm, dry, well-ventilated location with temperatures between 70-85°F and low humidity. Hang bulbs in bundles or spread them on screens, ensuring good air circulation around all sides. Cure for 2-3 weeks until the outer papery skin is completely dry and papery, the stalk is brittle, and the roots are hard and brown.
Once cured, trim roots to 1/4 inch and cut stalks to 1 inch above the bulb for storage varieties, or leave stalks intact if braiding. Properly cured garlic stores in a cool (50-60°F), dry location for 4-8 months depending on variety. Softneck varieties store longer than hardneck due to their outer leaf layers.
Storage and Usage Tips
Store cured garlic in mesh bags, paper sacks, or braided strands in a cool, dark pantry or storage area. Avoid refrigeration, which promotes sprouting and mold growth. Check stored bulbs monthly, removing any with soft spots or mold. Properly stored garlic remains usable for culinary purposes throughout winter and into spring.
Fresh, homegrown garlic elevates any dish. Use it in grilled vegetable recipes, roasted preparations, or raw in vinaigrettes. The flavor intensity increases with proper curing—well-cured garlic develops complex, nuanced flavors that far exceed commercial alternatives.
Reserve the largest, healthiest bulbs from your harvest for replanting next season. This practice maintains genetic vigor and adaptation to your specific growing conditions. Year after year, your garlic will become increasingly suited to your climate and soil, producing larger bulbs and more robust plants. Combined with other fresh produce like cilantro grown from seed, homegrown garlic creates the foundation for a productive kitchen garden.
FAQ
Can I plant garlic in spring instead of fall?
While technically possible in very cold climates, spring planting produces significantly smaller bulbs because plants don’t experience the cold stratification period necessary for proper bulb development. Fall planting is strongly recommended for optimal results.
How many cloves will one bulb produce?
Hardneck varieties typically produce 4-12 cloves per bulb, while softneck varieties yield 12-20+ cloves. Bulb size, variety, and growing conditions influence clove count.
What’s the difference between garlic scapes and bulbs?
Scapes are the flowering stalks produced by hardneck garlic varieties in late spring. They’re edible, delicious, and harvesting them directs energy toward bulb development. Bulbs are the underground storage structures containing cloves.
Why is my garlic producing small bulbs?
Small bulbs typically result from overcrowding, insufficient nutrients, inadequate sunlight, poor drainage, or late planting. Ensure 4-6 inch spacing, apply balanced fertilizer in spring, provide full sun, and plant in well-draining soil amended with compost.
Can I grow garlic indoors?
Garlic requires cold dormancy and isn’t well-suited to indoor growing. Container growing outdoors in a sheltered location is possible, but traditional in-ground cultivation produces superior results.
When should I harvest garlic scapes?
Harvest scapes when they form a loose curl, typically 2-3 weeks before bulb harvest. Cut scapes 1-2 inches above the top leaf to avoid damaging the plant. Use them immediately or store in the refrigerator for several weeks.
What causes garlic bulbs to split or separate?
Bulb splitting occurs when plants experience alternating wet and dry periods during late growth stages. Maintain consistent moisture levels through April and May, and avoid overwatering during the final weeks before harvest.
Related Posts

Superscript in Google Docs: Expert Tips

Strikethrough in Excel: Easy Steps for Beginners
