
Disconnect a Car Battery Safely: Expert Advice
How to Disconnect a Car Battery Safely: Expert Advice
Disconnecting your car battery is one of the most fundamental maintenance tasks you’ll encounter as a vehicle owner. Whether you’re preparing for storage, performing electrical work, or replacing the battery itself, knowing how to safely disconnect it can prevent dangerous electrical shocks, equipment damage, and costly repairs. This comprehensive guide walks you through the entire process with expert tips and safety precautions.
Many DIYers hesitate to disconnect their car battery because they’re unsure about the correct procedure. The reality is that with proper preparation and attention to detail, this task is straightforward and safe for anyone to perform. Understanding the why behind each step ensures you’ll handle the job confidently and protect both yourself and your vehicle.
Why You Need to Disconnect Your Car Battery
Understanding when and why to disconnect your car battery helps you approach the task with the right mindset. The most common reasons include long-term vehicle storage, which prevents parasitic drain that can completely deplete your battery over weeks or months. If you’re storing your car for winter or an extended period, disconnecting the battery is essential maintenance.
Another critical reason is electrical system work. Whenever you’re working on your car’s wiring, replacing components, or performing repairs near electrical connections, disconnecting the battery eliminates the risk of accidental short circuits. This protects both you and expensive electronic components.
Battery replacement naturally requires disconnection. Additionally, checking your engine’s overall health sometimes involves battery disconnection to reset systems or clear diagnostic codes. Some owners also disconnect batteries before extended trips to prevent theft-related battery drain.
The process also applies when troubleshooting electrical gremlins. A complete power reset achieved through disconnection can resolve mysterious electrical issues that plague older vehicles.
Tools and Safety Equipment Required
Before you begin, gather these essential tools to ensure a safe and efficient disconnection:
- Socket wrench set (typically 8mm, 10mm, or 13mm depending on your vehicle)
- Safety glasses to protect eyes from battery acid and corrosion
- Work gloves (preferably latex or nitrile for chemical protection)
- Battery terminal brush (optional but useful for cleaning corrosion)
- Flashlight or headlamp for visibility in the engine bay
- Container for small parts to prevent losing bolts or terminal covers
- Baking soda and water (for cleaning battery corrosion if needed)
Safety should always be your top priority. Never attempt this task while wearing loose jewelry, as metal can conduct electricity and create hazardous situations. Keep your workspace dry and ensure adequate ventilation, as batteries can emit hydrogen gas in certain conditions.
Familiarize yourself with your specific vehicle’s battery location. Most cars have batteries in the engine bay, but some luxury vehicles and hybrids place them elsewhere. Consult your owner’s manual or a reliable resource like This Old House’s automotive guides for vehicle-specific information.
Step-by-Step Disconnection Process
Step 1: Prepare Your Vehicle
Start by parking your car on level ground in a safe location. Turn off the engine and allow it to cool for at least five minutes. This prevents burns and allows any residual electrical charge to dissipate. Remove the keys from the ignition entirely—don’t just turn the key to the off position.
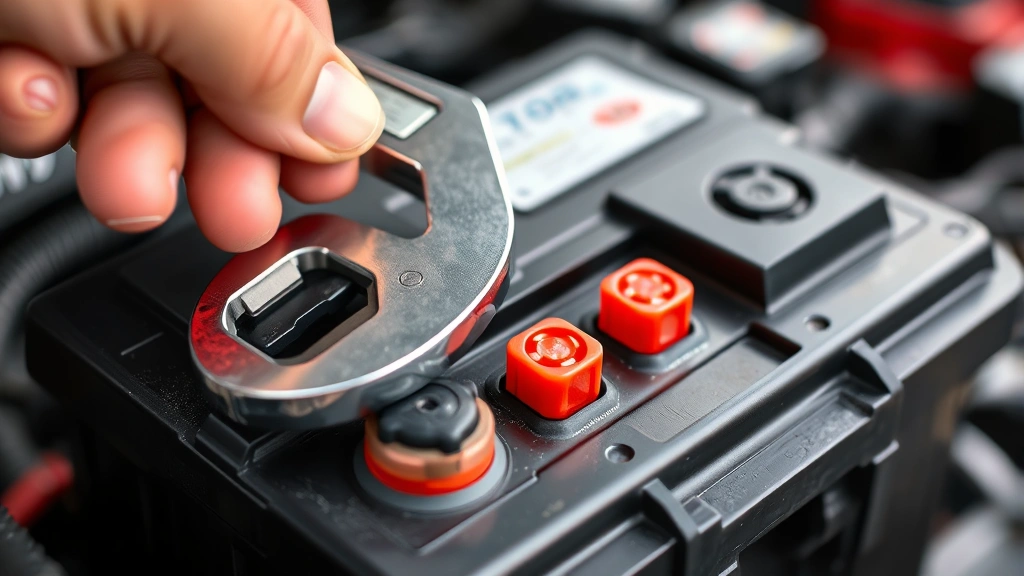
Open your hood and locate the battery. Take a moment to identify the positive terminal (marked with a red cover or plus sign) and the negative terminal (marked with a black cover or minus sign). This distinction is absolutely critical for safe disconnection.
Step 2: Locate and Identify Terminals
Battery terminals are the metal posts extending from the battery’s top. The positive terminal is always larger than the negative terminal on most vehicles. The negative terminal is grounded to your vehicle’s chassis, making it the first one to disconnect and the last one to reconnect.
Before touching anything, inspect the terminals for corrosion or damage. Heavy white, blue, or green crusty buildup indicates corrosion that might require cleaning. While you can clean it later, note its presence now so you can address it during reconnection.
Step 3: Disconnect the Negative Terminal First
This is the golden rule of battery disconnection: always disconnect the negative terminal first. Using your appropriately sized wrench, loosen the bolt on the negative terminal clamp. Turn counterclockwise until the clamp is loose enough to lift away from the terminal post.
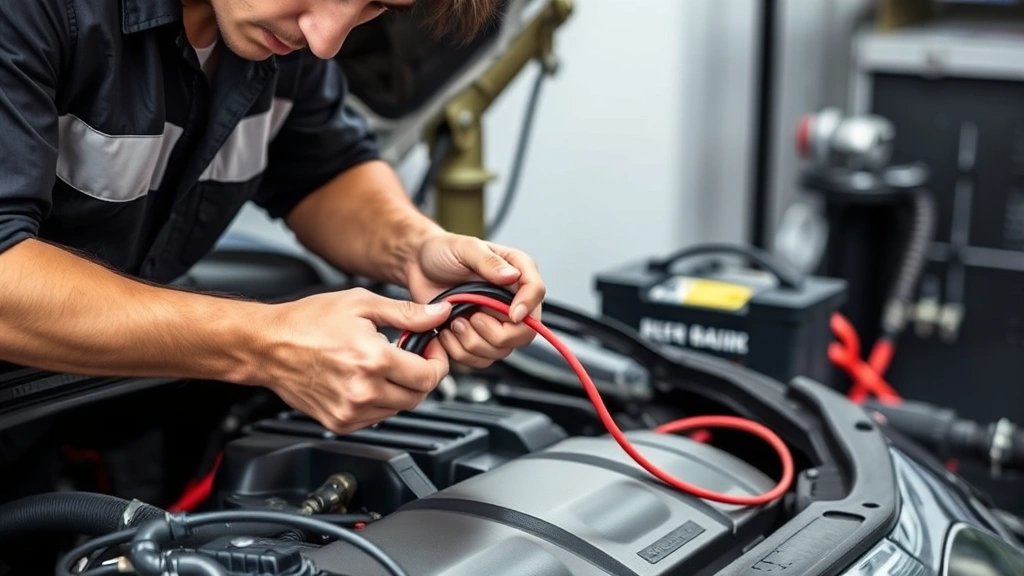
Gently rock the terminal clamp side to side while pulling upward. Don’t yank forcefully, as this can damage the terminal. Once removed, position the negative cable away from the terminal so it cannot accidentally reconnect. Some people wrap it with a cloth or secure it with tape to prevent accidental contact.
Step 4: Disconnect the Positive Terminal
After the negative terminal is completely disconnected and secured, proceed to the positive terminal using the same technique. Loosen the bolt, rock gently, and lift away. The positive terminal is live until disconnected, so maintaining a safe distance from metal tools is essential during this step.
Position the positive cable away from the battery and secure it similarly to the negative cable. Both cables should now be completely isolated from their terminals.
Step 5: Verify Complete Disconnection
Take a moment to visually confirm that both terminals are completely separated from the battery posts. Neither cable should have any contact with metal on the battery or vehicle chassis. This verification step prevents accidental reconnection or electrical hazards.
If your vehicle has a battery hold-down bracket (a metal strap securing the battery), you can now remove it if needed for battery replacement. Simply unbolt the bracket and set it aside carefully.
Common Mistakes to Avoid
Understanding what not to do is just as important as knowing the correct procedure. The most dangerous mistake is disconnecting the positive terminal first. This can cause sparks or electrical arcs, especially if a wrench touches both the positive terminal and the vehicle chassis simultaneously.
Never leave the negative terminal connected while working on other battery connections. Even with the positive disconnected, the negative connection maintains a complete circuit that could cause injury or equipment damage.
Another common error is forgetting to remove jewelry or wearing conductive materials. A metal watch or ring touching both a terminal and the vehicle frame creates a direct electrical path that can cause severe burns.
Don’t ignore corrosion on terminals. Corroded connections create poor electrical contact and can cause problems during reconnection. Family Handyman provides excellent guidance on terminal maintenance that complements proper disconnection procedures.
Failing to secure disconnected cables is risky. A loose positive cable swinging in the engine bay could accidentally touch metal and create dangerous sparks. Always position and secure both cables safely away from the battery and engine components.
Don’t disconnect the battery without understanding the consequences for your vehicle’s systems. Modern cars with computer systems may lose stored settings, radio presets, and climate control preferences. Some vehicles require reprogramming after battery disconnection.
Reconnecting Your Battery Safely
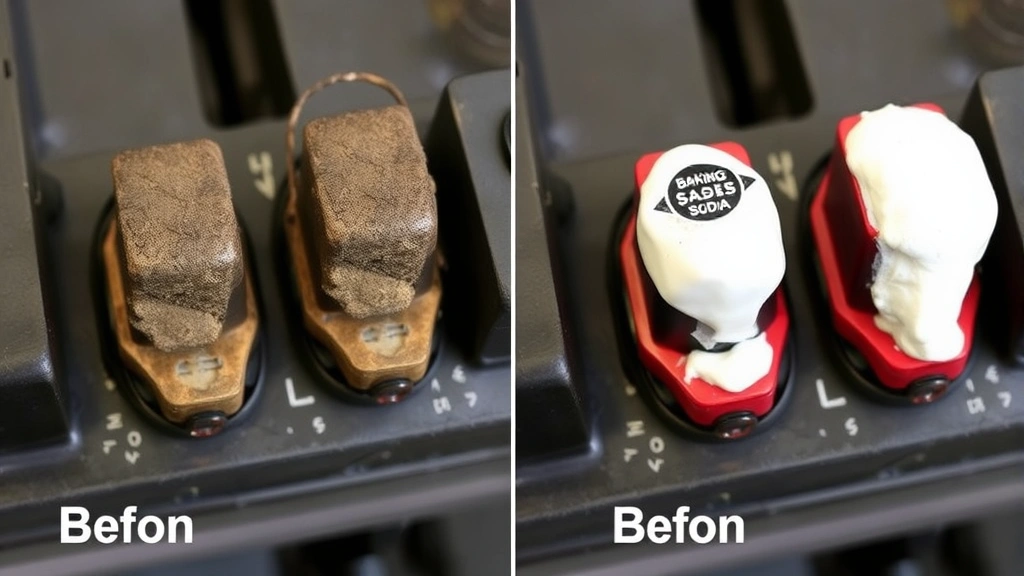
Reconnecting follows the reverse process, but with equally important safety considerations. Before reconnecting, inspect the terminals for any corrosion. If present, clean both the terminal posts and the clamps using a battery terminal brush and a baking soda solution.
Start by connecting the positive terminal first during reconnection (opposite of disconnection). Slide the positive cable clamp onto the positive battery post and tighten the bolt securely. The connection should be tight enough that the clamp doesn’t move when you try to wiggle it.
Next, connect the negative terminal using the same technique. Tighten it securely and verify that both connections are firm. If your vehicle has a battery hold-down bracket, reinstall and secure it now.
Before starting the engine, take a moment to verify that both cable clamps are properly seated on their respective terminals. Look for any gaps or loose connections. Once satisfied, you can safely start your vehicle.
If your vehicle has electronic systems that were reset during disconnection, you may need to reprogram your radio, clock, and other settings. Consult your owner’s manual for specific instructions, as procedures vary significantly between manufacturers.
Troubleshooting Battery Disconnection Issues
Stuck or Corroded Terminals
If a terminal clamp won’t budge, resist the urge to force it. Applying excessive pressure can damage the terminal post, creating a permanent problem. Instead, spray penetrating oil around the base of the clamp and wait 15-20 minutes for it to penetrate. Try again gently, rocking the clamp side to side as you pull.
For heavily corroded terminals, the baking soda and water solution works wonders. Make a paste and apply it around the corroded area. Let it sit briefly, then use a terminal brush to scrub away corrosion. Rinse with clean water and dry thoroughly before attempting removal again.
Sparking During Disconnection
If you see sparks when removing a terminal, stop immediately. This typically indicates you’ve accidentally touched both a terminal and ground simultaneously, or that you disconnected the positive terminal first. Don’t panic—simply remove your tool and reassess the situation.
Check that you’re using the correct wrench size. A wrench that’s too loose or too large can slip and bridge the terminal and chassis. Replace it with the proper size and try again carefully.
Dashboard Lights or Alarms After Disconnection
Some vehicles trigger dashboard warning lights or alarm systems when the battery is disconnected. This is normal and usually resolves itself once the battery is fully reconnected and the vehicle runs for a few minutes. If warnings persist, consult your owner’s manual or contact a professional mechanic.
Difficulty Reconnecting Terminals
If terminals seem difficult to reconnect, first ensure you haven’t damaged the terminal posts during removal. Examine the posts for cracks, stripped threads, or bent metal. Minor damage can sometimes be addressed with careful cleaning and gentle realignment.
If the clamp won’t tighten properly, try slightly repositioning the cable. Sometimes the angle of approach affects how the clamp seats on the post. Patience during reconnection prevents damage that would require professional repair.
FAQ
How long can a car sit with the battery disconnected?
A car can safely sit with the battery disconnected indefinitely without damage to the battery itself. However, leaving a vehicle unused for extended periods (more than a few weeks) requires additional considerations like fuel stabilizer and tire pressure maintenance. The disconnected battery simply prevents parasitic drain from electronic systems.
Will disconnecting the battery erase my car’s computer memory?
Modern vehicles store some data in non-volatile memory, meaning radio presets and learned driving patterns may persist. However, other settings like clock time and climate preferences will reset. Some diagnostic trouble codes may clear, which can be beneficial if you’re troubleshooting electrical issues. Always check your owner’s manual for vehicle-specific information.
Can I disconnect the battery myself, or do I need a mechanic?
Disconnecting your battery is a safe DIY task that requires minimal tools and expertise. If you’re uncomfortable working with electrical systems or your vehicle has unusual battery placement, consulting a professional is always wise. For standard under-hood batteries, most owners can complete this task in under 10 minutes.
What should I do if battery acid spills on my skin?
Immediately rinse the affected area with large amounts of water for at least 15 minutes. Remove any contaminated clothing. If burning sensation persists or if acid contacts your eyes, seek medical attention immediately. Always wear safety glasses and gloves when working with batteries to prevent this emergency.
Is it necessary to disconnect the battery before washing the engine?
Yes, disconnecting the battery before washing your engine bay is highly recommended. Water and electrical connections don’t mix, and a complete battery disconnection eliminates the risk of electrical damage or personal injury from water-related short circuits. Allow the engine to cool completely before any water contact.
How do I know if my battery terminals need cleaning?
Inspect your terminals regularly for white, blue, or green crusty buildup. This corrosion indicates chemical reactions that reduce electrical conductivity. Clean terminals ensure reliable connections and prevent starting problems. Regular inspection during routine maintenance catches corrosion before it becomes problematic.
What’s the difference between battery disconnection and battery removal?
Disconnection means removing the cable clamps from the terminal posts while leaving the battery in place. Removal means completely extracting the battery from the vehicle. Disconnection is sufficient for most maintenance tasks, storage, and electrical work. Removal is necessary for battery replacement or when you need complete access to battery components.
Can disconnecting the battery damage my alternator?
Properly disconnecting your battery won’t damage your alternator. However, running your vehicle with the battery disconnected can damage the alternator because it has nowhere to discharge electrical current. Always reconnect the battery before starting the engine.
How often should I disconnect my car battery?
Most owners only disconnect their battery for specific tasks like storage, electrical work, or battery replacement. Frequent disconnection isn’t necessary for regular maintenance. However, if you store your vehicle seasonally, disconnecting the battery during storage is excellent preventive maintenance that extends overall battery life.
Related Posts

Superscript in Google Docs: Expert Tips

Strikethrough in Excel: Easy Steps for Beginners
