
How to Check Car Oil? Expert Tips & Tricks
How to Check Car Oil: Expert Tips & Tricks
Checking your car’s oil is one of the most fundamental maintenance tasks every vehicle owner should master. Regular oil checks help you catch problems early, prevent engine damage, and extend your vehicle’s lifespan significantly. Whether you drive a sedan, SUV, or truck, understanding how to check oil in car takes just a few minutes and requires minimal tools.
Engine oil serves as the lifeblood of your vehicle, lubricating moving parts, reducing friction, and protecting against wear and corrosion. Over time, oil degrades and levels drop due to normal consumption and minor leaks. By checking your oil monthly or before long trips, you’ll maintain optimal engine performance and avoid costly repairs down the road.
This comprehensive guide walks you through the entire process, from preparation to interpretation, with expert tips that mechanics use daily. You’ll learn when to check, what to look for, and how to maintain proper oil levels like a pro.
What You’ll Need to Get Started
Before you begin checking your oil, gather the essential supplies. You won’t need an expensive toolkit—most items you probably already have at home. Having everything ready prevents frustration and ensures you complete the task efficiently.
- Clean cloth or paper towels: Use lint-free materials to wipe the dipstick without leaving fibers behind
- Engine oil: Keep the correct grade for your vehicle on hand, typically found in your owner’s manual
- Oil funnel: Makes pouring oil safer and prevents spills that damage engine components
- Owner’s manual: Essential reference for your specific vehicle’s oil type and capacity
- Work gloves: Optional but recommended to protect your hands from dirt and heat
- Flashlight: Helps you see the dipstick markings clearly, especially in dim lighting
You can find quality oil at Family Handyman’s oil guide or visit your local auto parts store for recommendations specific to your vehicle model.
Preparing Your Vehicle Correctly
Proper preparation is crucial for accurate oil level readings. Many people make mistakes during this stage, leading to incorrect measurements and potential overfilling. Taking two minutes to prepare correctly saves headaches later.
Park on level ground: Always position your vehicle on a flat, level surface. Parking on inclines or slopes causes oil to settle unevenly, giving false readings. Your driveway or a flat parking lot works perfectly.
Allow the engine to cool: If you’ve been driving, wait 5-10 minutes before checking oil. Hot oil expands and sits higher on the dipstick, making levels appear higher than they actually are. Conversely, checking immediately after driving can also coat the dipstick unevenly.
The best practice: Check oil when the engine is cold or has cooled completely. Many mechanics recommend checking in the morning before driving, when oil has settled overnight in the pan. This gives the most accurate reading of your actual oil level.
Safety first: Ensure the engine is off and cool enough to touch. Never attempt to check oil on a running engine—you risk burns and accidents. If you must check warm oil, be extremely cautious around moving engine parts.
Locating the Dipstick and Oil Cap
Finding these components is straightforward in most vehicles, though locations vary by make and model. Modern cars typically have bright yellow or orange handles for easy identification.
The oil dipstick: Pop your hood and look for a long stick with a loop or knob handle. The dipstick usually has a bright yellow or orange handle labeled with an oil can symbol. Pull straight up with steady, firm pressure. If it resists, wiggle gently while pulling—it should slide out smoothly.
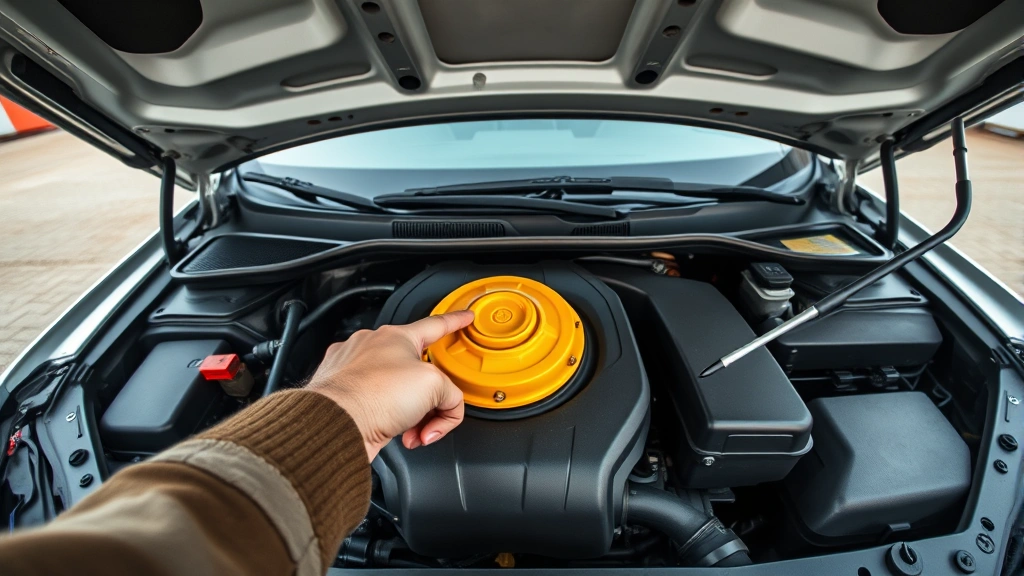
The oil cap: Located on top of the engine, the oil cap typically features an oil can symbol. It screws off counterclockwise and sits on the valve cover. Note its location before removing the dipstick, as you’ll need it when adding oil if levels are low.
Consulting your manual: If you’re having trouble locating either component, your owner’s manual provides exact locations with diagrams. Different manufacturers position these items differently, so the manual is your best reference guide.
For additional guidance on routine car maintenance like checking other fluids, visit our comprehensive maintenance section.
Step-by-Step Oil Checking Process
Now that you’re prepared and know where to look, let’s walk through the exact steps. Follow this process carefully for consistent, accurate results every time.
- Open your hood: Release the hood latch inside your vehicle, then lift the hood fully. Secure it with the prop rod if necessary.
- Locate the dipstick: Identify the oil dipstick by its bright handle and oil can symbol. It’s usually located on the side of the engine block.
- Pull the dipstick straight out: Grasp the handle firmly and pull straight upward with steady pressure. Avoid twisting or angling, which can cause it to stick.
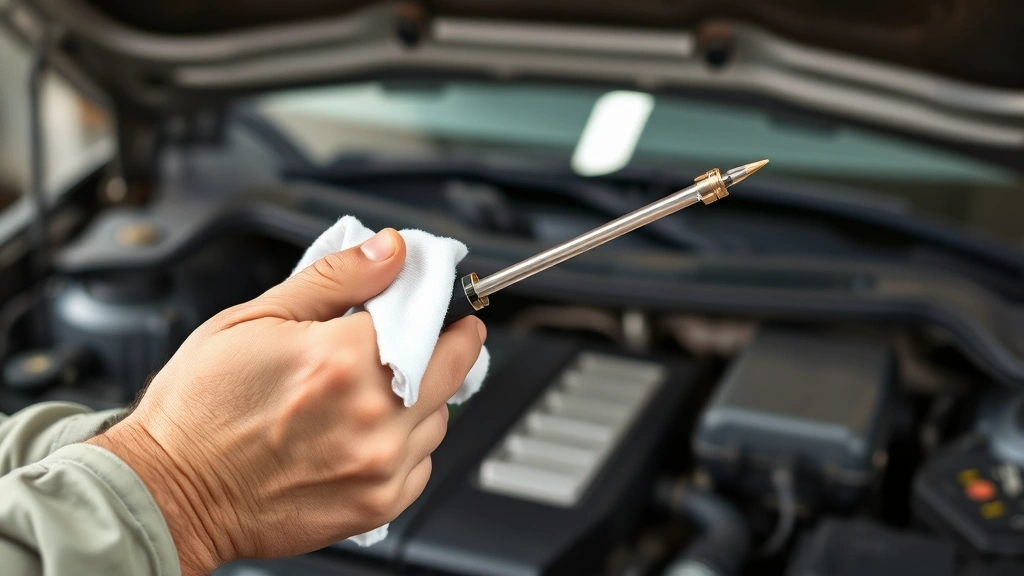
- Wipe completely clean: Using a clean cloth or paper towel, wipe the entire length of the dipstick. This removes old oil residue that interferes with accurate readings.
- Reinsert fully: Push the dipstick back into its tube until it seats completely. You should hear or feel a slight click when it’s properly inserted.
- Remove and read immediately: Pull the dipstick out again and examine the oil level against the marked indicators. Read the level where the oil line ends on the stick.
- Check the oil condition: While you have the dipstick out, observe the oil’s color and consistency. This tells you much about your engine’s health.
This entire process takes less than five minutes once you’ve done it once or twice. Repetition builds muscle memory, making future checks even faster.
Reading the Dipstick Accurately
Modern dipsticks feature clear markings that indicate minimum and maximum oil levels. Understanding these marks prevents both underfilling and overfilling, which both cause problems.
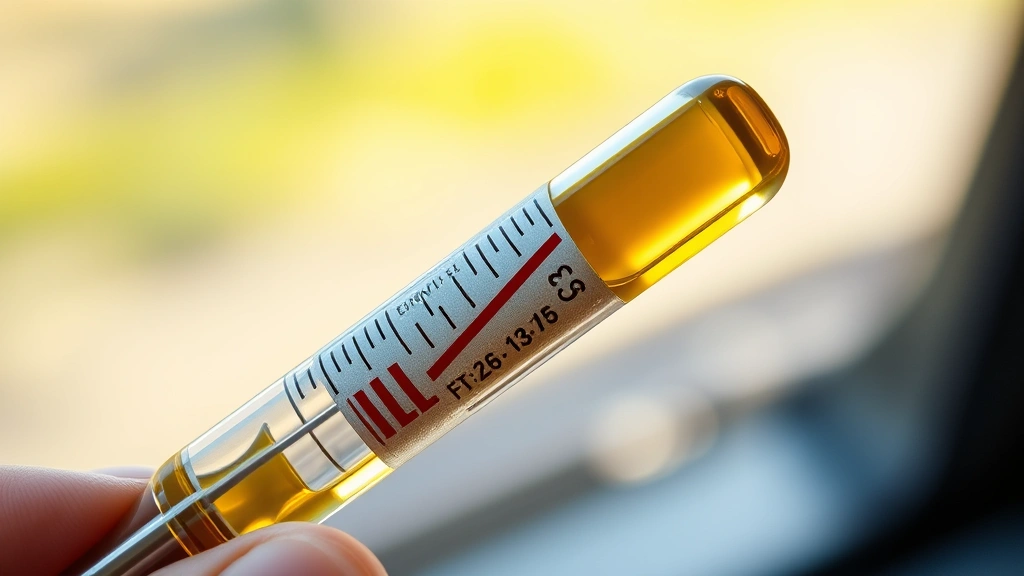
Minimum and maximum marks: Most dipsticks have two marks—minimum (often labeled “MIN” or “L”) and maximum (often labeled “MAX” or “F” for full). The space between these marks typically represents one quart of oil. Your oil level should fall between these two marks.
Ideal level: The best position is at or just below the maximum mark. Some mechanics prefer slightly below maximum to account for temperature expansion. Never exceed the maximum line, as overfilled oil causes seal damage and poor engine performance.
Low oil warning: If your level is below the minimum mark, you need to add oil immediately. Driving with insufficient oil risks catastrophic engine damage. Low oil means inadequate lubrication, leading to increased friction and heat.
Optical vs. color indicators: Some newer vehicles use color-changing dipsticks or electronic sensors instead of traditional markings. Check your owner’s manual for specific reading instructions if your vehicle uses these alternative systems.
If you’re unsure about your reading, visit our detailed oil checking guide for additional clarity and visual references.
Understanding Oil Color and Condition
The color and appearance of your oil reveal important information about engine health and maintenance needs. Learning to interpret these signs helps you catch problems before they become expensive.
Healthy oil: Fresh oil appears amber or light brown in color. It flows smoothly without visible particles or sludge. This indicates your engine is clean and running properly.
Dark brown or black oil: This is normal after driving several hundred miles. Oil darkens as it collects dirt and combustion byproducts. However, very dark oil that’s thick or sludgy indicates you’re overdue for an oil change.
Milky or frothy appearance: A cloudy, foamy look suggests water contamination in your oil. This indicates a blown head gasket, cracked engine block, or severe leak. Have a mechanic inspect immediately.
Metallic particles or grit: Visible metal flakes or a gritty texture suggest internal engine wear. Parts are grinding together, creating metal particles. This requires professional diagnosis and likely engine work.
Burning smell: If the oil smells burnt or acrid, your engine is overheating or oil is leaking onto hot surfaces. Address this immediately to prevent fire risk and engine damage.
Consistency and flow: Quality oil flows smoothly off the dipstick. If oil is extremely thick, it may be too viscous for your engine, or you’re using the wrong grade. Conversely, oil that’s too thin won’t provide adequate protection.
These observations combined with regular oil level checks keep your engine running smoothly. Consider checking related systems like your tire pressure as part of comprehensive vehicle maintenance.
Adding Oil When Needed
If your oil level is low, adding oil is straightforward. However, proper technique prevents spills and ensures you add the correct amount.
Choosing the right oil: Your owner’s manual specifies the correct oil grade (such as 5W-30 or 10W-40) and type (conventional, synthetic, or blend). Using the wrong grade affects engine performance and protection. Most modern vehicles require synthetic or high-quality conventional oil.
How much to add: The space between minimum and maximum marks equals approximately one quart. If you’re at minimum, add one quart and recheck. If you’re slightly below maximum, add half a quart. It’s better to add gradually than to overfill.
The pouring process: Remove the oil cap by turning it counterclockwise. Place your oil funnel in the opening to prevent spills. Pour oil slowly and carefully, watching the funnel to ensure oil flows steadily without splashing. Pause occasionally to let oil settle into the pan.
Rechecking your work: After adding oil, wait a minute for it to drain into the pan. Then pull the dipstick, wipe it clean, reinsert it fully, and pull it again to verify your new level. Adjust if necessary until you reach the proper level.
Disposing of used oil: If you change your own oil, never dump it down the drain or in the trash. Used oil is hazardous waste. Take it to a recycling center or auto parts store that accepts used oil. Many places accept it free of charge.
For comprehensive guidance on other critical car maintenance tasks, explore our full maintenance library.
Common Mistakes to Avoid
Even experienced car owners sometimes make errors when checking oil. Knowing these pitfalls helps you maintain accurate readings and protect your engine.
Checking hot oil: The most common mistake is checking immediately after driving. Hot oil expands and reads higher than actual level. Wait 5-10 minutes for the engine to cool, or check in the morning before driving.
Not wiping the dipstick: Failing to wipe oil residue from the dipstick before reinserting it causes inaccurate readings. Old oil coating the stick obscures the true level. Always wipe thoroughly with a clean cloth.
Overfilling your oil: Adding too much oil is as bad as having too little. Excess oil causes seal leaks, foaming, and poor engine performance. Check after each addition to avoid overfilling.
Ignoring warning lights: Modern vehicles have oil pressure warning lights on the dashboard. If this light comes on while driving, stop immediately and check your oil. Don’t ignore it, as continued driving risks engine seizure.
Using the wrong oil type: Always use the grade specified in your owner’s manual. Using heavier or lighter oil than recommended affects engine lubrication, fuel economy, and lifespan. The manual is your definitive guide.
Checking on uneven ground: Parking on slopes gives false readings because oil settles unevenly. Always check on level, flat surfaces for accurate measurements.
Not replacing the dipstick fully: If you don’t reinsert the dipstick completely before your second pull, the reading will be inaccurate. Push it in until you feel it seat properly.
Maintenance Schedule and Tips
Establishing a regular checking routine prevents problems and extends engine life. Different driving conditions and vehicle ages affect how often you should check.
Monthly checks: Check your oil at least once monthly, preferably before long trips. This catches problems early and ensures consistent engine protection. Set a phone reminder on the first of each month.
After long drives: Always check oil after highway trips exceeding 500 miles. Extended driving consumes more oil and generates heat, potentially lowering levels.
Oil change intervals: Modern synthetic oil typically lasts 7,500-10,000 miles between changes. Conventional oil should be changed every 3,000-5,000 miles. Your owner’s manual specifies exact intervals for your vehicle.
Seasonal considerations: Cold weather increases oil viscosity, while hot weather thins it. Check more frequently during extreme temperature seasons. Winter driving in snow or ice also increases oil consumption.
High-mileage vehicles: Cars over 100,000 miles may burn more oil. Check every two weeks or before long trips. Consider switching to high-mileage oil formulas designed for older engines.
Tracking your checks: Keep a log of oil levels and changes. This helps you identify trends and spot developing problems early. Note the date, mileage, oil level, and any observations about color or condition.
Professional inspections: During oil changes, mechanics check for leaks, worn seals, and other issues. Take advantage of their expertise and ask questions about your specific vehicle’s needs.
For additional maintenance guidance, explore tire rotation and other routine maintenance to keep your vehicle running optimally.
Visit This Old House’s automotive section for additional home and vehicle maintenance resources, and check ACDelco for OEM oil recommendations for your specific vehicle model.
FAQ
How often should I check my car’s oil?
Check your oil at least monthly and before long trips. High-mileage vehicles or those with known consumption issues should be checked every two weeks. Always check when the engine is cold for accurate readings.
Can I check oil while the engine is hot?
You can, but readings will be inaccurate. Hot oil expands and appears higher on the dipstick than it actually is. For the most accurate measurement, always wait 5-10 minutes after driving or check in the morning before starting the engine.
What does dark oil mean?
Dark brown or black oil is normal after several hundred miles of driving. Oil darkens as it collects dirt and combustion byproducts. However, very dark, thick, or sludgy oil indicates you’re overdue for an oil change. Change your oil according to your vehicle’s maintenance schedule.
Is it bad to overfill oil?
Yes, overfilling is problematic. Excess oil causes seal leaks, reduces fuel economy, and can damage your engine. Always keep levels between minimum and maximum marks. If you overfill, drain excess oil at a service center or by carefully removing some through the drain plug.
What oil grade should I use?
Always use the grade specified in your owner’s manual. Common grades include 5W-30, 10W-40, and 0W-20. Using the wrong viscosity affects engine protection and performance. Your manual is the definitive guide for your specific vehicle.
Why is my oil level dropping quickly?
Rapid oil consumption indicates a problem. Possible causes include oil leaks, worn piston rings, damaged valve seals, or a blown head gasket. Have a mechanic inspect your vehicle to diagnose the issue before serious engine damage occurs.
Can I use synthetic oil in my older car?
Yes, synthetic oil is compatible with older vehicles. In fact, it often provides better protection and longer intervals between changes. However, check your owner’s manual for specific recommendations. Some older engines may require specific synthetic formulas designed for their specifications.
What should I do if the oil pressure warning light comes on?
Stop driving immediately and check your oil level. Low oil triggers this light, indicating inadequate lubrication. If oil level is normal, you have an oil pressure sensor problem or internal engine issue. Have a mechanic diagnose the problem before driving further.
Related Posts

Superscript in Google Docs: Expert Tips

Strikethrough in Excel: Easy Steps for Beginners
