
How to Install Shelving? Expert Tips Inside
How to Install Shelving: Expert Tips Inside
Installing shelves is one of the most rewarding DIY projects you can tackle, transforming empty walls into functional storage and display spaces. Whether you’re adding floating shelves to a bedroom, organizing a garage, or creating a bookcase wall, proper installation ensures your shelves are safe, level, and built to last. This comprehensive guide walks you through every step of the process, from planning and preparation to final installation.
The beauty of shelf installation is that it doesn’t require advanced carpentry skills or expensive tools. With patience, the right materials, and attention to detail, anyone can create professional-looking shelving that enhances their home’s functionality and aesthetics. We’ll cover everything from finding studs and choosing the right hardware to securing heavy loads and troubleshooting common problems.
Planning Your Shelving Project
Before you drill a single hole, spend time planning your shelving installation. Start by determining what you want to store and display on your shelves. This decision directly impacts the type of shelving you’ll need, the spacing between shelves, and how much weight capacity is required. A shelf for decorative items requires different hardware than one designed to hold a library of heavy books.
Measure your wall space carefully, accounting for any outlets, light switches, or architectural features. Consider the height of your shelves from the floor—typically, the lowest shelf should be around 12 inches from the ground for accessibility, with 12-16 inches between shelves for most applications. However, if you’re storing larger items or books, you may need more vertical clearance.
Visit This Old House for additional design inspiration and structural guidelines. Think about the overall aesthetic you want to achieve and whether your shelves should match your room’s décor or make a statement. Taking time to explore DIY shelving guides helps you understand different styles and approaches before committing to installation.
Tools and Materials You’ll Need
Gathering the right tools before starting prevents frustration and ensures a professional result. Here’s what you’ll need for a successful shelving installation:
- Stud finder – electronic models are most reliable and affordable
- Level – a 24-inch level provides accuracy for most shelving projects
- Drill-driver – essential for creating pilot holes and driving screws
- Drill bits – various sizes for pilot holes and anchors
- Measuring tape – at least 25 feet for larger walls
- Pencil – for marking measurements and drilling points
- Stud locator – helps identify wall framing
- Saw – if you need to cut shelf boards to size
- Safety glasses – protect your eyes from dust and debris
Material choices depend on your shelving type. For floating shelves, you’ll need heavy-duty brackets rated for your expected load, quality wood or composite boards, and wall anchors if you can’t mount into studs. For bracket-style shelves, gather sturdy brackets, shelf boards, screws appropriate for your wall type, and potentially toggle bolts or heavy-duty anchors for drywall mounting.
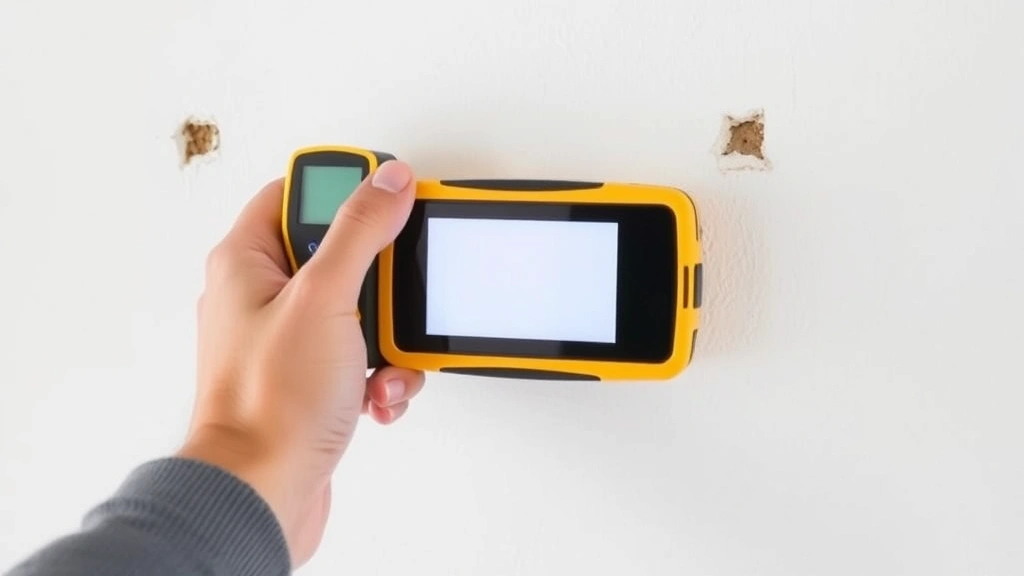
Finding Studs and Marking Locations
The foundation of safe shelving installation is finding and marking wall studs. Studs provide the strongest anchor points and should always be your first choice when possible. Use an electronic stud finder to locate the wooden framing behind your drywall. Move the finder slowly across the wall until it beeps, indicating a stud location. Mark this spot with a pencil, then move the finder beyond the mark until it stops beeping to find the stud’s far edge. Most studs are 16 inches apart, so you can predict additional stud locations once you’ve found the first two.
Once you’ve identified stud locations, decide on your shelf heights and spacing. Use your level and measuring tape to mark the exact positions where brackets or shelf supports will mount. Mark a horizontal line using your level to ensure perfect alignment—this is crucial for shelves to look professional and function properly. Double-check your measurements before drilling any holes; measuring twice prevents costly mistakes.
For walls without convenient studs or when you need flexibility in shelf placement, you’ll use wall anchors. Different anchor types suit different wall materials. Drywall anchors work for light to medium loads, while toggle bolts and heavy-duty anchors handle heavier items. Understanding your wall composition and intended load capacity determines which anchors to use.
Installing Floating Shelves
Floating shelves create a clean, modern look because the brackets remain hidden inside the shelf. This installation method requires precision and careful planning. Start by installing the mounting rails or heavy-duty brackets securely into wall studs if possible. These brackets must be perfectly level and securely fastened with appropriate screws—typically 3-inch screws into studs provide maximum support.
If studs aren’t available, use heavy-duty toggle bolts or expanding anchors rated for the combined weight of the shelf, bracket, and everything you’ll place on it. Drill pilot holes at your marked locations, then insert anchors according to package instructions. Mount the brackets and verify they’re level both horizontally and vertically before proceeding.
The shelf board slides over the mounted brackets or rails. Ensure the board is level and sits completely flush against the wall. For additional security, especially with heavier loads, you can drive screws up through the bracket into the shelf from underneath. This hidden fastening maintains the floating shelf’s seamless appearance while significantly increasing weight capacity.
Test the shelf’s stability by applying moderate pressure at different points. It should not shift, flex excessively, or make noise. If you notice any movement, stop immediately and reinforce the mounting before adding weight.
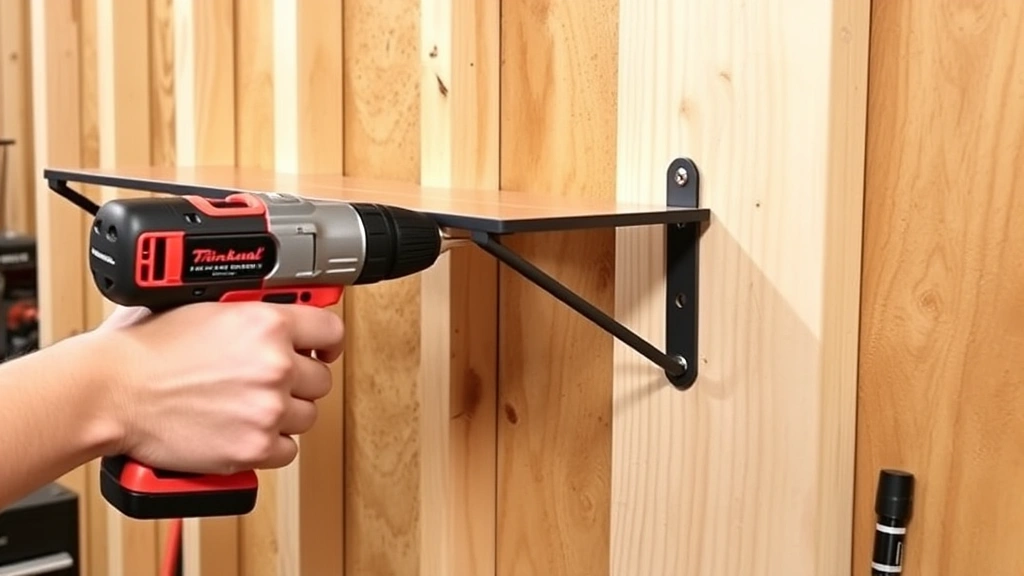
Wall-Mounted Bracket Shelves
Traditional bracket-style shelves offer versatility and are often easier to install than floating shelves. The brackets provide visible support and typically allow for easier load distribution. Start by installing the brackets at your marked locations. If mounting into studs, use 2.5-inch wood screws for secure fastening. Each bracket should be mounted with at least two screws into studs for stability.
When studs aren’t available at your desired locations, use heavy-duty wall anchors. For drywall mounting, toggle bolts or heavy-duty expanding anchors provide excellent support. Drill holes slightly smaller than your anchors, then insert them according to instructions. The anchor expands behind the drywall, distributing force across a larger area and preventing pull-through.
Space brackets appropriately based on your shelf length and expected load. For a 24-inch shelf holding books, brackets should be no more than 16 inches apart. Longer shelves or heavier loads require closer bracket spacing. Always install brackets level—use your level to verify each bracket is perfectly plumb and level before securing it completely.
Once brackets are installed and verified to be level, place your shelf board on top. Ensure the board sits evenly on all brackets and doesn’t rock. You can secure the shelf to brackets with small screws driven through the bracket into the shelf from underneath for additional security, especially if children will access the shelves.
Securing Heavy Items
When planning to store heavy items like books, collectibles, or equipment, weight capacity becomes critical. Every wall, bracket, and anchor system has limits. Understand these limits before installation begins. Floating shelves rated for 25 pounds per shelf might hold decorative items but not a book collection. Bracket shelves rated for 50 pounds per bracket can support more weight but still have maximum limits.
Distribute weight evenly across your shelves. Place the heaviest items toward the center and toward the brackets rather than at the shelf edges. This distribution pattern maximizes load capacity and reduces stress on brackets and wall anchors. Avoid concentrating all heavy items on one shelf; spread them across multiple shelves to distribute weight throughout your shelving system.
For extremely heavy loads, consider consulting structural guidelines or consulting with a professional. Some installations benefit from additional reinforcement, such as installing additional brackets or using heavier-duty hardware. When in doubt, it’s better to be conservative with weight limits than to risk shelf failure.
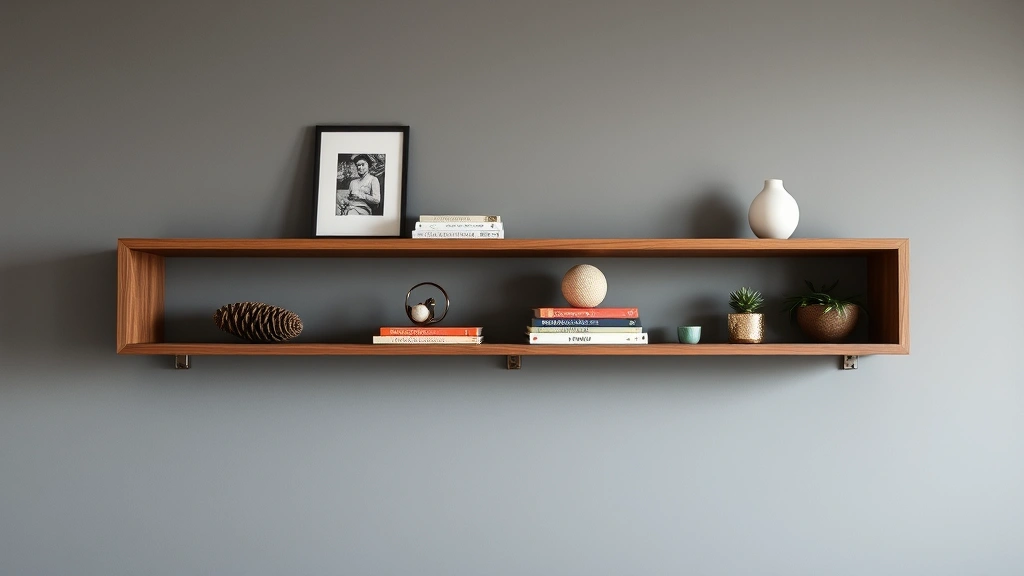
Finishing Touches
After your shelves are installed and level, attention to finishing details elevates the entire project. If you’ve used wood shelves, consider staining or painting them to match your décor. Sand any rough edges and apply a finish that protects the wood while enhancing its appearance. Many people prefer natural wood finishes that showcase the material’s beauty, while others prefer painted shelves that coordinate with wall colors.
Organize your shelves thoughtfully. Group similar items together, vary heights and textures for visual interest, and leave some breathing room rather than packing shelves completely full. This approach creates a more attractive display while preventing overloading. Consider adding shelf liners or felt pads under items to protect both the shelf and the items being stored.
Install any additional accessories like shelf dividers, brackets, or edge trim to enhance functionality and appearance. Some people add lighting above shelves to highlight displays or improve task lighting in the area. Under-shelf LED strips are affordable options that add both function and ambiance.
For shelving in kitchens or bathrooms, ensure you’ve chosen moisture-resistant materials and hardware appropriate for humid environments. Stainless steel brackets and hardware resist rust better than standard steel in these applications. Regular maintenance—dusting and occasional cleaning—keeps your shelves looking fresh and extends their lifespan.
FAQ
How long does it take to install shelves?
A simple single shelf installation typically takes 1-2 hours, including measuring, finding studs, drilling, and mounting. More complex projects with multiple shelves may take 4-8 hours. Time varies based on wall condition, whether you’re mounting into studs, and your experience level. Plan extra time if you’re new to this type of project.
Can I install shelves without studs?
Yes, wall anchors allow shelf installation anywhere on drywall. However, weight capacity is reduced compared to stud mounting. Heavy-duty toggle bolts and expanding anchors can handle moderate loads, but for very heavy items, stud mounting is always preferable. Match your anchor type to your expected load.
What’s the best type of shelf for heavy books?
Solid wood shelves mounted on heavy-duty brackets into studs provide the best support for books. Use at least two brackets per shelf, spaced no more than 16 inches apart. Ensure brackets are rated for at least 50 pounds each. Distribute books evenly across the shelf to prevent sagging.
How do I prevent shelves from sagging?
Choose appropriately thick shelf material—thicker wood resists sagging better than thin plywood. Use proper bracket spacing based on shelf length and expected load. Avoid overloading shelves, and distribute weight evenly. Thicker brackets and shorter shelf spans also reduce sagging risk.
Should I use wood screws or bolts for shelf installation?
Wood screws work well for stud mounting and are easier to install than bolts. For drywall anchoring, use anchors with appropriate screws. Bolts provide maximum strength for heavy-duty applications but require more installation complexity. Choose based on your wall type and expected load.
What’s the ideal shelf spacing?
Standard spacing is 12-16 inches between shelves for most applications. Adjust spacing based on what you’re storing—taller items need more clearance. Consider accessibility and visual balance when determining spacing. Test arrangements before permanently installing brackets.
Can floating shelves support a TV?
Some floating shelves are rated for TV mounting, but most standard floating shelves aren’t. TV mounting requires specialized brackets rated for television weight. Check manufacturer specifications carefully—many floating shelf systems aren’t appropriate for TV installation. Use dedicated TV mounting brackets instead.
How do I find studs without a stud finder?
While electronic stud finders are most reliable, you can tap along the wall listening for solid sounds indicating studs. Studs are typically 16 inches apart, so once you find one, you can predict others. However, electronic stud finders are affordable and much more reliable than tapping methods.
What’s the maximum weight floating shelves can hold?
Weight capacity varies by bracket quality and installation method. Most quality floating shelves hold 25-50 pounds per shelf when properly installed into studs. Wall anchor installations may only support 10-25 pounds. Always check manufacturer specifications and don’t exceed rated capacity.
Should I seal wood shelves?
Sealing wood shelves protects them from dust, moisture, and stains. Apply polyurethane, varnish, or wood stain based on your décor preferences. Sealed shelves are easier to clean and last longer. Skip sealing only if you prefer raw wood appearance and accept higher maintenance requirements.
Related Posts

Superscript in Google Docs: Expert Tips

Strikethrough in Excel: Easy Steps for Beginners
