
Plunger Usage Tips: Expert Advice Inside
Plunger Usage Tips: Expert Advice Inside
A clogged drain or toilet is one of the most common household problems homeowners face, yet many people don’t know how to use a plunger effectively. Whether you’re dealing with a backed-up bathroom sink, shower drain, or toilet, mastering proper plunger technique can save you hundreds of dollars in plumber bills and get your plumbing flowing again in minutes. This comprehensive guide walks you through everything you need to know about selecting the right plunger, preparing your space, and executing the perfect plunge.
The plunger remains one of the most reliable and cost-effective tools in any homeowner’s arsenal. Unlike chemical drain cleaners that can damage pipes or create safety hazards, a plunger uses simple physics—air pressure and suction—to dislodge clogs naturally. Understanding the nuances of proper plunger use means the difference between clearing a drain in five minutes or spending an hour frustrating yourself (or calling an expensive professional). Let’s dive into the expert techniques that will make you a plunging pro.
Understanding Different Plunger Types
Not all plungers are created equal, and using the wrong type for your specific clog can significantly reduce your chances of success. The three main plunger styles serve different purposes, and understanding their distinctions is crucial before you attempt any unclogging.
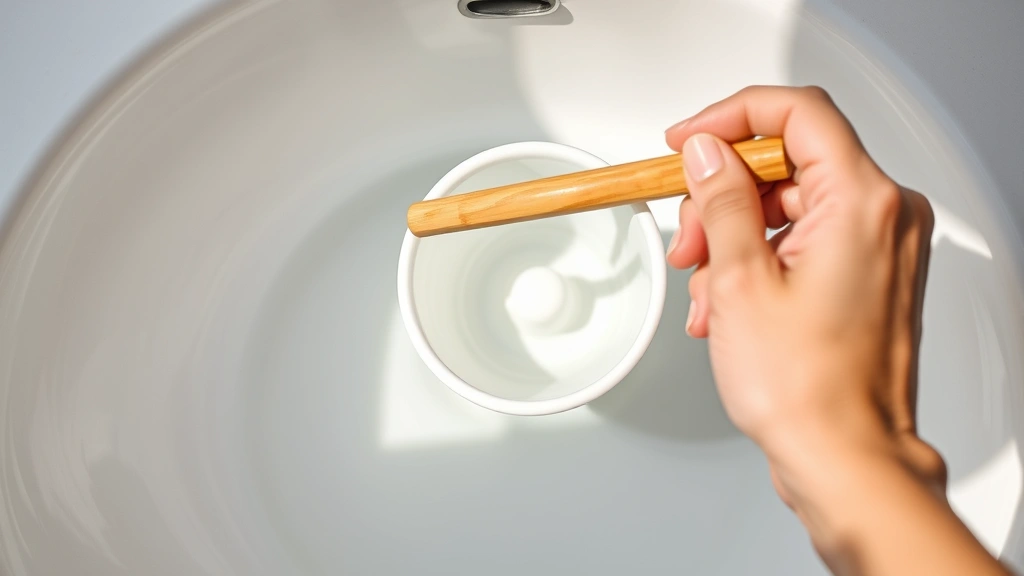
Cup plungers feature a simple rubber cup attached to a wooden or plastic handle. These are the most common household plungers and work best on flat-bottomed surfaces like sinks, showers, and tub drains. The rubber cup creates an airtight seal over the drain opening, allowing you to generate the suction and pressure needed to dislodge clogs.
Flange plungers have an additional rubber extension (flange) that folds down from the cup’s bottom. This design specifically targets the curved drain opening in toilets, creating a better seal and more effective pressure transfer. If you’re planning to tackle toilet clogs, a flange plunger is non-negotiable.
Accordion plungers feature a rigid plastic construction with bellows-style accordion folds. These generate significant pressure but require considerable strength and technique. They’re less common in residential settings and better suited for experienced users dealing with stubborn clogs.
When shopping for plungers, invest in quality. A good-quality plunger from This Old House’s recommended products will last years and provide better suction. Many homeowners make the mistake of buying the cheapest plunger available, only to discover it doesn’t create a proper seal when they need it most.
Preparing Your Space for Success
Successful plunging isn’t just about technique—preparation is equally important. Before you begin, take time to set up your environment properly. This groundwork dramatically increases your success rate and prevents unnecessary mess.
Fill the fixture with water. Whether you’re unclogging a sink or toilet, ensure there’s enough water covering the plunger cup. For sinks and tubs, fill them with several inches of water. For toilets, the water level should already be adequate, but check that it’s not too high or too low. The water creates a hydraulic seal that transfers pressure more effectively than air alone.
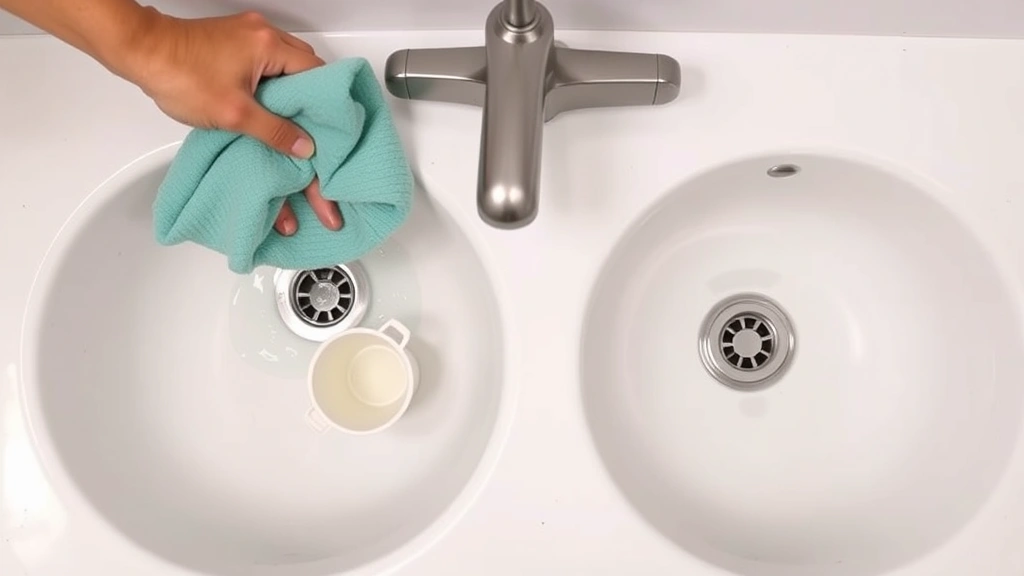
Block overflow openings. Sinks with overflow holes (those small holes near the rim) need to be sealed while plunging. Use a wet cloth or your hand to cover the overflow opening—this prevents air from escaping and allows full pressure to transfer to the clog. Without blocking the overflow, much of your plunging effort dissipates uselessly.
Close surrounding drains. If you’re plunging a sink in a double-sink setup, block the other drain with a wet cloth. Similarly, if you’re working on a shower, seal any drain openings nearby. This ensures all your plunging pressure focuses on the clogged drain rather than escaping through alternative routes.
Gather your materials. Have towels nearby to catch splashing water, a bucket for excess water removal if needed, and wear clothes you don’t mind getting wet. Keep your FixWise Hub Blog handy for reference, and consider having a wet/dry vacuum available as backup if initial plunging doesn’t work.
The Perfect Plunging Technique
Now that you understand plunger types and have prepared your space, it’s time to learn the technique that actually works. This is where most people fail—they plunge haphazardly without understanding the physics involved.
Position the plunger correctly. For cup plungers on sinks, center the rubber cup directly over the drain opening. Ensure the cup fully covers the drain so you can create a complete airtight seal. For flange plungers on toilets, the flange should be inserted into the drain opening with the cup surrounding it.
Create the seal. Push down gently at first to seat the plunger cup firmly against the drain surface. You should feel resistance as you create the seal. Don’t plunge aggressively yet—this initial push simply establishes the connection between plunger and drain.
Execute the plunge cycle. Once sealed, perform rapid up-and-down motions, maintaining pressure throughout. The key is combining both the downstroke (which pushes water and pressure down into the clog) and the upstroke (which creates suction that pulls the clog toward you). Many people focus only on pushing down, missing the crucial suction component. Each complete cycle should take about one second—down and up.
Maintain consistency. Perform 15-20 rapid plunges without breaking the seal. If the seal breaks during this sequence, stop and reseat the plunger before continuing. Breaking the seal wastes all your effort because you lose the pressure buildup you’ve created.
Check progress. After 15-20 plunges, lift the plunger away and observe water drainage. Does water drain quickly? If yes, the clog is clearing. If water still pools, reseat the plunger and repeat the cycle. Most clogs require 2-4 cycles of plunging to fully clear.
Repeat strategically. If the first round doesn’t work completely, refill the fixture with water and repeat. The repeated pressure cycles gradually break apart the clog material, allowing it to pass through the drain system. Patience and consistency matter more than aggressive force.
A common misconception is that harder plunging works better. This is false. Controlled, rhythmic plunging with proper seal maintenance outperforms wild, forceful plunging every time. Think of it like CPR—steady, consistent compressions work better than erratic pounding.
Toilet-Specific Strategies
Toilet clogs present unique challenges because of the toilet’s design and the types of clogs that typically occur. Understanding toilet-specific approaches increases your success rate significantly.
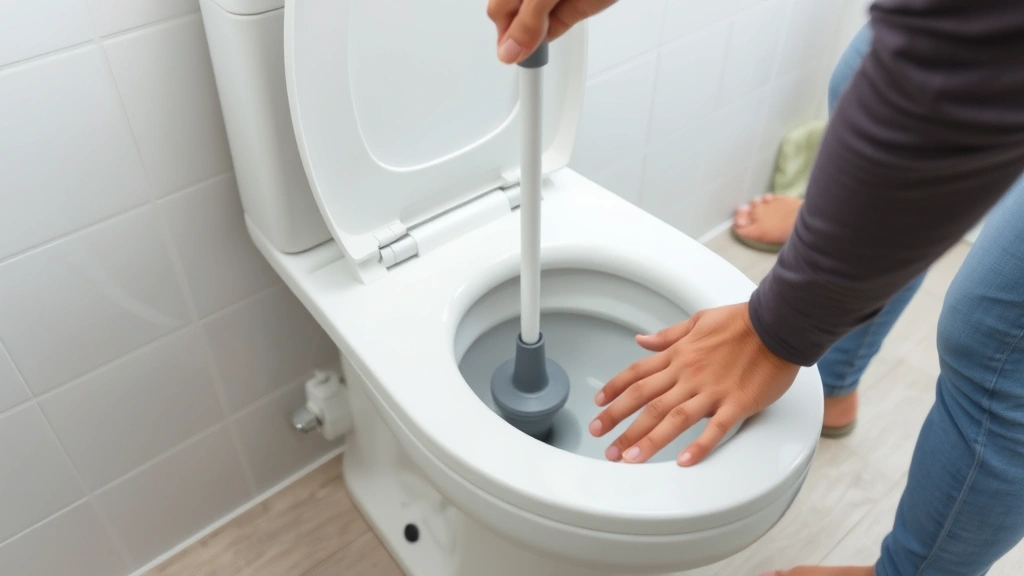
Use a flange plunger exclusively. Never use a cup plunger on a toilet—the bowl’s curved shape won’t allow proper seal creation. A flange plunger’s extended rubber piece fits into the drain hole perfectly, creating the pressure needed to clear toilet clogs.
Check water level first. Ensure the toilet bowl contains adequate water to cover the plunger cup by several inches. If the bowl is empty or nearly empty, add water from a bucket before beginning. If the water level is dangerously high (suggesting a severe clog), remove some water with a cup before plunging to prevent splashing.
Position for maximum seal. Insert the flange fully into the drain opening while the cup surrounds the bowl’s drain area. Push down gently to seat everything firmly. The flange should be completely inside the drain hole, not visible from above.
Plunge with controlled force. Toilet clogs often involve toilet paper and waste materials that respond well to pressure. Use firm, deliberate plunges—slightly more forceful than sink plunging, but still controlled. Perform 15-20 rapid cycles, then check if water drains or if the clog has broken up.
Consider a toilet auger as backup. If plunging doesn’t work after several attempts, a toilet auger (also called a toilet snake) may be necessary. Unlike general plunger advice from Family Handyman, toilet-specific tools sometimes work better for severe obstructions.
Prevent future toilet clogs. Use reasonable amounts of toilet paper, avoid flushing non-flushable items (wet wipes, feminine products, paper towels), and consider installing a bidet or toilet paper dispenser that encourages moderation. Prevention is far easier than cure.
Sink and Drain Plunging Methods
Sink and shower drain clogs differ from toilet clogs in composition and require slightly different techniques. Hair, soap scum, and food debris create different obstruction patterns than toilet waste.
Remove visible debris first. Before plunging, remove any visible hair or debris from the drain opening. Use needle-nose pliers or a drain snake to pull out accessible material. This prevents pushing debris deeper and can sometimes clear minor clogs entirely.
Fill the sink adequately. Unlike toilets, sinks need deliberate water addition. Fill the sink with 3-4 inches of water. This water provides the hydraulic medium that transfers your plunging force through the drain system to the clog.
Block the overflow opening. Press a wet cloth firmly over the sink’s overflow hole. This is critical—without blocking the overflow, water simply escapes upward rather than being forced downward through the drain. Your plunging effort becomes ineffective.
Apply steady pressure. Use a cup plunger with firm, rhythmic motions. Sink clogs often respond faster than toilet clogs, so you might see results within 10-15 plunges. Listen for gurgling sounds—this indicates air and pressure moving through the drain system, which is a good sign.
Try the wet cloth method for double sinks. With double-sink setups, block one drain completely with a wet cloth while plunging the other. This forces all pressure through the plunged drain rather than allowing it to escape through the adjacent sink.
Address shower and tub drains. These often clog with hair and require aggressive plunging. Ensure the drain is covered with water, use a cup plunger, and plunge vigorously. Shower drains typically respond well to plunging because the clog material (primarily hair) breaks apart easily under pressure.
Common Mistakes to Avoid
Understanding what NOT to do is as important as knowing what to do. These common mistakes undermine plunging effectiveness and frustrate homeowners unnecessarily.
Breaking the seal prematurely. The most frequent mistake is lifting the plunger to check progress after just a few plunges. This breaks your pressure buildup. Commit to at least 15-20 consecutive plunges before checking progress. Patience is essential.
Using the wrong plunger type. Using a cup plunger on a toilet or a flange plunger on a sink wastes effort. Match your tool to your task. Keep both types on hand if you have multiple fixtures that might clog.
Insufficient water coverage. Plunging without adequate water creates poor seal conditions and reduces hydraulic pressure transfer. Always ensure the drain is submerged under several inches of water before beginning.
Forgetting to block overflow holes. This single oversight can reduce plunging effectiveness by 50% or more. Always seal overflow openings with a wet cloth before plunging sinks.
Using chemical drain cleaners first. If you’ve already poured chemical drain cleaner into the clogged drain, wait before plunging. Chemical cleaners can splash up and burn skin, and they don’t improve plunging effectiveness. If you must plunge after using chemicals, wear protective gloves and eye protection.
Excessive force. Plunging isn’t about raw strength. Controlled, rhythmic pressure works better than violent force. Excessive force can actually damage pipes, especially in older homes with fragile plumbing. Let the technique work for you rather than relying on muscle.
Giving up too quickly. Many clogs require multiple plunging cycles. If your first round doesn’t completely clear the clog, refill the fixture and try again. Persistence often succeeds where a single attempt fails.
When to Call a Professional
While plungers solve most minor clogs, some situations require professional plumbing intervention. Knowing when to stop and call a plumber prevents wasted time and potential pipe damage.
Multiple fixtures backing up simultaneously. If your toilet, sinks, and shower all drain slowly or back up together, the clog is likely in your main sewer line. This requires professional equipment like a motorized auger or camera inspection. Plunging won’t help and might make things worse.
Persistent clogs that return quickly. If a drain clogs repeatedly within days or weeks despite successful plunging, something deeper is wrong. Tree roots, pipe damage, or accumulated debris deeper in the line needs professional diagnosis and repair.
Unusual odors or sewage backup. If you notice raw sewage backing up into your home or smell strong sewer odors, stop plunging immediately and call a professional. This indicates a serious problem requiring specialized tools and expertise.
No improvement after multiple attempts. If you’ve plunged thoroughly 4-5 times without any improvement, the clog is likely beyond plunger capability. A plumber with a motorized snake or hydro-jet can clear obstructions that manual plunging cannot.
Visible pipe damage or leaks. If you notice water leaking from under the sink or from pipes while plunging, stop immediately. You may have damaged a pipe, and further plunging could worsen the situation. Call a professional for inspection and repair.
Elderly or immunocompromised residents. If sewage exposure poses health risks, hire a professional rather than handling it yourself. Your safety matters more than saving money.
Professional plumbers have access to equipment like advanced drain cleaning tools from Home Depot that can handle severe clogs quickly. When DIY methods fail, professional help is a worthwhile investment.
FAQ
How long should I plunge before giving up?
Plunge for at least 15-20 consecutive motions before checking progress. If the clog doesn’t clear after 3-4 cycles (with refilling between cycles), consider calling a professional. Most clogs respond within this timeframe if they’re plungeable clogs.
Can I plunge if I’ve already used drain cleaner?
Wait at least 30 minutes after pouring chemical drain cleaner before plunging. Better yet, try plunging first before using chemicals. If you must plunge after chemical use, wear protective gloves and eye protection to prevent chemical burns from splashing.
What’s the difference between a plunger and a plumbing snake?
A plunger uses air pressure and suction to dislodge clogs, while a plumbing snake (auger) is a flexible tool that physically breaks apart or retrieves clogs. Plungers work on surface-level clogs; snakes reach deeper obstructions. Try plunging first; use a snake if plunging fails.
Should I plunge a clogged toilet immediately?
If the toilet is overflowing or water level is dangerously high, remove some water first using a cup or bucket. Then plunge normally. Never plunge an overflowing toilet as this spreads contaminated water.
How do I maintain my plunger?
Rinse your plunger thoroughly with hot water after each use. Store it in a well-ventilated area to dry completely. A damp plunger stored in a closed cabinet develops mold and mildew. Replace plungers every 5-10 years as rubber deteriorates and loses suction effectiveness.
Can plunging damage my pipes?
Proper plunging technique rarely damages pipes. However, excessive force on old, fragile pipes can cause damage. Use controlled, rhythmic plunging rather than violent force. If pipes are very old or you’re uncertain about their condition, call a professional instead.
Why isn’t my plunger creating suction?
The rubber cup may have holes or cracks reducing suction. The seal might not be complete—ensure the cup fully covers the drain opening. Alternatively, your plunger might be dry; slightly damp rubber creates better seal than completely dry rubber.
Is it better to plunge or use drain cleaner?
Plunging is safer, more environmentally friendly, and often more effective than chemical drain cleaners. Drain cleaners can damage pipes and create safety hazards. Always try plunging first; reserve chemicals for situations where plunging fails.
Related Posts

Superscript in Google Docs: Expert Tips

Strikethrough in Excel: Easy Steps for Beginners
