
How to Propagate Snake Plant: Expert Guide
How to Propagate Snake Plant: Expert Guide
Snake plants are the overachievers of the houseplant world—they’re nearly impossible to kill, they purify your air, and they look legitimately stylish doing it. But here’s where they get even better: propagating them is absurdly simple. Whether you’re looking to multiply your collection, share cuttings with friends, or just want to understand what’s happening beneath the soil, learning how to propagate snake plant opens up a whole new dimension of plant parenthood.
The beauty of snake plant propagation lies in its forgiving nature. Unlike finicky orchids or temperamental succulents, these resilient plants practically want to multiply. You can propagate them through leaf cuttings, division, or water propagation—each method works beautifully, and honestly, you’d have to try pretty hard to mess it up. In this guide, we’re breaking down everything you need to know to successfully clone your snake plant and build an entire jungle from a single parent plant.
Before diving in, it’s worth noting that snake plant propagation is genuinely one of the easiest ways to expand your indoor garden. If you’re interested in exploring other propagation techniques, you might also enjoy learning about how to propagate pothos, another incredibly beginner-friendly plant that responds beautifully to propagation methods.
Why Propagate Snake Plants?
Let’s talk about motivation. Why would you want to propagate your snake plant in the first place? The reasons are genuinely compelling. First, there’s the economic angle—a mature snake plant can cost anywhere from thirty to fifty dollars at a nursery, but propagating one costs essentially nothing. You’re essentially creating free plants from a plant you already own.
Then there’s the sentimental value. Sharing plant cuttings with friends and family creates a living connection. Years down the line, your friend’s thriving snake plant in their apartment traces directly back to your propagation efforts. There’s something genuinely special about that.
From a practical standpoint, propagation lets you rejuvenate an aging plant. If your original snake plant is getting leggy or overgrown, dividing it and propagating new sections gives you fresh, vigorous growth. You’re essentially hitting the reset button while maintaining the genetic lineage of your favorite plant.
Plus, there’s the pure joy of watching something grow from almost nothing. A single leaf becomes a root, then a shoot, then a full plant. It’s low-stakes experimentation that teaches you about plant biology without requiring a degree in botany.

Three Main Propagation Methods
Snake plants offer three distinct propagation pathways, each with its own advantages and timeline. Understanding these methods helps you choose the approach that fits your situation, patience level, and available materials.
Leaf Cutting Propagation: This is the classic method where you snip individual leaves from the parent plant and encourage them to develop roots and new shoots. It’s the most dramatic transformation—watching a single leaf become a complete plant feels like genuine magic. However, it takes the longest, typically three to six months for a mature plant.
Water Propagation: If you like instant gratification and want to watch roots develop in real-time, water propagation delivers. You place leaf cuttings in water and observe the entire root development process. It’s transparent, rewarding, and surprisingly fast. The main trade-off is the transition from water to soil, which requires careful attention.
Division: This is the fastest route to a mature plant. If your snake plant has multiple rhizomes (underground stems), you can literally separate them and pot each section individually. Within weeks, you’ll have multiple full-sized plants. This method works best for established plants with obvious growth points.
Leaf Cutting Propagation
Leaf cutting propagation is the most accessible method for beginners and the one most people envision when they think about plant cloning. Here’s the complete walkthrough.
Step 1: Select and Prepare Your Leaves
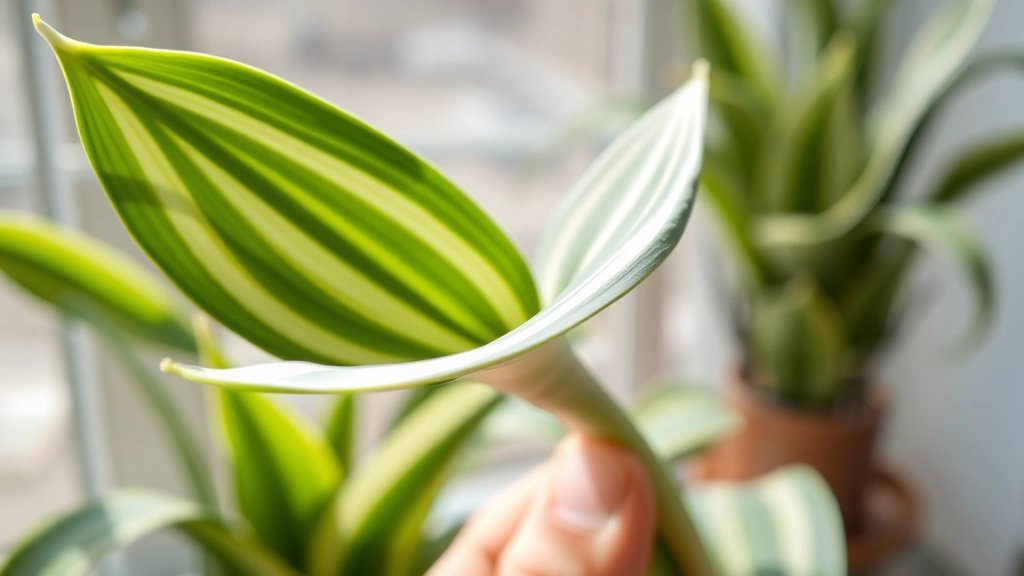
Start with a healthy parent plant. Look for mature leaves that are firm, unblemished, and at least four to six inches long. Avoid yellowing or damaged leaves—these won’t have the energy reserves needed for successful propagation. Using a clean, sharp knife or scissors, cut leaves as close to the base as possible. The more of the leaf you capture, including the base where roots will emerge, the better your success rate.
Here’s a pro tip: disinfect your cutting tool before and after use. A quick wipe with rubbing alcohol prevents disease transmission between plants. It takes thirty seconds and dramatically improves your success rate.
Step 2: Prepare Your Growing Medium
Snake plants aren’t picky about soil, but they absolutely despise moisture retention. Use a well-draining medium—a mix of regular potting soil with added perlite or coarse sand works beautifully. A ratio of two parts potting soil to one part perlite creates the ideal balance. You can use small containers, seed trays, or even a shallow tray where you’ll place multiple cuttings.
Fill your container with slightly moistened medium. The soil should be damp but not waterlogged. This initial moisture helps the cutting make contact with the soil, but you’ll let it dry out considerably between waterings.
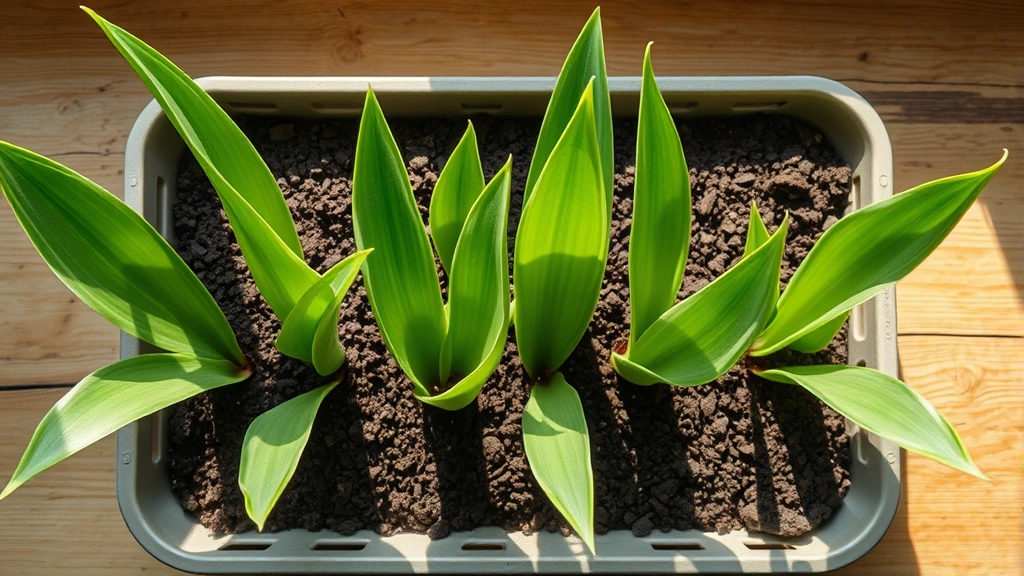
Step 3: Insert and Position Your Cuttings
Here’s where technique matters slightly. Insert your leaf cutting into the soil about one-third to one-half inch deep, with the base (the end that was closest to the plant) down in the soil. The cutting should stand upright or at a slight angle. If it flops over, it won’t make proper contact with the soil. Some people use small pebbles or toothpicks to support the cutting until roots develop.
Space your cuttings so they’re not touching each other. Air circulation matters, and you don’t want competing cuttings or crowding that might invite fungal issues.
Step 4: Create the Right Environment
Place your cuttings in bright, indirect light. A north or east-facing window works perfectly. Avoid direct, intense sunlight, which can scorch tender new growth. Temperature should remain between 65 and 75 degrees Fahrenheit—consistent warmth accelerates root development.
Water sparingly. This is the critical part where most people fail. Water only when the soil is completely dry, typically every two to three weeks. Overwatering causes rot, and that’s game over for your cuttings. If you’re unsure whether to water, wait another week. Snake plants are incredibly drought-tolerant and would rather be too dry than too wet.
Step 5: Watch for Root Development
After four to eight weeks, gently check for root development by lightly tugging on a cutting. Resistance means roots are forming. You might also notice tiny new shoots emerging from the base. Once you see roots about half an inch long and the beginning of new growth, your cutting is ready for individual potting.
Water Propagation Technique
Water propagation offers a completely different experience—it’s fast, visual, and genuinely satisfying. The entire process unfolds before your eyes, which appeals to the part of us that finds watching plants grow absolutely mesmerizing.
Setting Up Your Water Propagation Station
Prepare your leaf cuttings exactly as you would for soil propagation—clean cuts, healthy leaves, base end identified. Use small jars, glasses, or propagation vessels filled with filtered or distilled water. Tap water works fine, but if your water is heavily chlorinated, letting it sit for 24 hours before use allows chlorine to evaporate.
Insert your cutting into the water so the base is submerged but the top portion remains above the water line. You want the cutting to touch the water but not float completely submerged. Some people use small propagation clips, but even a simple piece of foam or a wooden stick works perfectly as a support.
Maintaining Water Propagation
Change the water every three to five days. Fresh water provides oxygen and prevents bacterial growth that could rot your cutting. Place your water propagation setup in bright, indirect light—the same lighting conditions as soil propagation. Avoid direct sunlight on the water, which can promote algae growth.
Within two to three weeks, you’ll see roots beginning to form at the base of the cutting. They’ll appear as tiny white nubs that gradually elongate. This is where water propagation truly shines—you’re watching the biological process unfold in real-time. After roots reach about one inch long, your cutting is ready for the transition to soil.
The Critical Transition to Soil
This is where many people struggle with water propagation. The cutting has adapted to life in water, and suddenly introducing it to soil can be shocking. Here’s the gentle approach: gradually acclimate your cutting by placing it in very moist soil for the first week, then gradually reducing moisture as the cutting adjusts. Alternatively, some people keep the cutting in water for several weeks until multiple roots develop and a small shoot emerges, which creates a more established plant that handles the transition better.
Division: The Fastest Route
If you want a mature plant immediately rather than waiting months for a cutting to develop, division is your answer. This method works best for snake plants that have been in the same pot for several years and have developed multiple growth points or rhizomes.
Identifying Division Candidates
Look for snake plants with obvious separate stems or growth points. If you can see distinct sections that could theoretically be separated, your plant is ready for division. Younger plants or single-stem plants aren’t ideal candidates—you’d end up with pieces that are too small to establish quickly.
The Division Process
Remove your snake plant from its pot and gently brush away soil to expose the rhizomes—the horizontal stems that connect the different growth points. Using a clean, sharp knife, carefully separate the plant into sections. Each section should have at least two to three leaves and a portion of rhizome attached. Clean cuts are essential; ragged, torn rhizomes are prone to rot.
Let the cut surfaces dry for a few hours before potting. This callusing prevents infection when the divided sections contact soil. Then pot each section individually in well-draining soil, water lightly, and place in bright, indirect light. Within a few weeks, each divided section will establish itself as an independent plant.
Timeline and What to Expect
Understanding the realistic timeline for each propagation method helps you set proper expectations and avoid the frustration of thinking something has failed when it’s actually just developing at its natural pace.
Leaf Cutting Timeline: Weeks one to three involve minimal visible change—your cutting is developing roots underground. Weeks four to eight bring the first signs of new growth, usually a tiny shoot emerging from the base. By week twelve, you’ll have a small plant with several leaves. Full maturity takes four to six months.
Water Propagation Timeline: This moves slightly faster visually. Roots appear within two to three weeks, and visible shoots emerge around week four to five. The transition to soil adds another two to three weeks of adjustment time. Overall, you’re looking at three to four months from cutting to established plant.
Division Timeline: This is dramatically faster. Division creates an immediate established plant. Within two to three weeks, the divided sections will recover from the trauma and begin actively growing. You’ll see new growth within a month.
Troubleshooting Common Issues
Even though snake plant propagation is forgiving, problems can arise. Here’s how to identify and solve the most common issues.
Rotting Cuttings: The number-one killer of snake plant propagations is overwatering. If your cuttings feel mushy or develop a foul smell, they’re rotting. The solution is dramatic: remove the cutting, discard the old soil, trim away any mushy portions, let the cutting dry completely for several days, then start fresh with completely dry soil. Water only when the soil is bone-dry.
No Root Development After Three Months: If you’re seeing absolutely no progress after three months, your cutting likely isn’t viable. This sometimes happens with cuttings that weren’t properly severed from the parent plant or that were already compromised. Start with a fresh cutting from a different part of your plant.
Yellowing Leaves: Yellow leaves on a propagating cutting often indicate too much moisture or poor drainage. Switch to a more porous growing medium and reduce watering frequency. If the entire cutting is yellow and soft, it’s probably beyond saving.
Slow Growth After Rooting: Once roots develop and new growth emerges, the cutting might grow slowly for several months. This is completely normal. Snake plants aren’t speed demons—patience is part of the process. Ensure you’re providing bright, indirect light and maintaining appropriate watering schedules.
Fungal or Pest Issues: Propagation setups are generally pest-free, but occasionally spider mites or mealybugs can appear. If you notice webbing or tiny white cottony masses, isolate the affected cuttings and spray with a mixture of water and a few drops of dish soap. Repeat every few days until the issue resolves.
Aftercare and Growing Your New Plants
Congratulations—your propagation was successful and you now have rooted cuttings or newly divided plants. The real work of establishing them as mature plants begins now.
Potting Your New Plants
Once your cutting has developed roots about half an inch long and visible new growth, it’s ready for its own pot. Use small containers initially—a two to three-inch pot works perfectly. Larger pots retain too much moisture and increase rot risk. Fill with well-draining soil and water lightly after potting.
Light Requirements
Snake plants are incredibly adaptable regarding light, which is part of their appeal. They tolerate low-light conditions better than most houseplants, but they truly thrive in bright, indirect light. An east or west-facing window is ideal. If you only have low-light options, your snake plant will still survive, but growth will be slower.
Watering Schedule
This is where consistency matters. Water thoroughly when the soil is completely dry, typically every two to three weeks depending on your environment. In winter, plants need less water, so you might water only once a month. The golden rule: when in doubt, underwater. Overwatering is the primary cause of snake plant death.
Temperature and Humidity
Snake plants prefer temperatures between 60 and 80 degrees Fahrenheit. They tolerate average household humidity beautifully and actually prefer lower humidity. You don’t need to mist them or use a humidifier—in fact, high humidity combined with overwatering can create conditions for fungal issues.
Fertilizing Your Propagated Plants
New propagated plants don’t need fertilizer during their first few months. Once they’re established and actively growing, you can fertilize during the growing season (spring and summer) with a balanced, diluted houseplant fertilizer. Apply fertilizer every four to six weeks. Reduce or eliminate fertilizing during fall and winter when growth naturally slows.
When to Pot Up
As your propagated plant grows, you’ll eventually need to move it to a larger container. This typically happens every 12 to 18 months, or when roots begin emerging from drainage holes. Snake plants actually prefer being slightly root-bound, so don’t rush to pot them into enormous containers. Moving up one size at a time creates healthier, more balanced plants.
Frequently Asked Questions
How long does it take to propagate a snake plant?
The timeline depends on your method. Leaf cutting propagation typically takes three to six months from cutting to established plant. Water propagation is slightly faster at three to four months. Division creates an established plant immediately, though it takes a few weeks to recover from the shock. Most people see visible progress within the first month regardless of method.
Can I propagate a snake plant from a single leaf?
Absolutely. A single leaf is actually the most common propagation method. One leaf contains enough stored energy and genetic material to develop roots and eventually grow into a complete plant. You’ll get the best results with mature, healthy leaves that are at least four inches long.
What’s the success rate for snake plant propagation?
Snake plants have one of the highest success rates of any houseplant—often 70 to 90 percent if you follow basic guidelines. The main failure point is overwatering. If you keep your soil on the dry side and provide bright light, you’ll succeed more often than not.
Do I need special equipment or supplies?
Nope. You need a healthy parent plant, a clean knife or scissors, soil (or water), a small container, and bright indirect light. That’s it. You probably have everything you need already in your home. Propagation doesn’t require expensive equipment.
Can I propagate snake plant cuttings in soil without water propagation first?
Yes, absolutely. Soil propagation works beautifully and is arguably the most straightforward method. Water propagation is just another option that some people prefer because they enjoy watching the roots develop. Both methods work equally well.
What if my parent snake plant is variegated? Will the propagation retain the variegation?
Here’s the tricky part: variegated snake plants (like Sansevieria trifasciata ‘Laurentii’) sometimes don’t pass variegation to leaf cuttings. The variegation might revert to solid green. Division is more reliable for maintaining variegation because you’re preserving the exact genetic material. If variegation is important to you, division is your best bet.
Can I propagate snake plant in winter?
You can, but growth will be slower because plants naturally slow their metabolism in winter. Spring and summer are ideal because plants are actively growing and root development happens faster. Winter propagation works, just be patient and expect a longer timeline.
How many leaves can I safely remove from my parent plant?
You can remove several leaves without harming your parent plant, but be reasonable. Removing more than a quarter of the plant’s foliage at once can stress it. Remove a few leaves, wait a few weeks for the plant to recover, then take more if you want. This approach keeps your parent plant healthy while you’re building your collection.
Do I need rooting hormone for snake plant propagation?
Rooting hormone isn’t necessary for snake plants—they’re enthusiastic rooters on their own. That said, using a rooting hormone can slightly speed up the process and increase success rates, particularly if you’re propagating in water. It’s optional but potentially helpful.
What’s the difference between propagating pothos and snake plant?
While you can learn general propagation techniques from pothos, snake plants are actually more drought-tolerant and require less frequent watering during propagation. Pothos benefits from consistently moist (but not waterlogged) soil, while snake plants prefer drier conditions. Both are beginner-friendly, but their watering needs differ significantly.
Can I use the same propagation methods for other succulents?
Many of the techniques work for other succulents, but always check specific requirements for each plant type. Some succulents prefer more moisture than snake plants, while others need even less. The core principles—well-draining soil, bright light, and careful watering—apply broadly, but details matter.
Related Posts

How Long to Boil Lobster Tails: Cooking Guide

How Long to Fly from New York to London? Travel Times
