
How to Grow Ginger: Expert Tips and Techniques
How to Grow Ginger: Expert Tips and Techniques
There’s something deeply satisfying about harvesting your own ginger root from the garden. Unlike waiting for those grocery store rhizomes to arrive in questionable condition, homegrown ginger delivers superior flavor, vibrant color, and the undeniable pride that comes with nurturing something from a humble knobby piece into a thriving plant. Whether you’re a seasoned gardener or someone who’s killed more houseplants than they’d like to admit, growing ginger is surprisingly forgiving—and honestly, it might just become your new favorite garden project.
The beauty of cultivating ginger at home lies in its adaptability. While it thrives in tropical climates, gardeners in cooler regions can absolutely succeed by creating the right microclimate or growing ginger in containers. The process isn’t complicated, but it does require patience and attention to specific conditions. In this comprehensive guide, we’ll walk you through everything you need to know to transform those ginger rhizomes into a bountiful harvest.
Understanding Ginger Basics
Ginger (Zingiber officinale) is a tropical perennial that produces edible rhizomes—the underground stems we recognize as ginger root. Native to Southeast Asia, this remarkable plant has been cultivated for thousands of years, valued for both its culinary applications and medicinal properties. Unlike many root vegetables such as how to grow carrots or traditional tubers, ginger operates on its own timeline and rhythm.
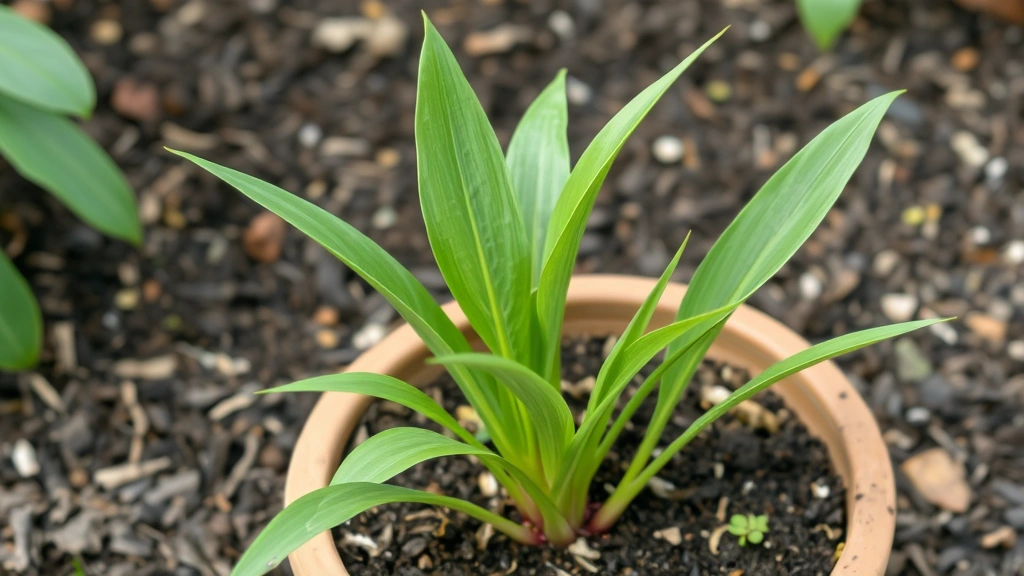
The plant itself grows as an herbaceous perennial with long, lance-shaped leaves that emerge from the rhizomes. If left undisturbed, ginger produces delicate flowers, though home gardeners typically harvest the rhizomes before flowering occurs. The growth cycle typically spans 8 to 10 months, meaning patience is genuinely required—but the wait is absolutely worth it.
What makes ginger particularly appealing for home gardeners is its relatively low maintenance nature once established. It doesn’t demand constant attention, doesn’t require specialized equipment, and doesn’t need you to be an expert horticulturist. What it does need are consistent warmth, appropriate moisture, and well-draining soil. Get these fundamentals right, and you’re already halfway to success.
Selecting and Preparing Your Planting Material
The foundation of your ginger-growing success begins with selecting quality rhizomes for planting. You’ll want to source what’s called “seed ginger”—specifically chosen rhizomes designated for propagation rather than culinary use. These are typically treated to ensure disease-free growth and optimal vigor.
When shopping for seed ginger, look for pieces that are firm, free of soft spots or mold, and ideally 1 to 2 ounces in weight. The rhizome should have visible growth buds (called eyes), which look similar to potato eyes. These buds are absolutely crucial—without them, your rhizome won’t sprout. Aim for rhizomes with at least 2 to 3 visible buds per piece.
If you’re sourcing ginger from a grocery store, understand that these often won’t perform as well since they may have been treated with growth inhibitors. However, if that’s your only option, soak the rhizomes in warm water for 24 hours before planting to help break dormancy and rinse away any chemical coatings.
Before planting, prepare your rhizomes by cutting them into sections if desired. Each section should be at least 1 to 1.5 inches long and contain at least one visible bud. Some gardeners prefer planting whole rhizomes, which works fine if space permits. After cutting, let the pieces sit for a few days in a dry location to allow the cut surfaces to callus over—this prevents rot when soil moisture is present. Think of it as giving your ginger pieces a chance to heal before their journey underground.
Ideal Growing Conditions
Ginger demands warmth. This isn’t negotiable. The plant grows best when temperatures consistently stay between 70°F and 85°F. Below 60°F, growth slows dramatically. Below 50°F, the plant essentially stops growing and can suffer damage. This temperature requirement is why many gardeners in cooler climates choose container growing, which allows them to move plants indoors when temperatures drop.
Humidity is another critical factor. Ginger loves moisture in the air—ideally between 50 and 70 percent humidity. In dry climates, consider growing ginger in containers where you can control the microclimate more effectively, or group plants together to create a more humid environment. Misting occasionally helps, though consistent soil moisture is more important than aerial moisture.
Light requirements are moderate. Ginger doesn’t need full, intense sun like tomatoes or peppers do. In fact, afternoon shade is beneficial, particularly in very hot climates. Aim for 4 to 6 hours of indirect or dappled sunlight daily. This makes ginger an excellent choice for partially shaded garden areas or under tree canopies where you might struggle to grow sun-demanding vegetables.
Soil composition matters tremendously. Ginger absolutely requires well-draining soil rich in organic matter. Heavy clay soil leads to rhizome rot—the most common reason for ginger growing failure. Your ideal growing medium should be a blend of equal parts compost, peat moss or coconut coir, and perlite or coarse sand. This creates a light, airy texture that retains moisture without waterlogging. If you’re growing in containers, use a high-quality potting mix amended with additional compost.
pH should fall between 6.0 and 6.5 for optimal nutrient availability. If you’re uncertain about your soil’s pH, a simple test kit from any garden center provides accurate readings. Adjusting pH is straightforward—limestone raises it, sulfur lowers it—and doing so before planting prevents nutrient deficiencies down the road.
Planting Your Ginger
Timing is crucial for ginger success. Plant rhizomes in spring, after the last frost date in your region has passed and soil temperatures consistently reach at least 60°F. In warmer climates, you can plant in late winter for earlier harvests. The goal is to get ginger into the ground when conditions favor sprouting without risk of cold damage.
If you’re growing ginger in the ground, prepare beds by incorporating 3 to 4 inches of compost into the top 8 to 10 inches of soil. Break up compacted soil, remove rocks and debris, and create a loose, welcoming environment for rhizomes. For container growing—which we recommend for most home gardeners—select a pot at least 12 inches deep and 12 inches in diameter. Larger containers perform even better, as they provide more root space and better moisture regulation.
Plant rhizome sections 1 to 2 inches deep with the bud side facing upward. Space multiple rhizomes 6 to 8 inches apart if planting in beds. In containers, you can plant 2 to 3 rhizomes depending on pot size. After planting, water thoroughly but gently—you want the soil moist, not soggy. The rhizome should be in contact with moist soil, but excess water should drain away within a few hours.
Don’t expect immediate action. Ginger rhizomes can take 2 to 4 weeks to sprout, sometimes longer. This is normal and not a sign of failure. Maintain consistent soil moisture and warmth during this germination period. Some gardeners cover newly planted containers with plastic wrap to create a humidity dome, removing it once sprouting begins.
Ongoing Care and Maintenance
Once your ginger has sprouted and established its first leaves, the real growing period begins. Water consistently, keeping soil moist but never waterlogged. The key is finding that balance—ginger needs regular moisture, but sitting in standing water invites fungal issues and rot. Check soil moisture by inserting your finger 2 inches deep; if it feels dry, water thoroughly.
Feeding your ginger supports vigorous growth and larger rhizomes. Begin fertilizing once the plant is actively growing (usually about 4 to 6 weeks after sprouting). Use a balanced fertilizer—something like 10-10-10—or an organic option like fish emulsion. Feed every 4 to 6 weeks throughout the growing season. As the plant matures, you can shift to a lower nitrogen formula to encourage rhizome development rather than excessive foliage.
Mulching around your ginger plants offers multiple benefits. A 2 to 3-inch layer of organic mulch like shredded leaves or straw helps retain soil moisture, moderates soil temperature, and gradually breaks down to improve soil structure. Avoid piling mulch directly against plant stems, which can encourage rot. Leave a small gap around the base of the plant.
Like many root crops such as how to grow onions, ginger occasionally benefits from periodic mounding. As rhizomes develop, they naturally push upward through the soil. Gently mounding additional compost around the plant base provides a deeper root zone and encourages larger rhizome development. This practice, called “earthing up,” is optional but yields impressive results.
Weeding isn’t typically a major concern if you’ve mulched properly, but do remove any weeds that emerge. Ginger foliage is relatively lush and dense, which naturally suppresses weeds once plants mature. Just ensure young plants aren’t competing for nutrients in their first few months.
Pruning isn’t necessary for ginger, though you can remove damaged or diseased leaves as needed. The plant will naturally regulate its own growth. Some gardeners remove flower buds if they appear, as this redirects energy toward rhizome development, but allowing flowers to bloom does no harm if you’re patient enough to wait for harvest anyway.
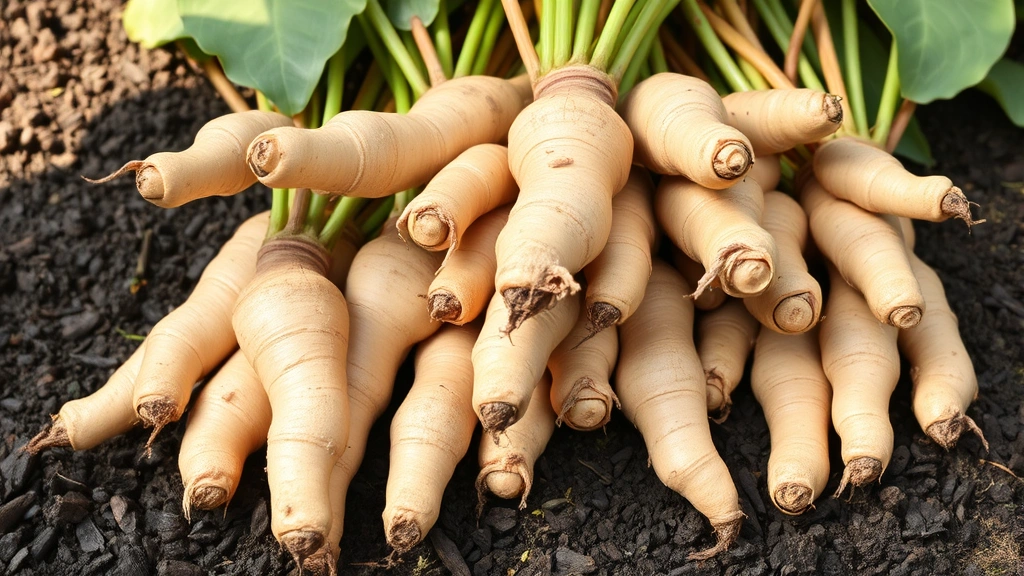
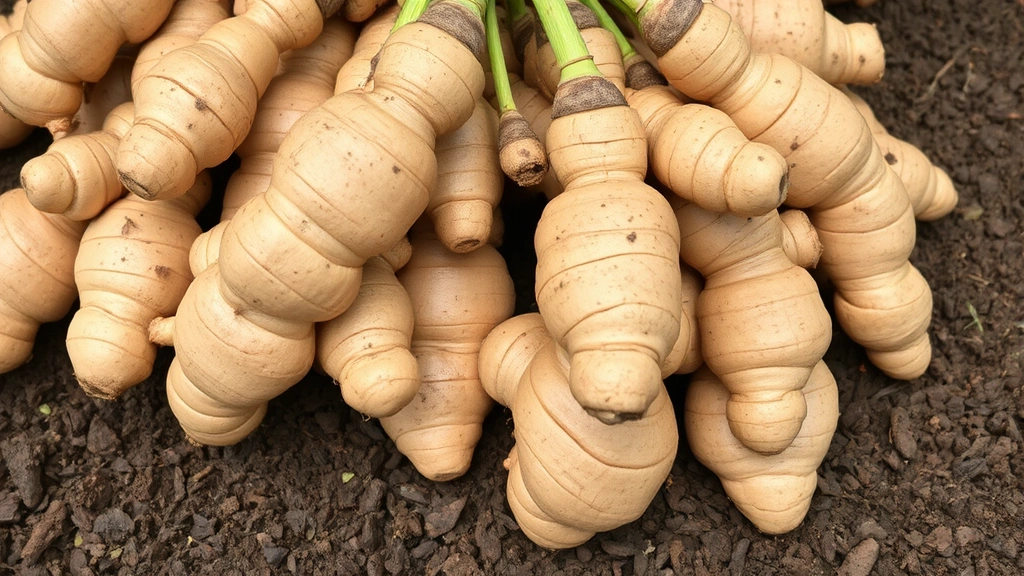
Harvesting Your Ginger
Patience reaches its reward after 8 to 10 months of growth. Harvesting typically occurs in late fall or early winter, depending on your planting date. You’ll know ginger is ready when the foliage begins yellowing and dying back naturally. This signals that the plant has finished developing rhizomes and is entering dormancy.
To harvest, gently dig around the plant base, working your way around the rhizome cluster. Use a garden fork or spade to carefully lift the entire plant and rhizome system. Avoid stabbing directly into the soil where rhizomes lie, as this damages your precious harvest. Once the plant is lifted, gently separate rhizomes by hand or with a small knife, brushing away excess soil.
Young ginger (harvested at 4 to 6 months) offers a tender, milder flavor—perfect for fresh culinary applications. Mature ginger (8 to 10 months) develops the characteristic hot, pungent flavor associated with dried ginger and ginger powder. Choose your harvest time based on your intended use. For storage and preservation, mature ginger is superior, as its thicker skin and denser structure make it less prone to drying out.
After harvesting, gently wash rhizomes under running water and allow them to air dry completely—typically 1 to 2 weeks in a warm, well-ventilated space. Don’t peel until you’re ready to use, as the skin protects the interior. Once properly dried, your homegrown ginger is ready for how to store ginger for months of culinary enjoyment. Reserve a few of the best rhizomes for next season’s planting—this is incredibly cost-effective and ensures you always have viable seed ginger on hand.
Common Problems and Solutions
Root Rot and Fungal Issues: The most common ginger problem stems from poor drainage and excessive moisture. If rhizomes develop soft spots, emit a foul smell, or plants show yellowing leaves despite adequate watering, fungal rot is likely present. Prevention is far easier than treatment—ensure excellent drainage and avoid overwatering. If rot appears, remove affected plants immediately and improve soil conditions for remaining plants. In future seasons, prioritize drainage above all else.
Slow or No Growth: If your ginger isn’t sprouting after 4 weeks or grows extremely slowly, temperature is likely the culprit. Ginger demands warmth—move containers to warmer locations or wait until soil temperatures rise before planting. Inadequate light can also slow growth, though this is rarely the primary issue. Insufficient nutrients show as pale, weak foliage; address this with regular feeding.
Yellow Leaves: While some yellowing is normal as plants mature, premature yellowing indicates problems. Poor drainage, nutrient deficiency, or pest damage can cause this. Check soil moisture first, then inspect leaves for insects. Spider mites occasionally trouble ginger in very dry conditions; spray affected plants with neem oil if pests are present.
Pest Damage: Ginger is relatively pest-resistant, but spider mites, mealybugs, and scale insects occasionally appear, particularly on indoor or container-grown plants. Inspect regularly and treat infestations early with insecticidal soap or neem oil. Like other propagation techniques such as how to propagate pothos, maintaining plant health prevents most pest problems before they start.
Rhizome Scab or Spots: These are usually fungal or bacterial issues related to moisture and humidity. They’re primarily cosmetic and don’t affect flavor or nutrition. Prevent by ensuring good air circulation, avoiding overhead watering, and maintaining appropriate humidity levels rather than saturation.
Frequently Asked Questions
How long does it take to grow ginger from rhizome to harvest?
Typically 8 to 10 months from planting to harvest maturity. Young ginger can be harvested at 4 to 6 months if you prefer tender, milder rhizomes. Exact timing depends on temperature consistency and growing conditions—warmer climates often see faster maturation.
Can I grow ginger indoors?
Yes, absolutely. Container growing indoors works well, particularly if you can maintain temperatures between 70°F and 85°F. Place containers in bright, indirect light and ensure excellent drainage. Indoor growing requires attention to humidity; misting or grouping plants together helps. The slower growth indoors means you might need 12 to 14 months for full maturity, but it’s entirely viable.
What’s the difference between seed ginger and culinary ginger?
Seed ginger is specifically selected and treated for planting, with vigor and disease resistance prioritized. Culinary ginger from grocery stores may have been treated with growth inhibitors and isn’t optimized for propagation. While culinary ginger sometimes sprouts, seed ginger offers far better results and success rates.
Do I need to divide ginger rhizomes before planting?
No, it’s optional. Whole rhizomes work fine and often produce larger, more uniform plants. Dividing allows you to plant more sections if rhizomes are large, but it’s not necessary. If you do divide, ensure each section has at least one visible bud and allow cut surfaces to callus before planting.
Can I save rhizomes for next year’s planting?
Definitely. Reserve your best, largest rhizomes at harvest time. Store them in a cool (50°F to 60°F), dry location with good air circulation. Check periodically for sprouting or rot. By spring, they’ll be ready to plant again. This is the most economical approach to growing ginger year after year.
What should I feed ginger during the growing season?
A balanced fertilizer like 10-10-10 works well, applied every 4 to 6 weeks. Organic options include fish emulsion, compost tea, or seaweed extract. Once rhizomes begin developing (usually around month 6), you can shift to a lower nitrogen formula like 5-10-10 to encourage rhizome development rather than excessive leafy growth.
How much ginger can I expect to harvest from a single rhizome?
A mature rhizome typically produces 3 to 5 times its original weight in new rhizome growth over the growing season. So planting a 1-ounce rhizome might yield 3 to 5 ounces of fresh ginger. Container growing with optimal conditions sometimes produces even more generous yields.
Is ginger actually related to other root vegetables?
Ginger is a rhizome, not a true root, and it’s botanically distinct from vegetables like how to grow garlic. While garlic is a bulb and shares some cultural similarities with ginger, they’re from completely different plant families. However, both thrive with similar soil preparation and drainage requirements.
Related Posts

How Long to Boil Lobster Tails: Cooking Guide

How Long to Fly from New York to London? Travel Times
