
How to Wash Hats: Expert Care Guide
How to Wash Hats: Expert Care Guide for Every Style
Your favorite hat deserves better than a dark corner of your closet or a dusty shelf. Whether it’s a cherished baseball cap, a delicate straw hat, or a wool beanie that’s seen better days, proper care extends its lifespan and keeps it looking fresh. Most people toss their hats in the washing machine or, worse, ignore them entirely until they’re unwearable. The truth is, hats require thoughtful handling—but it’s far simpler than you might think.
The challenge isn’t complexity; it’s knowing which method suits your specific hat material. A baseball cap’s structured bill demands different treatment than a floppy sun hat or a knit winter cap. The good news? Once you understand the basics, you’ll confidently tackle any hat in your collection. This guide walks you through everything from gentle hand-washing techniques to machine-washing shortcuts, plus storage tips that prevent damage between wears.
Let’s get your hats looking sharp and lasting longer.
Why Proper Hat Care Matters
A hat isn’t just an accessory—it’s an investment in your style and protection. Quality hats cost real money, whether it’s a premium baseball cap or a structured fedora. Neglecting proper care leads to faded colors, misshapen crowns, frayed bills, and unraveling stitching. What starts as a small stain becomes a permanent eyesore. What begins as minor shrinkage turns into an unwearable hat.
Beyond aesthetics, dirty hats harbor bacteria and oils that irritate your scalp. Sweat buildup, dust, and environmental grime accumulate faster than you realize, especially if you wear the same hat regularly. Regular washing isn’t vanity—it’s hygiene. The difference between a hat that lasts three years and one that lasts a decade often comes down to how you clean and maintain it.
Understanding how to wash hats properly means respecting the materials and construction. Most hats feature delicate stitching, structured components like bills or brims, and fabrics that react unpredictably to heat and agitation. A washing machine’s aggressive tumbling can distort shapes that took careful manufacturing to create. Hand-washing takes minutes longer but preserves your investment exponentially.
Understanding Your Hat Material
Before you fill a sink with water, identify your hat’s material. Check the interior tag first—manufacturers typically note fiber content and care recommendations. If the tag is missing or faded, examine the hat closely. Cotton, polyester, wool, straw, leather, and blends each require different approaches.
Cotton and cotton blends are forgiving and handle most washing methods well. They’re durable enough for hand-washing and, in many cases, gentle machine cycles. Polyester hats resist shrinking and fading, making them excellent candidates for machine washing. Wool hats demand cold water and mild detergent to prevent felting and shrinkage. Straw and natural fiber hats require gentle hand-washing with minimal water contact, as excessive moisture weakens the structure.
Leather and suede hats need specialized care—typically spot-cleaning only, with occasional conditioning. Structured hats with rigid bills or brims require careful handling to maintain their shape. If your hat combines materials (like a cotton cap with a leather bill), follow the most delicate material’s requirements.
Hand-Washing Method: The Gold Standard
Hand-washing is the safest approach for almost every hat. It takes roughly five to ten minutes and delivers superior results compared to machine washing. Here’s the step-by-step process:
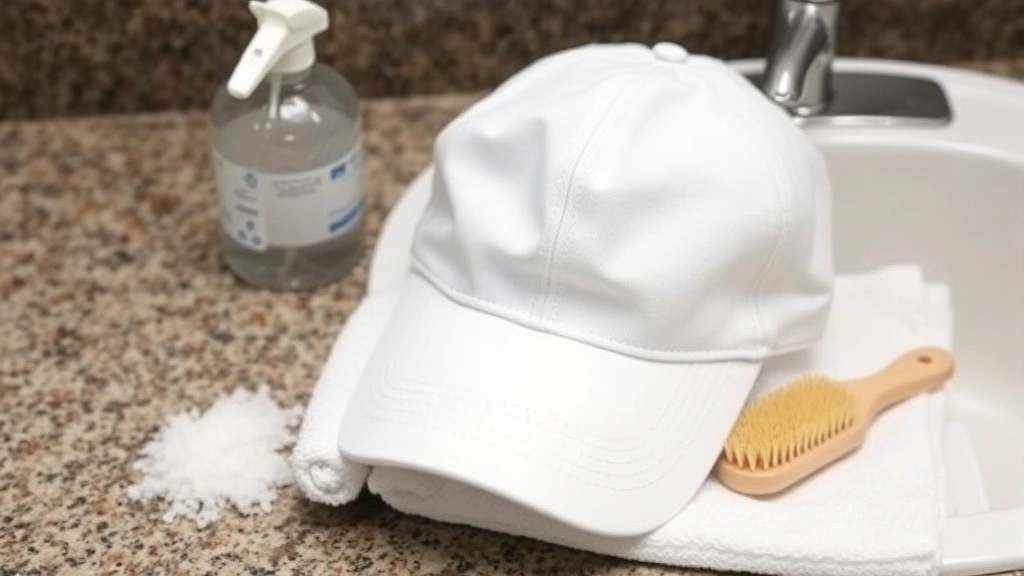
Step 1: Prepare Your Supplies Gather lukewarm water (never hot), mild detergent or specialized hat cleaner, a soft-bristled brush or cloth, and a clean towel. Avoid bleach unless your hat is white and the tag explicitly permits it. Fill a sink or basin with enough water to submerge your hat.
Step 2: Pre-Treat Stains Apply a small amount of diluted detergent directly to visible stains. Let it sit for five minutes. For stubborn spots, use a soft brush to gently work the cleaner into the fabric without scrubbing aggressively.
Step 3: Soak and Swish Submerge your hat and let it soak for ten to fifteen minutes. Gently swish it through the soapy water, paying attention to the sweatband and inner crown where bacteria thrive. Don’t wring or twist—simply agitate gently.
Step 4: Rinse Thoroughly Remove the hat and rinse under cool running water until all soap disappears. Repeat the rinse cycle at least twice. Residual soap can leave stains and make the fabric stiff.
Step 5: Gentle Squeeze Press the hat gently between your hands to remove excess water. Never wring it out. A gentle squeeze removes moisture without distorting the shape.
This foundational technique works for most hats and delivers consistently excellent results. It’s especially important for delicate or vintage hats where machine washing risks permanent damage.
Machine-Washing Baseball Caps Safely
Not all hats tolerate machine washing, but sturdy baseball caps made from cotton or polyester often survive gentle cycles. If you choose the machine route, follow these guidelines to minimize risk. Learn more about how to wash a baseball cap for detailed cap-specific instructions.
Use a Mesh Wash Bag Place your cap inside a mesh laundry bag designed for delicates. This barrier protects the structure from direct agitation and tumbling. It’s a small investment that prevents major damage.
Select Gentle Cycle Choose the delicate or hand-wash setting on your machine. Avoid heavy-duty or normal cycles that churn aggressively. Water temperature should be cold or lukewarm—never hot.
Minimal Detergent Use half the detergent you’d normally add. Less soap means easier rinsing and reduced chemical residue. Look for gentle, pH-neutral formulas designed for delicates.
Skip the Dryer Entirely Machine drying is off-limits for hats. The heat warps materials and the tumbling action distorts shapes. Air drying is non-negotiable.
Machine washing works best for caps made entirely from synthetic materials without leather bills or special embellishments. If your cap has a leather bill, metallic embroidery, or delicate stitching, hand-washing remains the safer choice. For comprehensive guidance on how to wash a hat, explore established techniques that prioritize longevity.
Drying and Reshaping Your Hat
Drying is where many people inadvertently ruin their hats. Improper drying causes shrinkage, stiffness, and permanent shape loss. Patience during this phase pays dividends.
Air Dry Completely Lay your hat on a clean, dry towel in a well-ventilated area away from direct sunlight or heat sources. Never hang wet hats, as gravity stretches the material and distorts the shape. Never use a hair dryer, radiator, or oven. Let it dry naturally—this typically takes twelve to twenty-four hours depending on material thickness and humidity.
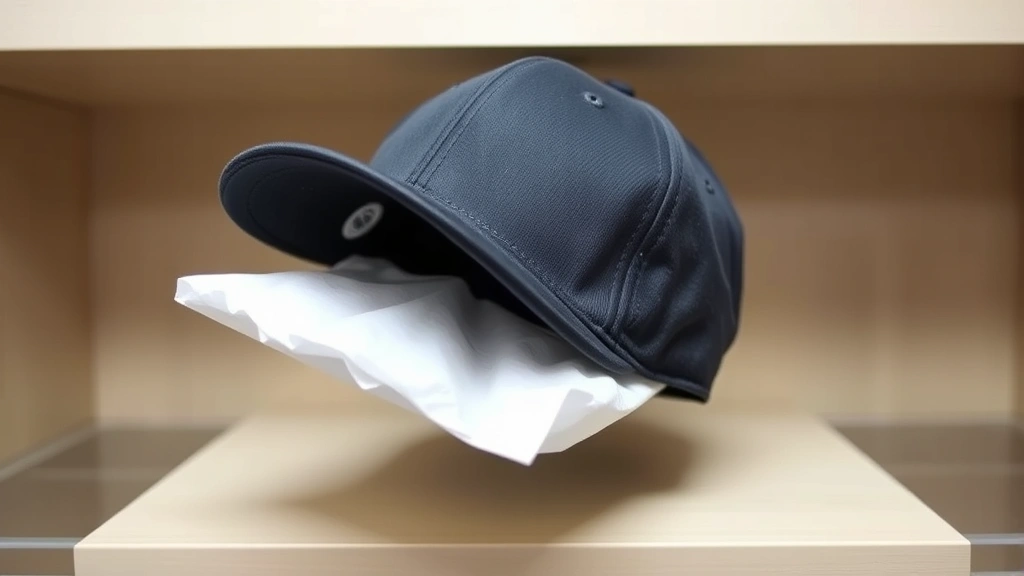
Maintain Shape During Drying For structured hats like baseball caps, stuff the crown with acid-free tissue paper or a clean towel to maintain its rounded form. Replace the stuffing every few hours as it absorbs moisture. For wide-brimmed hats, drape them over a clean bowl or hat form to preserve the brim’s curve.
Reshape Gently Once fully dry, reshape the hat if needed. For baseball caps, you can carefully hand-mold the bill back to its original curve. For wool hats, gentle steam from a kettle (held at a safe distance) can help reshape without damaging fibers.
Avoid Rigid Structures Don’t use hat forms or blocks during drying unless they’re specifically designed for your hat type. Overly rigid supports can create creases or flatten areas that should remain rounded.
Spot-Cleaning Stains Quickly
Not every stain requires a full wash. Quick spot-cleaning extends the time between washes and prevents minor marks from setting permanently. The key is acting immediately—fresh stains are infinitely easier to remove than dried ones.
For Grease and Oils Sprinkle baking soda or talcum powder on the stain and let it sit for thirty minutes. The powder absorbs oils. Brush it away gently with a soft brush. If residue remains, mix a tiny amount of dish soap with cool water, dab the area with a cloth, and rinse with a damp cloth.
For Water-Based Stains Mix equal parts white vinegar and water. Dab the solution onto the stain with a cloth, working from the outside edges toward the center to prevent spreading. Blot with a clean, damp cloth to rinse. Vinegar neutralizes odors while cleaning.
For Mud and Dirt Let the stain dry completely. Brush away dried mud with a soft brush. Once loose particles are gone, treat any remaining discoloration with a damp cloth and mild soap solution.
For Sweat Stains These are common on sweatbands. Mix equal parts hydrogen peroxide and water, dab onto the stain, and let sit for five minutes. Rinse thoroughly. This works especially well on light-colored hats.
Spot-cleaning is preventative maintenance that keeps your hat looking fresh between deep washes. It’s also ideal for delicate materials that shouldn’t endure full washing cycles frequently.
Storage Solutions That Prevent Damage
How you store your hats matters as much as how you clean them. Poor storage causes permanent creases, fading, and shape distortion. Implement these storage strategies to protect your collection:
Use Hat Racks or Stands Display hats on dedicated racks or stands rather than tossing them in closets. Proper support prevents the crown from collapsing and the brim from bending. Hat racks are affordable and functional.
Store Upright When Possible Hats stored flat or stacked develop creases and lose shape. Upright storage on shelves or racks maintains the natural form. If you must stack hats, place acid-free tissue paper between them.
Avoid Direct Sunlight UV rays fade colors and weaken fibers. Store hats in a cool, dry closet away from windows. If you display them, rotate them periodically to ensure even fading if exposure is unavoidable.
Control Temperature and Humidity Extreme heat causes materials to warp and adhesives to fail. High humidity promotes mold and mildew. Aim for a cool, dry environment between fifty and sixty percent humidity. Avoid attics and basements where temperature and moisture fluctuate dramatically.
Add Moisture Absorbers In humid climates, place silica gel packets or activated charcoal near stored hats to absorb excess moisture. Replace them regularly.
Protect from Pests Store hats where insects and rodents can’t reach them. Cedar blocks or lavender sachets deter moths without exposing hats to harsh chemicals.
Material-Specific Care Tips
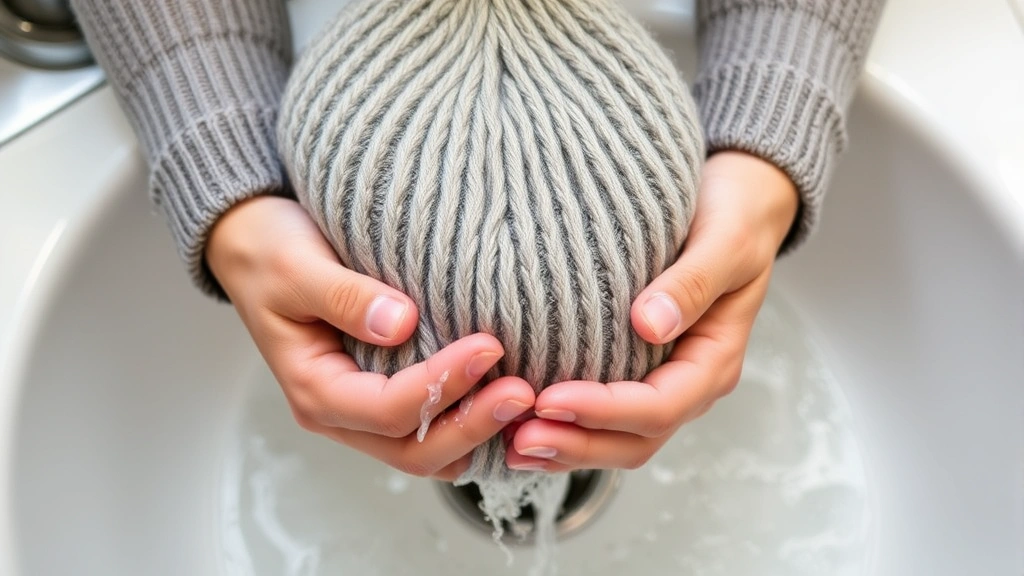
Wool Hats and Beanies Wool is delicate and prone to felting if exposed to heat and agitation. Hand-wash in cold water with wool-specific detergent. Never wring. Dry flat on a towel, reshaping gently while damp. Wool naturally resists stains and odors, so frequent washing isn’t necessary—airing between wears often suffices.
Cotton and Canvas Caps These forgiving materials tolerate hand-washing and gentle machine cycles. They’re also more resistant to shrinkage than wool. You can wash them more frequently without concern. Maintain the structure by drying with stuffing in the crown.
Straw and Raffia Hats These natural fibers are surprisingly fragile when wet. Hand-wash gently with minimal water. Avoid soaking—just wipe the surface with a damp cloth. Dry flat or draped over a form to preserve the brim shape. Store in a cool, dry place; humidity causes mold on natural fibers.
Leather and Suede Hats Avoid water entirely. Spot-clean with a specialized leather cleaner or a cloth barely dampened with vinegar solution. Condition leather occasionally with appropriate leather conditioner. Professional cleaning is worth the investment for expensive leather hats.
Vintage and Delicate Hats For antique or specialty hats, consider professional dry cleaning. The cost is minimal compared to the risk of irreversible damage. Professional cleaners have specialized equipment and expertise for rare materials.
Hats with Embellishments Sequins, beads, and metallic trim require extra care. Hand-wash gently without scrubbing the decorated areas. Dry carefully to prevent beads from shifting. If embellishments are glued rather than stitched, avoid soaking.
Just as you’d apply different techniques when learning how to clean UGGs versus canvas shoes, each hat material demands respect and appropriate methodology. Understanding these distinctions prevents costly mistakes.
Frequently Asked Questions
Can I use bleach on my white hat?
Bleach is risky even on white hats. It weakens fibers, yellows some materials, and can cause uneven discoloration. If your tag explicitly permits bleach, dilute it heavily (one part bleach to ten parts water) and use sparingly on stains only. Oxygen-based cleaners are safer alternatives for whitening.
How often should I wash my hat?
It depends on how frequently you wear it and your environment. A daily-wear baseball cap might need washing every two to three weeks. Occasional-wear hats can go months between washes. If you notice visible dirt, sweat stains, or odors, it’s time to wash. Spot-cleaning between deep washes extends the interval.
Why did my hat shrink after washing?
Shrinkage typically results from hot water or high heat during drying. Some materials like wool and cotton naturally shrink when exposed to heat. Always use cool or lukewarm water and air dry completely. Check the care tag before washing to understand your specific hat’s shrinkage risk.
Can I wash my hat in the dishwasher?
Absolutely not. Dishwashers use extremely hot water and harsh detergents designed for dishes. The heat and chemicals will damage most hat materials, cause shrinkage, and potentially melt adhesives. Hand-washing or gentle machine cycles are the only appropriate options.
What’s the best way to remove odors from my hat?
Baking soda is your best friend. Sprinkle it inside the hat, seal it in a bag overnight, and brush away the powder. For stubborn odors, mix equal parts white vinegar and water, spray lightly inside the hat, and air dry completely. Proper washing also eliminates odor-causing bacteria.
Should I iron my hat?
Direct ironing damages most hat materials. However, gentle steam from a kettle (held several inches away) can reshape wool or cotton hats without causing damage. Never use an iron directly on the hat. For bills and brims, careful hand-reshaping while damp is safer than heat.
How do I prevent sweat stains on my hat?
Wash your hat regularly to prevent sweat buildup. Wear a sweatband or moisture-wicking liner inside the hat to reduce direct contact between your scalp and the fabric. Store the hat in a cool, dry place to prevent sweat from setting. Some people apply a protective spray designed for fabric, though test it on an inconspicuous area first.
Can I use fabric softener on my hat?
Avoid fabric softeners. They leave residue that makes hats stiff and can damage delicate fibers. Stick to mild detergent and thorough rinsing instead. Your hat will feel softer naturally once it’s clean and properly dried.
What if my hat has a sweat-stained interior?
The sweatband is the dirtiest part of any hat. During hand-washing, focus extra attention here. Use a soft brush to gently scrub the interior with diluted detergent. For stubborn stains, let the hat soak longer or apply a vinegar-water solution directly to the sweatband. Thorough rinsing ensures no soap residue remains.
Is professional hat cleaning worth the cost?
For expensive, delicate, or vintage hats, absolutely. Professional cleaners have specialized equipment and expertise that prevents damage. For everyday caps and inexpensive hats, DIY washing is perfectly adequate. Consider professional cleaning for leather hats, antiques, or pieces with irreplaceable embellishments.
Related Posts

How Long to Boil Lobster Tails: Cooking Guide

How Long to Fly from New York to London? Travel Times
