
How to Make Ice Cream in a Bag: Step-by-Step Guide
How to Make Ice Cream in a Bag: Step-by-Step Guide
There’s something genuinely magical about watching ice cream materialize right before your eyes—especially when you’re the one making it happen. The bag method isn’t just a nostalgic throwback to elementary school science fairs; it’s a legitimate, surprisingly effective way to create creamy, delicious frozen treats without needing an expensive ice cream maker. Whether you’re planning a summer gathering, entertaining kids, or simply craving homemade ice cream, this technique delivers results that taste infinitely better than you’d expect from something so refreshingly simple.
What makes this method so appealing is its accessibility. You don’t need special equipment, fancy ingredients, or culinary expertise. Just a few pantry staples, two bags, some ice, salt, and about five minutes of shaking later—you’ve got legitimate ice cream. The physics behind it is fascinating too: the salt lowers the freezing point of ice, allowing it to absorb heat from the cream mixture faster than regular ice could. The result? Faster freezing and that creamy texture everyone craves.
Beyond the practical appeal, there’s genuine entertainment value here. Guests of all ages enjoy the interactive nature of the process, and kids particularly love being part of the creation. It’s the kind of activity that transforms a regular afternoon into something memorable.
Ingredients and Supplies You’ll Need
Before you start shaking, let’s talk about what actually goes into this process. The beauty of bag ice cream is that you probably have most of these items already, or they’re readily available at any grocery store.
For the Ice Cream Base:
- 1 cup heavy cream or half-and-half
- 1/2 cup whole milk
- 2-3 tablespoons sugar (adjust to taste preference)
- 1/2 teaspoon vanilla extract (or your chosen flavoring)
- A pinch of salt
For the Freezing Setup:
- One small ziplock bag (quart-sized or smaller)
- One large ziplock bag (gallon-sized)
- 4-6 cups of ice
- 1/2 cup rock salt or table salt
- A kitchen towel or gloves (optional but highly recommended—this gets cold)
Quality matters here, particularly with the cream and milk. Full-fat dairy produces creamier results than lower-fat alternatives. If you’re working with what you have, it’ll still work, but you’ll notice the difference if you upgrade.
Preparing Your Ingredients
Preparation is where precision actually matters. Unlike some cooking projects where eyeballing measurements works fine, ice cream benefits from consistency. Grab a measuring cup and actually measure your ingredients rather than guessing.
Combine your cream, milk, sugar, vanilla extract, and salt in a bowl and stir until the sugar dissolves completely. This step takes about a minute, but it’s worth doing properly. Undissolved sugar crystals will create an unpleasant grainy texture in your final product. If you’re adding additional flavorings—like cocoa powder, instant coffee, or fruit puree—mix them in now while everything’s still liquid. This ensures even distribution throughout your ice cream.
For cocoa lovers, consider dissolving 2 tablespoons of cocoa powder with a tiny bit of warm water first before adding it to your mixture. This prevents clumping. If you’re making something like almond milk-based ice cream, substitute that for regular milk and reduce the overall liquid slightly since almond milk tends to be thinner.
Let your mixture sit at room temperature for now—you don’t want it cold yet. This might seem counterintuitive, but starting with room-temperature mixture actually helps the freezing process work more efficiently.
Assembling Your Ice Cream Bags
This is where the two-bag system comes into play. The small bag holds your ice cream mixture, and the large bag creates an ice bath around it. This setup is crucial for even freezing.
Pour your prepared ice cream mixture into the small ziplock bag. Seal it completely, pressing out as much air as possible. Double-check that seal—a leak here is a disaster waiting to happen. If you’re paranoid (and honestly, who isn’t?), you can double-bag this layer by placing your sealed small bag into another small bag.
Fill your large bag halfway with ice. Pour in your rock salt and stir it into the ice. The salt-ice combination is what does the heavy lifting here. Rock salt works better than table salt because the larger crystals distribute more evenly, but table salt works in a pinch—you might just need slightly more of it.
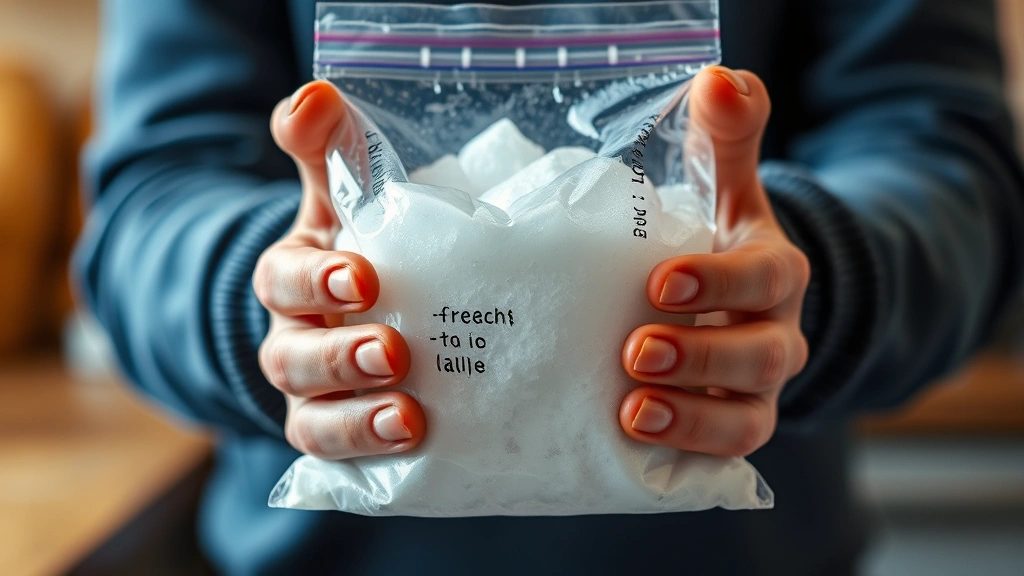
Place your sealed small bag into the large bag with the salt-ice mixture. Fill the rest of the large bag with more ice, creating an ice bath completely surrounding your mixture. Seal the large bag securely. Now you’re ready for the actual freezing process.
The Freezing Process: Step by Step
This is the fun part—literally. Wrap the large bag in a kitchen towel or put on gloves. This isn’t optional; the outside of this bag will be brutally cold, and prolonged direct contact with your bare hands will be uncomfortable at best and potentially harmful at worst.
Shake Phase (Minutes 1-3): Start shaking vigorously. We’re talking enthusiastic, consistent movement—not gentle swirling. Shake it like you mean it. The movement keeps the mixture moving and prevents it from freezing into a solid block. This is also where the entertainment value kicks in. Music helps. Dancing helps. Getting everyone involved helps.
Check Phase (Minute 3-4): Open the large bag carefully and peek at your mixture through the small bag. It should be starting to thicken noticeably but shouldn’t be fully solid yet. If it still looks quite liquid, keep shaking. If it’s getting thick but not quite there, you’re almost done.
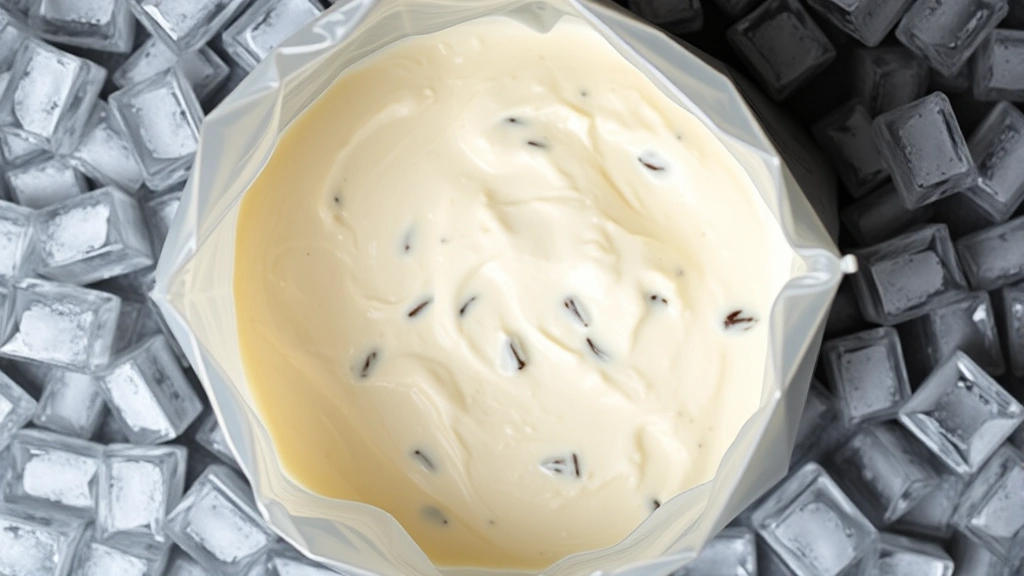
Final Phase (Minute 4-5): Give it another 30-60 seconds of vigorous shaking. The mixture should now have a soft-serve ice cream consistency. This is when you stop—you want it creamy, not rock-hard.
Remove the small bag from the large bag, open it up, and serve immediately. The texture will be perfect right now. If you let it sit, it’ll continue freezing and become harder.

Troubleshooting Common Issues
Sometimes things don’t go exactly according to plan. Here’s what to do when they don’t.
It’s Taking Forever to Freeze: This usually means your ice is melting faster than it should. Either your kitchen is particularly warm, or you’re not using enough salt. Add more salt to the ice bath and increase the shaking intensity. Also verify you’re using actual rock salt or plenty of table salt—these lower the freezing point more effectively than plain ice alone.
It’s Frozen Solid Too Quickly: Counterintuitively, this can happen. If your ice cream is rock-hard before you reach that soft-serve stage, your ice-to-salt ratio was too aggressive. Next time, use slightly less salt or slightly warmer ice. You can also let it sit at room temperature for a minute or two to soften up.
The Mixture Leaked Everywhere: This is why that seal matters. For future attempts, really press out that air and make sure the zipper is fully closed. Some people double-seal just to be absolutely certain. It’s not glamorous, but it works.
It Tastes Icy Rather Than Creamy: This usually means the freezing happened too slowly, allowing larger ice crystals to form. Increase your shaking intensity and use more salt to speed up the process. The faster it freezes, the smaller the ice crystals, and the creamier the result.
The Flavor Isn’t Strong Enough: You might be using too much milk relative to cream. Try reducing milk by a quarter cup and increasing cream instead. Also, don’t shy away from your flavorings—a teaspoon of vanilla is nice, but a teaspoon and a half is better. Similarly, if you’re making chocolate, go bold with your cocoa powder.
Flavor Variations to Try
Once you’ve mastered the basic vanilla, the flavor possibilities expand significantly. Start with your base recipe and modify from there.
Chocolate Indulgence: Add 3 tablespoons of unsweetened cocoa powder mixed with 2 tablespoons warm water. This creates genuine chocolate ice cream, not just chocolate-flavored dairy.
Strawberry Bliss: Blend fresh strawberries (about half a cup) and strain out the seeds. Use this puree in place of half your milk. Add an extra tablespoon of sugar since fruit naturally adds tartness.
Coffee Shop Style: Dissolve 2 tablespoons of instant coffee in a tablespoon of hot water, then cool it before adding to your base. This creates that sophisticated coffee ice cream flavor. If you enjoy making other beverages at home, you might appreciate knowing how to make French press coffee—the techniques aren’t dissimilar in terms of extraction.
Mint Chocolate Chip: Add 1/4 teaspoon peppermint extract and a drop of green food coloring to your base. Fold in mini chocolate chips just before the final shaking phase.
Salted Caramel: Drizzle caramel sauce into your mixture (about 3 tablespoons) and add a quarter teaspoon of sea salt. The contrast between sweet and salty is genuinely addictive.
Cookies and Cream: Crush up some chocolate sandwich cookies and fold them in during the final minute of shaking. The contrast between cold cream and cookie texture is perfect.
For more adventurous flavors, you might experiment with extracts like almond or coconut. Just remember that extracts are concentrated, so start small—a quarter teaspoon at a time.
Pro Tips and Tricks
These aren’t essential, but they’ll elevate your ice cream game noticeably.
Pre-Chill Everything: If you’re making multiple batches, refrigerate your cream and milk mixture for 30 minutes before the freezing process. This shaves a minute off your shaking time.
Use a Towel Properly: Wrap the large bag completely in a kitchen towel, leaving just the top accessible for opening. This insulates it slightly and makes it more comfortable to hold. It also prevents your hands from getting absolutely frozen.
Recruit Help: If you’re making this for a group, pass the bag around. Everyone shakes for 30 seconds, then passes it along. It’s faster, more fun, and distributes the cold discomfort.
Make a Tasting Bar: Prepare multiple small batches with different flavors simultaneously. Use a marker to label each large bag so you know which flavor is which.
Time It Right: Make this just before serving. The texture is absolutely perfect in that 5-10 minute window right after freezing. After that, it hardens up and becomes more traditional scoopable ice cream rather than that perfect soft-serve consistency.
Consider Your Dairy Source: If you’re exploring homemade dairy alternatives, knowing how to make almond milk opens up lactose-free ice cream possibilities. Similarly, distilled water is useful if you want to make dairy-free ice cream using coconut cream and other plant-based options.
Upgrade Your Salt: Rock salt is genuinely better than table salt for this application. It’s inexpensive and available in the ice cream section of most grocery stores. It’s worth seeking out.
Temperature Control: If your kitchen is particularly warm, keep your ice in the freezer until the last possible moment. Some people even freeze their large ziplock bag with ice in it for 15 minutes before assembling everything.
Frequently Asked Questions
How long does homemade bag ice cream stay frozen?
It stays soft-serve perfect for about 10 minutes at room temperature. After that, it begins melting. If you want to store it longer, transfer it to a regular container and keep it in the freezer for up to a week, though it’ll become harder and more traditionally scoopable rather than that fresh soft-serve texture.
Can I use table salt instead of rock salt?
Yes, but you’ll need to use about 50% more of it. Rock salt works more efficiently because of its larger crystal structure. Table salt works in a pinch—it’s just less efficient.
What if I don’t have heavy cream?
You can use all milk, though your ice cream will be less creamy. Half-and-half works perfectly as a substitute. Some people use evaporated milk for extra creaminess without having to use all cream.
Can I make dairy-free ice cream this way?
Absolutely. Use coconut cream mixed with coconut milk, or try homemade almond milk combined with coconut cream. The freezing process remains identical.
Why does it sometimes taste icy?
Large ice crystals form when freezing happens slowly. Increase your shaking intensity, use more salt, or use colder ice. The faster it freezes, the smaller the crystals and the creamier the result.
Can I make this in advance?
You can prepare your base mixture hours ahead—just keep it in the refrigerator. The actual freezing process needs to happen fresh, though. The entire shaking phase takes only 5 minutes, so it’s worth waiting until you’re ready to serve.
How many servings does one batch make?
The recipe above makes about 2-3 servings depending on portion size. Double or triple the recipe if you’re feeding a crowd, but you’ll need to increase your ice and salt proportionally—roughly double everything for double batches.
Is this method safe for kids?
Yes, it’s actually a great kids’ activity. Just make sure they use gloves or a towel to hold the bag—direct contact with the salt-ice mixture can be uncomfortable. Supervision is recommended for very young children.
What’s the science behind why this works?
When salt dissolves in water (from the melting ice), it lowers the freezing point below 32°F. This causes the ice to melt, and the energy needed for that melting comes from the surrounding environment—specifically, your ice cream mixture. This rapid heat transfer freezes your cream quickly.
Can I add alcohol to make adult ice cream?
Yes, but use it sparingly. Alcohol has a lower freezing point than water, so too much will prevent freezing. Limit it to 1-2 tablespoons per batch. Liqueurs work particularly well—Bailey’s Irish Cream, for example, creates genuinely delicious ice cream.
For additional inspiration on homemade preparations, you might also enjoy exploring how to make apple cider or make brown gravy from scratch—there’s something satisfying about creating food and beverages entirely by hand.
What external resources are most helpful for ice cream making?
For detailed ice cream science, This Old House offers comprehensive ice cream guides. Family Handyman provides practical ice cream recipes, and Home Depot’s ice cream maker section includes educational content. For pure flavor experimentation, Serious Eats has extensive ice cream science and recipes.
The bag ice cream method is proof that you don’t need complicated equipment or advanced culinary training to create genuinely delicious frozen treats. What you do need is curiosity, a willingness to shake enthusiastically, and appreciation for simple pleasures. Try it once, and you’ll understand why this technique has endured for decades. More importantly, you’ll create memories alongside that creamy, delicious ice cream.
Related Posts

How Long to Boil Lobster Tails: Cooking Guide

How Long to Fly from New York to London? Travel Times
