
How to Remove Gel Nail Polish: Expert Tips
How to Remove Gel Nail Polish: Expert Tips for Healthy, Beautiful Nails
Gel nail polish is a game-changer for anyone who wants their manicure to last longer than a week. The glossy finish, vibrant colors, and chip-resistant formula make it a favorite among nail enthusiasts. But here’s the thing—removing gel polish isn’t as simple as wiping it off with regular remover. Do it wrong, and you’ll end up with damaged, brittle nails that look worse than before you started.
The good news? Learning how to get gel nail polish off safely is absolutely achievable with the right technique and a little patience. Whether you’re dealing with a DIY gel manicure at home or removing a salon application, this guide will walk you through every method, common mistakes to avoid, and aftercare tips that’ll keep your nails in top shape.
Think of gel polish removal like a delicate operation—rush it, and you’ll pay the price. Take your time, follow the proper steps, and your nails will thank you. Let’s dive into the methods that actually work.
Why Proper Removal Matters
Here’s what happens when you don’t remove gel polish correctly: the protective layer of your nail gets stripped away along with the polish, leaving behind thin, peeling nails that are prone to breakage. This isn’t just a cosmetic issue—damaged nails can become painful and take months to fully recover.
Gel polish is essentially a plastic coating that bonds to your nail plate. Simply scraping it off or picking at it will damage the nail surface underneath. The process requires patience and the right approach. When you understand the science behind gel polish, you realize why certain removal methods work better than others.
Your nails are living tissue that need oxygen and moisture. Gel polish creates an airtight seal, which is why it lasts so long. But this same seal means you can’t just wash it away. You need a solvent that breaks down the polymer chains holding the polish together—and that’s where acetone comes in. If you’re not using acetone, you’ll need an equally effective alternative.
The Acetone Soak Method
The acetone soak is the gold standard for gel nail polish removal, and it’s the method most professionals use. Here’s the step-by-step process:
- Gather your supplies: You’ll need pure acetone (100% acetone, not nail polish remover), cotton pads or balls, aluminum foil, a nail file, cuticle oil, and a bowl of warm water.
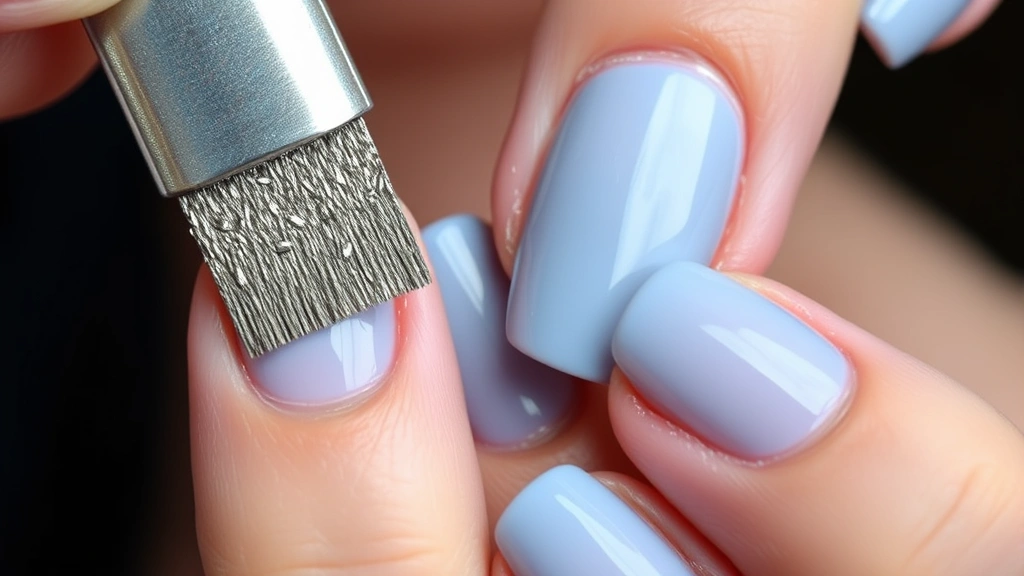
- File the surface: Using a coarse nail file, gently buff the shiny top coat of the gel polish. This breaks the seal and allows the acetone to penetrate more effectively. Don’t file too aggressively—you’re just creating micro-scratches, not grinding down your nail.
- Prepare the acetone: Pour acetone into a shallow bowl. If you’re concerned about the drying effects, you can add a tiny bit of cuticle oil to the acetone, though pure acetone works best.
- Soak your nails: Place your fingertips into the acetone for 10-15 minutes. You’ll see the gel polish begin to soften and lift. Don’t rush this step—patience is key.
- Gently remove the polish: After soaking, use a wooden or plastic cuticle pusher to gently scrape away the softened polish. If it doesn’t come off easily, soak for another few minutes. Never force it.
- Repeat as needed: Depending on how thick the gel application was, you might need to repeat the soaking and scraping process.
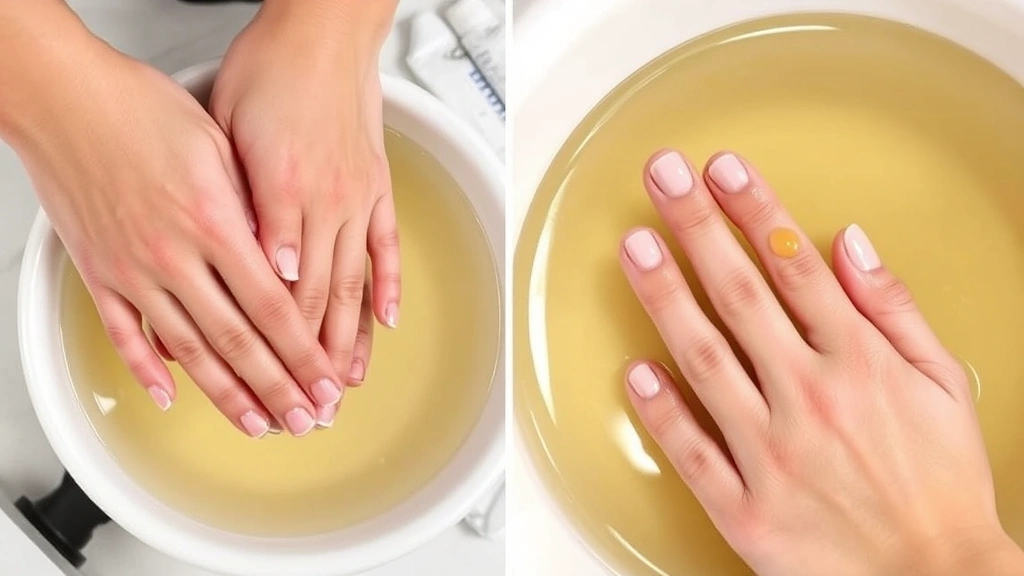
- Finish with a soak: Once all polish is removed, soak your nails in warm water with a bit of dish soap to rinse away any remaining acetone.
The acetone soak method is effective because it directly dissolves the gel polymer. While acetone can be drying, the key is to moisturize afterward and not overexpose your skin to it. Wear gloves if you have sensitive skin, or apply a barrier cream around your cuticles before starting.

Foil Wrap Technique Explained
The foil wrap method is a variation that some people find more convenient and less messy than a full soak. It’s particularly useful if you’re only removing a few nails or want to minimize acetone exposure.
- File the top coat: Start by buffing the shiny surface of your gel polish, just like with the soak method.
- Saturate cotton pads: Soak cotton pads or small pieces of cotton in pure acetone.
- Wrap each nail: Place the acetone-soaked cotton on each nail, then wrap the fingertip tightly with aluminum foil to hold it in place. The foil creates a sealed environment that keeps the acetone concentrated around the nail.
- Wait patiently: Leave the foil wraps on for 15-20 minutes. This gives the acetone time to break down the gel polish.
- Remove and scrape: Unwrap one finger at a time and gently scrape away the softened polish with a cuticle pusher. If needed, rewrap and soak longer.
- Clean up: Wash your hands thoroughly with soap and water to remove any remaining acetone.
Many people prefer this method because it feels more controlled and you’re not dunking your hands into a bowl of acetone for an extended period. The trade-off is that it takes slightly longer and requires more preparation. However, it’s less wasteful and allows you to work on one nail at a time if you prefer.
Using an Electric File
If you want to skip acetone altogether, an electric nail file can be an effective alternative. This method requires more elbow grease but works if you’re patient and have the right tools.
Start with a coarse-grit bit (around 150-180 grit) and carefully file away the gel polish layer by layer. Keep the file moving at a slight angle and avoid pressing too hard—you’re filing off the polish, not your nail. This process can take 20-30 minutes per hand, depending on how thick the application is.
The advantage? No harsh chemicals. The disadvantage? It’s time-consuming and requires a steady hand to avoid accidentally damaging the nail bed. Many professionals use electric files in combination with a light acetone soak to speed up the process. If you go this route, invest in a quality electric nail drill with multiple bit options—cheap ones tend to vibrate excessively and make the job harder.
Electric files are also useful for removing gel polish that’s already lifted or partially peeling. You can use the file to carefully separate the polish from the nail before attempting other removal methods.
Non-Acetone Alternatives
Not everyone wants to use acetone, and that’s understandable. The fumes can be strong, and it’s drying to skin and nails. Here are some alternatives, though keep in mind they’re generally less effective than acetone:
Isopropyl alcohol: Some people swear by isopropyl alcohol (rubbing alcohol) as an acetone substitute. It’s less harsh but also less effective. You’ll need to soak longer and expect more resistance when scraping. The foil wrap method works better with alcohol than a straight soak.
Gel polish remover products: Commercial gel polish removers marketed as “acetone-free” typically contain acetone alternatives like ethyl acetate. While these work, they’re often more expensive than pure acetone and may require longer soaking times. Read reviews carefully—some brands work better than others.
Soaking in hot water and dish soap: This is the gentlest method but also the least effective. Soak your nails in hot soapy water for 20-30 minutes, then try gently scraping. This might work on gel polish that’s already lifting or poorly applied, but it won’t remove well-applied gel.
Cuticle oil and patience: Some nail enthusiasts recommend soaking in warm cuticle oil, which can slowly soften gel polish over time. This is extremely slow but very gentle. You’re looking at 30-45 minutes minimum, and success depends on the gel polish quality.
The reality is that if you want reliable, consistent results, acetone is your best option. The other methods work in specific circumstances, but acetone remains the most effective solvent for breaking down gel polymers.
Common Mistakes to Avoid
Even when you know the right method, it’s easy to make mistakes that damage your nails. Here are the most common pitfalls:
- Picking or peeling: Resist the urge to pick at the gel polish. Yes, it’s tempting when you see it starting to lift, but peeling it off manually will rip away layers of your nail plate. This is how people end up with thin, damaged nails.
- Skipping the file step: Some people jump straight to soaking without buffing the top coat. This extends the removal time significantly because acetone has a harder time penetrating the glossy seal. Always file first.
- Using too much force: When scraping away softened gel, use gentle pressure. Your cuticle pusher should glide off the polish with minimal resistance. If you’re pushing hard, the polish isn’t soft enough yet—soak longer.
- Rushing the process: Trying to remove gel polish in 5 minutes is a recipe for disaster. Give each soak the full 15-20 minutes. Patience prevents damage.
- Ignoring the surrounding skin: Acetone can irritate and dry out the skin around your nails. If you have sensitive skin, apply a protective barrier cream around your cuticles before starting removal.
- Skipping aftercare: Many people remove their gel polish and immediately apply a new coat. Your nails need recovery time. Wait at least a few days between removing and reapplying gel.
- Using cheap tools: A dull nail file or low-quality cuticle pusher makes the job harder and increases the risk of damage. Invest in decent tools—they make a real difference.
Aftercare and Nail Recovery
The removal process is only half the battle. What you do after removal determines whether your nails recover or continue deteriorating. Here’s your aftercare protocol:
Hydrate immediately: After removing gel polish, soak your nails in warm water with a few drops of cuticle oil for 10 minutes. This replenishes moisture that acetone stripped away. Your nails are thirsty after being sealed under gel for weeks.
Apply cuticle oil daily: For the next week, apply cuticle oil to your nails and surrounding skin at least twice daily. This speeds up recovery and prevents peeling. Look for oils with vitamin E or jojoba oil.
Keep nails short: If your nails are damaged or peeling, trim them short to prevent breakage. Shorter nails are less likely to catch on things and break. You can grow them back once they’re healthy.
Avoid water exposure: Try to minimize prolonged water exposure for a few days after removal. Wet nails are softer and more prone to peeling. Wear gloves when washing dishes or cleaning.
Skip the manicure for a bit: Even though it’s tempting to reapply gel immediately, give your nails a break. If you’re getting another manicure, consider a regular polish application instead of gel. Your nails need recovery time—think of it as a spa day for your nail plate.
Take a biotin supplement: Biotin supports nail health and growth. Taking a daily biotin supplement (2.5 mg) for a few weeks after gel removal can help your nails recover faster. Always consult with a healthcare provider before starting supplements.
Moisturize your hands: Acetone dries out your hands and cuticles. Use a good hand cream or moisturizer several times daily. Your cuticles will be extra appreciative.
Frequently Asked Questions
How long does gel polish removal typically take?
Using the acetone soak method, expect 20-30 minutes total. The foil wrap method takes about the same time. Electric file removal can take 30-45 minutes depending on how thick the gel application was. The key is not rushing—going slowly prevents nail damage.
Can I remove gel polish at home, or should I go to a salon?
You can absolutely remove gel polish at home. The process isn’t complicated, and you’ll save money doing it yourself. Salons use the same methods we’ve outlined here. The main advantage of salon removal is that professionals have experience and proper ventilation. If you’re comfortable following instructions carefully, home removal works fine.
What should I do if my nails are already damaged before removal?
If your nails are peeling, thin, or brittle before you remove the gel, be extra gentle during removal. Consider using the electric file method since it allows more control. After removal, focus heavily on aftercare and recovery. You might want to take a longer break before reapplying gel—give your nails at least two weeks to recover.
Is acetone-free gel polish remover as effective as regular acetone?
Acetone-free removers work, but they’re generally less effective and require longer soaking times. They’re better for sensitive skin but come at a higher cost. If you have very sensitive skin, they’re worth trying, but pure acetone remains the most reliable option.
Can I use regular nail polish remover instead of pure acetone?
Regular nail polish remover contains acetone but also includes other ingredients and water, making it less concentrated. It will work eventually but requires significantly longer soaking times. For gel polish, pure acetone (100%) is worth getting—it’s inexpensive and much more effective.
How often can I safely wear gel polish?
Most nail experts recommend taking a break between gel applications. Wear gel for 2-3 weeks, then take a 1-2 week break with regular polish or no polish. This gives your nails time to recover from the acetone removal and the gel seal. Continuous gel applications without breaks can lead to chronic nail damage.
What if the gel polish won’t come off?
If you’ve soaked for 20 minutes and the polish isn’t budging, you likely have one of these issues: the acetone isn’t pure enough, you didn’t file the top coat sufficiently, or the gel was applied very thick. Try filing more aggressively and soaking again. If it’s still stuck after another 10 minutes, you can use an electric file to carefully remove the remaining polish.
Can I remove gel polish if I’m pregnant?
Many pregnant women worry about acetone exposure. While acetone fumes are strong, the exposure during gel removal is typically brief and not considered harmful in normal amounts. That said, if you’re concerned, ensure good ventilation, wear gloves, and consider having someone else do the removal or use a non-acetone method. Always discuss with your healthcare provider if you have specific concerns.
Why does my nail hurt after gel removal?
Nail pain after removal usually means the nail plate was damaged during the process. This could be from picking, using too much force with the scraper, or aggressive filing. Prevention is key—use gentle techniques during removal. If your nails hurt after removal, avoid wearing gel for several weeks and focus on recovery and hydration.
Related Posts

How Long to Boil Lobster Tails: Cooking Guide

How Long to Fly from New York to London? Travel Times
