

How to Check AirPod Battery: Simple Steps
How to Check AirPod Battery: Simple Steps to Keep Your Earbuds Powered
There’s nothing quite like the sinking feeling when your AirPods suddenly cut out mid-conversation or during your favorite podcast. Before panic sets in, you probably just need to check your battery level. Whether you’re a casual listener or someone who relies on your AirPods throughout the day, knowing how to monitor battery health is essential for staying connected without interruption.
The good news? Checking your AirPod battery is incredibly straightforward, and there are multiple ways to do it depending on which device you’re using. In this guide, we’ll walk you through every method available, from your iPhone to your Mac to your Apple Watch, so you’ll never be caught off guard by a dead battery again.
Think of this as preventative maintenance for your tech—kind of how you’d check your device’s vitals before a long trip. Speaking of device maintenance, if you’re interested in monitoring other aspects of your tech health, you might want to learn how to check PC temps to keep your computer running smoothly.
Check Battery on iPhone or iPad
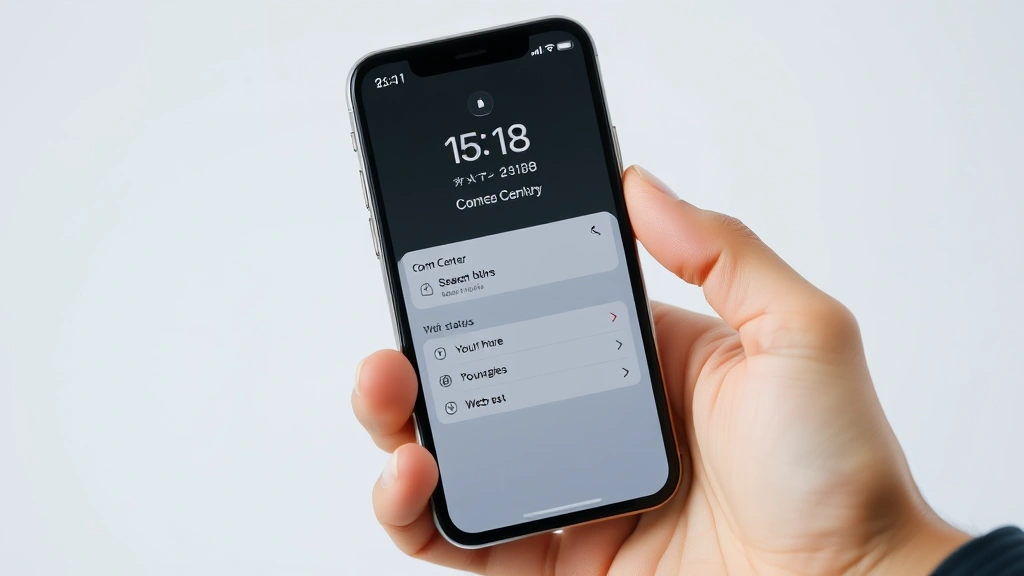
Your iPhone is probably the easiest place to check your AirPod battery status. The process is so simple you might wonder why it isn’t more widely known. Here’s exactly what to do:
- Open the Control Center by swiping down from the top-right corner of your screen (iPhone X and later) or swiping up from the bottom (iPhone 8 and earlier)
- Look for the battery percentage display that shows your iPhone’s current battery level
- Your connected AirPods battery percentage will appear right below or next to your iPhone’s battery indicator
- If you don’t see it immediately, make sure your AirPods are connected and powered on
This method works on any iPad as well. The Control Center approach gives you an immediate, at-a-glance view of your battery status without needing to dig through settings. It’s the fastest way to check before heading out the door.
If you want a more detailed view with specific information about each AirPod individually, you can also check the Settings app. Navigate to Settings > Bluetooth, find your AirPods in the list, and tap the information icon (i) next to them. This shows the battery percentage for each earbud separately, which is particularly helpful if one is draining faster than the other.
Monitor Battery on Mac
Mac users have several options for checking AirPod battery status, and they’re equally convenient once you know where to look. The quickest method is through the menu bar:
- Click the Bluetooth icon in the top-right corner of your Mac’s menu bar
- Find your AirPods in the list of connected devices
- The battery percentage will display next to your AirPods name
For a more detailed view on your Mac, you can access the battery information through System Preferences. Go to System Preferences > Bluetooth, select your AirPods from the devices list, and you’ll see individual battery percentages for each earbud, the charging case, and the overall status.
If you’re someone who frequently switches between multiple Apple devices, the battery information syncs across your ecosystem. So checking on your Mac gives you the same real-time data as your iPhone. This seamless integration is one of the reasons the Apple ecosystem works so well for device monitoring.
View Battery Status on Apple Watch
Your Apple Watch is another excellent way to keep tabs on your AirPod battery throughout the day. Since many people check their watch regularly, this becomes a natural checkpoint for battery status:
- Open the Control Center on your Apple Watch by swiping up from the bottom of the screen
- Look at the battery percentage display
- Your connected AirPods battery level will appear alongside your watch and iPhone batteries
This is particularly useful if you’re out for a run, at the gym, or anywhere you might not have easy access to your iPhone. The watch gives you a quick way to ensure your AirPods have enough juice for the rest of your workout or activity.
Using the Batteries Widget
If you want battery information at your fingertips without opening apps, the Batteries widget is your solution. This widget displays your AirPod battery status right on your home screen or lock screen:
For iPhone:
- Long-press on your home screen to enter edit mode
- Tap the plus button in the top-left corner
- Search for and select the Batteries app
- Choose the widget size you prefer and tap Add Widget
Once added, the widget shows battery percentages for all your connected devices, including your AirPods, Apple Watch, and iPhone. It’s a beautiful visual way to monitor your tech ecosystem’s health at a glance. Some people find this more intuitive than digging through Control Center, especially if they’re checking multiple devices regularly.
For Mac:
Mac users can add a similar battery widget to their Mac’s notification center. Click the Notification Center icon in the top-right corner, scroll to the bottom, and click Edit. Find the Batteries widget and add it to your notification center for easy access.
Understanding Battery Percentages
Now that you know how to check your battery, let’s talk about what the numbers actually mean for your daily use. AirPods typically provide different battery life depending on the model:
- AirPods (3rd generation): Up to 6 hours of listening time on a single charge
- AirPods Pro (2nd generation): Up to 6 hours with active noise cancellation enabled, up to 8 hours without it
- AirPods Max: Up to 20 hours of listening time
- Charging case: Provides multiple additional charges, extending total usage time to 30+ hours
Understanding these benchmarks helps you plan your day. If you’re heading out for an 8-hour shift and your AirPods are at 30%, you might want to top them up first. Conversely, if you’re running errands for just an hour and they’re at 15%, you’re perfectly fine.
The battery percentage you see represents the current charge in that moment. Keep in mind that heavy usage—like streaming video with audio or using active noise cancellation—drains the battery faster than simple music playback. Real-world usage often differs slightly from Apple’s stated estimates.
Tips for Extending AirPod Battery Life
Knowing your battery status is great, but preventing battery drain is even better. Here are practical strategies to keep your AirPods powered longer:
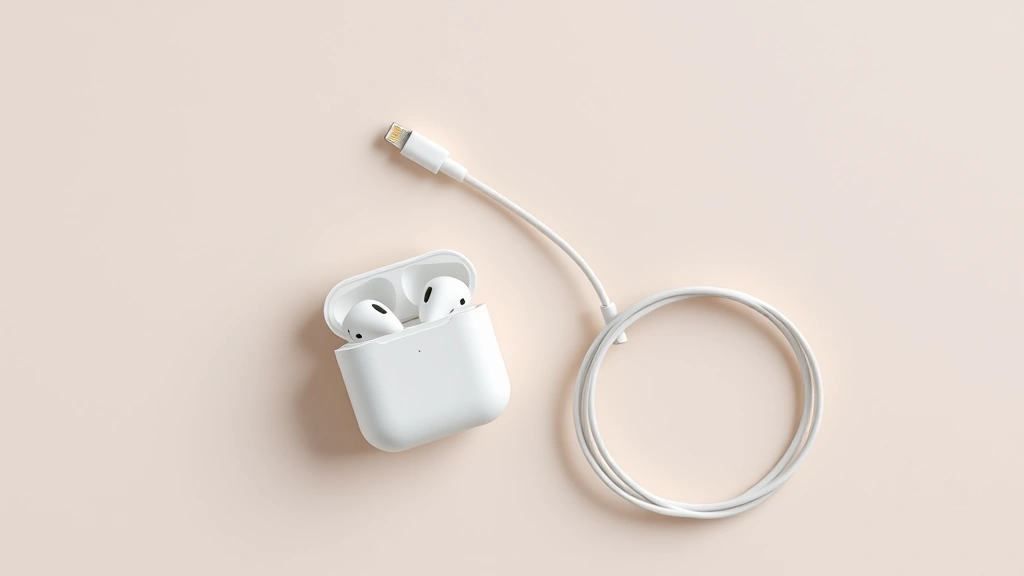
Use the charging case strategically. Your charging case is your AirPods’ best friend. Drop them in whenever you’re not actively using them, even for just 15 minutes. A quick 15-minute charge can add several hours of listening time.
Disable active noise cancellation when you don’t need it. AirPods Pro owners should know that ANC is a battery hog. Switch to Transparency mode or turn off noise control entirely when you’re indoors or in quiet environments. You’ll notice a significant difference in battery longevity.
Keep your AirPods and their case clean. Dust and debris on the charging contacts can interfere with efficient charging. Use a soft, lint-free cloth to gently clean both your AirPods and the case regularly.
Avoid extreme temperatures. Batteries perform poorly in very hot or very cold environments. Keep your AirPods at room temperature when possible, and don’t leave them in your car on hot days or outside in freezing weather.
Update to the latest firmware. Apple regularly releases firmware updates that can improve battery efficiency. These updates happen automatically when your AirPods are connected to a charged device, but you can manually check by going to Settings > General > About on your connected device.
Troubleshooting Battery Issues
Sometimes you might notice your AirPods battery drains unusually fast or won’t charge properly. Here are some troubleshooting steps:
One earbud drains faster than the other: This is common and usually not a cause for concern. One earbud might be used more frequently or have slightly different usage patterns. However, if one consistently dies much faster, try how to reset AirTag procedures might not apply directly, but similar reset methods exist for AirPods. Go to Settings > Bluetooth, tap the info icon next to your AirPods, and select Forget This Device. Then re-pair them from scratch.
AirPods won’t hold a charge: If your AirPods consistently die quickly even after a full charge, the battery might be degraded. Lithium batteries naturally lose capacity over time—typically after 500 or more charge cycles. If your AirPods are over two years old, battery degradation is normal. Contact Apple Support for replacement options.
Charging case won’t charge the AirPods: First, clean the charging contacts on both the case and the AirPods with a dry cloth. If that doesn’t work, try charging the case itself to ensure it has power. If the case won’t charge, the issue might be with your charging cable or the case’s battery.
Battery percentage shows as 0% but AirPods still work: This is a minor software glitch. Forget the AirPods in Bluetooth settings and reconnect them. The percentage should update correctly.
If you’re experiencing persistent battery problems after trying these solutions, Apple offers a one-year limited warranty on AirPods. If your device is still under warranty and the battery is defective, you’re eligible for a replacement. For those who are tech-savvy about maintenance, similar troubleshooting applies to other Apple accessories—if you’re interested in related device maintenance, you might explore how to change AirTag battery or how to replace AirTag battery guides for understanding battery management across Apple products.
For remote device pairing issues, some users also benefit from understanding how to pair Firestick remote concepts, which apply similar Bluetooth connectivity principles.
Frequently Asked Questions
Why can’t I see my AirPods battery percentage?
If your AirPods battery isn’t showing up, they’re likely not connected to your device. Make sure Bluetooth is enabled on your iPhone, Mac, or Apple Watch, and that your AirPods are powered on. If they still don’t appear, try forgetting the device and re-pairing from scratch.
How often should I charge my AirPods?
Ideally, charge your AirPods whenever the battery drops below 20%. However, if you use them occasionally, you might only need to charge them once or twice a week. The charging case makes it easy to top up whenever convenient.
Is it bad to leave AirPods charging overnight?
No, it’s perfectly safe. Modern AirPods use smart charging technology that stops charging once they’re at 100%, preventing overcharging. Leaving them in the case overnight won’t harm the battery.
What’s the difference between battery percentage on each earbud?
If you see different percentages for each earbud, it’s usually because one gets used slightly more than the other or has a marginally older battery. This is normal and nothing to worry about. However, if one is consistently significantly lower, you might have a defective earbud.
Can I replace just the battery in my AirPods?
Unfortunately, AirPods aren’t user-serviceable, so you can’t replace the battery yourself. If your AirPods battery is defective, contact Apple Support for replacement options. They may offer a discounted replacement or repair depending on your warranty status.
How long does it take to charge AirPods?
A full charge typically takes 15-20 minutes using the Lightning cable or MagSafe charging case. If you just need a quick boost, even 5 minutes of charging can provide an hour or more of listening time.
Related Posts

How Long to Boil Lobster Tails: Cooking Guide

How Long to Fly from New York to London? Travel Times
