
How to Use a Can Opener: Step-by-Step Guide
How to Use a Can Opener: Step-by-Step Guide
There’s something almost absurd about how many people struggle with a simple can opener. You’d think it’s straightforward—attach it to a can, turn the handle, done. Yet countless home cooks find themselves wrestling with the device, their canned goods remaining stubbornly sealed while frustration mounts. The truth is, using a can opener properly isn’t just about brute force; it’s about understanding the mechanics, positioning yourself correctly, and applying the right technique. Master this skill, and you’ll open cans with the casual efficiency of someone who actually knows what they’re doing.
Whether you’re dealing with a manual hand-crank opener, a butterfly model, or an electric version, the fundamental principles remain the same. The good news? Once you understand how these tools work and what they’re actually designed to do, opening a can becomes second nature. No more mangled fingers, dented lids, or mysterious metal shards floating in your soup. This guide walks you through every type of can opener and the techniques that actually work, so you can finally stop treating this mundane kitchen task like a puzzle.
Understanding Your Can Opener
Before you even think about opening a can, it helps to know what you’re working with. A can opener is essentially a tool designed to cut through the sealed lid of a metal can without creating dangerous sharp edges or leaving behind fragments. The cutting mechanism typically works by puncturing the lid’s seal and then rotating around the circumference to separate the top completely.
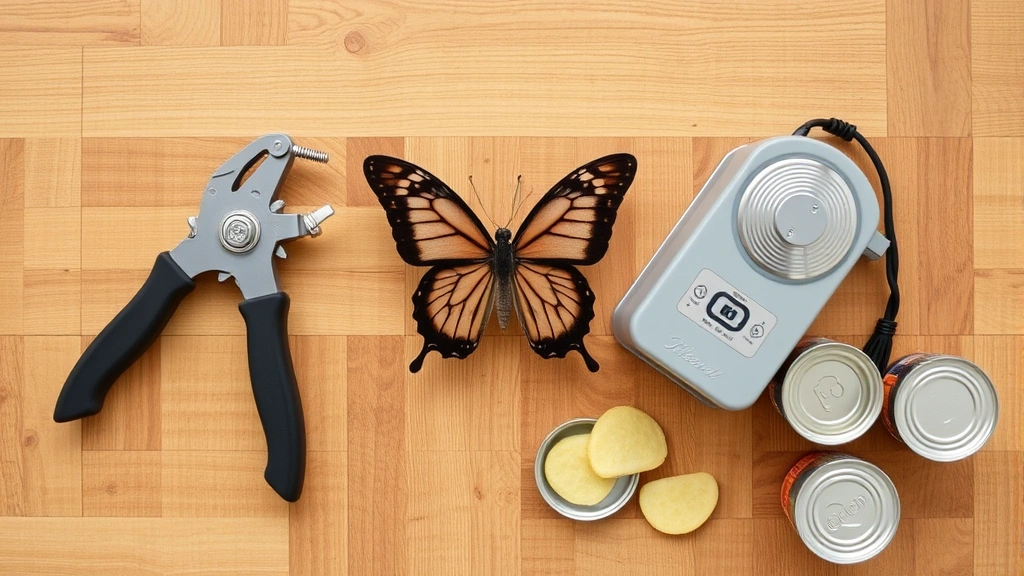
Most can openers fall into one of three categories: manual hand-crank models, butterfly or winged designs, and electric versions. Each operates on slightly different principles, though they all accomplish the same goal. Understanding which type you’re using and how its specific mechanism functions is the first step toward opening cans like someone who actually reads instructions.
The key insight many people miss is that can openers aren’t designed to force their way through the lid. Instead, they’re engineered to work with minimal effort when used correctly. If you find yourself struggling or straining, you’re likely doing something wrong rather than using a faulty opener.
Manual Hand-Crank Can Openers
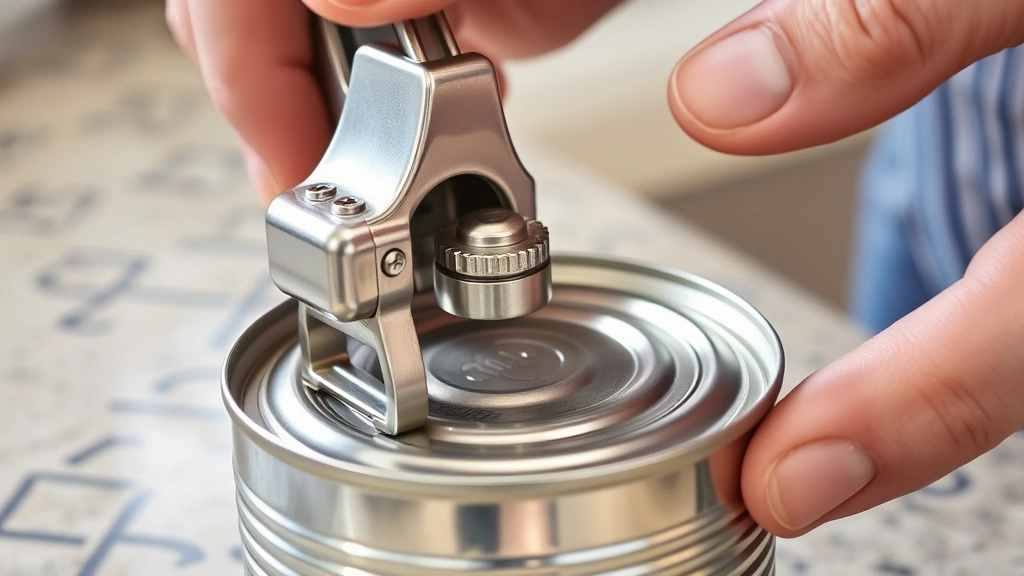
The manual hand-crank can opener is the workhorse of the kitchen—reliable, affordable, and requiring nothing but your own effort. These devices feature a cutting wheel that pierces the can lid while a gear mechanism rotates the opener around the can’s circumference.
Step-by-Step Instructions:
- Position the opener: Place the can on a stable, flat surface. Hold the can steady with one hand. With your other hand, position the can opener so the cutting wheel is perpendicular to the can’s lid, near the outer edge.
- Engage the cutting wheel: Press down firmly but not aggressively. You should feel the cutting wheel bite into the lid’s edge. This initial engagement is crucial—it creates the starting point for your cut.
- Turn the handle: Once engaged, begin turning the handle in a smooth, consistent motion. Don’t jerk or rush; steady rotation is what makes this work. The cutting wheel will follow the lid’s rim as you turn.
- Complete the rotation: Continue turning until you’ve gone almost all the way around the can. You’ll feel less resistance as you approach the end—this is normal and expected.
- Lift the lid: Once you’ve nearly completed the circle, stop turning. Carefully lift the can opener away from the can, then use a spoon or your fingers to lift the separated lid. Be cautious of sharp edges.
- Remove the lid safely: Some can openers have a magnetic feature that holds the lid, making this step easier. If yours doesn’t, use care to avoid cutting yourself on the freshly exposed metal edges.
The entire process should take about 15-20 seconds once you’ve got the hang of it. If it’s taking longer or requiring excessive force, you’re likely not engaging the cutting wheel properly at the start.
Butterfly and Winged Can Openers
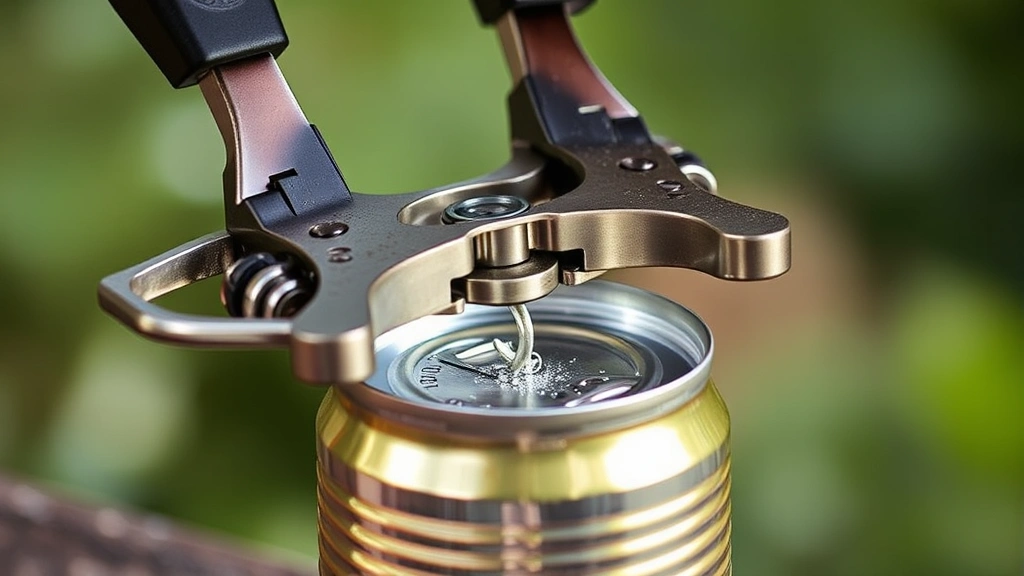
Butterfly or winged can openers work differently from hand-crank models. These compact devices feature two handles that you squeeze together, and they’re particularly useful for camping, travel, or tight kitchen spaces. The mechanism is simpler but requires a different technique.
Step-by-Step Instructions:
- Position the can: Place your can on a flat surface and stabilize it with your non-dominant hand. Keep your fingers away from where the cutting wheel will travel.
- Attach the opener: Position the butterfly opener so the cutting wheel engages the lid’s edge. The pivot point should be on the can’s rim, with the cutting wheel perpendicular to the lid surface.
- Squeeze the handles: Apply steady pressure by squeezing the two handles together. This motion drives the cutting wheel into the lid while simultaneously beginning the cutting action.
- Work around the can: Release the pressure slightly, then reposition the opener about an inch along the lid’s edge. Squeeze again. Repeat this process, moving incrementally around the can’s circumference.
- Complete the circle: Continue this squeeze-and-reposition motion until you’ve worked your way almost entirely around the can. The lid should become noticeably looser as you progress.
- Remove the lid: Once you’ve completed the circuit, gently lift the opener away and carefully remove the separated lid.
Butterfly openers require more individual motions than hand-crank models, but many people find them easier to control and less tiring for extended use. They’re also gentler on arthritic hands since they don’t require continuous twisting motion.
Electric Can Openers
Electric can openers take the physical effort out of the equation entirely. These motorized devices do the work for you, making them ideal for anyone with limited hand strength or dexterity issues.
Step-by-Step Instructions:
- Prepare your workspace: Place the electric opener on a clean, stable counter surface near an outlet. Ensure it’s plugged in and ready to use.
- Position the can: Most electric openers have a magnetic cup or platform. Place your can upright on this platform, ensuring it’s centered and stable.
- Engage the cutting mechanism: Lower the cutting wheel onto the can lid. Some models require you to press a button or lever; others activate automatically when the lid makes contact.
- Let it run: The motor will drive the cutting wheel around the can’s circumference automatically. This typically takes 10-15 seconds. Don’t force or guide the process—let the machine do its job.
- Lift and remove the lid: Once the cutting is complete, the motor will stop (or you’ll need to release the activation button). Carefully lift the opener and remove the lid.
Electric openers are remarkably convenient, though they do require counter space and access to electricity. They’re worth the investment if you open cans frequently or have mobility concerns.
Pro Tips for Success
Beyond the basic mechanics, several techniques and insights can make your can-opening experience smoother and safer.
Clean Your Opener Regularly: Metal shavings and food residue accumulate on can openers over time. Wipe yours down after each use and wash it weekly. A buildup of debris can actually prevent proper engagement with the can lid.
Apply Consistent Pressure: Whether you’re using a hand-crank or butterfly model, consistency matters more than force. Smooth, steady motions beat aggressive jabbing every time. This also reduces the risk of the opener slipping and causing injury.
Start at the Right Angle: Position your opener so the cutting wheel is truly perpendicular to the lid. An angled approach wastes energy and increases the likelihood of slipping.
Use Both Hands: Always stabilize the can with one hand while operating the opener with the other. This prevents the can from spinning, which makes the job infinitely easier and safer.
Choose Quality Equipment: Cheaper openers with dull cutting wheels or worn gears make the job unnecessarily difficult. A decent manual opener costs just a few dollars and will last years. If you’re looking to sharpen your kitchen tools, remember that many can openers benefit from occasional maintenance as well.
If you’re someone who enjoys mastering various kitchen skills, you might also appreciate learning proper technique for other tools. Understanding how to use a French press involves similar principles of patience and proper positioning that apply to can opening.
Common Mistakes to Avoid
Most can-opening failures trace back to a handful of predictable mistakes. Knowing what not to do can save you time, frustration, and potential injury.
Engaging the Wheel at the Wrong Angle: This is the most common error. If your cutting wheel isn’t perpendicular to the lid, it won’t bite properly, and you’ll waste energy fighting the opener. Take the extra second to position it correctly.
Pressing Down Too Hard: Excessive downward pressure doesn’t speed up the process; it actually makes things worse. The cutting wheel should engage with gentle but firm pressure. Let the tool do the work.
Not Fully Rotating Around the Can: Some people stop rotating before they’ve completed the full circle, leaving a section of the lid still attached. This creates a partially-open lid that’s awkward to remove and prone to causing cuts. Go all the way around.
Ignoring Dull Cutting Wheels: If your opener suddenly feels harder to use, the cutting wheel might be dull. Rather than fighting it, replace the opener or, if you’re handy, see if the wheel can be sharpened. Continuing with a dull opener is frustrating and unsafe.
Removing the Lid Carelessly: Once you’ve opened the can, the lid is sharp. Treat it with respect. Use a spoon to lift it rather than your fingers, or use a tool designed to remove the lid safely.
Maintenance and Care
A well-maintained can opener will serve you reliably for years. Neglect it, and even a quality opener will eventually frustrate you.
Daily Cleaning: After each use, wipe your opener with a damp cloth to remove food particles and metal shavings. This prevents buildup that can interfere with the cutting mechanism.
Weekly Deep Clean: Once a week, wash your opener with warm soapy water and a brush. Pay special attention to the cutting wheel and gear mechanisms where debris likes to hide. Dry thoroughly before storing.
Occasional Lubrication: For hand-crank and butterfly openers, a tiny drop of food-safe mineral oil on the pivot points and gear mechanisms keeps things moving smoothly. Don’t use cooking oil, which can gum up over time.
Storage: Store your opener in a dry location. Moisture can cause rust, particularly on older models. A kitchen drawer works fine, though keeping it in a utensil caddy prevents it from getting lost or damaged.
Replacement Consideration: Most manual can openers cost $5-15 and last several years. If yours is struggling despite proper technique and maintenance, replacing it is usually more practical than attempting repairs.
For those interested in maintaining other kitchen equipment, similar care principles apply. If you’re also working on maintaining various household items, you might find that knowing alternative methods to open bottles is a useful backup skill when your regular tools need maintenance.
Frequently Asked Questions
Why does my can opener keep slipping off the can?
Slipping usually indicates improper positioning or insufficient initial pressure. Ensure your cutting wheel is perpendicular to the lid and press firmly enough for the wheel to bite into the metal. You should feel definite resistance once properly engaged. Also check that the can itself is stable—a rocking can is much harder to open.
Can I sharpen my can opener’s cutting wheel?
Some high-end openers have replaceable or sharpenable cutting wheels, but most don’t. For most manual openers, replacing the entire tool is more practical than attempting to sharpen the wheel. If you’re interested in sharpening other kitchen tools, the principles are different for can openers.
Is it normal for the lid to have sharp edges?
Yes, unfortunately. Most can openers cut the lid from the side rather than removing the top completely, leaving sharp edges on both the lid and the can’s rim. Always handle the removed lid carefully, and consider using a lid lifter or spoon to remove it rather than your fingers.
What’s the difference between manual and electric openers?
Manual openers require physical effort but are affordable, durable, and require no electricity. Electric openers do the work for you but need counter space and power. Choose based on your hand strength, frequency of use, and kitchen layout.
Why does my butterfly opener seem harder to use than my hand-crank?
Butterfly openers work differently and require repositioning around the can rather than continuous rotation. Some people find them easier; others prefer hand-crank models. It often comes down to personal preference and hand strength. Try different styles to see which feels most natural.
Can I use a can opener on cans that have a pull-tab?
Technically yes, but why would you? Pull-tab cans are designed to open without a tool. Using a can opener on them wastes effort. Save your opener for traditional sealed cans.
How do I prevent metal shavings from getting into my food?
Use a quality can opener that cuts cleanly. Cheap openers with dull wheels produce more shavings. After opening, wipe the lid’s underside with a clean cloth or paper towel before removing it from the can. Never rinse the can immediately after opening—wait a moment for any loose shavings to settle.
Are there alternatives to using a can opener?
Several alternatives exist, though none are quite as safe or effective. Concrete, rocks, or knives can technically open cans but risk injury and contamination. If you’re in a survival situation, yes, improvise. In your kitchen, a proper can opener is the right tool for the job. For other kitchen opening challenges, you might explore creative ways to open bottles without a bottle opener, but cans really do require an opener.
Related Posts

How Long to Boil Lobster Tails: Cooking Guide

How Long to Fly from New York to London? Travel Times
