

Master the Curveball: Pro Tips and Techniques
Master the Curveball: Pro Tips and Techniques
The curveball stands as one of baseball’s most devastating and mesmerizing pitches. When executed properly, this breaking ball can leave hitters bewildered, swinging at pitches that seem to defy physics as they drop sharply out of the strike zone. Whether you’re a beginner pitcher looking to expand your arsenal or an experienced thrower seeking to refine your technique, mastering the curveball requires dedication, proper mechanics, and consistent practice.
Learning how to throw a curveball is more than just learning a trick—it’s about understanding the fundamental principles of grip, arm slot, and finger action that create the spin needed for an effective breaking ball. Many young pitchers attempt curveballs too early in their development, risking injury and developing bad habits. This comprehensive guide walks you through everything you need to know to throw a curveball safely and effectively, from basic grip fundamentals to advanced spin techniques used by professional pitchers.
Understanding Curveball Basics
A curveball is a breaking pitch that moves significantly downward and sideways as it approaches the batter. Unlike a fastball, which relies on speed, a curveball depends on spin—specifically, backspin combined with side spin—to create the illusion of movement. The ball doesn’t actually curve through the air; rather, it follows a straight path while the spin causes it to deviate from the trajectory the batter expects based on release point.
The physics behind the curveball involves the Magnus effect, where the spin on the ball creates pressure differences that cause it to move. A properly thrown curveball can drop 12 to 24 inches from a fastball trajectory, making it one of the most dramatic pitches in baseball. This dramatic movement is what makes curveballs so effective at striking out hitters and getting ground balls.
Before attempting to throw a curveball, you should already be comfortable throwing a consistent fastball with proper mechanics. If you’re new to pitching, check out foundational pitching resources or work with a coach to establish proper baseball training techniques before progressing to breaking balls.

The Proper Grip
The grip is absolutely fundamental to throwing an effective curveball. The most common and recommended grip for beginners is the two-seam curveball grip, which provides better control and less strain on the arm than some alternative grips.
Two-Seam Curveball Grip:
- Place your index and middle fingers on the seams of the baseball, with both fingers positioned on one of the two seams that run perpendicular to the long seams
- Your index finger should be slightly on top of the middle finger
- Position your thumb directly underneath the ball, roughly centered between your index and middle fingers
- Keep your ring finger and pinky finger along the side of the ball for stability
- Your grip should be firm but not overly tight—tension in your hand will interfere with proper spin
Alternative Grip Considerations:
Some pitchers prefer the four-seam curveball grip, which involves placing all four fingers across the seams. However, this grip is generally recommended only for more advanced pitchers with established mechanics, as it can place additional stress on younger arms. The fundamentals of proper technique apply regardless of grip choice—consistency and control matter more than which specific variation you choose.
Spend significant time simply holding the ball with your curveball grip during practice sessions. Get comfortable with how the ball sits in your hand and develop muscle memory for consistently achieving the same grip every time you prepare to throw.
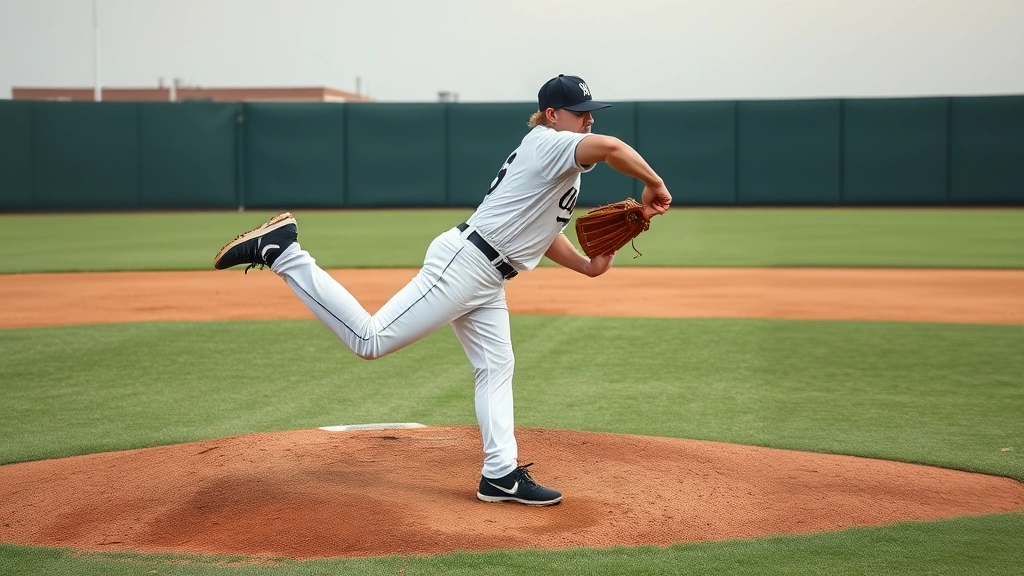
Arm Slot and Release
Your arm slot—the angle and position of your arm as you release the ball—dramatically affects how your curveball moves. Most effective curveballs are thrown with a slightly higher arm slot than fastballs, typically between 12 and 1 o’clock (imagining a clock face on your body).
Proper Arm Slot Positioning:
- Begin your pitching motion with the same mechanics as your fastball, maintaining consistency through the initial stages
- As you reach the top of your arm circle, position your elbow slightly higher than your shoulder
- Keep your wrist in a neutral position initially, then begin pronating (rotating inward) as you approach release
- Your fingers should come off the ball in a downward motion, with your index and middle fingers creating the spin
- Complete your follow-through with your arm continuing across your body in a natural motion
The key to an effective curveball is finger action during release. Unlike a fastball where you push through the ball, a curveball requires you to pull down and across the ball with your fingers. This pulling action, combined with the pronation of your wrist, creates the topspin and sidespin necessary for movement.
Release Point Consistency:
Batters are incredibly perceptive—they’ll quickly recognize if your curveball release point differs significantly from your fastball release point. Work extensively on maintaining the same release point for both pitches, which keeps hitters guessing. Your arm path should be identical; only the grip and finger action change.
Spin Rate and Movement
Modern baseball has become increasingly obsessed with spin rate, measured in revolutions per minute (RPM). However, for developing pitchers, focus on spin axis and movement shape before worrying about raw RPM numbers.
Understanding Spin Characteristics:
- Spin Axis: The direction of spin on the ball, which determines movement direction. For a curveball, you want the axis tilted to create downward and sideways movement
- Movement Profile: How much the ball drops and breaks compared to a fastball. Effective curveballs typically have 12-24 inches of drop
- Consistency: Throwing the same pitch repeatedly with similar spin characteristics helps develop effectiveness
You can monitor your spin rate and movement using apps and devices like Rapsodo or other affordable tracking tools, though these are optional for developing pitchers. The most important factor is consistent, quality repetition in practice.
Different arm angles and grip variations will naturally produce different movement profiles. Some curveballs have more drop, while others have more horizontal break. Experiment with slight grip adjustments and arm slot changes to find what works best for your arm and body mechanics.
Common Mistakes to Avoid
Many developing pitchers make predictable errors when learning how to throw a curveball. Understanding and avoiding these mistakes will accelerate your progress and reduce injury risk.
Mistake #1: Gripping Too Tightly
Excessive grip pressure restricts wrist mobility and prevents proper pronation. This results in poor spin axis and less effective movement. Your grip should be firm enough to control the ball but relaxed enough that someone could easily pull the ball from your hand.
Mistake #2: Rushing the Learning Process
Throwing curveballs before mastering fastball mechanics is a recipe for arm problems. Establish a solid foundation with proper fastball mechanics, develop adequate arm strength, and only then progress to breaking balls. Most experts recommend waiting until age 13 or 14 before introducing curveballs.
Mistake #3: Sacrificing Fastball Velocity
Your curveball should be a secondary pitch, not your primary offering. Young pitchers sometimes develop curveballs that are thrown harder than necessary, which reduces movement and increases injury risk. A curveball should typically be 10-15 mph slower than your fastball.
Mistake #4: Inconsistent Release Points
Batters will quickly identify your curveball if it comes from a different arm angle than your fastball. Practice extensively to maintain release point consistency between your fastball and curveball.
Mistake #5: Overuse and Overtraining
Curveballs place more stress on the arm than fastballs. Limit your curveball throws during practice sessions and games. Young pitchers should throw curveballs no more than 25% of their total pitches in games and fewer in practice.
Training Drills and Progression
Developing an effective curveball requires structured practice with specific drills. Progress through these stages gradually, spending adequate time at each level before advancing.
Stage 1: Grip and Feel Development (Weeks 1-2)
- Spend 10-15 minutes daily simply holding and adjusting your grip
- Practice the pronation motion without throwing, developing wrist mobility
- Throw curveballs from a shorter distance (30-40 feet) focusing on grip and release feel rather than velocity or movement
- Don’t worry about where the ball goes—focus on the mechanics of your hand and wrist
Stage 2: Short-Distance Work (Weeks 3-4)
- Increase distance to 45-50 feet while maintaining focus on mechanics
- Throw 10-15 curveballs per practice session, followed by fastball work
- Have a catcher or partner provide feedback on ball movement
- Video your mechanics from the side to identify any flaws in your arm slot or release
Stage 3: Full-Distance Development (Weeks 5-8)
- Progress to full pitching distance (60 feet 6 inches for youth, 54 feet for younger players)
- Gradually increase the number of curveballs thrown per session, but never exceed 25-30 throws
- Mix curveballs with fastballs in practice, simulating game situations
- Work on command—hitting specific locations rather than just throwing strikes
Stage 4: Game Application (Week 9+)
- Begin using curveballs in games, initially in non-critical situations
- Limit curveball usage to 20-25% of pitches thrown in games
- Continue regular practice and maintenance work to keep mechanics sharp
This progression mirrors how you might systematically test and refine technical skills, building confidence at each stage before advancing.
Safety Considerations
Throwing curveballs carries inherent risks, particularly for young pitchers whose arms are still developing. Taking proper safety precautions is essential.
Age Recommendations:
Major League Baseball and the American Academy of Pediatrics recommend that pitchers under 13 years old should not throw curveballs. Pitchers aged 13-14 can begin learning curveballs if they have proper mechanics and adequate arm strength. This guideline exists because young arms lack the skeletal maturity to handle the stress of breaking ball pitching.
Arm Care and Conditioning:
- Complete a thorough warm-up before throwing any breaking balls, including 5-10 minutes of light running and dynamic stretching
- Perform shoulder-specific exercises 3-4 times weekly to build rotator cuff strength
- Include flexibility work, focusing on shoulder and hip mobility
- Use proper cool-down and recovery protocols after practice and games
Pitch Limits and Rest:
Follow appropriate pitch count limits based on age and rest requirements. Young pitchers need adequate rest between pitching appearances—generally 2-3 days for pitchers aged 13-14. This rest period allows arm recovery and prevents overuse injuries.
Recognizing Pain:
Distinguish between normal fatigue and actual pain. Fatigue is expected during training, but sharp pain, especially on the inside of the elbow, is a warning sign to stop immediately and seek professional evaluation. Never pitch through pain.
Learning proper mechanics is similar to any technical skill—whether you’re learning to wire an outlet or mastering a new pitch, doing it correctly from the start prevents problems later.
FAQ
At what age should I start throwing a curveball?
Most experts recommend waiting until age 13-14 before introducing curveballs. Younger pitchers should focus on developing fastball mechanics and arm strength. Always consult with your coach or a sports medicine professional before starting breaking ball training.
How much slower should a curveball be than a fastball?
A curveball should typically be 10-15 mph slower than your fastball. For example, if your fastball is 75 mph, your curveball should be around 60-65 mph. This speed reduction allows for better spin and movement while reducing arm stress.
How many curveballs should I throw in a game?
Young pitchers should limit curveball usage to approximately 20-25% of total pitches thrown in games. If you throw 100 pitches in a game, about 20-25 should be curveballs. This prevents overuse and reduces injury risk.
Can a curveball cause arm injury?
Curveballs do place more stress on the arm than fastballs, which is why proper mechanics, adequate arm strength, and age-appropriate training are essential. When learned correctly and used appropriately, curveballs are safe. Poor mechanics, excessive usage, or throwing too young increases injury risk significantly.
How long does it take to develop a good curveball?
Most pitchers need 8-12 weeks of consistent, focused practice to develop a reasonably effective curveball. However, continued refinement happens over months and years. The timeline varies based on your current mechanics, arm strength, and practice intensity.
Should my curveball grip be the same every time?
Yes, absolutely. Consistency in grip leads to consistency in spin and movement. Practice your grip extensively so you can achieve the exact same positioning every time you prepare to throw. This consistency helps batters less able to identify your curveball.
What if my curveball isn’t moving much?
Poor movement usually indicates grip inconsistency, improper wrist pronation, or arm slot issues. Video your mechanics and compare them to instructional resources. Consider working with a pitching coach who can identify specific mechanical flaws. Don’t increase velocity trying to compensate—focus on mechanics instead.
Is it better to learn a slider or curveball first?
Most pitchers learn curveballs before sliders. Curveballs have more dramatic movement and are generally easier to learn initially, though sliders become more effective at higher levels. Master your curveball before progressing to other breaking balls.
Related Posts

Superscript in Google Docs: Expert Tips

Strikethrough in Excel: Easy Steps for Beginners
