
How to Stain Wood: Expert Guide
How to Stain Wood: Expert Guide to Professional Results
Wood staining is one of those DIY projects that seems deceptively simple until you’re standing in front of a bare piece of timber wondering if you’re about to make a terrible mistake. The truth? It’s not complicated, but it does demand respect for the process. Whether you’re refinishing a cherished heirloom dresser or breathing new life into plain pine shelving, knowing how to stain wood properly transforms raw materials into something genuinely beautiful.
The difference between a rushed staining job and a professional-looking finish often comes down to preparation, patience, and understanding a few fundamental principles. We’re not talking about rocket science here—we’re talking about treating your wood with the same care you’d give to any craft worth doing well. Over the next few sections, we’ll walk through everything you need to know, from selecting the right stain to applying that final coat with confidence.
Choosing the Right Wood Stain
Before you even think about opening a can of stain, you need to understand what you’re actually choosing. Wood stains come in several varieties, each with distinct characteristics that affect how your project will look and perform.
Oil-Based Stains remain the gold standard for many woodworkers. They penetrate deeply into the wood grain, offering rich color saturation and bringing out the natural beauty of the wood’s character. The downside? They take longer to dry—typically 8 to 24 hours between coats—and they emit stronger fumes. If you choose an oil-based option, ensure your workspace has proper ventilation.
Water-Based Stains have made impressive strides in recent years. They dry faster (usually 1 to 4 hours), emit fewer odors, and clean up easily with water. They’re also more environmentally friendly. The trade-off is that they can raise the wood grain slightly, requiring light sanding between coats, and some woodworkers argue they don’t penetrate quite as dramatically as oil-based alternatives.
Gel Stains offer a middle ground. These thick, paste-like stains are excellent for vertical surfaces since they won’t drip, and they provide more consistent color across different wood types. They’re particularly forgiving for beginners because they’re harder to mess up—the thick consistency means fewer streaks and more uniform coverage.
Color selection deserves its own consideration. Test your stain choice on a scrap piece of the same wood type you’re working with. The same stain can look dramatically different on pine versus oak versus maple. Buy sample-size containers if available, or purchase a small can and test it first. Lighting matters too—view your test sample in the same light where your finished piece will live.
Preparing Your Wood Surface
This is where most amateur staining projects go wrong. People rush the prep work, convinced they’re being efficient when they’re actually setting themselves up for disappointment. Quality preparation isn’t optional—it’s the foundation of a professional finish.
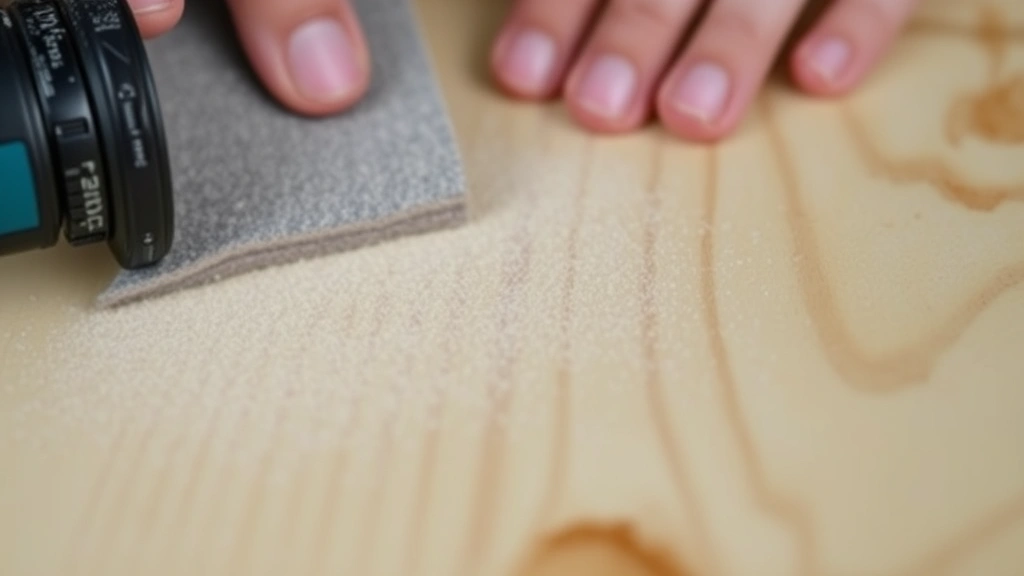
Sanding is Non-Negotiable. You need to sand your wood smooth before applying any stain. Start with 80 or 120-grit sandpaper if the surface is rough or has imperfections. Progress to 150 or 180-grit for your final sanding pass. The smoother your surface, the more evenly the stain will absorb. Sand in the direction of the wood grain, not against it. This prevents scratches that will become visible once the stain is applied.
After sanding, your wood will have created fine dust that needs complete removal. Use a tack cloth—those sticky cloths designed specifically for this purpose—to wipe down every surface. Don’t skip this step. Dust particles trapped under stain create a gritty, unfinished appearance that no amount of top coat can hide.
Addressing Existing Finishes. If you’re working with previously finished wood, you’ll need to remove the old finish first. For painted pieces, chemical stripper or sanding might be necessary. For varnished or lacquered wood, aggressive sanding with 60 to 80-grit paper followed by finer grits will work. Some people use a systematic approach to restoration that involves methodical surface preparation similar to other restoration projects.
Wood Conditioning. Softwoods like pine, fir, and birch absorb stain unevenly, resulting in blotchy coloring. A wood conditioner applied before staining seals the surface partially, promoting more uniform absorption. Let the conditioner dry according to manufacturer instructions—typically 15 to 30 minutes—before applying your stain.

Essential Tools and Materials
You don’t need an elaborate arsenal of equipment, but using the right tools makes the process genuinely easier and produces better results.
Application Tools. Brushes, foam applicators, and lint-free cloths all have their place. Natural bristle brushes work best with oil-based stains, while synthetic bristles suit water-based products. For gel stains and small projects, foam applicators provide excellent control. Many professionals use lint-free cotton cloths for wiping stains, which gives you more tactile control over how much stain you’re applying and where it goes.
Protective Equipment. Gloves protect your hands from stain—especially important since some wood stains are stubborn about washing off. Safety glasses keep splinters and sanding dust out of your eyes. A dust mask or respirator is essential when sanding and when working with oil-based stains, particularly in poorly ventilated spaces. Don’t underestimate fume exposure; it’s not just unpleasant, it’s genuinely harmful.
Workspace Preparation. Cover your work surface with drop cloths or plastic sheeting. Stain is notoriously difficult to remove from floors and surfaces it wasn’t meant for. Ensure adequate lighting so you can see exactly what you’re doing. Many professionals use work lights or clamp lamps to illuminate their project clearly.
Additional Materials. You’ll want mineral spirits for oil-based stains (or water for water-based), sandpaper in various grits, tack cloths, wood conditioner if needed, and a container for mixing or diluting stain if necessary. Keep rags and paper towels within arm’s reach. Stain application is a process where you’ll frequently need to wipe something, adjust something, or clean something.
Step-by-Step Application Process
Now we get to the actual staining. This is where your preparation work pays dividends because you’re working with a properly prepared surface.
Step One: Stir Your Stain Thoroughly. Don’t just give it a casual swirl. Pigments settle to the bottom of stain containers, and uneven mixing means inconsistent color. Stir for a full minute or two, making sure you’re reaching the bottom of the container. If your stain has been sitting for a while, stir even more thoroughly.
Step Two: Test Your Application Method. Before committing to your actual project, test your chosen application method on a scrap piece of the same wood. This tells you how the stain behaves with your chosen tool, how quickly it dries, and whether the color matches your expectations. This small investment of time prevents expensive mistakes.
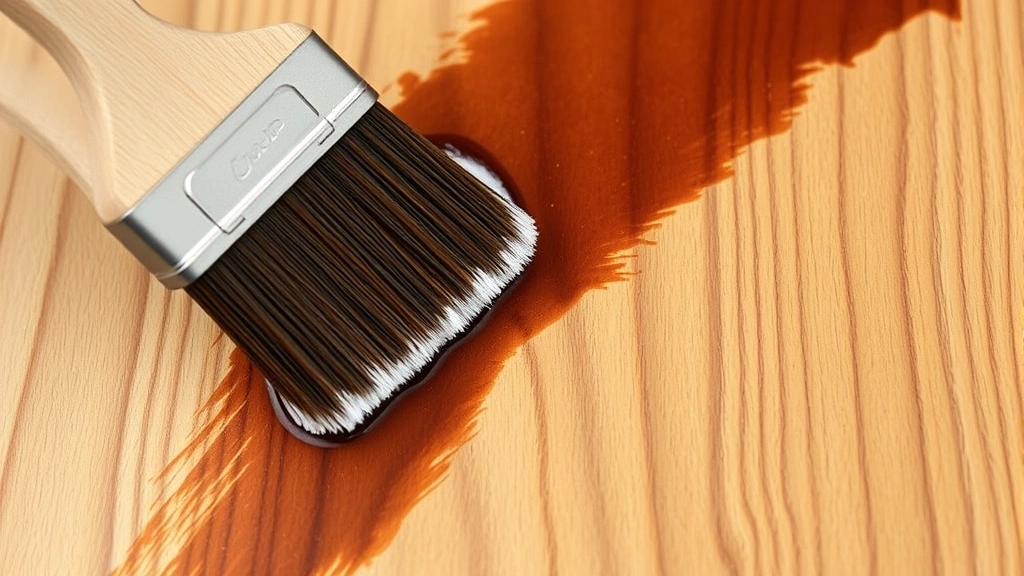
Step Three: Apply Stain in the Direction of the Grain. This is crucial. Whether you’re using a brush, foam applicator, or cloth, always work parallel to the wood grain. Applying stain perpendicular to the grain creates visible lines and an amateurish appearance. For large surfaces, work in manageable sections—maybe a foot or two at a time—so you can maintain a wet edge and blend sections smoothly.
Step Four: Control Your Coverage. You’re aiming for an even, saturation-level application, not a thick coating. With a brush or applicator, apply stain generously enough that the wood is fully wetted, then use a clean, dry cloth to wipe off excess. This wiping step is where you control the final color intensity. Heavier wiping means lighter color; lighter wiping means deeper color. Consistency in your wiping technique produces consistent results across your entire project.
Step Five: Mind Your Edges and Corners. These areas tend to absorb stain more heavily because they often have more exposed end grain. Apply slightly less stain to edges, or wipe them more thoroughly to prevent dark spots or blotchiness.
Step Six: Maintain a Wet Edge. If you’re working on a large surface, avoid stopping in the middle of a section. Stain dries, and if you restart in a dried area, you’ll create visible lines where the new stain overlaps. Plan your work so you’re always working on a section that’s still slightly wet from your previous passes.
Multiple Coats. Most projects benefit from two coats of stain. The first coat establishes the base color; the second deepens and enriches it. Allow proper drying time between coats—check your stain’s specific instructions, as this varies significantly between products. Sand lightly between coats with 220-grit sandpaper to ensure good adhesion for the second coat.
Finishing and Protection
Stain alone doesn’t protect wood; it only colors it. A protective topcoat is essential for durability and longevity, similar to how you’d approach protecting finished surfaces in other restoration work.
Polyurethane Topcoats. Oil-based polyurethane provides excellent protection and enhances the richness of your stain color. Water-based polyurethane dries clear without the amber tint that oil-based versions add. Both require 24 to 48 hours of drying time between coats. Sand lightly between coats with 220-grit paper.
Lacquer and Varnish. These traditional finishes offer beautiful results for those willing to invest the time. They do require more skill to apply without drips or runs, making them less beginner-friendly than polyurethane. For detailed guidance on application techniques, This Old House offers comprehensive finishing resources.
Wipe-On Finishes. These thin, penetrating finishes are applied with a cloth and don’t build up thick protective layers like polyurethane. They’re excellent for fine furniture where you want to maintain a natural appearance, but they don’t provide quite as much protection against water rings or scratches.
Application Tips for Topcoats. Use the same grain-following technique you used for stain. Apply thin coats rather than one thick coat—thin coats dry more evenly and produce better results. Most professionals apply three to four thin coats of polyurethane for furniture that will see regular use.
Common Mistakes to Avoid
Learning from others’ mistakes accelerates your own progress. Here are the most common staining errors and how to prevent them.
Blotchy Stain Application. This usually results from inadequate wood conditioning on softwoods, or from inconsistent application technique. Solution: Use wood conditioner on softwoods, and maintain a consistent wiping technique across your entire project.
Visible Brush Strokes. Stain shouldn’t show obvious brush marks. If it does, you’re either applying too thick or not wiping adequately. Solution: Apply thinner coats and wipe more thoroughly. Consider using a foam applicator or cloth instead of a brush.
Dark Spots or Blotches. These often indicate end grain absorbing more stain. Solution: Sand end grain more thoroughly during prep, and apply slightly less stain to these areas during application.
Stain Not Drying Evenly. Humidity and temperature affect drying time. Cold, humid conditions dramatically slow drying. Solution: Work in a climate-controlled environment when possible, or allow extended drying time during humid seasons.
Color Not Matching Your Expectations. You tested the stain, but the final result looks different. This usually means either inconsistent application, inadequate wiping, or the wood type being different than expected. Solution: Always test on scrap pieces, and maintain consistent application technique throughout your project.
For professional guidance on technique refinement, Family Handyman provides detailed technique tutorials.
Frequently Asked Questions
How long does wood stain take to dry?
Drying time varies significantly by product type. Oil-based stains typically require 8 to 24 hours between coats. Water-based stains dry faster, usually 1 to 4 hours. Gel stains fall somewhere in between. Always check your specific product’s instructions, as formulations vary. Temperature and humidity also affect drying time—expect slower drying in cool, humid conditions.
Can you stain wood without sanding?
Technically, yes, but the results will be disappointing. Stain absorbs unevenly into unsanded wood, creating blotchy, inconsistent coloring. Sanding removes the surface layer where stain sits unevenly, promoting uniform absorption. If you’re working with already-smooth wood, you might get away with minimal sanding, but even a light sanding with 150 to 180-grit paper significantly improves results.
What’s the difference between stain and paint?
Stain penetrates wood and colors the fibers themselves, showing off the wood’s natural grain and character. Paint sits on top of the wood surface, covering the grain completely. Stain typically requires a topcoat for protection, while paint provides its own protection. For detailed finish comparisons, Home Depot’s finishing guides offer comprehensive overviews.
Can you stain pressure-treated wood?
Pressure-treated wood needs to weather for several months before staining, allowing treatment chemicals to settle and the wood to stabilize. Staining too soon can result in uneven absorption and poor adhesion. Once properly weathered, you can stain pressure-treated wood using the same techniques as untreated wood. Some people recommend using a specialized primer designed for pressure-treated lumber first.
How do you remove stain mistakes?
If you catch a mistake while the stain is still wet, wipe it off immediately with a clean cloth. For dried stains you want to remove, sanding is your primary option. You can sand out problem areas and re-stain them, though matching the surrounding area perfectly can be challenging. This is another reason testing on scrap wood beforehand is so valuable.
Should you sand between stain coats?
Yes, lightly sanding between coats with 220-grit sandpaper ensures good adhesion for the second coat and removes any raised grain or dust particles. This light sanding takes just a few minutes and significantly improves the quality of your final finish.
What wood types stain best?
Hardwoods like oak, walnut, and maple stain beautifully and take on rich, even color. Softwoods like pine and fir require wood conditioner to prevent blotchy staining, but they can still look excellent with proper preparation. Exotic woods and dense hardwoods sometimes require experimentation to find stains that absorb properly. When in doubt, test on scrap wood first.
Related Posts

How Long to Boil Lobster Tails: Cooking Guide

How Long to Fly from New York to London? Travel Times
