

Rinse Rice Properly? Expert Tips & Steps
How to Rinse Rice Properly: Expert Tips & Complete Steps
Rinsing rice is one of the most overlooked yet essential steps in rice preparation. Many home cooks skip this crucial process, unaware that it dramatically impacts the final texture, taste, and nutritional quality of their meals. Whether you’re preparing jasmine rice for a delicate stir-fry or basmati rice for a fragrant pilaf, proper rinsing removes excess starch, debris, and surface impurities that accumulate during milling and packaging.
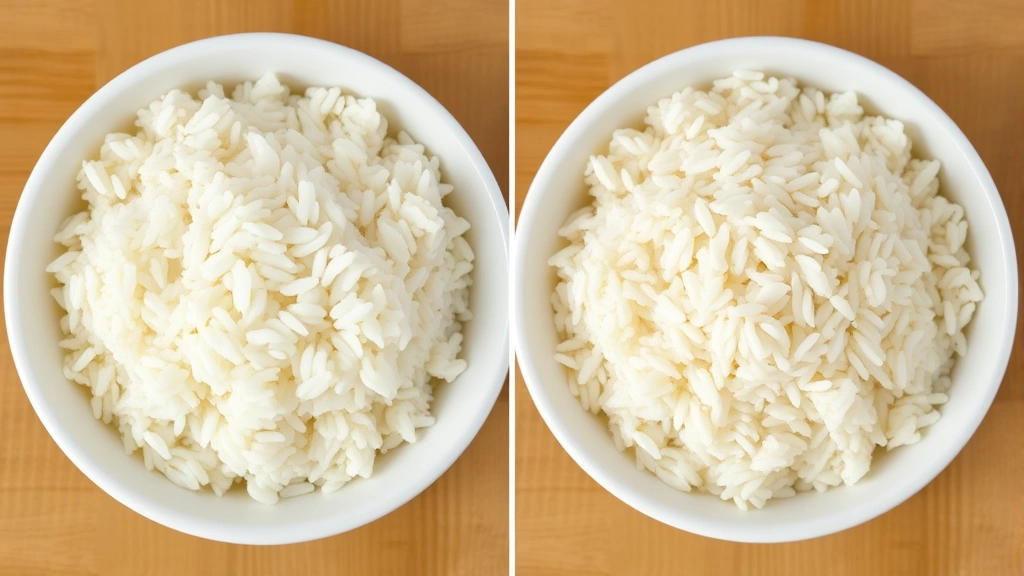
The difference between rinsed and unrinsed rice is immediately noticeable in the cooking process. Rinsed rice produces fluffier, more separated grains with a cleaner flavor profile, while unrinsed rice tends to become gummy and clumpy. This guide walks you through professional rinsing techniques used by culinary experts and home improvement enthusiasts who take their kitchen preparation seriously, much like how you’d approach detailed how-to guides for any household task.
Why Rinsing Rice Matters
Understanding the importance of rinsing rice begins with knowing what you’re actually removing from the grain surface. During the milling process, rice grains are processed and polished, leaving behind a fine layer of starch, talc, and other processing agents. Additionally, rice can contain small stones, dust particles, and debris from storage and transportation.
The primary benefits of proper rice rinsing include:
- Improved texture: Rinsing removes excess starch that causes grains to stick together, resulting in fluffy, separated rice instead of a mushy mass.
- Better flavor: The starch coating can create a chalky, unpleasant taste. Rinsing reveals the grain’s natural, cleaner flavor profile.
- Enhanced appearance: Cooked rinsed rice has a more appealing, translucent appearance compared to cloudy, starchy unrinsed rice.
- Food safety: Removing potential contaminants and debris reduces health risks associated with consuming foreign particles.
- Reduced cooking time: Some varieties cook slightly faster when properly rinsed, though this varies by rice type.
Professional chefs and food scientists consistently recommend rinsing as a non-negotiable step in rice preparation. This commitment to proper technique reflects the same attention to detail you’d apply when following step-by-step instructions for any important household process.
Understanding Different Rice Types
Not all rice varieties require identical rinsing approaches, though the fundamental method remains consistent. Different rice types have varying starch content and processing standards that influence how aggressively you should rinse.
Long-grain white rice: This common variety, including basmati and jasmine types, benefits significantly from thorough rinsing. These grains are typically milled to a high polish and contain considerable surface starch. Plan on rinsing until the water runs nearly clear.
Short-grain rice: Sushi rice and arborio rice are intentionally milled to retain more surface starch, which contributes to their sticky texture. While you should still rinse these varieties, you may stop when the water becomes only slightly cloudy rather than completely clear.
Brown rice: The bran layer on brown rice contains nutrients and fiber, so rinsing is gentler and quicker. A quick rinse under cold water suffices; extensive rinsing isn’t necessary since you’re primarily removing surface dust rather than significant starch.
Specialty varieties: Wild rice, black rice, and red rice have distinct characteristics. Wild rice needs minimal rinsing, while black and red rice may release some color during rinsing—this is normal and acceptable.
Basic Rinsing Method
The fundamental rice rinsing technique is straightforward and requires minimal equipment. Follow these steps for consistent, professional results:
Step 1: Measure your rice
Begin by measuring the desired amount of rice using a standard measuring cup. Most recipes use a 1:2 ratio of rice to water, so proper measurement is foundational. Pour the measured rice into a fine-mesh strainer or colander.
Step 2: Initial inspection
Hold the strainer over a bowl or sink and visually inspect the rice for any visible debris, stones, or discolored grains. While modern rice is generally clean, occasional foreign particles can slip through processing. Removing obvious debris prevents unpleasant surprises during eating.
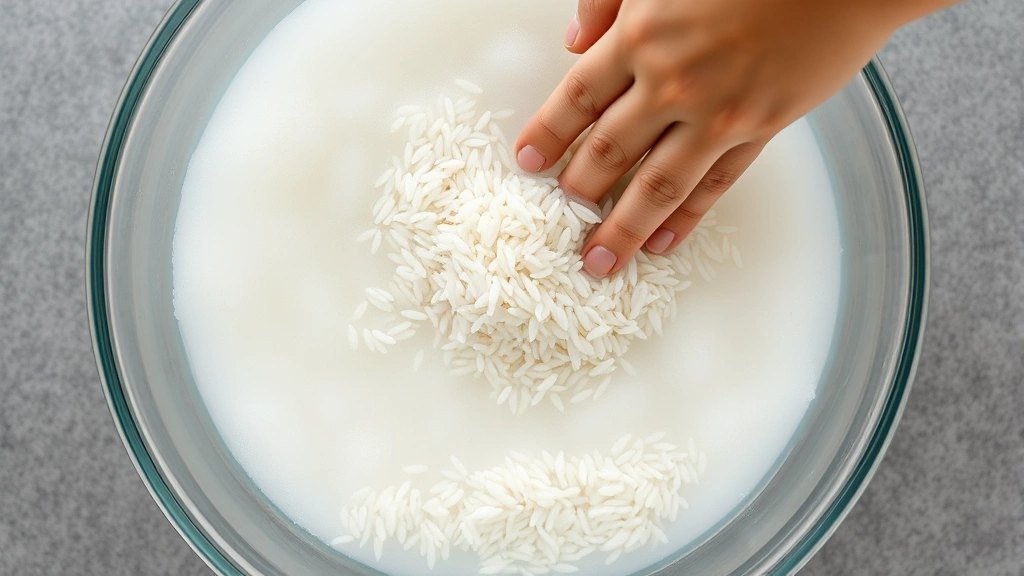
Step 3: First rinse
Place the strainer under cool running water. Using your hand, gently swirl and stir the rice while water flows through the strainer. This action dislodges surface starch and debris. Continue for 15-20 seconds, allowing water to cascade through the grains. The water will appear noticeably cloudy—this is the starch you’re removing.
Step 4: Drain completely
Lift the strainer from the water and allow it to drain for 5-10 seconds. Shake gently to remove excess water clinging to the grains. Over-wet rice can affect the water-to-rice ratio during cooking.
Step 5: Repeat the process
Return the strainer to running water and repeat the rinsing and swirling motion. This second rinse removes additional starch. The water should be slightly less cloudy than the first rinse.
Step 6: Continue until water clears
Perform 3-5 additional rinsing cycles, depending on rice variety. For long-grain white rice, continue until the water runs nearly clear. For short-grain rice, you can stop when water is only slightly cloudy. Brown rice typically requires only 1-2 rinses total.
Step 7: Final drain
After the final rinse, drain the rice thoroughly. Some cooks place the strainer over a bowl and let it sit for 1-2 minutes to ensure all excess water drains. This prevents adding extra moisture to your cooking vessel.
Advanced Rinsing Techniques
Once you’ve mastered the basic method, several advanced approaches can optimize results for specific cooking methods or rice varieties. These techniques are particularly useful when preparing rice for important meals or when working with premium rice varieties.
The bowl method
Fill a large bowl with cool water and pour in your measured rice. Using your hand, gently rub the grains together under the water, creating a circular motion. This technique works well when you don’t have a fine-mesh strainer readily available. The friction between grains helps release starch more effectively than water flow alone. After 15-20 seconds of gentle rubbing, carefully pour off the cloudy water, leaving the rice in the bottom of the bowl. Refill with fresh water and repeat 4-6 times. This method is gentler on delicate rice varieties and allows you to visually monitor starch removal progress more clearly.
The soak-and-rinse combination
Professional cooks often combine rinsing with brief soaking for optimal results. After your initial 2-3 rinses, place the drained rice in a bowl and cover with cool water. Allow it to soak for 15-30 minutes. During this time, any remaining surface starch continues to soften and release. After soaking, perform one final rinse cycle. This technique is particularly beneficial when preparing rice for biryani, pilaf, or other dishes where grain separation is crucial. The combination of mechanical rinsing and passive soaking delivers superior texture.
Temperature-controlled rinsing
Some culinary experts recommend using cool or cold water rather than room-temperature water for rinsing. Cold water is believed to help maintain the rice grain’s structure and prevent premature starch gelatinization. If your tap water is warm, fill a bowl with cold water or add ice to achieve lower temperatures. This technique is subtle but can contribute to slightly fluffier final results, especially noticeable when cooking large quantities.
Vinegar rinse for delicate varieties
For extremely delicate rice varieties or when preparing sushi rice, some chefs add a tiny splash of rice vinegar to the final rinse water. The acidity is believed to help set the grain structure and enhance flavor. Use only 1 tablespoon of vinegar per gallon of water—the goal is a subtle effect, not vinegar-flavored rice.
Essential Tools and Equipment
While rice rinsing requires minimal equipment, having the right tools makes the process efficient and effective. Just as proper procedures require appropriate tools, rice rinsing benefits from proper equipment selection.
Fine-mesh strainer: This is the most important tool for rice rinsing. Look for a strainer with holes small enough that individual grains cannot pass through, yet large enough to allow water to flow freely. Stainless steel strainers are durable and long-lasting. A 5-6 inch diameter strainer works well for typical household portions.
Colander: A colander with small perforations works adequately for rice rinsing, though the holes are often slightly larger than ideal. Colanders are useful if you’re rinsing larger quantities. Choose one with stable feet to prevent tipping during the rinsing process.
Large mixing bowl: Essential for the bowl rinsing method and for catching water during the process. Glass or stainless steel bowls are preferable to plastic, which can retain odors and stains from rice.
Rice cooker with rinse function: Modern rice cookers often include a rinse cycle feature that automates the rinsing process. If you cook rice regularly, this convenience feature can be valuable. However, manual rinsing provides more control and insight into the process.
Measuring cup: Accurate rice measurement is foundational to successful cooking. Use the same measuring cup consistently to maintain proper water-to-rice ratios in your recipes.
Common Rinsing Mistakes to Avoid
Even with straightforward instructions, several common mistakes can compromise your rinsing results. Understanding these pitfalls helps you achieve consistently excellent outcomes.
Rinsing too vigorously: Aggressive rinsing can crack or break delicate rice grains, especially basmati varieties. Use gentle, swirling motions rather than aggressive rubbing. Think of it as a cleansing massage rather than a scrubbing action.
Not rinsing enough: Stopping too early leaves excess starch in the rice. For long-grain varieties, continue rinsing until water runs nearly clear. Underbrushed rice will cook into a gummy texture regardless of other cooking variables.
Rinsing with hot water: Hot water can begin gelatinizing the starch on rice grains, counteracting your rinsing efforts. Always use cool or cold water for rinsing.
Skipping the final drain: Excess water clinging to rice grains after rinsing throws off your water-to-rice ratio during cooking. Always allow the strainer to drain completely after the final rinse.
Using the wrong strainer: Holes that are too large allow rice grains to escape down the drain, wasting rice and creating cleanup issues. Holes that are too small trap water and prevent proper drainage. A fine-mesh strainer is specifically designed for this task.
Inconsistent technique: Varying your rinsing approach between cooking sessions produces inconsistent results. Establish a routine and stick to it. This consistency allows you to perfect your technique, similar to how systematic approaches yield reliable outcomes in other areas.
Cooking Rice After Rinsing
Properly rinsed rice requires slightly adjusted cooking techniques compared to unrinsed rice. Understanding these adjustments ensures your rinsing efforts translate into excellent final results.
Water ratio adjustments: The standard 1:2 rice-to-water ratio (1 cup rice to 2 cups water) applies to rinsed rice. However, if your rice is still slightly damp after rinsing, reduce water slightly to compensate. Conversely, if your rice dries completely before cooking, you might add an extra tablespoon or two of water. This flexibility requires minor adjustments based on your specific conditions.
Resting before cooking: Some cooks allow rinsed rice to rest for 15-30 minutes before cooking. This resting period allows any remaining surface moisture to equilibrate throughout the grain, promoting more even cooking and better texture development.
Cooking method selection: Rinsed rice performs excellently with all standard cooking methods: stovetop, rice cooker, instant pot, or oven-baked. The rinsing process is universally beneficial regardless of your chosen cooking method. Follow your preferred recipe’s temperature and timing guidelines.
Fluffing technique: After cooking, allow rice to rest for 5 minutes before fluffing with a fork. This resting period allows steam to redistribute evenly. Fluff gently to separate grains without breaking them. Properly rinsed rice should separate easily without clumping.
Storage of cooked rice: Cooked rinsed rice stores well in the refrigerator for 3-4 days. Place cooled rice in an airtight container. When reheating, add a tiny splash of water to restore moisture that evaporates during storage.
FAQ
How many times should I rinse rice?
Most long-grain white rice varieties require 4-6 rinses until water runs nearly clear. Brown rice typically needs only 1-2 rinses. Short-grain varieties can stop at 3-4 rinses when water is only slightly cloudy. The specific number depends on your rice variety and desired texture. Trust the visual indicator of water clarity rather than a fixed number.
Can I skip rinsing rice?
Technically yes, but results will be noticeably inferior. Unrinsed rice produces gummy, clumpy texture with a chalky flavor. Rinsing is a quick process requiring minimal effort—the texture improvement justifies the extra 2-3 minutes of preparation time.
Is it normal for rice to lose color during rinsing?
Slight color loss is normal and expected. However, if water becomes deeply colored (particularly with black or red rice), the rice may be lower quality or improperly stored. A little color loss is acceptable; dramatic color loss may indicate problems. Trust your judgment about whether the color loss seems excessive.
Should I rinse jasmine or basmati rice differently?
These premium varieties benefit from thorough, gentle rinsing. Use the same basic technique but be extra careful with aggressive motions that might break delicate grains. Rinse until water runs nearly clear, as these varieties have significant surface starch that benefits from complete removal.
Does rinsing remove nutrients from rice?
Rinsing removes some water-soluble B vitamins and minerals, but the amount is minimal—typically less than 5% of total nutrient content. The texture improvement and reduced arsenic exposure (starch often contains accumulated arsenic) outweigh this minor nutrient loss. Enriched white rice has added nutrients that are largely retained despite rinsing.
What’s the best water temperature for rinsing?
Cool or cold water is optimal for rinsing rice. Cold water prevents premature starch gelatinization and helps maintain grain structure. Avoid hot water, which begins cooking the rice surface and counteracts rinsing benefits.
Can I rinse rice in a rice cooker?
Many modern rice cookers include automated rinse cycles. However, manual rinsing in a strainer provides more control and allows you to visually monitor starch removal. If your rice cooker has this feature, it’s convenient for regular cooking, but manual rinsing is superior for special occasions or premium rice varieties.
How long can rinsed rice sit before cooking?
Rinsed rice can sit for several hours before cooking without problems. However, within 30-60 minutes, surface moisture may begin evaporating. If rice sits longer than an hour before cooking, you might need to add slightly more water to compensate for evaporation. For best results, cook rinsed rice within 30 minutes of rinsing.
Related Posts

Superscript in Google Docs: Expert Tips

Strikethrough in Excel: Easy Steps for Beginners
