
Remove Tub Drain? Plumber’s Guide Inside
How to Remove a Tub Drain: Complete Plumber’s Guide
Removing a bathtub drain might seem like a job reserved for professional plumbers, but with the right knowledge and tools, most homeowners can tackle this project successfully. Whether you’re dealing with a stubborn clog, replacing an old drain assembly, or upgrading to a new fixture, understanding the process will save you money and give you confidence in your DIY abilities. This comprehensive guide walks you through every step of removing your tub drain safely and effectively.
A bathtub drain consists of several interconnected components working together to manage water flow and prevent backups. The visible drain opening connects to a drain body, overflow tube, and a complex system of pipes beneath your tub. Before you begin any removal work, it’s essential to understand how these parts fit together and what tools you’ll need to avoid damaging your plumbing or tub itself.
Understanding Your Tub Drain System
Your bathtub drain system is more complex than most people realize. The visible drain stopper or strainer sits at the top, but beneath it lies an intricate assembly of pipes, overflow mechanisms, and connection points. Understanding these components helps you work more efficiently and avoid costly mistakes.
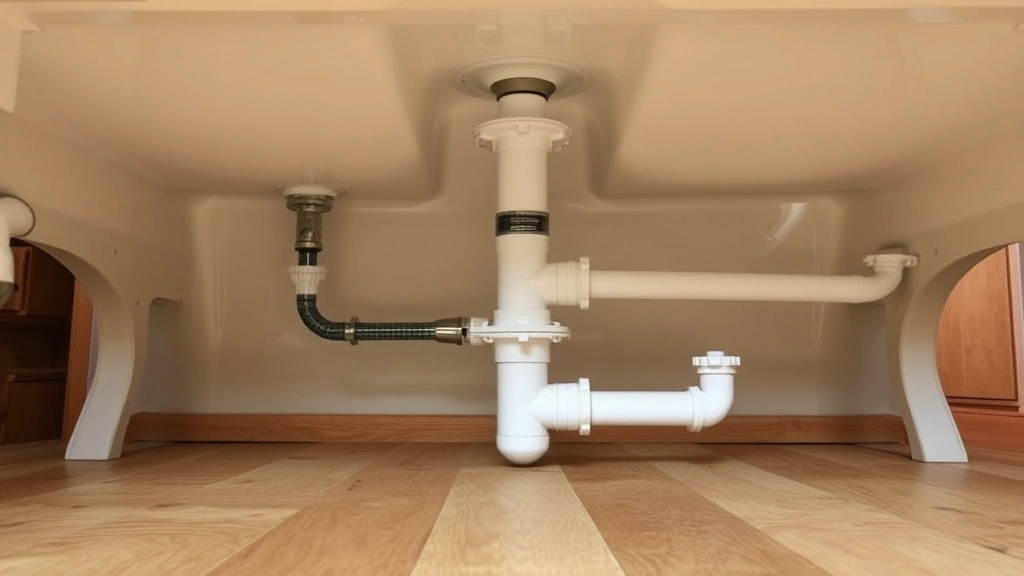
The main components include the drain opening and trim ring, which is the visible part you see in your tub. Below this sits the drain body or rough-in, which connects the tub to your home’s plumbing system. Many tubs also feature an overflow tube that prevents water from spilling over the edge—this component connects to the main drain assembly and requires careful handling during removal.
The P-trap is a U-shaped section of pipe that holds standing water to create a seal, preventing sewer gases from entering your home. This component is critical to your plumbing system’s function and must be handled carefully during drain removal. When you unclog a shower drain or remove a tub drain, understanding the P-trap’s location helps you work more strategically.
Different tub types have different drain configurations. Deck-mounted tubs have drains that exit through the floor beneath the tub, while alcove tubs (the most common type) have drains that connect to wall-mounted plumbing. Freestanding tubs often feature exposed drain assemblies that are more visible and sometimes easier to work with. Identifying your tub type before beginning work ensures you use the correct removal technique.
Tools and Materials You’ll Need
Gathering the right tools before you start prevents frustration and ensures a smoother removal process. Most of these items are inexpensive and useful for other household projects.
- Adjustable wrench or basin wrench – Essential for loosening connections beneath the tub
- Screwdrivers – Both Phillips and flathead types for various fasteners
- Pliers – Slip-joint or groove-joint pliers provide excellent grip and leverage
- Drain removal tool or spanner wrench – Specifically designed for removing drain bodies; this tool is inexpensive and invaluable
- Flashlight or headlamp – Working under a tub requires good visibility
- Bucket or pan – Catches water and debris from the drain system
- Towels and rags – Absorb spilled water and protect your bathroom floor
- Penetrating oil – Helps loosen corroded or stuck components
- Safety glasses – Protects your eyes from debris and splashes
- Work gloves – Protects hands and improves grip on wet pipes
You may also need caulk removal tools if your drain trim ring is sealed with silicone caulk. A drain key or removal wrench is particularly useful and can be purchased at any home improvement retailer for under fifteen dollars. If your drain is severely corroded, you might benefit from heat tape or a heat gun, though this should be used cautiously around plumbing materials.
Safety Precautions Before Starting
Working on plumbing systems requires attention to safety. Taking precautions protects both you and your home’s water system.
First, turn off the water supply to your bathroom or entire home if you can’t isolate the bathroom supply. Look for shut-off valves near your toilet or under the sink. If you can’t find them, locate your home’s main water shut-off valve. This prevents water from flowing into the drain system while you work and protects you from unexpected sprays.
Second, drain all standing water from the tub and pipes. Open the drain completely and let water flow for several minutes. Use a wet/dry vacuum to remove stubborn water from the drain opening. This prevents water from spilling into your bathroom when you disconnect pipes.
Third, ensure proper ventilation in your bathroom. Open windows and use a fan to circulate air, especially if you’re using penetrating oil or heat tools. Some plumbing materials release fumes when heated, and good air circulation keeps your workspace safe.
Fourth, protect your bathroom floor with towels and a waterproof mat. Even with proper preparation, water spillage happens. Towels absorb spills quickly and prevent water damage to surrounding areas.
Finally, wear appropriate safety equipment. Safety glasses protect your eyes from debris and splashing water. Work gloves provide grip and protect your hands from sharp edges, corrosion, and bacteria in the drain system.
Step-by-Step Removal Process
Now that you’re prepared, let’s walk through the actual removal process. This detailed approach works for most standard bathtub drain installations.
Step 1: Access the Area Under Your Tub
Most bathtub drains connect to pipes located in the basement, crawl space, or behind an access panel. You need clear access to these connection points to remove the drain successfully. If your tub is on an upper floor, you may need to work from below or remove an access panel in the bathroom wall or ceiling. Take photos of the existing setup before you begin—this helps when reassembling or installing a replacement drain.
Step 2: Remove the Drain Strainer or Stopper
The visible part of your drain—the strainer or stopper—comes out first. For pop-up stoppers, locate the overflow plate on your tub’s side and remove any screws holding it. Gently pull the stopper assembly out through the drain opening. For lift-and-turn or push-pull stoppers, simply unscrew them by turning counterclockwise or pull them straight up. This exposes the drain body beneath.
Step 3: Remove Caulk and Trim Ring
Most drain trim rings are sealed with silicone caulk. Use a caulk removal tool or old credit card to scrape away the caulk carefully. Work slowly to avoid scratching your tub’s finish. Once the caulk is removed, you can unscrew the trim ring from beneath the tub (if accessible from below) or pry it gently upward if it’s a slip-fit design.
Step 4: Disconnect the Overflow Tube
The overflow tube connects to your main drain assembly. Locate where it connects—usually with a slip nut or compression fitting. Use your wrench to loosen this connection by turning counterclockwise. Have your bucket ready, as water may still be present in the overflow tube. Carefully pull the overflow tube away from the main drain assembly.
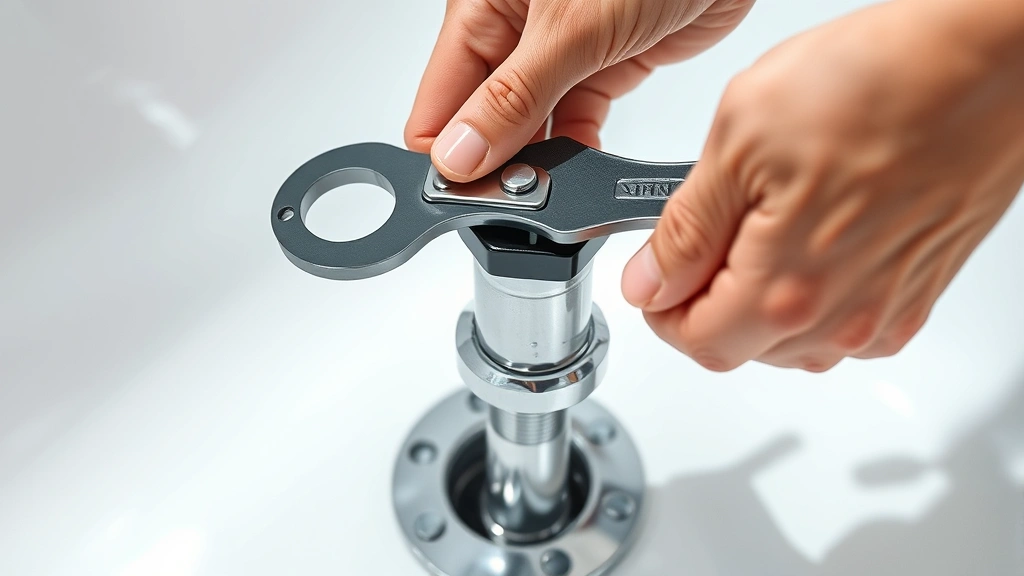
Step 5: Remove the Drain Body
This is where your drain removal tool or spanner wrench becomes essential. Position the tool’s prongs into the slots on the drain body (viewed from beneath the tub). Turn counterclockwise to unscrew the drain body from the tub. If you don’t have a specialized tool, a large adjustable wrench can work, though it’s less effective. Apply steady, even pressure—forcing it may crack the tub or strip the fitting.
Step 6: Disconnect P-Trap and Supply Lines
Once the drain body is removed from the tub, you need to disconnect it from your home’s plumbing system. Locate the P-trap and use your basin wrench to loosen the nuts connecting it to the drain assembly. These connections are usually slip nuts that turn counterclockwise. Have your bucket positioned to catch any remaining water. Gently pull the drain assembly away from the wall or floor connection.
Step 7: Clean the Connection Area
With the old drain removed, clean the area where the new drain will connect. Remove old putty, caulk, or debris using a scraper. A clean surface ensures proper sealing and prevents leaks in your new installation. Wipe the area with a damp cloth and allow it to dry completely before installing a replacement drain.
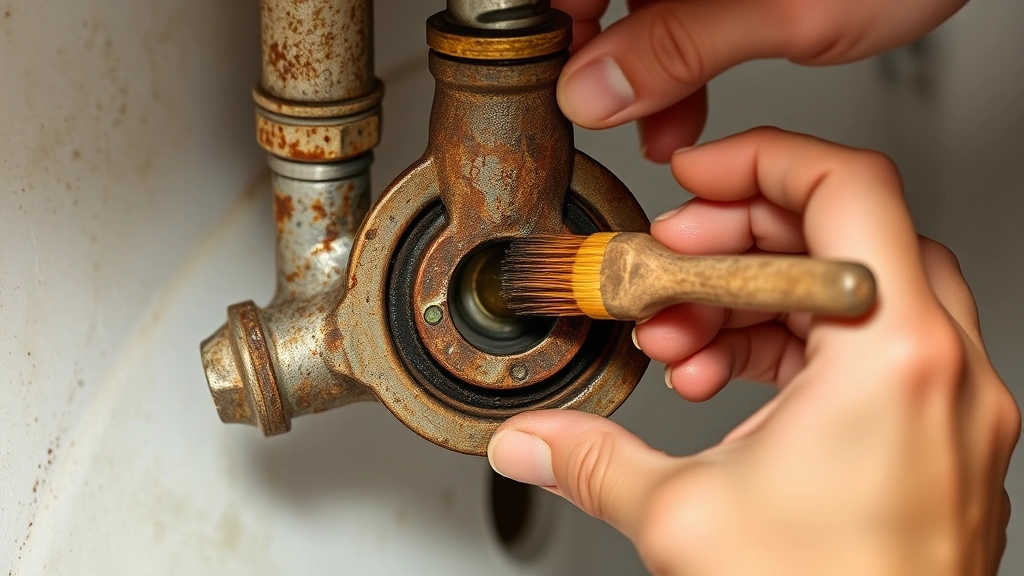
Dealing with Stuck or Corroded Drains
Sometimes drains refuse to budge. Corrosion, mineral buildup, and age can make removal challenging. These techniques help free stubborn drains.
Penetrating Oil Method
Apply penetrating oil (like WD-40 or similar products) around the drain body connection points. Let it soak for 15-30 minutes, allowing the oil to seep into corroded areas. Reapply if needed. The oil reduces friction and helps loosen mineral deposits. After soaking, attempt removal again using your wrench with slow, steady pressure.
Heat Application
Gentle heat can expand metal connections and break corrosion bonds. Use a heat gun on low setting, directing heat toward the drain body’s connection points for 1-2 minutes. Never use a torch—this risks damaging pipes and creating fire hazards. Let the area cool slightly, then attempt removal. This method works particularly well on brass and metal drains that have corroded over decades.
Tapping Technique
Sometimes gentle tapping breaks corrosion loose. Use a rubber mallet to tap around the drain body connection, working slowly and methodically. This vibration can help separate stuck components without damaging them. Combine tapping with penetrating oil for best results.
Professional Removal Tools
If standard tools don’t work, consider renting specialized equipment from a home improvement center. Family Handyman recommends that stubborn drains sometimes require professional-grade extraction tools. These specialized wrenches provide better leverage and control than standard tools.
Common Mistakes to Avoid
Learning from others’ mistakes saves time, money, and frustration. Here are the most common errors homeowners make when removing tub drains.
Skipping the Water Shut-Off
Working on plumbing without shutting off water supply can result in unexpected flooding. Always locate and use your water shut-off valve before beginning work. This simple step prevents water damage and makes the job cleaner and safer.
Using Wrong Tools
Attempting to remove a drain with improper tools often results in stripped fittings, bent pipes, or cracked tubs. Invest in the correct tools—a drain removal tool costs less than $15 and prevents hundreds in damage. Proper tools make the job faster and safer.
Forcing Stuck Components
Applying excessive force to stuck drains cracks tubs and damages pipes. Use penetrating oil, heat, and patience instead. If a drain resists after these methods, it’s time to call a professional rather than risk permanent damage.
Ignoring the Overflow Connection
Many homeowners forget the overflow tube connects to the main drain assembly. Ignoring this connection complicates removal and can damage the overflow mechanism. Always identify and disconnect the overflow tube before attempting to remove the main drain body.
Not Protecting the Workspace
Failing to place towels and buckets beneath the drain area results in water damage to ceilings and floors below. Always prepare your workspace with protective materials before beginning work, even if you think water drainage is complete.
Mixing Up Components
Drain systems have multiple similar-looking parts. Take photos before disassembly and label components as you remove them. This prevents confusion when reassembling or installing replacement parts. Clear labeling also helps if you need to consult with a plumber later.
When to Call a Professional Plumber
Some situations warrant professional help. Knowing when to call a plumber prevents costly mistakes and ensures your plumbing system functions properly.
Call a professional if your drain is severely corroded and won’t budge after applying penetrating oil and heat. Forcing a stuck drain risks cracking your tub or damaging hidden pipes. Professional plumbers have specialized tools and experience extracting stubborn drains without damage.
If you discover unexpected complications during removal—such as cracks in the tub, unexpected pipe configurations, or signs of water damage—stop work and consult a professional. These issues require expertise beyond basic drain removal.
If you’re uncomfortable working beneath your tub or in tight spaces, professional help ensures the job gets done safely. Plumbers work in these conditions regularly and complete the job efficiently.
If you’re unsure about your home’s plumbing configuration or water shut-off location, This Old House suggests consulting a professional before attempting any plumbing work. Understanding your system prevents costly mistakes.
If you need to remove a bathtub drain and also handle related plumbing work like unclogging a shower drain, professionals can address multiple issues during a single visit, saving time and money.
FAQ
How long does it take to remove a bathtub drain?
Most drain removals take 30 minutes to 2 hours for experienced DIYers. Stuck or corroded drains may require additional time for penetrating oil to work or heat application. Professional plumbers typically complete the job in 1-2 hours, including cleanup.
Can I remove a tub drain without special tools?
While specialized drain removal tools make the job easier, you can sometimes use an adjustable wrench or large pipe wrench. However, these tools don’t grip as effectively and risk slipping, which can damage the drain or surrounding pipes. Investing in a proper drain removal tool ($10-20) is worthwhile.
What should I do if water leaks after reinstalling a new drain?
Leaks usually indicate improper sealing or loose connections. Check that all nuts are tightened securely. Ensure you applied plumber’s putty or silicone caulk correctly around the drain body. If leaks persist, the new drain may be defective—contact the manufacturer or your plumber.
Is it necessary to turn off water before removing a tub drain?
Yes, absolutely. Turning off water prevents unexpected water flow and makes the job cleaner. Even if you’ve drained the tub, residual water in pipes can spill when you disconnect components. Always shut off water before beginning any plumbing work.
Can I reuse my old drain assembly?
Most drain assemblies are designed for single installation and shouldn’t be reused. Corrosion, wear, and potential damage during removal make reused drains prone to leaking. For reliability, install a new drain assembly rather than reusing old components.
What’s the difference between a drain body and a P-trap?
The drain body is the fixture component that connects your tub to your home’s plumbing. The P-trap is part of the plumbing system beneath or behind the wall that holds standing water to create a seal preventing sewer gases from entering your home. Both components work together but serve different functions.
How do I know if my drain needs replacement?
Signs include persistent slow draining even after unclogging the drain, visible corrosion or rust, leaking connections, or unpleasant odors. If your drain assembly is over 20-30 years old, replacement is preventative maintenance worth considering.
What if I accidentally crack my tub while removing the drain?
Small cracks can sometimes be repaired with epoxy putty or bathtub repair kits from home improvement retailers. Larger cracks typically require tub replacement. Work carefully and use proper tools to avoid this costly situation. If you crack your tub, stop work immediately and consult a professional about repair options.
Related Posts

Superscript in Google Docs: Expert Tips

Strikethrough in Excel: Easy Steps for Beginners
