
How to Remove Nail Glue: Expert Guide
How to Remove Nail Glue: Expert Guide
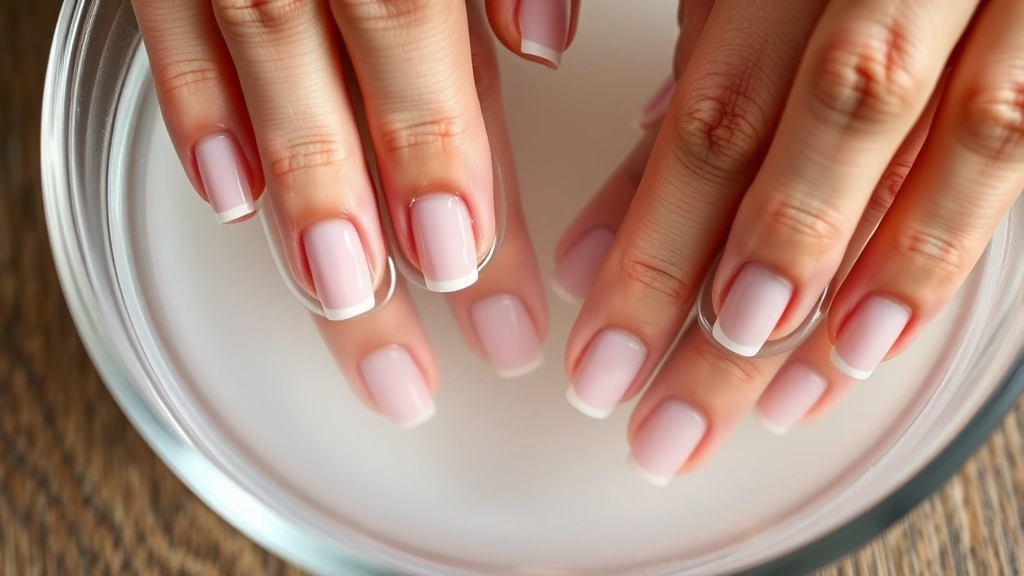
There’s nothing quite like the panic that sets in when you realize your fingers are stuck together with nail glue. Whether you’ve accidentally bonded your skin to a nail tip or you’re dealing with residual adhesive on your nails, this sticky situation demands immediate attention—but also calm, methodical action. The good news? Removing nail glue is entirely manageable with the right approach, and you probably have most of the solutions sitting in your bathroom cabinet right now.
Nail glue is engineered to create an incredibly strong bond, which is precisely why it works so well for artificial nails but also why it can feel like a permanent fixture when it ends up where you don’t want it. The key to successful removal lies in understanding what you’re dealing with and choosing the appropriate method for your specific situation. Unlike some sticky predicaments, nail glue actually responds quite well to common household items and a bit of patience.
In this comprehensive guide, we’ll walk you through multiple removal techniques, explain why each method works, and help you choose the best approach for your circumstances. We’ll also cover prevention strategies so you can minimize the likelihood of dealing with this issue in the future.
Understanding Nail Glue and Why Removal Matters
Nail glue, typically composed of cyanoacrylate as its primary active ingredient, is a fast-acting adhesive that bonds instantly to moisture. This is why it works so effectively for attaching artificial nails to your natural nail bed—the slight moisture present on your skin creates an immediate, durable connection. Understanding this chemistry helps explain why certain removal methods work better than others.
The urgency of removing nail glue depends on the severity of the situation. If you’ve simply got some dried adhesive on the surface of your nails, you have plenty of time to address it methodically. However, if you’ve accidentally glued your fingers together or bonded your skin to a nail, you’ll want to act quickly but deliberately to avoid causing damage to the delicate skin on your fingers. Never force stuck fingers apart—this can cause painful tears in your skin.
Beyond the immediate discomfort, leaving dried nail glue on your skin can lead to irritation, and if it’s on your nails, it can interfere with healthy nail growth and create an unsightly appearance. Addressing it promptly ensures your nails and skin remain in optimal condition.
The Acetone Method: Most Effective Solution
Acetone is the gold standard for removing nail glue, and for good reason. This powerful solvent breaks down the cyanoacrylate bonds that make nail glue so effective, essentially reversing the adhesive process. If you’re dealing with nail glue stuck on your skin, acetone is your most reliable option.
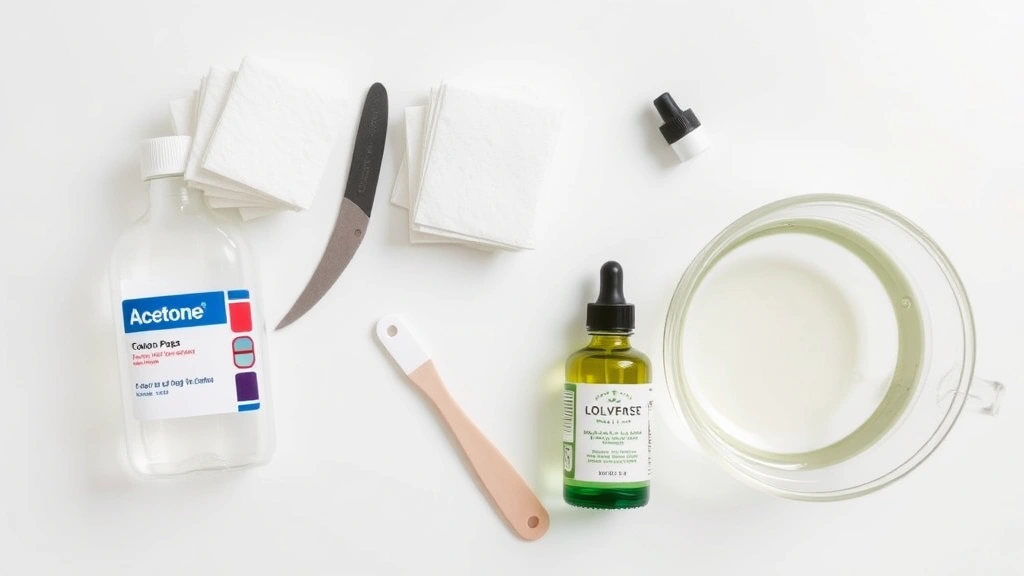
What You’ll Need:
- Acetone or acetone-based nail polish remover
- Cotton balls or pads
- Small bowl (glass or ceramic)
- Warm water
- Mild soap
- Moisturizing lotion
- Towel
Step-by-Step Process:
- Prepare your workspace: Pour acetone into a small bowl and place it on a stable surface. Ensure you’re working in a well-ventilated area, as acetone has a strong odor and can cause dizziness in poorly ventilated spaces.
- Soak the affected area: Submerge your fingers (or the area with glue) in the acetone for 10-15 minutes. If you’re only dealing with small spots of glue, you can soak a cotton ball in acetone and hold it directly against the adhesive.
- Gently rub and roll: After soaking, use your other hand to gently rub the glue in a rolling motion. The adhesive should begin to break down and ball up. Resist the urge to scratch or pick at it aggressively.
- Repeat if necessary: For stubborn residue, repeat the soaking process. You may need 2-3 rounds of 10-15 minute soaks.
- Rinse thoroughly: Once the glue is removed, wash your hands with warm water and soap to remove all acetone residue.
- Moisturize: Apply a generous amount of hand lotion or moisturizing cream, as acetone can be drying to skin.
Important Considerations: While acetone is highly effective, it’s also quite harsh. If you have sensitive skin, you might want to test it on a small area first. Additionally, avoid getting acetone in your eyes or mouth. If you’re pregnant, consult your healthcare provider before using acetone, and ensure excellent ventilation during the process.
Warm Water and Soap: Gentle Alternative
Sometimes the simplest solution works best. Warm water and soap might seem too gentle to tackle nail glue, but this method can be surprisingly effective, especially for fresh or partially dried adhesive. This approach is ideal if you prefer avoiding harsh chemicals or if you’re dealing with sensitive skin.
The Method:
- Fill a bowl with warm water: The water should be hot enough to be comfortable to touch but not scalding. Around 110-115°F is ideal.
- Soak thoroughly: Submerge your fingers for 15-20 minutes. The warm water helps soften the adhesive and makes it more pliable.
- Add soap: While your fingers are still in the water, add a generous squirt of dish soap or hand soap. The soap helps break down the glue’s molecular structure.
- Gently work the glue: Use your fingers to gently massage the area where the glue is located. You should feel it beginning to soften and separate from your skin or nails.
- Pat dry and repeat: If the glue hasn’t completely dissolved, pat your hands dry and repeat the process.
This method typically takes longer than acetone-based approaches, but it’s gentler on your skin and doesn’t require exposure to harsh chemicals. It’s particularly effective when combined with the next method we’ll discuss.
Oil-Based Solutions for Stubborn Residue
Oil is nature’s answer to sticky situations. Whether you use coconut oil, olive oil, baby oil, or even vegetable oil, the principle remains the same: oil breaks down the adhesive bonds without the harshness of acetone. This method works particularly well for residual glue that remains after other removal attempts or for very sensitive skin.
Why Oil Works: Nail glue is hydrophobic, meaning it repels water. However, it doesn’t adhere well to oily surfaces, so oil essentially creates a slippery barrier that prevents the glue from maintaining its bond.
Application Process:
- Choose your oil: Any food-grade or cosmetic oil will work. Coconut oil is particularly pleasant-smelling and has skin-conditioning benefits.
- Apply generously: Coat the affected area thoroughly with oil. Don’t be shy—more oil means better penetration.
- Let it sit: Allow the oil to work for 5-10 minutes. During this time, the adhesive will begin to lose its grip.
- Gently massage: Using your fingers or a soft cloth, gently massage the area. The glue should begin to roll off in small balls.
- Repeat as needed: For stubborn adhesive, you may need to apply oil multiple times.
- Clean thoroughly: After removing the glue, wash your hands with warm water and soap to remove excess oil.
This method is excellent for combining with the warm water approach. Start with warm water and soap, then follow up with an oil-based treatment if any residue remains. The combination often proves more effective than either method alone.
Mechanical Removal Techniques
Sometimes, especially after the adhesive has been softened through one of the chemical methods above, you’ll need to physically remove the glue. This requires patience and a gentle touch to avoid damaging your skin or nails.
Tools and Techniques:
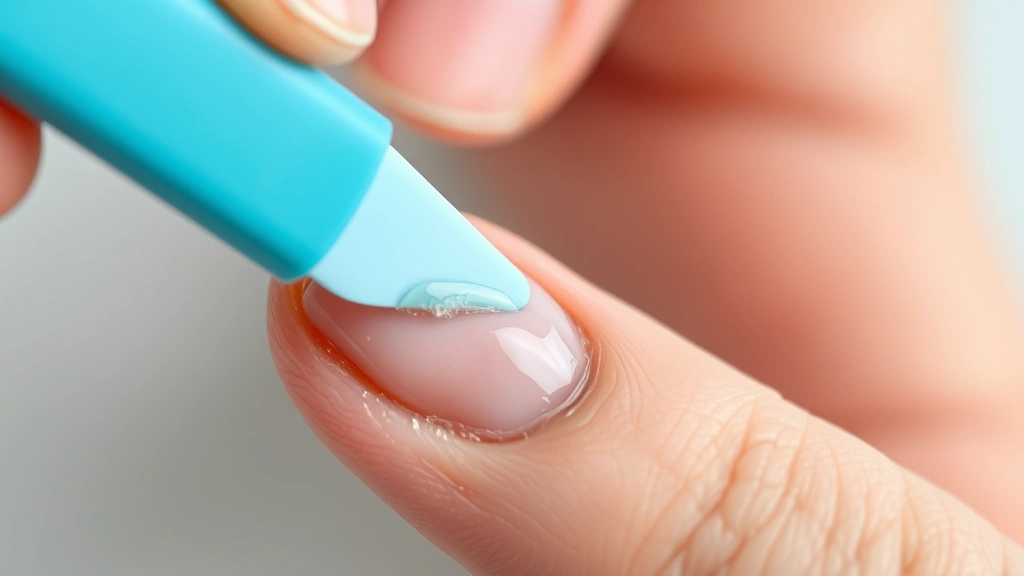
- Soft nail file: After softening the glue with acetone or warm water, use a fine-grit nail file to gently file away dried adhesive from your nails. Use light pressure and work in one direction to avoid damaging the nail surface.
- Cuticle pusher: A rubber or wooden cuticle pusher can gently lift dried glue away from the skin-nail junction without causing injury.
- Soft-bristled toothbrush: After soaking, use a soft-bristled toothbrush to gently brush away loosened glue. This works particularly well when combined with oil treatments.
- Cotton swab: For precision work on small areas, a dampened cotton swab dipped in acetone allows you to target specific spots without affecting surrounding skin.
Critical Safety Rules: Never use sharp objects like razors, knives, or metal scrapers on your skin. Never force glued fingers apart. Never scrape your nails so aggressively that you damage the nail bed. The goal is to work with the softened adhesive, not against it.
Preventing Nail Glue Accidents
The best approach to nail glue removal is preventing the need for it in the first place. These practical strategies will help you avoid sticky situations.
Application Best Practices:
- Use in small amounts: A tiny drop of nail glue is all you need. Many people use far too much, which increases the risk of spills and overflow.
- Apply to nails, not skin: When applying glue to artificial nails, focus on the nail itself. Keep the applicator tip away from your fingers and surrounding skin.
- Keep nails dry: Nail glue bonds to moisture. Ensure your natural nails are completely dry before application. Any moisture will cause premature bonding.
- Work in good lighting: Poor visibility leads to mistakes. Use a bright lamp or natural light when applying nail glue.
- Have acetone nearby: Before you start applying glue, have your acetone and cotton balls ready. This way, if an accident happens, you can act immediately.
If you’re dealing with gel nail polish removal, the process differs somewhat from nail glue removal, though some techniques overlap. Understanding these distinctions helps you choose the right removal method for your specific nail situation.
Storage and Handling:
- Store in a cool place: Heat can cause nail glue to harden or become runny. Keep it in a cool, dark location.
- Cap tightly: The cap should be sealed securely after each use. A dried-up tube of nail glue is useless and creates waste.
- Keep away from children and pets: Nail glue is dangerous if ingested. Store it out of reach.
- Check expiration dates: Old nail glue may not work as effectively and can be more prone to spillage.
For those who frequently work with artificial nails, consider keeping a dedicated nail glue removal kit in your bathroom. Include acetone, cotton balls, oil, and a soft nail file. Having everything in one place means you’ll be prepared if an accident occurs.
Frequently Asked Questions
How long does it take to remove nail glue?
The removal timeline depends on the method and the amount of glue involved. Acetone-based removal typically takes 15-30 minutes total (including multiple soaking rounds). Warm water and soap methods may take 30-45 minutes. Oil-based approaches usually require 15-20 minutes. The key is patience—rushing the process can damage your skin or nails.
Is acetone safe to use on skin?
Acetone is generally safe for brief contact with skin, but it’s quite drying and can cause irritation in sensitive individuals. Always use it in a well-ventilated area, avoid eye contact, and follow up with moisturizer afterward. If you have particularly sensitive skin, start with gentler methods like warm water and soap or oil-based solutions before resorting to acetone.
Can I use nail polish remover instead of pure acetone?
Yes, acetone-based nail polish remover works, though it’s typically less concentrated than pure acetone and may take slightly longer. However, avoid non-acetone removers, which are much less effective for removing nail glue. Check the label to ensure your remover contains acetone as the primary ingredient.
What should I do if I’ve glued my fingers together?
Stay calm—this is more common than you’d think and is almost always reversible. Don’t force your fingers apart, as this can tear your skin. Instead, soak the bonded area in warm water for several minutes to soften the glue, then gently wiggle your fingers while continuing to soak. If the glue doesn’t release after 10-15 minutes of soaking, switch to an acetone soak. You may need to apply acetone-soaked cotton balls directly to the bonded area and let them sit for 10-15 minutes before attempting to separate your fingers again.
Can I remove nail glue while wearing acrylic nails?
Yes, but be cautious. If you’re removing glue from the base of acrylic nails, acetone is still your best bet, but it can also soften acrylic over time. If you’re only removing surface glue or residue, use oil-based methods or gentle warm water soaking to minimize impact on the acrylics themselves. If you’re planning to remove the acrylics entirely, check out our guide on removing gel nail polish, as the processes share some similarities.
Why does nail glue sometimes not come off easily?
Several factors affect how readily nail glue comes off. If the glue has been cured for a long time, it becomes harder and requires more aggressive treatment. Multiple layers of glue are also more challenging to remove than a single coat. Additionally, if the glue has bonded to very dry skin, it may need more time to soften. Patience and persistence are key—repeated applications of your chosen solvent will eventually break down even stubborn adhesive.
Is there a way to remove nail glue without harsh chemicals?
Absolutely. While acetone is the most effective solution, warm water and soap or oil-based methods can work, especially for fresh glue. These gentler approaches take longer but avoid chemical exposure. You can also try combinations: start with warm water and soap, then follow up with oil if needed. Many people find that a multi-method approach works better than relying on a single technique.
Can I prevent nail glue from bonding to my skin?
Yes, several preventive measures help. Keep your hands completely dry before applying glue. Apply glue only to the artificial nail, not the surrounding skin. Use very small amounts—a tiny drop is sufficient. Consider using a nail glue with a brush applicator rather than a bottle with a dropper, as these offer better control. Some people also apply a thin layer of petroleum jelly around the nail edges before gluing, creating a barrier that prevents accidental bonding to skin. If you’re applying similar adhesives to other items, the same principles of careful application apply.