
Remove Lash Extensions Safely: DIY Expert Tips
Remove Lash Extensions Safely: DIY Expert Tips
Lash extensions can transform your eye appearance, but they require commitment to maintenance and eventual removal. Whether your extensions have reached the end of their lifespan or you’re simply ready for a change, knowing how to remove lash extensions at home safely is essential to protect your natural lashes from damage. Professional removal can be expensive and time-consuming, making DIY removal an attractive option when done correctly with proper technique and patience.
The key to successful at-home lash extension removal lies in understanding the adhesive bond, using the right products, and following a methodical approach. Many people rush through removal or use harsh techniques that can result in lash loss, irritation, or infection. This comprehensive guide walks you through proven methods, essential supplies, and critical safety precautions to ensure your natural lashes remain healthy throughout the removal process.
Understanding Lash Extension Adhesive
Professional lash extensions are bonded to your natural lashes using semi-permanent adhesive, typically cyanoacrylate-based formulas that create a strong, flexible bond designed to last 4-6 weeks. This adhesive is specifically engineered to withstand daily activities including blinking, washing, and minor contact. Understanding how this adhesive works is crucial before attempting removal, as it explains why improper techniques can damage your natural lashes.
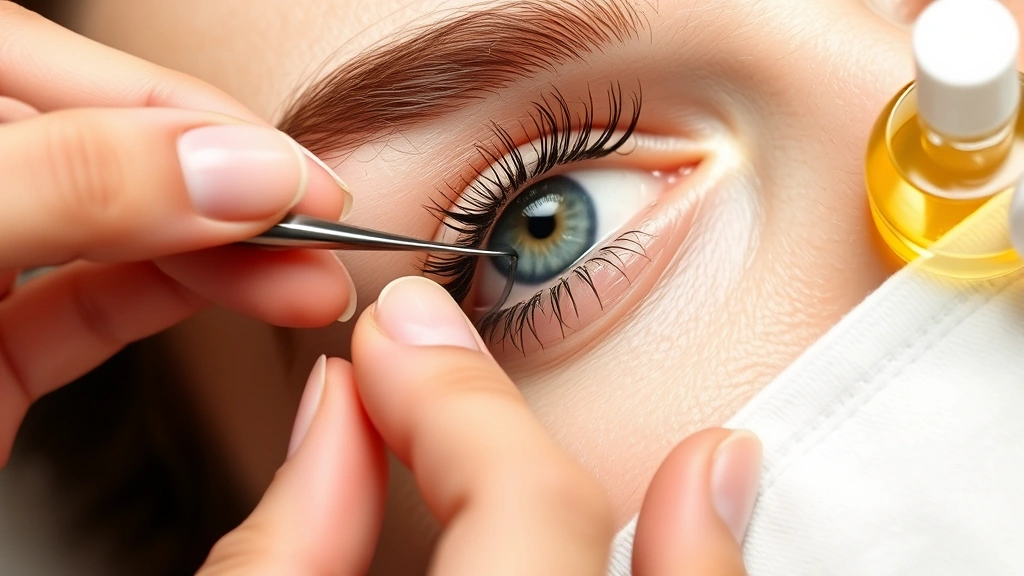
The adhesive bonds at the base of your natural lash, creating a connection that, if pulled forcefully, can strip away the outer protective layer of your lash or cause the entire lash to be yanked out prematurely. This is why patience and gentle pressure are non-negotiable during removal. The adhesive weakens when exposed to oil, heat, and moisture—which is why effective removal methods leverage these principles. Most quality lash extension adhesives are formulated to be removed with oil-based products or specialized removers, making these the safest options compared to physical pulling or scraping.
Essential Supplies for Safe Removal
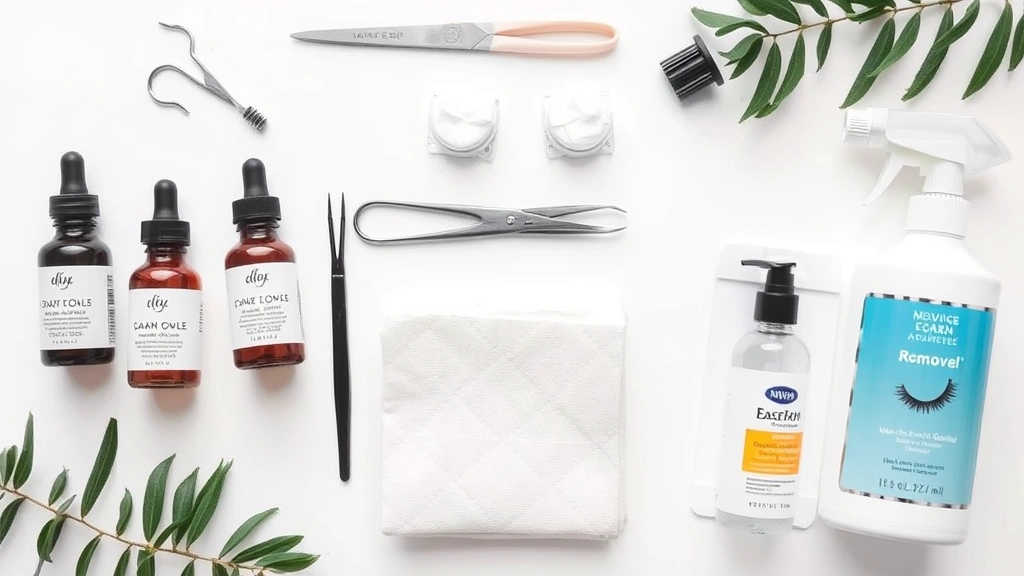
Before beginning the removal process, gather all necessary supplies to avoid interruptions and ensure you have safe, effective tools on hand. Having everything prepared demonstrates the importance of proper planning in this delicate procedure.
- Oil-based products: Coconut oil, baby oil, olive oil, or castor oil (avoid mineral oil which can be too heavy)
- Lash extension remover: Medical-grade removers specifically formulated for extensions
- Microfiber applicators: Soft brushes or applicator wands designed for precision application
- Lint-free pads or cotton rounds: Avoid regular cotton which sheds fibers onto delicate eye area
- Tweezers: Fine-pointed, sterilized tweezers for gentle lash separation
- Warm compress or steam source: Washcloths, eye masks, or facial steamers
- Gentle cleanser: Oil-free, fragrance-free facial cleanser for final cleanup
- Eye protection: Ensure good lighting and consider using a mirror with magnification
- Protective barrier: Petroleum jelly to protect skin around eyes during removal
- Sterile gauze pads: For gentle wiping and protection during application
Quality supplies make a significant difference in safety and effectiveness. Investing in proper tools prevents accidents and reduces the risk of infection or damage to natural lashes. Similar to how proper technique matters when you remove gel nail polish at home, using appropriate products for lash extension removal protects your natural structures.
Preparation Steps Before Removal
Proper preparation sets the stage for safe, effective removal and significantly reduces complications. Never rush this phase, as it determines how smoothly the entire process will proceed.
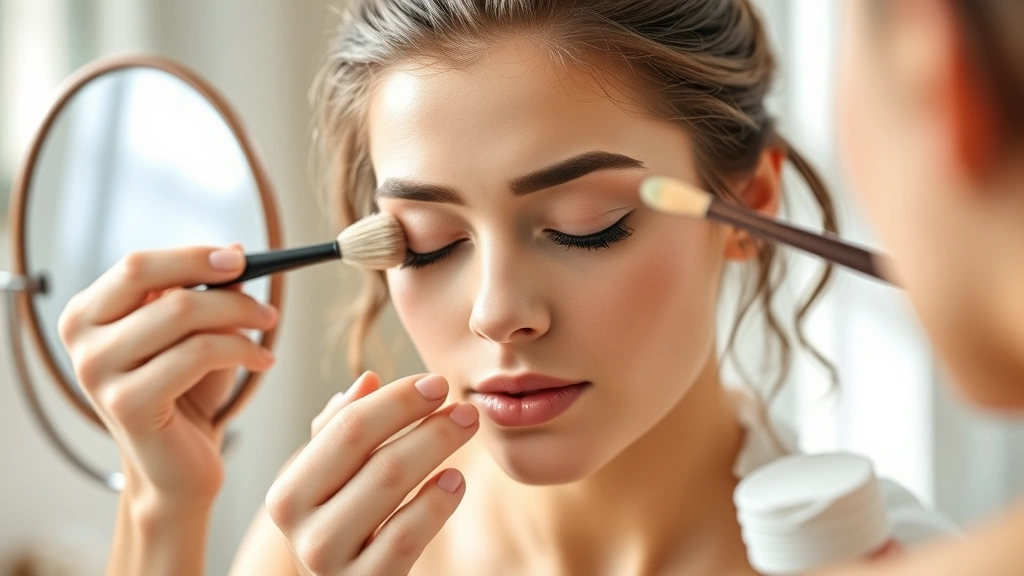
- Cleanse your eye area thoroughly: Use a gentle, oil-free cleanser to remove makeup, dirt, and oils. This prevents contamination during removal and allows products to work more effectively.
- Pat completely dry: Moisture can dilute removal products and reduce their effectiveness. Use a clean, lint-free cloth and allow several minutes for complete drying.
- Apply protective barrier: Gently apply petroleum jelly or a protective ointment around the eye area, eyelids, and brow bone. This shields sensitive skin from irritation caused by removal products or oils.
- Position yourself properly: Use a well-lit area with a magnifying mirror or good lighting. Position yourself comfortably—you’ll need to hold still for extended periods, so comfort is essential.
- Ensure good ventilation: Open windows or use a fan if using chemical removers, as fumes can cause discomfort and dizziness.
- Set realistic timing: Plan 30-60 minutes for removal. Rushing leads to pulling and damage. If extensions are stubborn, multiple sessions may be necessary.
- Have someone assist (optional): A trusted friend or family member can help apply products to hard-to-reach areas and provide a second set of hands.
Oil-Based Removal Method
The oil-based removal method is the gentlest, most accessible option for most people and requires only natural products found in most homes. This method works by breaking down the adhesive’s bond without harsh chemicals, making it ideal for sensitive eyes or those with product sensitivities.
Step-by-step oil removal process:
- Warm your chosen oil slightly (coconut, baby, or castor oil) by running the bottle under warm water or placing it in warm water for 2-3 minutes. Warm oil works more effectively than cold oil.
- Dip a clean microfiber applicator or soft brush into the warmed oil.
- Gently apply oil along the lash line where extensions meet your natural lashes, focusing on the adhesive bond area.
- Allow the oil to saturate the adhesive for 3-5 minutes. Do not rush this step—patience is crucial.
- Using a lint-free pad, gently massage the lash line in a downward motion with minimal pressure.
- Repeat oil application and gentle massage every 3-5 minutes for 20-30 minutes, or until extensions begin loosening.
- Once extensions feel loose, use fine-pointed tweezers to gently separate and remove individual lashes (see detailed instructions in section 7).
- Never pull or pluck—if resistance is felt, apply more oil and wait longer.
This method typically takes longer than chemical removers but offers superior safety for natural lash preservation. The oil penetrates the adhesive gradually, allowing for easier, gentler removal without damaging the delicate lash structure underneath.
Adhesive Remover Products
Specialized lash extension removers are formulated specifically for this purpose and often work faster than oil-based methods. However, they require careful handling and strict adherence to product instructions. Family Handyman emphasizes the importance of following manufacturer guidelines when using chemical products around sensitive areas.
Types of adhesive removers available:
- Cream-based removers: Easier to control and less likely to drip into eyes; typically gentler than gel formulas
- Gel removers: Thicker consistency that stays in place; effective for lower lashes
- Liquid removers: Fast-acting but require more careful application to prevent drips
- Foam removers: Lightweight and airy; good for sensitive skin but may require longer processing time
Application guidelines for chemical removers:
- Read and follow all product instructions completely before beginning.
- Apply a patch test on a small area 24 hours prior to ensure no allergic reaction.
- Apply the remover along the lash line using the provided applicator or a microfiber brush.
- Keep eyes closed and allow the remover to work for the time specified by the manufacturer—typically 5-15 minutes.
- Gently massage the lash line with a lint-free pad using downward motions.
- Rinse thoroughly with lukewarm water once extensions are loose.
- Never leave remover on longer than recommended, as this increases irritation risk.
When selecting a remover, look for products labeled as safe for at-home use and check reviews from verified users. Avoid professional-grade removers not intended for personal use, as these may contain stronger chemicals unsuitable for unsupervised application.
Steam and Warm Compress Technique
Heat and moisture work synergistically to soften adhesive bonds, making this method an excellent complement to oil or remover applications. Steam opens pores and allows oils and removers to penetrate more effectively, reducing the overall time needed for removal.
Warm compress method:
- Fill a clean bowl with hot (not boiling) water—approximately 130-140°F is ideal.
- Soak a clean microfiber cloth or washcloth in the hot water for 30 seconds.
- Wring out excess water (the cloth should be damp, not dripping).
- Place the warm cloth gently over closed eyes for 2-3 minutes, allowing heat to penetrate.
- Remove the cloth and immediately apply oil or remover to the lash line while skin is still warm.
- Repeat this process every 5-10 minutes throughout your removal session.
- Never apply direct steam to eyes, as this risks burns or eye damage.
Alternative steam options:
- Use a facial steamer or handheld steam device, keeping it at least 12 inches from your face
- Apply a warm (not hot) wet cloth over closed eyes repeatedly
- Take a hot shower and use the bathroom steam to prepare your lashes before removal
- Use a heated eye mask designed for home use
Heat enhances the effectiveness of both oil-based and chemical removal methods, potentially cutting your removal time in half. The combination of warmth, moisture, and oil creates the optimal environment for adhesive breakdown, making this technique valuable regardless of your primary removal method.
Removing Individual Extensions
Once the adhesive has sufficiently weakened through oil, remover, heat, or a combination of these methods, individual extension removal becomes possible. This phase requires precision, patience, and extreme gentleness to protect natural lashes.
Proper individual extension removal technique:
- Examine each lash carefully to identify which extensions are loose enough for removal. Some may still be firmly attached and need additional treatment.
- Use fine-pointed, sterilized tweezers to gently grasp the extension near the base where it bonds to your natural lash.
- Apply minimal downward pressure while gently rolling the extension away from your natural lash—never pull straight out.
- If any resistance is felt, stop immediately and apply additional oil or remover. Forcing removal causes natural lash loss.
- Work systematically from one eye, then move to the other, removing one lash at a time.
- Take frequent breaks to rest your eyes and reassess remaining extensions.
- For stubborn extensions, apply heat and oil again before attempting removal.
- Once removed, gently wipe away excess adhesive residue with a lint-free pad.
This process may take 45-90 minutes depending on the number of extensions and how well the adhesive has softened. Patience during this phase directly correlates with natural lash health post-removal. Never sacrifice safety for speed.
Aftercare and Natural Lash Recovery
The care you provide after removal is critical to natural lash recovery and preventing damage. Many people spend considerable effort on safe removal only to compromise results through inadequate aftercare. Think of this phase similarly to how to get rid of frizzy hair—proper maintenance prevents future problems.
Immediate post-removal care (first 24 hours):
- Cleanse gently with a fragrance-free, oil-free cleanser to remove all adhesive residue and product buildup
- Pat dry with a clean cloth—never rub or tug at lashes
- Apply a nourishing lash serum or eye cream formulated for sensitive skin
- Avoid makeup, mascara, and eye products for at least 24 hours
- Sleep on your back to prevent lashes from being crushed against pillows
- Avoid hot water, steam, and saunas for 48 hours post-removal
Extended recovery protocol (1-4 weeks):
- Nourish natural lashes: Use lash serums containing biotin, peptides, or vitamin E to strengthen and promote growth
- Avoid harsh products: Skip waterproof mascara and opt for gentle, water-based formulas if needed
- Minimize eye makeup: Give lashes a break from heavy makeup application and removal
- Practice gentle cleansing: Use soft motions when washing face and removing makeup
- Stay hydrated: Drink adequate water and maintain a nutrient-rich diet to support lash growth
- Protect from friction: Use silk or satin pillowcases to reduce lash breakage during sleep
- Avoid rubbing eyes: Resist the urge to rub or pull at lashes, even if they feel itchy
Natural lash growth cycles typically last 6-8 weeks, so patience is essential. Most people notice significant lash recovery within 2-3 weeks when proper aftercare is followed. If you notice excessive lash loss, irritation, or infection signs, consult an eye care professional immediately.
Common Mistakes to Avoid
Understanding what not to do is equally important as knowing proper removal techniques. These common mistakes lead to preventable damage and complications.
- Pulling or tugging: The most common cause of natural lash loss. Never use force—if extensions don’t come off easily, apply more product and wait longer.
- Using fingers instead of tweezers: Fingers lack precision and often apply too much pressure, damaging natural lashes.
- Rushing the process: Attempting removal in under 20 minutes typically results in forced removal and lash damage.
- Ignoring adhesive residue: Leaving adhesive on natural lashes causes brittleness and future breakage. Clean thoroughly after removal.
- Using wrong products: Acetone, rubbing alcohol, and harsh chemicals damage natural lashes and surrounding skin. Stick to oils and specialized removers.
- Applying heat directly: Never direct steam or heat sources directly at eyes, as this risks burns and vision damage.
- Skipping patch tests: Always test remover products on a small area first to identify allergies or sensitivities.
- Neglecting aftercare: Post-removal care is critical. Don’t skip nourishment and protection phases.
- Removing too frequently: Allow at least 2-3 weeks between removal and reapplication to allow natural lashes to fully recover.
- Attempting removal with infections: If you have an eye infection or significant irritation, consult a professional before removing extensions.
Many of these mistakes stem from impatience or lack of information. By understanding why each step matters, you’re more likely to maintain discipline throughout the removal process. Similar to how proper technique matters when you remove hair color from skin, taking time with lash extension removal prevents costly damage.
For additional home maintenance guidance, visit the FixWiseHub blog for comprehensive how-to guides and tutorials covering various DIY projects and personal care procedures. The principles of careful, methodical work apply across many home improvement and personal care tasks.
FAQ
How long does it take to remove lash extensions at home?
Proper at-home lash extension removal typically takes 45-90 minutes depending on the number of extensions, adhesive strength, and removal method used. Oil-based methods often take longer than chemical removers. Never rush this process—speed increases damage risk.
Can I use regular oil to remove lash extensions?
Yes, natural oils like coconut oil, baby oil, olive oil, and castor oil work effectively for removal. Avoid mineral oil, which is too heavy and doesn’t penetrate adhesive as effectively. Warm the oil slightly before application for best results.
What if my eyes become irritated during removal?
Stop immediately and rinse your eyes thoroughly with lukewarm water. Remove any remaining extensions on another day using a gentler method. If irritation persists beyond a few hours, consult an eye care professional.
Will removing lash extensions damage my natural lashes?
When done properly using gentle techniques and appropriate products, removal should not damage natural lashes. Damage occurs from rushing, pulling, using harsh chemicals, or improper technique. Following this guide minimizes damage risk significantly.
How often can I remove and reapply lash extensions?
Allow at least 2-3 weeks between removal and reapplication to permit natural lash recovery. Applying new extensions too frequently prevents natural lashes from fully regenerating and increases cumulative damage risk.
Can I shower or swim after removing lash extensions?
Avoid hot water, steam, and swimming for 48 hours post-removal to allow any remaining adhesive to fully cure and your eyes to recover. After 48 hours, normal water exposure is safe.
What products should I use during lash recovery?
Use lash serums containing biotin, peptides, or vitamins E and B5 to nourish and strengthen natural lashes. Avoid waterproof mascara and heavy eye makeup during the recovery period. Look for products specifically formulated for sensitive eyes.
Is professional removal safer than DIY removal?
Professional removal by trained technicians using proper equipment is often safer, but quality DIY removal following proper technique is also safe and effective. The key difference is professional experience and specialized equipment—DIY requires strict adherence to guidelines.
Can I remove lash extensions if I have an eye infection?
No. If you have any eye infection, significant redness, or discharge, consult an eye care professional before attempting removal. Removing extensions during infection can worsen the condition and cause complications.
What should I do if I accidentally pulled out natural lashes?
Don’t panic—natural lashes regrow within 6-8 weeks. Continue proper aftercare and avoid future trauma to the area. If you pulled out multiple lashes or notice unusual hair loss patterns, consult a dermatologist or eye specialist.
Related Posts

Superscript in Google Docs: Expert Tips

Strikethrough in Excel: Easy Steps for Beginners
