
Propagating Roses: Expert Tips for Success
Propagating Roses: Expert Tips for Success
Growing roses from cuttings is one of the most rewarding and cost-effective ways to expand your garden. Whether you’re a seasoned gardener or just beginning your horticultural journey, propagating roses allows you to clone your favorite varieties and share them with friends and family. This comprehensive guide will walk you through every step of the process, from selecting the right cuttings to nurturing them into healthy, blooming plants.
Rose propagation doesn’t require expensive equipment or advanced horticultural knowledge. With patience, attention to detail, and the right techniques, you can successfully create new rose plants that are genetically identical to their parent. This method is far more economical than purchasing nursery roses and gives you complete control over the varieties you grow in your garden.
Understanding Rose Propagation Methods
There are several methods for propagating roses, each with distinct advantages and challenges. The most popular technique among home gardeners is hardwood cutting propagation, which involves taking mature, woody stems from established roses. This method has a high success rate and is relatively straightforward for beginners. Hardwood cuttings are typically taken during the dormant season and can be stored for extended periods before planting.
Softwood cutting propagation uses tender, green growth from new shoots and requires more careful handling but often produces faster results. These cuttings are taken during the active growing season and need immediate attention to prevent drying out. While softwood cuttings root more quickly than hardwood varieties, they’re more prone to fungal diseases and require careful humidity management.
Another method gaining popularity is air layering, where you encourage roots to develop on a branch while it’s still attached to the parent plant. This technique offers excellent success rates because the cutting continues receiving nutrients from the parent plant until roots are well-established. However, it requires more time and patience than traditional cutting methods.
Many gardeners also explore seed propagation, though this method produces plants that may differ from the parent rose. Seeds offer genetic diversity but won’t produce exact clones. For most home gardeners seeking to replicate specific roses, cutting propagation remains the preferred choice.

Best Time to Take Cuttings
Timing is absolutely critical for successful rose propagation. The ideal window for taking hardwood cuttings is late fall through early winter, after the first frost and once the plant has entered dormancy. During this period, the stems have matured and contain sufficient stored energy to support root development. In most climates, this means taking cuttings between November and February.
If you’re in a warmer climate where roses don’t fully dormant, you can extend your propagation window. The key is waiting until stems have hardened off and the plant has slowed its growth cycle. Avoid taking cuttings during rapid spring growth or intense summer heat, as these conditions make the cuttings more susceptible to stress and disease.
For softwood cuttings, the best time is late spring through early summer when new growth is vigorous but stems have begun to firm up slightly. These cuttings need warm temperatures and high humidity to succeed, so timing your propagation with warm weather is essential. Check resources like This Old House for regional timing guides specific to your climate zone.
The phase of the moon has long been considered important in gardening folklore, though scientific evidence is limited. However, many experienced gardeners report better success taking cuttings during the waning moon phase. Whether you follow this tradition or not, consistent timing and attention to your local climate conditions matter most.
Selecting and Preparing Your Cuttings
Choosing the right stems dramatically impacts your propagation success rate. Select healthy, disease-free stems that are approximately pencil-thickness and show no signs of pest damage or discoloration. The best cuttings come from the middle sections of long canes, avoiding the tender tips and the hard, thick base.
For hardwood cuttings, look for stems that have completed their growth and developed a brown, woody appearance. These mature stems contain more carbohydrate reserves needed for root initiation. Avoid any stems showing signs of disease, cankers, or unusual discoloration. If the parent plant appears stressed or diseased, skip propagation until it recovers.
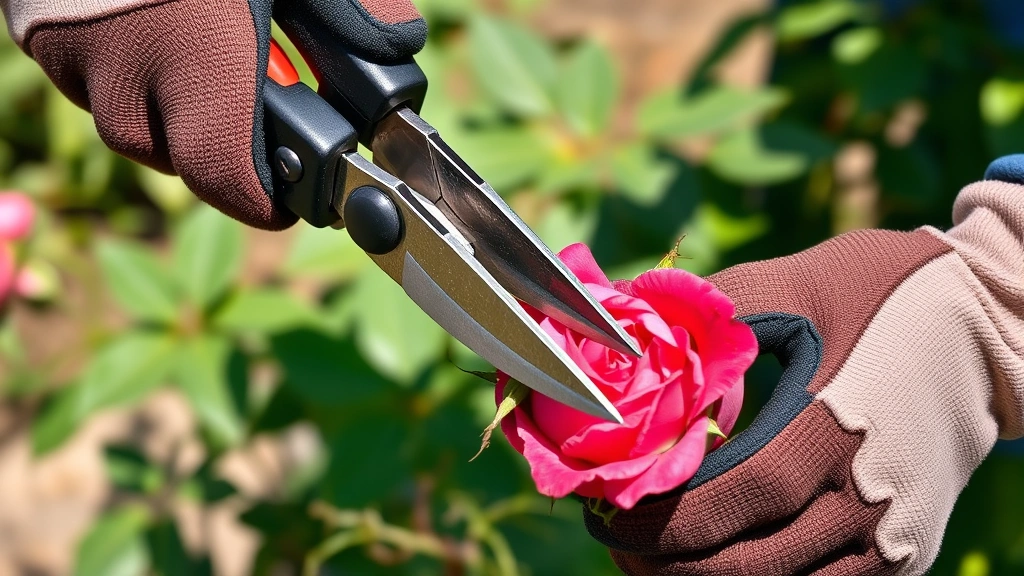
Once you’ve identified suitable stems, prepare your cuttings by making clean cuts with sharp, sterilized pruning shears. Each cutting should be 6 to 8 inches long for hardwood varieties and 4 to 6 inches for softwood cuttings. Make your bottom cut just below a leaf node at a 45-degree angle, which increases surface area for root development. The top cut should be straight across, made above a leaf node, which helps you remember which end is up during planting.
Remove all leaves from the bottom two-thirds of each cutting, leaving only a few leaves at the very top. This reduces moisture loss and prevents buried leaves from rotting in the soil. If leaves are large, you can cut them in half to further reduce transpiration stress. Some gardeners lightly wound the bottom inch of the cutting by scraping away a thin layer of bark on two sides, which can enhance rooting hormone penetration.
For softwood cuttings, work quickly after cutting and keep them in a plastic bag with a damp paper towel to prevent drying. Never let softwood cuttings sit exposed to air for extended periods. Hardwood cuttings are more forgiving and can be stored in a cool, moist location for several weeks if necessary.
Rooting Media and Containers
The growing medium you choose significantly affects your propagation success. The ideal rooting medium is well-draining, moisture-retentive, sterile, and free from nutrients that might encourage fungal growth. Many gardeners use a 50/50 blend of perlite and peat moss, which provides excellent drainage while maintaining adequate moisture.
An alternative mixture combines equal parts perlite, coarse sand, and peat moss, offering superior drainage for those in humid climates. Some gardeners prefer rockwool cubes or coconut coir as sustainable alternatives to peat moss. Whichever medium you choose, ensure it’s been moistened before inserting cuttings, as dry medium can wick moisture from tender new growth.
Container selection matters more than many gardeners realize. Use containers with drainage holes—plastic nursery pots, seed trays, or small pots work well. Avoid large containers that will hold excessive moisture around the cutting. A 2-3 inch pot accommodates a single cutting perfectly, while a small seed tray can hold multiple cuttings if spaced properly. Clean containers with a 10% bleach solution to eliminate any fungal spores from previous use.
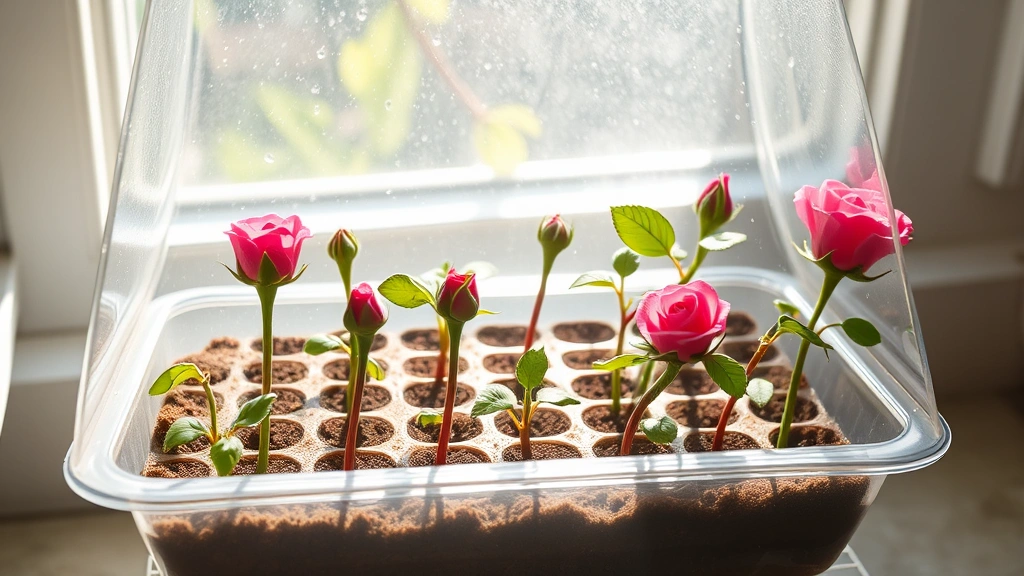
Some gardeners construct simple propagation boxes from clear plastic containers, which maintain humidity while allowing light penetration. Others use professional propagation trays with humidity domes. For budget-conscious growers, a clear plastic bag stretched over a container of cuttings works surprisingly well, though you’ll need to monitor for excessive condensation.
Fill your chosen container with pre-moistened rooting medium, leaving about an inch of space at the top. Make a hole in the medium slightly smaller than your cutting’s diameter—this helps the cutting maintain contact with the rooting medium and prevents air pockets that slow root development.
The Propagation Process Step-by-Step
Step 1: Apply Rooting Hormone
Rooting hormone dramatically increases success rates, particularly with difficult-to-root varieties. These hormones, available in powder, liquid, or gel form, contain auxins that stimulate root cell development. Powder formulations are most popular for hardwood cuttings—dip the bottom inch of your cutting into the powder, tapping off excess. For softwood cuttings, liquid or gel formulations provide better coverage and reduce damage to delicate tissue.
Rooting hormone also typically contains fungicides that protect against damping-off disease. Quality matters here; purchase fresh hormone from reputable garden suppliers. Old rooting hormone loses potency, so replace it annually. Some gardeners use natural alternatives like willow water or honey, though these are generally less effective than commercial products.
Step 2: Insert Cuttings into Medium
Gently insert the prepared cutting into your pre-made hole, pushing it down until the lowest remaining leaves just touch the rooting medium surface. Press the medium gently around the cutting to eliminate air pockets and ensure good contact. The cutting should stand upright without wobbling. If it’s unstable, add a small stake for support.
Space multiple cuttings so their leaves don’t touch each other, as this promotes fungal disease. Typically, you can fit 4-6 cuttings in a 4-inch pot if properly spaced. Immediately after inserting cuttings, water gently with a misting bottle to settle the medium and eliminate remaining air pockets.
Step 3: Create Optimal Environmental Conditions
Successful propagation requires maintaining humidity levels between 70-90% while preventing waterlogging. Place your container in a location receiving bright, indirect light—a north-facing window or area under shade cloth works well. Direct sunlight can overheat the cuttings and increase water loss.
Temperature control is equally important. Hardwood cuttings root best in cool conditions (50-60°F), while softwood cuttings prefer warmer temperatures (65-75°F). A heating mat can help achieve optimal soil temperature for softwood cuttings. Bottom heat encourages faster root development without overheating the foliage.
Maintain humidity by covering your container with a humidity dome, plastic bag, or clear plastic wrap. Check daily for excess condensation, which can promote fungal growth. If condensation is heavy, briefly remove the cover to allow air circulation. Mist softwood cuttings daily with a fine spray if they’re not under a humidity dome.
Step 4: Monitor and Maintain
Check your cuttings every few days, ensuring the medium remains consistently moist but never waterlogged. Insert your finger into the medium—it should feel like a wrung-out sponge. Water with distilled or rainwater when the top inch becomes dry. Overwatering is the primary cause of failure, as it promotes root rot and fungal diseases.
Watch for signs of disease, particularly fungal infections appearing as black or brown spots on stems or leaves. Remove any affected cuttings immediately to prevent spread. If disease becomes widespread, change your propagation medium and sterilize containers.
Hardwood cuttings typically develop callus (protective tissue) within 2-3 weeks, with roots emerging 4-8 weeks later. Softwood cuttings root faster, often within 2-4 weeks. You’ll know roots have developed when new growth emerges from the top of the cutting or when you see roots emerging from drainage holes.
Caring for Your Developing Roses
Once roots have developed and new growth appears, gradually acclimate your cuttings to lower humidity and brighter light. This hardening-off process prevents shock when you eventually transplant them. Over 1-2 weeks, gradually increase air circulation, reduce humidity dome coverage, and provide brighter light conditions.
After 6-8 weeks of root development and successful hardening off, transplant your rooted cuttings into larger containers with regular potting soil. Use a well-draining rose potting mix or a blend of peat moss, perlite, and compost. Gently remove each cutting from its propagation medium, being careful not to damage delicate new roots.
Plant each rooted cutting in a 4-6 inch pot, burying it to the same depth it was in the propagation medium. Water thoroughly and place in a bright location with indirect light. For the first week, keep the soil consistently moist but not waterlogged. After establishing, gradually transition to normal watering patterns—allowing the top inch of soil to dry between waterings.
Feed your developing roses with a balanced, half-strength fertilizer every 2-3 weeks once new growth is vigorous. This provides nutrients needed for leaf development and root expansion. As plants grow, gradually increase fertilizer strength to full recommended rates.
Keep your young roses indoors or in a protected location for the first growing season. Avoid exposing them to harsh outdoor conditions until they’ve developed substantial root systems and are at least 12 inches tall. In fall, gradually acclimate them to outdoor conditions if you plan to plant them in your garden.
Troubleshooting Common Problems
Cuttings Rot Without Rooting
Rotting indicates excessive moisture or fungal infection. The most common cause is overwatering or poor drainage. Check your rooting medium consistency—it should be well-draining. If using peat moss, ensure you’re using perlite or sand in adequate ratios. Reduce watering frequency and increase air circulation. If fungal issues persist, switch to fresh, sterile rooting medium and sterilize your containers with bleach solution.
Cuttings Dry Out and Shrivel
Shriveling indicates insufficient humidity or excessive water loss. Ensure your humidity dome or covering maintains adequate moisture. Check daily for drying conditions, particularly with softwood cuttings. If your location is very dry, consider using a heating mat with a humidity dome, which maintains moisture while providing bottom heat. Mist softwood cuttings more frequently—sometimes 2-3 times daily in low-humidity conditions.
Slow or No Root Development
If cuttings aren’t rooting after 8-10 weeks, several factors could be responsible. Verify you’re using fresh rooting hormone—old hormone loses effectiveness. Ensure adequate bottom heat, particularly for softwood cuttings. Check that your light levels are sufficient but not excessive—cuttings need bright, indirect light. If all environmental factors are correct, the parent plant variety may simply be difficult to propagate. Some rose varieties root more readily than others; refer to Family Handyman for variety-specific propagation tips.
Mold or Fungal Growth
White, gray, or black mold indicates fungal infection. Remove affected cuttings immediately. Increase air circulation by briefly removing humidity covers daily. Reduce humidity levels slightly if possible. Apply a fungicide designed for seedlings if mold becomes widespread. In future propagations, ensure your rooting medium is sterile and your containers are properly sanitized before use.
Weak or Leggy Growth
If your rooted cuttings develop long, weak stems with sparse leaves, they need brighter light. Move them to a location with stronger, indirect light. Leggy growth indicates insufficient light intensity, causing the plant to stretch seeking light sources. Once established in larger containers, gradually increase light exposure to encourage compact, bushy growth.
FAQ
Can I propagate roses any time of year?
While you can technically propagate roses year-round, success rates vary dramatically by season. Hardwood cuttings taken in late fall and winter have the highest success rates. Softwood cuttings taken in spring and early summer also succeed well. Summer and fall propagation is possible but more challenging due to temperature fluctuations and pest pressures.
What’s the difference between hardwood and softwood cuttings?
Hardwood cuttings are taken from mature, woody stems during dormancy. They root more slowly but have higher success rates and can be stored. Softwood cuttings come from tender, green growth during the active growing season. They root faster but require more careful handling and immediate attention to prevent drying.
How long until my propagated roses bloom?
Most propagated roses won’t bloom until their second or third year of growth. Young plants need to establish strong root systems and develop sufficient foliage before they can produce flowers. Providing excellent growing conditions and proper care accelerates flowering, but patience is essential.
Can I propagate climbing or miniature roses?
Yes, all rose types can be propagated using the same techniques. Climbing roses root readily and develop vigorous plants. Miniature roses propagate successfully but require slightly more careful humidity management due to their small size. Old garden roses and heirloom varieties often root more reliably than modern hybrid teas.
What’s the success rate for rose propagation?
Success rates typically range from 30-80% depending on variety, technique, and environmental conditions. Hardwood cuttings from vigorous varieties often achieve 60-80% success, while softwood cuttings and difficult varieties might achieve 30-50%. Even with perfect technique, some cuttings fail—this is normal and expected.
Do I need special equipment for propagation?
No special equipment is required. Basic supplies include sharp pruning shears, a container with drainage, rooting medium, rooting hormone, and a clear plastic bag or dome to maintain humidity. Many successful gardeners propagate roses with just these simple tools. For larger-scale propagation, home improvement retailers offer affordable propagation trays and humidity domes.
Can I use honey instead of rooting hormone?
Honey does contain natural compounds that encourage rooting and has antimicrobial properties. Some gardeners report success using honey as a rooting hormone alternative. However, commercial rooting hormones contain higher concentrations of active auxins and fungicides, making them more reliable. If you want to experiment with natural alternatives, dilute honey with water to prevent excessive stickiness.
What should I do with my rooted cuttings over winter?
Rooted cuttings established in pots should be kept indoors or in a protected location during their first winter. Ensure they receive adequate light and maintain moderate watering. Avoid fertilizing during winter dormancy. In spring, gradually acclimate them to outdoor conditions before planting in the garden. Young roses need this protection to ensure survival through their first winter.
Are there roses that are difficult to propagate?
Some rose varieties root more readily than others. Old garden roses, wild roses, and species roses typically propagate easily. Modern hybrid teas and some floribundas can be more challenging. Climbing roses usually root reliably. If you’re struggling with a particular variety, consult gardening references for variety-specific tips or consider trying a different propagation method like air layering.
Related Posts

Superscript in Google Docs: Expert Tips

Strikethrough in Excel: Easy Steps for Beginners
