
Craft Homemade Tallow: Easy Step-by-Step Guide
Craft Homemade Tallow: Easy Step-by-Step Guide
Tallow, rendered animal fat traditionally used for centuries, is experiencing a renaissance among homesteaders, survivalists, and eco-conscious crafters. This versatile substance can be transformed into candles, soap, cooking fat, and even skincare products. Making tallow at home is surprisingly simple, requiring minimal equipment and basic ingredients. Whether you’re interested in sustainable living or exploring traditional skills, learning how to make tallow opens doors to self-sufficiency and resourcefulness.
The process of rendering tallow is straightforward enough for beginners yet rewarding enough for experienced crafters. By following this comprehensive guide, you’ll discover how to transform raw animal fat into a clean, shelf-stable product perfect for multiple applications. We’ll walk through sourcing materials, preparation, rendering methods, and storage techniques to ensure your homemade tallow turns out perfectly every time.

What Is Tallow and Why Make It
Tallow is rendered beef or mutton fat that has been melted down, strained, and solidified. Historically, it was the primary material for candles before petroleum-based alternatives became available. Today, homesteaders and environmentally conscious individuals are rediscovering tallow’s numerous applications and benefits. Unlike commercial products laden with chemicals, homemade tallow is pure, natural, and completely customizable.
The advantages of making tallow at home are substantial. First, it’s incredibly economical—you can often obtain beef fat scraps from local butchers for free or at minimal cost. Second, tallow is remarkably versatile; it works beautifully for candle making, soap production, and even as a cooking medium. Third, producing tallow aligns with zero-waste principles by utilizing parts of the animal that might otherwise be discarded. Finally, homemade tallow allows you to control quality and avoid synthetic additives found in commercial products.
Understanding the basics of how-to guides and tutorials will help you succeed in this rewarding project. The rendering process is essentially one of patience and temperature control, making it accessible to anyone willing to dedicate a few hours to the task.

Sourcing Quality Fat
The foundation of excellent tallow begins with sourcing high-quality animal fat. Your primary option is beef fat, which produces superior tallow with a higher melting point and better performance in candles and skincare applications. Contact local butcher shops and ask about their fat trimmings—many butchers are delighted to provide these scraps for free since they’d otherwise dispose of them.
When visiting butchers, request suet or fat trimmings specifically. Suet is the hard fat surrounding beef kidneys and creates the best-quality tallow. However, any beef fat works well for the rendering process. Some people also use mutton (sheep) fat, which produces a slightly different scent profile but works equally well. Avoid pork fat for traditional tallow applications, as it has different rendering characteristics and smoke points.
Building relationships with local butchers often yields additional benefits. Once they know you’re interested in their fat scraps, they may set aside quality pieces for you. Some butchers might even trim fat from customer orders and hold it specifically for tallow makers. This sustainable approach benefits both parties and strengthens your local community connections.
Plan to collect and freeze fat until you have enough for rendering—typically 5-10 pounds yields approximately 1-2 pounds of finished tallow. Storing raw fat in the freezer prevents spoilage and allows you to accumulate sufficient quantities for an efficient rendering session.
Preparing Your Workspace
Successful tallow making requires proper workspace preparation. Choose a well-ventilated area, preferably your kitchen or a dedicated workspace outdoors. Rendering fat produces steam and mild odors, so adequate ventilation is essential. If working indoors, open windows and consider running an exhaust fan throughout the process.
Gather all necessary equipment before beginning. You’ll need a large stainless steel pot, a heat source (stovetop works perfectly), a meat grinder or food processor (optional but helpful), cheesecloth or fine mesh strainers, glass jars for storage, a thermometer, and slotted spoons or skimmers. Having everything organized streamlines the process and prevents interruptions once rendering begins.
Protect your work surfaces with newspaper or parchment paper to simplify cleanup. Tallow rendering can be messy, so preparing your workspace accordingly saves time later. Consider wearing an apron and having paper towels readily available. If you’re concerned about odors, lighting a candle or boiling a small pot of water with lemon peels simultaneously can help mask rendering aromas.
Safety is paramount when working with hot fat. Keep children and pets away from the rendering area, have a fire extinguisher nearby, and never leave hot fat unattended. Working during daylight hours provides better visibility and control over the process. Ensure your stove is in good working condition and your pot has a secure, stable base.
Cutting and Preparing Fat
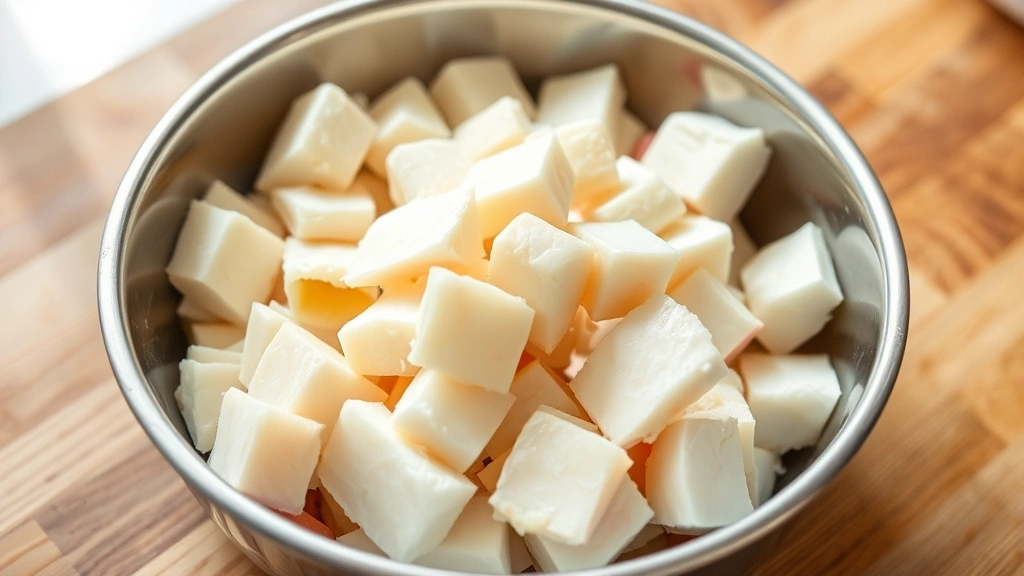
Begin by removing your frozen or refrigerated fat from storage. Allow it to thaw slightly if frozen—this makes cutting easier. Using a sharp knife, cut the fat into small cubes, approximately 1-2 inches in size. Smaller pieces render more quickly and uniformly, reducing overall processing time.
For those with a meat grinder or food processor, grinding the fat creates even smaller pieces and accelerates rendering significantly. If using a food processor, pulse the fat in short bursts rather than continuous operation to avoid creating a paste. Work in batches and keep the blade and bowl cold by chilling them before processing.
Pat the prepared fat dry with paper towels before adding to your pot. Excess moisture can cause splattering and prolongs the rendering process. Some traditional methods involve rinsing fat with cold water first to remove blood and impurities, then drying thoroughly. This extra step produces slightly cleaner finished tallow, though it’s not strictly necessary.
At this stage, you can add optional aromatics if desired. Whole herbs like rosemary or thyme, vanilla pods, or essential oils can infuse tallow with pleasant scents. Add these materials after the fat has begun rendering but before straining to allow flavors to develop. This technique is particularly useful when making tallow for organized kitchen storage of specialty products.
Wet Rendering Method
The wet rendering method is the most popular approach for home tallow makers because it produces clean results and is forgiving for beginners. Place your prepared fat into a large stainless steel pot and add just enough water to barely cover the fat—approximately one cup of water per five pounds of fat works well.
Heat the mixture over medium-low heat, bringing it to a gentle simmer. The water helps regulate temperature and prevents scorching. As the fat renders, it will melt and separate from connective tissue and impurities. This process typically requires 2-4 hours, depending on fat quantity and piece size. Stir occasionally to ensure even rendering, but don’t rush the process by increasing heat excessively.
During rendering, you’ll notice the fat transforming into liquid while solids (called cracklings or greaves) sink to the bottom and rise to the surface. These cracklings are edible and nutritious—many people save them for cooking or pet food. Skim off surface cracklings periodically and set them aside.
Continue simmering until all visible fat has liquefied and only small brown bits remain. The mixture should smell pleasantly meaty without any burnt odors. If you detect scorching smells, immediately reduce heat and stir thoroughly. Burnt tallow is still usable but may have an unpleasant flavor unsuitable for culinary applications.
Once rendering is complete, allow the mixture to cool slightly, then carefully strain through cheesecloth into clean glass jars. The water will settle to the bottom as the tallow cools and solidifies above it. This natural separation makes the water easy to remove once fully cooled.
Dry Rendering Method
For those preferring a faster alternative, the dry rendering method skips water entirely. Place prepared fat directly into your pot without any liquid and heat over low to medium-low heat. This method requires more careful temperature monitoring since there’s no water buffer to prevent overheating.
Stir frequently—at least every 10-15 minutes—to ensure even rendering and prevent browning. The dry method typically completes in 1-2 hours, roughly half the time of wet rendering. However, this speed comes with slightly increased risk of scorching if temperatures aren’t carefully managed.
The dry method produces tallow with a slightly more pronounced flavor and aroma, which some people prefer for candle making. The process is straightforward: continue heating and stirring until fat has completely liquefied and only small brown solids remain. Strain through cheesecloth into glass jars and allow to cool.
Some advanced renderers use slow cookers for the dry method, setting them to low heat and rendering for 8-12 hours with minimal stirring. This ultra-low-temperature approach produces exceptionally clean, pale tallow and virtually eliminates scorching risk. However, it requires advance planning since slow cooker rendering cannot be rushed.
Filtering and Clarifying
Proper filtering dramatically improves tallow quality and appearance. After initial straining through cheesecloth, allow the tallow to cool completely—this takes 4-6 hours at room temperature or can be accelerated by refrigeration. Once solid, remove the water layer from the bottom by carefully scraping it away or gently reheating to separate layers.
For ultra-clear tallow suitable for premium candles or skincare products, perform a secondary filtering. Reheat the solidified tallow gently until it liquefies, then strain again through fine mesh or coffee filters. This second filtering removes fine particles that create cloudiness. Some crafters repeat this process multiple times for absolutely pristine results.
An alternative clarification method involves using a water bath. Place your tallow in a glass jar and set the jar in a pot of gently simmering water (never direct heat). This bain-marie approach allows tallow to slowly melt and impurities to settle naturally. Strain from the top layer carefully into clean containers. This method takes longer but produces exceptionally pure tallow.
Monitor color throughout the filtering process. Quality tallow ranges from pale cream to light golden, depending on the fat source and rendering method. Overly dark or brown tallow indicates scorching during rendering. While still usable, scorched tallow may have off-flavors unsuitable for cooking applications, though it works fine for candles and soap.
Storage and Shelf Life
Properly stored tallow remains stable for extended periods, making it ideal for long-term storage. Cool, completely solidified tallow should be transferred to airtight containers—glass jars work excellently for this purpose. Store in a cool, dark location away from direct sunlight, which can cause oxidation and rancidity.
Room temperature storage works well for tallow in most climates. In warm environments, refrigeration prevents softening and extends shelf life. Frozen tallow lasts indefinitely, making freezer storage an excellent option if you have space. Simply thaw at room temperature before using.
High-quality, properly rendered tallow can last 1-2 years at room temperature and indefinitely when frozen. Signs of spoilage include rancid odors, discoloration, or visible mold. Tallow made using the wet rendering method tends to last longer since water was present during rendering, potentially removing some oxidative compounds.
Label your containers with the rendering date and fat source. This practice helps track shelf life and allows you to use older batches first. Consider also noting whether the tallow was rendered via wet or dry methods, and any aromatics added during processing. This information proves valuable when experimenting with different applications.
Store tallow away from heat sources and strong-smelling substances, as it can absorb odors. Keep it separate from foods with strong flavors to prevent cross-contamination of aromas. A dedicated shelf in a pantry or cool closet works perfectly. Some people store tallow in their garage or outdoor shed in cool climates.
Common Troubleshooting
Even experienced tallow makers occasionally encounter challenges. If your finished tallow appears grainy or crystalline rather than smooth, this typically indicates temperature fluctuations during cooling. Reheat gently and allow to cool slowly at room temperature for smoother results. Alternatively, this texture doesn’t affect functionality—grainy tallow works perfectly well for candles and soap.
Cloudy or opaque tallow usually means incomplete filtering. Reheat and strain again through finer mesh or coffee filters. Multiple filtering passes gradually improve clarity. Some cloudiness is actually desirable in certain applications, so don’t stress if your tallow isn’t perfectly transparent.
Strong or unpleasant odors during rendering suggest scorching. Reduce heat immediately and stir thoroughly. If the smell persists, your tallow may have been scorched. While still usable for non-culinary applications, scorched tallow isn’t ideal for cooking. Future batches benefit from lower, more patient heat settings.
If tallow appears to have a rancid smell after storage, it was likely exposed to heat, light, or air. Prevent this by ensuring airtight containers and cool, dark storage conditions. Tallow that develops an off-smell should be discarded rather than used, particularly for applications involving skin contact.
Excessive cracklings or solids in your finished tallow indicate incomplete rendering or inadequate straining. These can be removed by reheating and straining again. Some people intentionally keep cracklings for nutritional purposes or pet food, so their presence isn’t necessarily a problem.
If your tallow is too soft or doesn’t solidify properly, your fat source may have had too high a proportion of unsaturated fat. This sometimes occurs with pork fat or lower-quality beef trimmings. Soft tallow still works for candles and cooking but may not perform as expected in soap making. Future batches benefit from sourcing higher-quality suet.
FAQ
Can I make tallow from pork fat?
While technically possible, pork fat (lard) has different characteristics than beef tallow. Pork fat renders similarly but produces a softer final product unsuitable for traditional tallow candles. Lard works wonderfully for cooking and baking but isn’t ideal for soap making or traditional tallow applications. Stick with beef fat for authentic tallow.
How much tallow do I get from raw fat?
Typically, you’ll yield approximately 20-25% of the original weight in finished tallow. Five pounds of raw beef fat produces roughly 1-1.25 pounds of finished tallow. Exact yields depend on fat quality, water content, and rendering method. Wet rendering often produces slightly less finished product due to water removal.
Is homemade tallow safe for cooking?
Yes, properly rendered tallow is excellent for cooking. It has a high smoke point (around 400°F) and adds wonderful flavor to roasted vegetables, fried foods, and baked goods. Many people consider tallow superior to modern cooking oils due to its nutritional profile and traditional use. Ensure your tallow wasn’t scorched during rendering before using for culinary purposes.
What can I make with homemade tallow?
Tallow has numerous applications. Traditional candles are the most popular use—tallow candles burn cleanly and provide excellent illumination. Tallow soap produces luxurious, long-lasting bars. Skincare products like salves and balms benefit from tallow’s moisturizing properties. Cooking is another excellent use, particularly for high-heat applications. Some people even use tallow for waterproofing leather goods.
Why is my tallow grainy?
Grainy texture typically results from rapid cooling or temperature fluctuations. Reheat gently and cool slowly at room temperature for smoother results. Alternatively, grainy tallow functions perfectly well despite its texture—it’s purely aesthetic. If smoothness is important for your application, take more time with the cooling process next batch.
Can I render fat in a slow cooker?
Yes, slow cookers work excellently for tallow rendering, particularly using the dry method. Set to low heat and render for 8-12 hours with minimal stirring. This ultra-low-temperature approach produces exceptionally clean tallow and virtually eliminates scorching risk. Just be patient—slow cooker rendering can’t be rushed but produces outstanding results.
How do I know if my tallow is bad?
Discard tallow showing signs of rancidity (off or sour smells), visible mold, or unusual discoloration. Fresh tallow smells pleasant and slightly meaty. If you’re uncertain, trust your nose—if something seems wrong, don’t use it. Properly stored tallow lasts years without issues, so spoilage is rare with correct storage practices.
Related Posts

Superscript in Google Docs: Expert Tips

Strikethrough in Excel: Easy Steps for Beginners
