
Craft an Iron Golem? A DIY Guide for Gamers
How to Make an Iron Golem: A Complete DIY Guide for Minecraft Gamers
Creating an Iron Golem in Minecraft is one of the most rewarding crafting projects for players looking to add automated defense and protection to their bases. Whether you’re a seasoned builder or just starting your Minecraft journey, this comprehensive guide will walk you through every step needed to construct a fully functional Iron Golem. From gathering materials to understanding the mechanics of golem spawning, we’ll cover everything you need to know to become a master golem architect.
Iron Golems serve as powerful protectors in your Minecraft world, attacking hostile mobs and keeping your village safe from danger. Unlike many other crafting projects that require complex machinery or rare resources, Iron Golem creation is relatively straightforward once you understand the basic structure and positioning requirements. This guide is designed for both creative and survival mode players who want to harness the protective power of these iron giants.
Materials You’ll Need to Gather
Before you begin constructing your Iron Golem, you’ll need to collect the essential building materials. The primary component you’ll need is iron blocks—specifically, you’ll require a total of 36 iron blocks to create one complete Iron Golem structure. This is a significant investment, so plan accordingly in your survival world by mining iron ore and smelting it in a furnace.
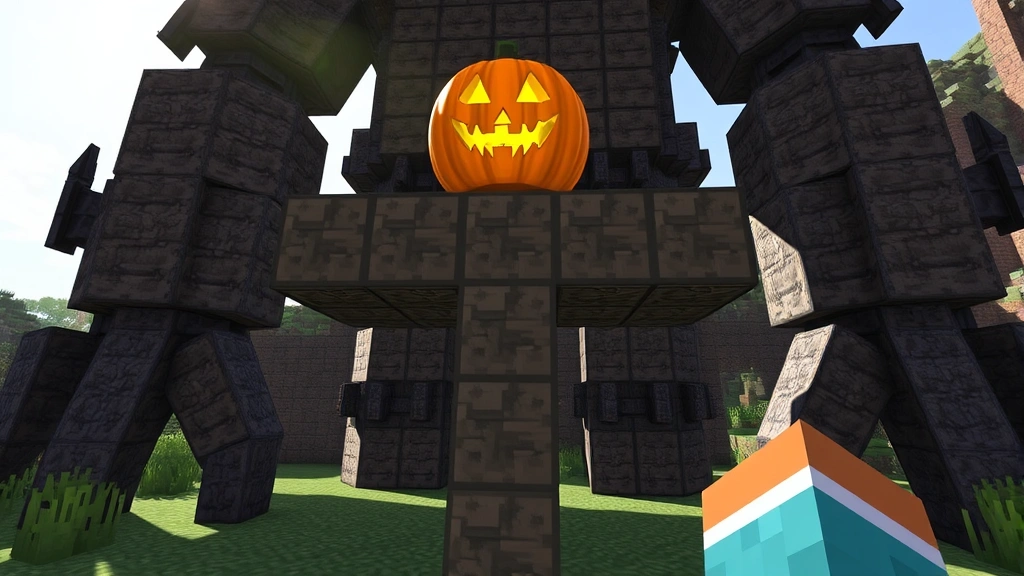
In addition to iron blocks, you’ll need a carved pumpkin or jack o’lantern for the golem’s head. If you’re playing in creative mode, this is instantly available, but survival mode players will need to locate a pumpkin patch or grow pumpkins themselves. You can carve a pumpkin using shears to create the distinctive face that serves as the golem’s head. A jack o’lantern works equally well and provides the added benefit of emitting light.
Optional materials that enhance your golem-building experience include building guides and tutorials to reference while constructing. Having a clear workspace is also beneficial—consider planning your build area before starting. You may also want to gather scaffolding or temporary blocks to help position your iron blocks at the correct heights.
- 36 Iron Blocks (4 blocks for the body, 4 for the arms, 1 for the head placement)
- 1 Carved Pumpkin or Jack o’Lantern
- Scaffolding or temporary blocks for construction
- Building space with at least 3×3 block area
Understanding Iron Golem Mechanics and Behavior
Iron Golems operate under specific mechanics that determine how they spawn, move, and interact with the Minecraft world. Understanding these mechanics is crucial for successful golem creation and management. The golem will only activate when you place the pumpkin head as the final block—this is the trigger that brings your iron structure to life.
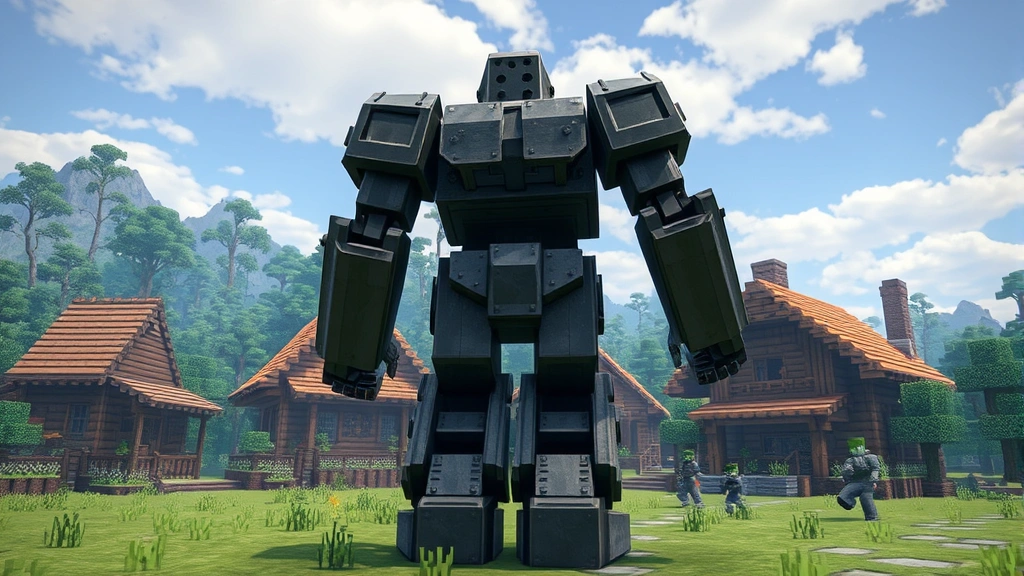
Once spawned, Iron Golems will patrol your base and attack any hostile mobs within a certain radius. They’re particularly effective against zombies, creepers, and skeletons. The golem will also interact with villagers, protecting them and preventing them from being harmed by nearby mobs. This makes Iron Golems invaluable for establishing safe village communities within your world.
It’s important to note that Iron Golems have specific despawn rules. Unlike other mobs, Iron Golems created by players will never despawn, even if you travel far away from them. This permanence makes them excellent long-term investments for base protection. However, if an Iron Golem takes too much damage and its health depletes, it will die and drop iron ingots and poppies—so be sure to protect your golems from excessive damage.
Step-by-Step Construction Guide
Now that you understand the materials and mechanics, let’s build your Iron Golem. Follow these precise steps to ensure your golem spawns correctly and functions as intended.
Step 1: Prepare Your Workspace – Clear a 3×3 area on flat ground where you plan to build your golem. Remove any obstacles or mobs that might interfere with the construction process. This clean workspace will make placement easier and reduce errors.
Step 2: Create the Body Column – Stack three iron blocks vertically in the center of your workspace. This forms the main body of your golem. Ensure these blocks are perfectly aligned, as misalignment will prevent the golem from spawning correctly.
Step 3: Add the Arms – Place one iron block to the left of the middle block on the body column and one iron block to the right. These should be at the same height as the top block of your body column, creating a T-shape. The arms should extend exactly one block in each direction.
Step 4: Position the Head – This is the critical final step. Place your carved pumpkin or jack o’lantern on top of the center body column. The moment this block is placed, your Iron Golem will spawn into existence, assuming all previous blocks are correctly positioned.
If your golem doesn’t spawn after placing the pumpkin head, double-check that:
- All iron blocks are solid blocks (not stairs or slabs)
- The structure forms a perfect T-shape
- The pumpkin is placed on top of the vertical column
- There’s sufficient space above for the golem to render
- You’re using a carved pumpkin or jack o’lantern, not a regular pumpkin
Proper Placement and Positioning Strategy
The location where you build your Iron Golem significantly impacts its effectiveness as a defender. Strategic placement ensures maximum protection for your base and villages. Consider placing golems near village centers, as they’ll naturally protect villagers and prevent hostile mob spawns in those areas.
When deciding where to position your golem, think about high-traffic areas where mobs frequently spawn. Golems are most effective when placed in open areas where they have clear lines of sight to approaching enemies. Avoid placing them in tight corridors or enclosed spaces, as this limits their movement and combat effectiveness.
For base defense, position multiple golems at strategic entry points. A well-placed golem at your base entrance will intercept most hostile mobs before they reach your structures. If you have multiple projects running simultaneously, you might organize your golem placement alongside other defensive structures.
Consider the terrain around your golem placement. Golems can navigate most terrain, but they’ll have difficulty with deep water or lava. Ensure your golem has adequate space to move and combat mobs effectively. A minimum of 5×5 blocks of open space around your golem allows for optimal movement and fighting capability.
Activation and Spawning Process
The activation process is the most critical moment in Iron Golem creation. Once you place that final pumpkin block, several things happen in rapid succession. The pumpkin becomes the golem’s head, and the entire structure transforms into a living, breathing entity ready to defend your base.
When the golem spawns, you’ll see it take its distinctive stance—arms at its sides, ready for combat. The golem will immediately begin patrolling the surrounding area, looking for hostile mobs to attack. If there are villagers nearby, the golem will interact with them, establishing a protective relationship.
One important detail: the order of placement matters less than the final configuration. You can place the blocks in any order, but once that pumpkin head is positioned, the T-shaped iron structure below it must be complete and correct. If you place the pumpkin before completing the body, nothing will happen—you’ll simply have a pumpkin sitting on an incomplete structure.
For players managing multiple construction projects, keep detailed notes about your golem spawning locations. This helps with organizing your base layout and ensuring you can quickly locate and maintain your golems.
Optimization and Advanced Tips for Golem Management
Once you’ve successfully created your first Iron Golem, you can employ advanced techniques to optimize your golem army and base defense system. Creating a golem farm is an advanced technique that allows you to produce multiple golems for various purposes.
To create an efficient golem farm, you’ll need to establish a reliable iron block production system. This might involve mining iron ore, smelting it, and storing the ingots for crafting. Some experienced players set up automatic iron farms using mob spawners and furnaces to maintain a steady supply of iron blocks.
Another optimization technique involves creating golem pathways—designated routes where your golems patrol and defend. By strategically placing multiple golems along these pathways, you create overlapping defense zones that cover your entire base. This network of golems works together to eliminate threats before they reach your structures.
Consider implementing a maintenance routine for your golems, similar to how you’d maintain other important systems. Periodically check on your golems to ensure they haven’t wandered into dangerous situations or become trapped.
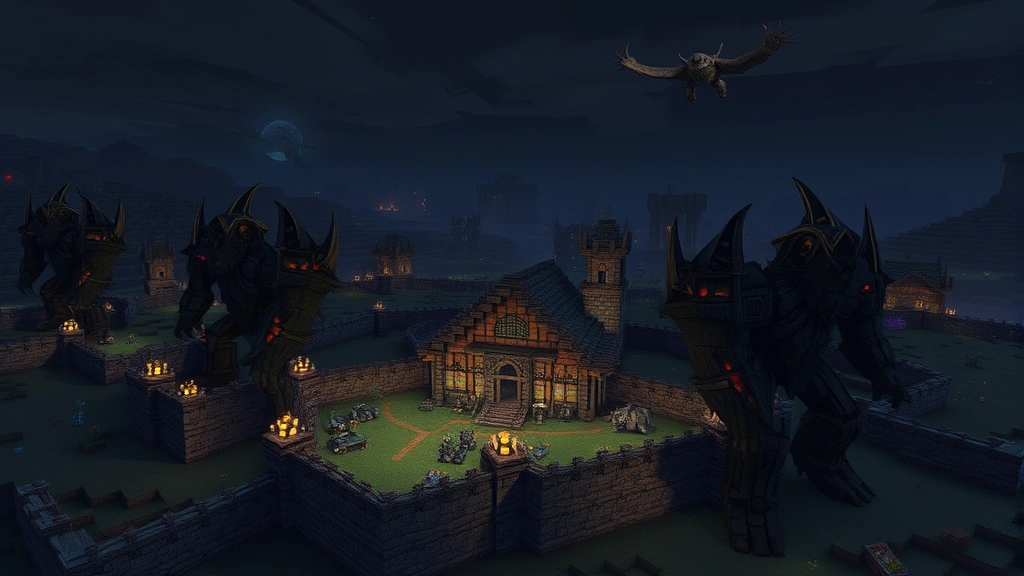
For creative builders, you can customize the appearance of your golems by placing them in themed structures. Some players create elaborate iron golem statues or temples, incorporating the golems into their overall base aesthetic while maintaining their protective functionality.
Advanced Configuration Options:
- Combine golems with other defense mechanisms like walls and moats
- Use redstone contraptions to summon golems when needed
- Create separate golem areas for different biomes or dimensions
- Implement golem rotation systems to prevent overuse of individual golems
- Build healing stations where golems can recover from damage
Common Problems and Solutions
Even experienced builders encounter issues when creating Iron Golems. Understanding these common problems and their solutions will save you time and frustration.
Problem: Golem Won’t Spawn – This is the most common issue. Verify that your iron block structure is exactly right: three blocks vertically in the center, with one block on each side of the middle block, forming a perfect T. Even slight misalignments prevent spawning. Also confirm you’re using a carved pumpkin or jack o’lantern, not a regular pumpkin.
Problem: Golem Keeps Wandering Away – Golems patrol autonomously, so some wandering is normal. If your golem is leaving your base entirely, consider building walls or barriers to contain its patrol area. You can also create multiple golems to ensure coverage of your entire base.
Problem: Golem Takes Damage Quickly – If your golem is dying too fast, you might be facing too many mobs simultaneously. Add additional golems to share the defense load, or create sheltered areas where your golems can rest between battles.
Problem: Insufficient Iron Supply – Creating multiple golems requires significant iron. Establish efficient mining operations or automatic iron farms. Consider using systematic organization methods to track your iron storage and production rates.
Problem: Golem Stuck in Terrain – Sometimes golems get stuck in blocks or terrain features. Manually free them by breaking and replacing nearby blocks, or create smoother terrain around your golem’s patrol area.
Frequently Asked Questions About Iron Golems
How long does it take to create an Iron Golem?
The actual construction process takes only a few minutes once you have your materials gathered. However, collecting 36 iron blocks can take significantly longer depending on your mining efficiency and access to iron ore. In survival mode, expect to spend 30 minutes to several hours gathering materials.
Can I create Iron Golems in any game mode?
Yes, Iron Golems can be created in survival, creative, and adventure modes. The construction process is identical across all modes, though creative mode provides instant access to materials. Some servers may have restrictions, so check your server rules if playing multiplayer.
Do Iron Golems require food or maintenance?
No, Iron Golems don’t need food or regular maintenance beyond occasional repairs if they take damage. They operate indefinitely as long as they have health remaining. You can repair a damaged golem by placing iron blocks next to it, which restores its health.
How many mobs can one Iron Golem defeat?
A single Iron Golem can handle moderate mob waves effectively. Against small groups of 5-10 mobs, one golem is usually sufficient. For larger raids or heavily populated areas, multiple golems provide better protection and prevent any mobs from reaching your base.
Can I move an Iron Golem after it spawns?
Iron Golems move autonomously and cannot be controlled directly. However, you can encourage movement by placing mobs or threats in desired directions. For permanent relocation, you’ll need to create a new golem in the desired location.
What’s the difference between player-created and naturally-spawned golems?
Player-created golems (those you build with iron blocks and pumpkins) never despawn and are under your control regarding placement. Naturally-spawned golems in villages are independent and may despawn if you travel far away. Player-created golems are generally more reliable for base defense.
Do Iron Golems attack players?
Iron Golems will not attack you unless you attack them first or if you have a low reputation in a village. Maintain peaceful relations with your golems by avoiding unnecessary combat with them.
How much damage can an Iron Golem take?
Iron Golems have 100 health points (50 hearts). They’re quite durable and can survive significant damage from most mobs. However, concentrated attacks from multiple powerful mobs can overwhelm a single golem relatively quickly.
Related Posts

Superscript in Google Docs: Expert Tips

Strikethrough in Excel: Easy Steps for Beginners
