
Laying Sod: Expert Tips for a Lush Lawn
Laying Sod: Expert Tips for a Lush Lawn
Creating a beautiful lawn doesn’t always require waiting months for grass seed to germinate. Laying sod offers homeowners an instant green carpet that transforms outdoor spaces in a single day. Whether you’re starting fresh after construction, replacing a bare patch, or upgrading an existing lawn, understanding how to lay sod properly ensures your investment thrives for years to come.
Sod installation is a manageable DIY project that combines physical work with strategic planning. Unlike seeding, which demands patience and precise watering schedules, sod provides immediate results with established root systems ready to anchor into your soil. This guide walks you through every step of the sod-laying process, from site preparation through post-installation care, ensuring your new lawn establishes successfully and maintains that lush, healthy appearance.
Preparing Your Lawn for Sod Installation
Successful sod installation begins long before the rolls arrive at your property. Proper preparation determines whether your new lawn establishes strong roots or struggles with poor contact. The foundation you create directly impacts your sod’s ability to absorb water, nutrients, and establish throughout the growing season.
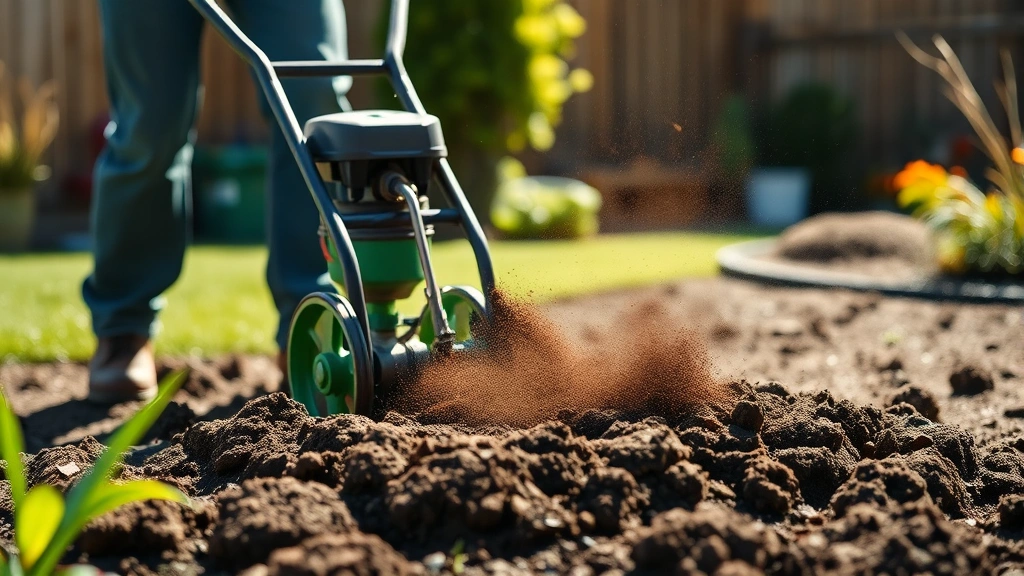
Remove existing vegetation and debris. Start by clearing your lawn of old grass, weeds, rocks, sticks, and other obstructions. Use a sod cutter to remove existing turf if the grass is thick or unhealthy. These machines can be rented from most home improvement centers and save considerable time and physical effort. If you prefer manual removal, a sharp spade works for smaller areas, though it’s labor-intensive. Don’t rush this step—any remaining debris creates air pockets that prevent proper sod-to-soil contact.
Test and amend your soil. Before laying sod, send soil samples to your local cooperative extension office for comprehensive testing. These tests reveal pH levels, nutrient content, and soil composition. Most grasses prefer slightly acidic soil (pH 6.0-7.0). Based on results, incorporate amendments like compost, peat moss, or lime. Work amendments 2-3 inches deep into the existing soil using a tiller. This creates a nutrient-rich environment that encourages rapid root development in your new sod.
Grade and level the surface. Uneven terrain causes water pooling, dry spots, and uneven sod settling. Use a landscape rake to identify high and low spots. Remove soil from elevated areas and fill depressions, creating a gently sloping surface that promotes drainage. Aim for a slope of approximately 1 inch per 4-8 feet away from structures to prevent water damage. Compact the prepared soil lightly with a roller—firm enough to prevent settling but not so hard that you create compacted layers that restrict root penetration.
Essential Materials and Tools
Gathering the right equipment before sod delivery ensures smooth installation without frustrating delays. Most tools can be rented affordably, making this project accessible to homeowners of all experience levels.
Required tools include:
- Landscape rake for soil preparation and final grading
- Sod roller or lawn roller to compress installed sod and eliminate air pockets
- Sharp knife or sod cutter for trimming edges and fitting pieces
- Wheelbarrow for transporting sod rolls
- Garden hose with spray nozzle for immediate watering
- Measuring tape to calculate sod quantity needed
- Work gloves and sturdy boots for comfort and safety
Materials needed:
- Sod rolls (calculate square footage and add 5-10% for waste)
- Topsoil or compost for amendments (2-4 cubic yards per 1,000 square feet)
- Fertilizer appropriate for new sod establishment
- Lime or sulfur if soil amendments require pH adjustment
Order sod from a reputable supplier specializing in turf for your climate zone. Ask about delivery timing—sod should be installed within 24-48 hours of harvesting for optimal viability. Confirm the grass species suits your region’s climate, sun exposure, and maintenance preferences. Cool-season grasses like fescue and bluegrass thrive in northern climates, while warm-season varieties like bermuda and zoysia perform better in southern regions.
Step-by-Step Installation Process
Installation day requires focus and efficiency since sod begins deteriorating once harvested. Start early to maximize daylight hours and coordinate with helpers who can speed the process considerably.
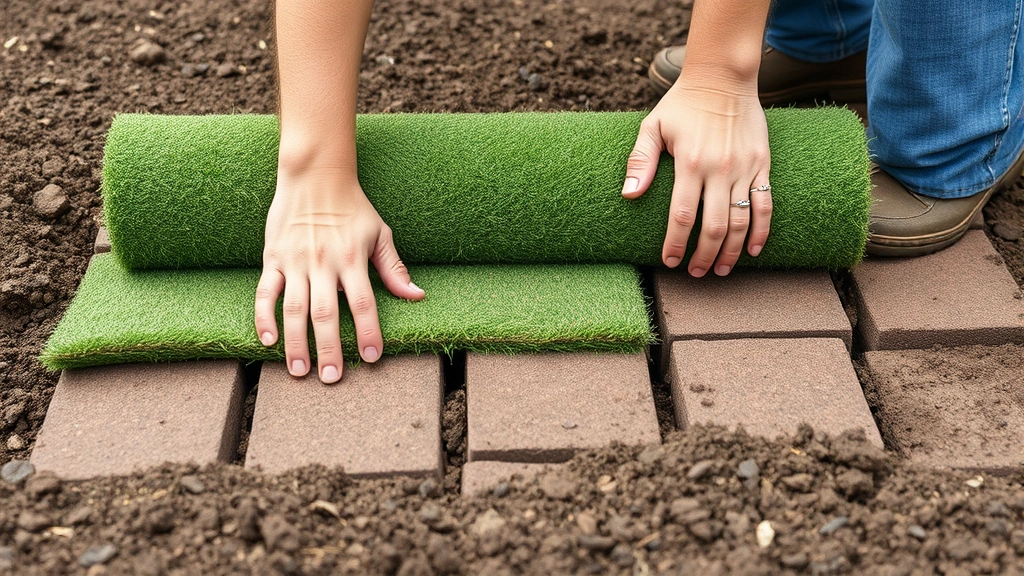
Lay sod in a staggered brick pattern. Begin at the longest, straightest edge of your lawn, typically along a driveway or patio. Unroll the first strip and butt it firmly against the edge. Place the second roll alongside the first, ensuring edges meet without gaps or overlaps. Stagger subsequent rows like bricks in a wall—offset seams so they don’t align vertically. This pattern distributes stress evenly and prevents visible seam lines from developing as sod settles.
Ensure firm soil contact. As you lay each section, press down firmly to eliminate air pockets between sod and soil. Walk across newly laid sod, applying your body weight to compress it. Use a sod roller filled with water to provide uniform pressure across larger areas. Roll in multiple directions to ensure complete contact. This critical step determines root establishment success—inadequate contact creates dry spots where roots cannot penetrate the soil below.
Trim edges and fit corners. Use a sharp utility knife to trim sod along curved edges, walkways, and structures. Measure and cut pieces to fit odd-shaped areas rather than forcing sod into positions where it won’t make proper contact. Small trimmed pieces work in corners and tight spaces, though larger pieces establish more reliably. Keep a bucket of water nearby for your knife blade—wet blades cut cleaner and more efficiently.
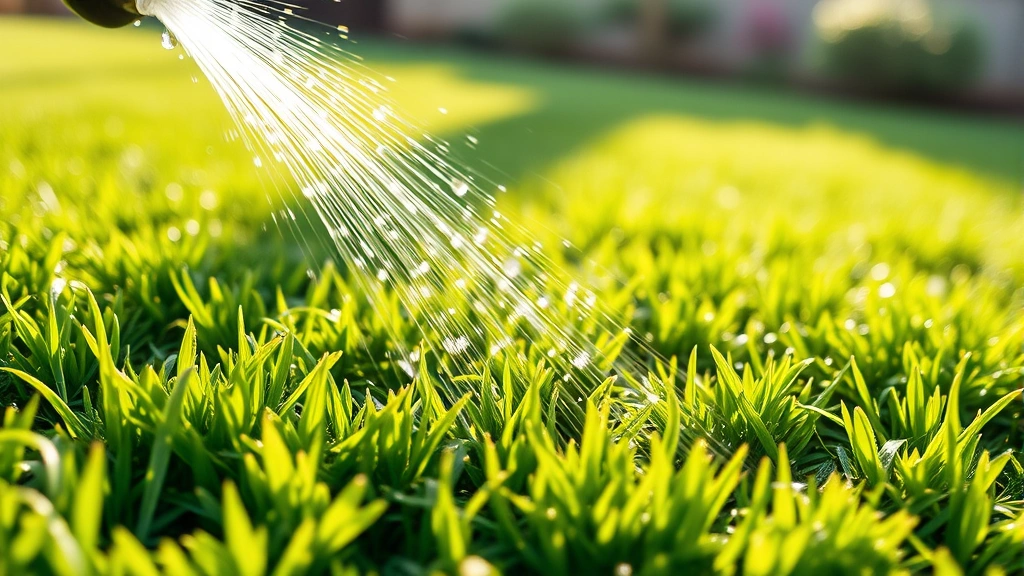
Water immediately after installation. Within 30 minutes of completing installation, apply water thoroughly to activate root growth and settle sod firmly into soil. Water should penetrate the sod and wet the top 2-3 inches of soil beneath. This initial watering is crucial for preventing desiccation and encouraging roots to extend downward seeking moisture.
Proper Watering and Establishment
The first two weeks determine whether your sod thrives or struggles. During this critical establishment period, consistent moisture management is essential—too little water stresses new roots, while excessive water encourages fungal issues and prevents proper rooting.
Week one watering schedule. Apply water daily for the first week, preferably in early morning when temperatures are cool and water loss through evaporation is minimal. Each watering session should penetrate the sod and wet soil 2-3 inches deep. Check moisture by lifting a corner of sod—the soil beneath should feel moist but not waterlogged. Adjust frequency based on weather; hot, dry conditions require more frequent watering than cool, cloudy periods.
Weeks two through four. Gradually reduce watering frequency as roots establish deeper into the soil. By week two, decrease to every other day, then transition to 2-3 times weekly by week four. Deeper, less frequent watering encourages roots to grow downward seeking moisture, creating a more drought-tolerant lawn. Morning watering remains ideal, delivering moisture when the grass can absorb it efficiently.
Avoid foot traffic during establishment. Keep people and pets off newly installed sod for at least two weeks. Walking on sod before roots anchor disrupts soil contact and damages tender shoots. Rope off the area if necessary to prevent accidental damage. After two weeks, light foot traffic is acceptable, though heavy use should wait until roots are fully established (typically 4-6 weeks).
Related to lawn care, you might also explore our guide on home improvement how-to guides for additional outdoor projects and maintenance tips.
First Month Maintenance Tips
Delay mowing until sod is established. Resist the temptation to mow new sod immediately. Wait until grass reaches approximately 3-4 inches tall, usually 10-14 days after installation. The first mowing should remove only the top third of grass blades, leaving grass 2-3 inches tall. Sharp mower blades are essential—dull blades tear grass, creating brown-tipped damage that stresses young plants. Continue regular mowing at 2.5-3.5 inches height depending on your grass species.
Fertilize appropriately. Apply a starter fertilizer formulated for new sod during installation or immediately after. These products contain higher phosphorus levels that encourage root development. Follow product instructions carefully—over-fertilizing burns roots and creates excessive top growth at the expense of root establishment. A second application 4-6 weeks later supports continued establishment. After the first season, transition to regular lawn fertilization schedules appropriate for your grass type and climate.
Address common establishment issues. Brown or yellowing patches indicate potential problems. Check soil moisture first—inadequate watering is the most common cause of sod failure. Lift affected sections to examine soil contact; reroll if air pockets exist. Some discoloration is normal as sod adjusts to new growing conditions. However, persistent problems may indicate disease, insect activity, or soil issues requiring professional diagnosis.
Monitor for weeds. Young sod is vulnerable to weed invasion, particularly in thin or damaged areas. Pull visible weeds by hand rather than using herbicides during the first month—chemical stress compounds establishment challenges. Once sod is fully established (6-8 weeks), selective herbicides can address persistent weeds without harming the new turf.
For additional home improvement guidance, explore our comprehensive DIY project tutorials covering various outdoor and indoor improvements.
Frequently Asked Questions
How much sod do I need?
Measure your lawn’s length and width, then multiply to calculate square footage. Most sod is sold in rolls covering 10 square feet (typically 2 feet by 5 feet). Divide your total square footage by 10 and add 10% for waste and trimming. For example, a 1,000-square-foot lawn requires approximately 110 rolls. Always order slightly more than calculated to account for cuts, irregular shapes, and mistakes.
What’s the best time to lay sod?
Spring and fall offer ideal conditions when temperatures are moderate and natural rainfall supports establishment. Spring allows the full growing season for root development before summer stress. Fall sod establishes through winter, emerging vigorous in spring. Avoid summer heat when possible, though sod can be installed then with increased watering attention. Winter installation is generally not recommended in cold climates where frozen ground prevents proper soil contact.
Can I lay sod over existing grass?
No—old grass must be removed. Sod laid over existing turf cannot make proper soil contact, and the grass beneath competes for moisture and nutrients. Sod cutter rental is affordable and eliminates the problem efficiently. The effort invested in proper removal ensures your new lawn’s success.
How long until sod is fully established?
Most sod establishes sufficiently for light activity within 2-3 weeks. However, complete root establishment requiring full soil penetration takes 4-6 weeks. During this period, continue careful watering and avoid heavy use. After six weeks, your lawn can handle normal use and maintenance.
Why is my sod turning brown?
Brown sod during establishment typically indicates insufficient watering or poor soil contact. Check soil moisture by lifting corners—soil should feel moist 2-3 inches deep. Reroll any areas with air pockets. Increase watering frequency if soil is dry. Some browning is normal as sod adjusts; however, persistent problems require investigation. Contact your local extension office if issues persist despite proper watering.
Do I need to remove thatch from new sod?
No thatch removal is needed immediately after installation. Thatch develops over years as dead grass accumulates. Focus on establishment during the first season, then address thatch removal (if necessary) in subsequent years using a dethatcher or power rake.
Related Posts

Superscript in Google Docs: Expert Tips

Strikethrough in Excel: Easy Steps for Beginners
