
Install Garbage Disposal: Expert Tips & Tricks
How to Install a Garbage Disposal: Expert Tips & Tricks
Installing a garbage disposal might seem intimidating, but with the right preparation and guidance, this is a manageable DIY project that can save you hundreds in professional installation fees. A functioning garbage disposal makes kitchen cleanup faster and more efficient, grinding food waste into small particles that flow safely through your plumbing system. Whether you’re replacing an old unit or installing your first garbage disposal, understanding the process step-by-step will ensure a successful installation.
This comprehensive guide walks you through everything you need to know about garbage disposal installation, from selecting the right unit for your kitchen to making final electrical connections. We’ll cover safety precautions, common mistakes to avoid, and troubleshooting tips that will make your installation smooth and stress-free. By the end, you’ll have the confidence and knowledge to tackle this project independently.
Choosing the Right Garbage Disposal
Before you begin any installation work, selecting the appropriate garbage disposal for your home is crucial. Garbage disposals come in various horsepower ratings, typically ranging from 0.5 to 1.5 horsepower. For most households, a 0.75 to 1-horsepower unit offers excellent performance for daily food waste grinding without excessive noise. This Old House recommends considering your household size and cooking habits when selecting horsepower.
There are two main types of garbage disposals: continuous-feed and batch-feed models. Continuous-feed disposals operate while you feed waste down the drain, offering convenience for busy kitchens. Batch-feed models require you to load waste, insert a stopper, and activate the unit, providing extra safety since they won’t operate with the opening exposed. Consider your family’s preferences and safety needs when deciding between these options.
Check your sink configuration and plumbing setup before purchasing. Most standard sinks with three-bolt mounting systems work with universal garbage disposal models. However, some newer or custom sinks may have different requirements. Measure your sink drain opening and verify your under-sink space can accommodate the disposal unit’s dimensions. Also consider whether your home has a dedicated electrical outlet or will require new wiring installation beneath the sink.
Tools and Materials You’ll Need
Gathering the correct tools before starting prevents frustrating mid-project delays. Essential tools include:
- Adjustable wrench – for tightening mounting bolts and drain connections
- Screwdrivers – both Phillips and flathead for various connections
- Plumber’s putty – creates waterproof seals around the drain opening
- Bucket or bowl – catches water and debris when disconnecting old pipes
- Flashlight or headlamp – illuminates the dark under-sink workspace
- Slip-joint pliers – grips pipes during disconnection and reconnection
- Teflon tape – seals threaded pipe connections to prevent leaks
- Electrical tester – verifies power is off before electrical work
Materials you’ll need include the new garbage disposal unit, mounting hardware (often included), drain pipes and fittings compatible with your setup, and possibly a new electrical outlet if one doesn’t exist. If your current disposal uses a wall switch, verify it will work with your new unit. Some disposals require physical strength to manipulate tight connections, so don’t hesitate to ask for assistance.
Safety Considerations Before Starting
Safety should be your top priority when installing a garbage disposal. First, turn off power to any existing disposal by flipping the circuit breaker. Use an electrical tester to confirm power is completely shut off before touching any wires or electrical components. Never assume a switch is off – always verify with a testing device.
When working under the sink, ensure adequate ventilation and lighting. The cramped space can feel claustrophobic, and poor visibility increases accident risk. Position your flashlight to illuminate the work area clearly. Wear safety glasses to protect your eyes from debris, dust, and potential splash-back from old water trapped in pipes.
If you’re uncomfortable with electrical work, consider hiring a licensed electrician for that portion of the installation. Improper electrical connections pose serious safety hazards including shock and fire risk. Family Handyman emphasizes the importance of proper grounding when connecting garbage disposal electrical systems.
Keep your hands clear of the disposal opening at all times, even when unplugged. Never reach into the disposal chamber. If something gets stuck, use tongs or pliers to remove it. Garbage disposals have sharp grinding components that can cause serious injuries.
Removing Your Old Disposal
If you’re replacing an existing unit, carefully disconnect the old disposal first. Turn off power at the circuit breaker and verify it’s off with an electrical tester. Place a bucket underneath the disposal to catch water and debris.
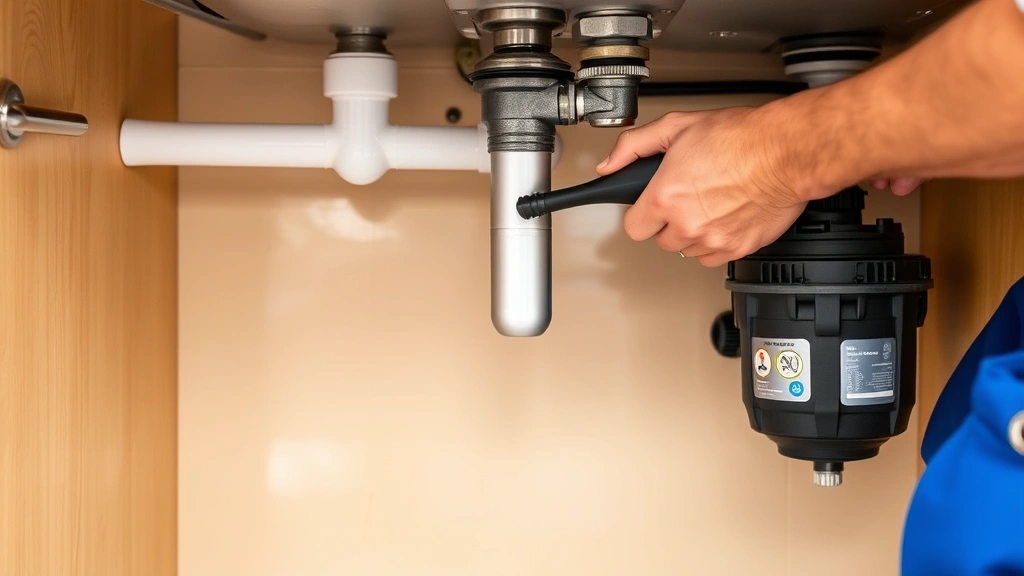
Disconnect the discharge tube by loosening the hose clamp connecting it to the wall drain pipe. The discharge tube is the curved pipe extending from the disposal. Water will likely spill, so be prepared with your bucket. Next, disconnect the drain connection at the sink strainer. Most disposals connect via a three-bolt mounting ring.
Support the disposal with one hand while loosening the mounting bolts with your wrench. Turn the bolts counterclockwise to release the unit from the sink flange. The disposal will be heavy, so ensure you have firm grip and control as you lower it into the bucket. Once fully disconnected, you can safely remove the old unit.
Inspect the sink opening and remove any old plumber’s putty or debris. Clean the area thoroughly with a cloth. This gives you a clean surface for mounting your new disposal unit.
Installing the Mounting Assembly
The mounting assembly is the framework that holds your garbage disposal securely under the sink. Start by removing the three-bolt mounting ring from your new disposal if it’s pre-installed. Insert the sink flange (the rubber and metal ring) into the sink drain opening from above.
From underneath the sink, slide the mounting ring onto the flange studs. Hand-tighten the three bolts evenly – don’t fully tighten one bolt before touching the others. Instead, tighten each bolt a quarter turn in rotation, working around the ring. This ensures even pressure and proper seating. Once all three bolts are snug, give each a final quarter turn with your wrench, but don’t over-tighten, which can crack the sink flange.
Test the mounting by gently pulling and pushing the disposal. It should feel solid with no movement. If it shifts or wobbles, loosen the bolts slightly and re-tighten using the rotating method. Proper mounting is essential for preventing leaks and ensuring the disposal operates smoothly.
Apply a thin bead of plumber’s putty around the sink opening’s underside if your flange doesn’t have a rubber gasket. This creates a waterproof seal that prevents water from leaking into the cabinet below. Smooth the putty with your finger for an even seal.
Connecting Drain Pipes
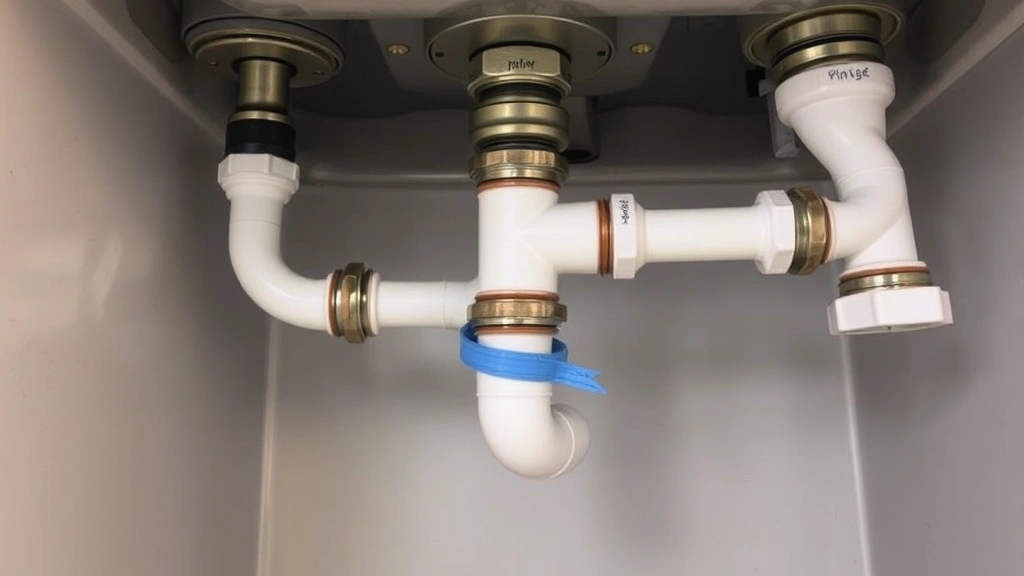
The discharge tube connects your disposal to your home’s main drain system. Most setups use a flexible hose clamped to the disposal outlet and wall drain pipe. Position the disposal in its mounted location and measure the distance to your wall drain opening.
Slide the discharge tube over the disposal outlet port. Secure it with the hose clamp provided, tightening the clamp screw clockwise with your screwdriver. The connection should be snug but not so tight that you crack the fitting. If your setup requires rigid PVC piping instead of flexible hose, use PVC cement and proper fittings according to your local plumbing codes.
Connect the discharge tube to the wall drain pipe. This connection typically uses a slip-nut fitting that threads onto the wall pipe. Wrap several layers of Teflon tape around the threads of the wall pipe before connecting. This tape creates a watertight seal and makes future disconnection easier. Hand-tighten the fitting first, then use your slip-joint pliers to snug it an additional quarter turn.
For double-sink setups, the disposal on one side connects to the drain on that side, while the other sink drains separately or through a shared main line. Verify your specific configuration before connecting. After all connections are complete, fill the sink with water and let it drain to check for leaks. If water drips from connections, tighten slightly using your pliers.
Electrical Installation
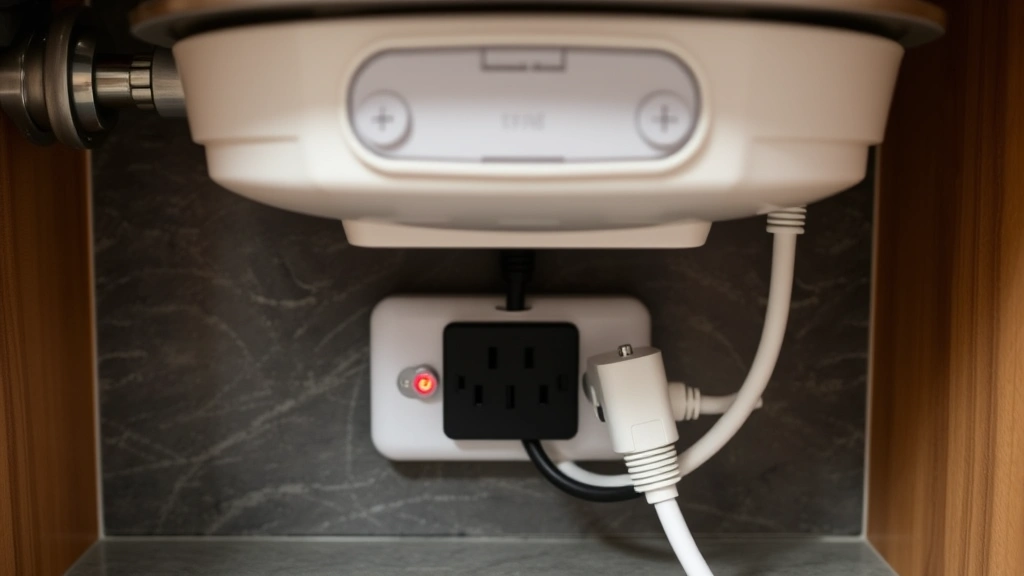
Electrical connections are critical for safe garbage disposal operation. Most disposals require a dedicated 15-amp circuit with a GFCI (Ground Fault Circuit Interrupter) outlet. If no outlet exists under your sink, you’ll need to install one. This may require running electrical wire from your breaker panel, which is a job best left to a licensed electrician if you lack experience.
If an outlet already exists, verify it’s GFCI-protected. A GFCI outlet has two buttons on its face labeled “Test” and “Reset.” If your outlet doesn’t have these buttons, it should be protected by a GFCI breaker in your electrical panel. Home Depot provides detailed electrical safety guidelines for garbage disposal installation.
Turn off power at the circuit breaker before making any electrical connections. Use your electrical tester to confirm the outlet is de-energized. The disposal’s electrical cord typically plugs directly into the outlet – this is the safest and most common setup for residential installations. Some older installations use hardwired connections, but plug-in connections are preferred for easier replacement and safer maintenance.
Position the cord so it doesn’t touch hot pipes or sharp edges. Secure it with clips or zip ties to keep it organized and protected. The cord should never be kinked, pinched, or submerged in water. Once everything is connected, restore power at the breaker and test the outlet with a GFCI tester to ensure proper function.
Testing Your New Disposal
Before considering your installation complete, thorough testing ensures everything works properly. First, visually inspect all connections – drain pipes, electrical cord, and mounting bolts – to confirm everything is secure and properly positioned.
Run water through the sink for several minutes with the disposal off. This verifies your drain pipes are connected correctly and water flows freely. Watch underneath for any leaks at connection points. If you notice dripping, tighten the affected fitting slightly with your pliers.
Turn on the disposal with water running. Listen for unusual grinding sounds or vibrations that might indicate improper installation. The unit should operate smoothly with a steady grinding sound. If it sounds rough or grinds loudly, turn it off immediately and check for foreign objects inside.
Feed small amounts of soft food waste into the disposal – banana peels, cooked vegetables, or bread work well for testing. Never test with hard items like bones or shells initially. Run the disposal for 10-15 seconds while water flows, then turn it off and let water run for another 30 seconds to flush the lines.
Test your wall switch if you have one installed. It should control the disposal smoothly without sticking or sparking. Check that the GFCI outlet functions by pressing the Test button – the outlet should lose power. Press Reset to restore power. This confirms proper GFCI protection.
After testing, run the disposal a few times over the next few days with normal use. Watch for leaks, unusual noises, or performance issues. Most problems surface within the first week of operation. If everything works smoothly, your installation is successful.
FAQ
How long does garbage disposal installation typically take?
For experienced DIYers, basic installation takes 1-2 hours. If you need to install new electrical outlets or have complications with your plumbing setup, add 2-4 additional hours. First-time installers should budget 3-4 hours total.
Can I install a garbage disposal if I don’t have an existing outlet under my sink?
Yes, but you’ll need to install a new GFCI-protected outlet. This requires running electrical wire, which is best handled by a licensed electrician. The outlet installation cost typically ranges from $150-$300 depending on distance from your breaker panel.
What’s the difference between 0.5 and 1.5 horsepower garbage disposals?
Higher horsepower models grind food waste faster and handle tougher materials more efficiently. For families of four or more, or if you cook frequently with meat and bones, 1-1.5 horsepower is ideal. Smaller households can manage with 0.5-0.75 horsepower. More power also means quieter operation in many cases.
Is it normal for my garbage disposal to leak slightly when first installed?
Minor drips from connection points during the first few uses are common as fittings settle. Tighten the affected connection slightly and test again. Persistent leaking indicates improper connection and requires troubleshooting. Never ignore ongoing leaks, as they can damage cabinets.
Can I install a garbage disposal myself, or should I hire a professional?
If you’re comfortable with basic plumbing and have electrical experience, DIY installation is feasible. However, if you lack confidence in electrical work or your plumbing setup is complex, hiring a professional ensures proper installation and maintains manufacturer warranties. Professional installation typically costs $200-$500.
What should I do if my garbage disposal won’t turn on after installation?
First, verify the circuit breaker is on and the outlet has power using a lamp or electrical tester. Check that the GFCI outlet hasn’t tripped – press Reset if needed. Inspect the power cord for damage. If the outlet works and the cord is undamaged, the disposal may be defective and require replacement under warranty.
How do I maintain my garbage disposal after installation?
Run cold water while using the disposal and for 30 seconds afterward to flush waste completely. Avoid putting hard items, fibrous vegetables, or grease down the disposal. Clean the disposal monthly by running ice cubes and citrus peels through it. Never use chemical drain cleaners, as they can damage the unit.
Can I install a garbage disposal if my sink drains into a septic system?
Garbage disposals and septic systems can work together, but you must use a disposal specifically designed for septic systems. These units grind waste more finely to prevent septic tank clogging. Check your septic system’s capacity before installation – some older systems may struggle with disposal output. Consult your septic professional before proceeding.
Related Posts

Superscript in Google Docs: Expert Tips

Strikethrough in Excel: Easy Steps for Beginners
