Hide a Hickey Fast: Expert Makeup Tips
How to Cover a Hickey: Expert Makeup Tips to Hide It Fast
A hickey can appear at the most inconvenient times, leaving you scrambling for solutions before an important meeting, family gathering, or social event. Whether you’re dealing with a fresh mark or a stubborn bruise that’s been lingering for days, knowing how to cover a hickey effectively can save you from embarrassment and help you feel confident again. The good news is that with the right techniques, products, and a bit of practice, you can conceal even the most visible hickey in minutes.
This comprehensive guide walks you through professional makeup artist secrets, color-correcting strategies, and practical tips that actually work. We’ll cover everything from understanding why hickeys form to applying products in the correct order for maximum coverage. By the end, you’ll have multiple methods at your disposal to handle any hickey situation with ease and confidence.
Understanding Hickeys and How They Form
Before diving into coverage techniques, it’s helpful to understand what you’re actually dealing with. A hickey is essentially a bruise caused by suction and pressure on the skin, typically on the neck, chest, or other sensitive areas. When someone applies strong suction to your skin, blood vessels beneath the surface rupture, causing blood to leak into surrounding tissues. This creates the characteristic red, purple, or dark blue mark that’s so difficult to hide.
The appearance of a hickey changes over time, which affects how you’ll approach covering it. Fresh hickeys tend to be bright red or pink because the blood is still actively pooled under the skin. After a few days, they typically turn purple or dark blue as the hemoglobin breaks down. By the end of the first week, hickeys often appear yellowish-green or brown as your body reabsorbs the blood. Understanding these color stages is crucial because it determines which color-correcting products will work best for concealment.
The severity and visibility of your hickey depends on several factors: how much pressure was applied, your skin tone, your skin’s sensitivity, and how well your blood vessels respond to trauma. Some people develop dark hickeys that last two weeks, while others see them fade within a few days. Regardless of the timeline, the makeup techniques in this guide will help you achieve coverage that lasts throughout your day.
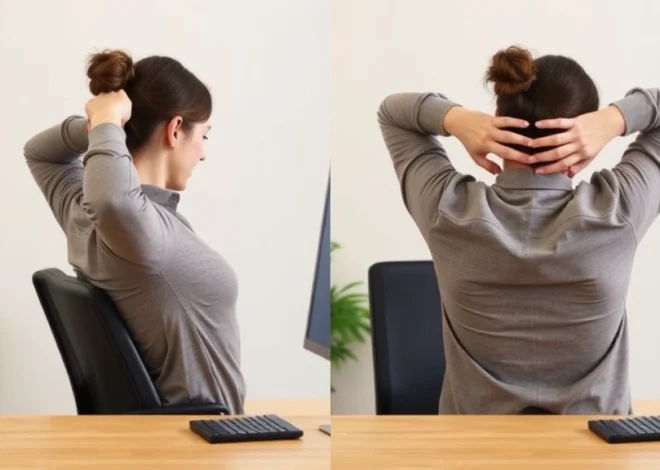
Preparation: Getting Your Skin Ready
The foundation of any successful hickey cover-up starts with proper skin preparation. Just like preparing surfaces before applying new finishes, your skin needs to be clean and properly primed for makeup to adhere correctly and last longer.
Step 1: Cleanse the Area
Start by washing your neck and the surrounding area with a gentle facial cleanser. Use lukewarm water and avoid scrubbing too hard, as the hickey area is already sensitive and bruised. Pat the skin dry with a soft towel rather than rubbing. This removes any dirt, oil, or previous makeup that could interfere with your coverage.
Step 2: Apply Moisturizer
A well-hydrated base is essential for smooth makeup application. Apply a lightweight, non-greasy moisturizer to the hickey and surrounding skin. Wait about two minutes for it to absorb before moving to the next step. Moisturizer helps your makeup glide on smoothly and prevents it from looking patchy or cakey. If you have oily skin, use a mattifying moisturizer or skip this step and go straight to primer.
Step 3: Prime the Area
Use a color-correcting primer or a standard makeup primer specifically designed for your skin type. Primer creates a smooth canvas, helps makeup last longer, and can provide additional coverage. Apply a thin, even layer across the hickey and about an inch around it. Allow the primer to set for 30-60 seconds before continuing. A good primer is like the foundation of any successful project—it makes everything that follows work better.
The Color Correction Method
This is where professional makeup artists separate themselves from amateurs. Color correction is the secret to making hickeys virtually invisible. The principle is simple: you use specific colors to neutralize the discoloration of the bruise, then apply foundation over top. Think of it like using primer before painting a wall—you’re creating an even base.
Understanding the Color Wheel for Hickeys
The color-correcting technique relies on opposite colors on the color wheel to neutralize each other:
- Red/Pink hickeys: Use a green or mint-toned color corrector to neutralize the red tones
- Purple/Blue hickeys: Use a yellow or golden color corrector to neutralize cool tones
- Brown/Yellow hickeys: Use a peachy or orange color corrector to neutralize the warm discoloration
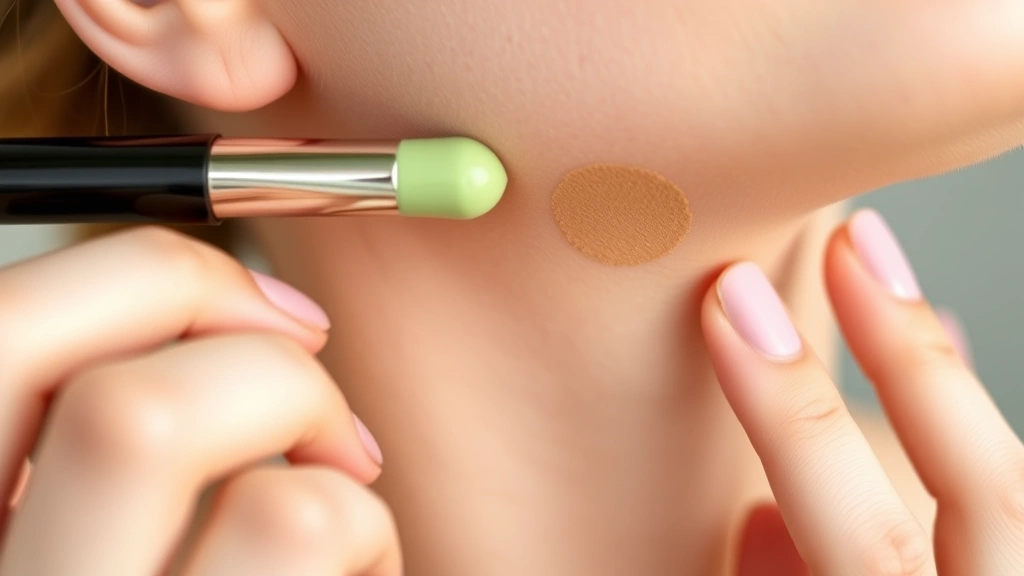
Application Technique for Color Correction
Using a small, precise brush or your ring finger (which applies the least pressure), gently dab your chosen color corrector directly onto the hickey. Don’t rub or blend yet—just apply enough product to cover the discolored area. The amount you need is typically less than you’d think; start with a small dab and add more if needed. Press the color corrector gently into the skin using a patting motion rather than rubbing, which could irritate the bruised area further.
Allow the color corrector to set for 30-45 seconds. You’ll notice the hickey’s appearance changes as the corrector neutralizes the discoloration. The mark may look slightly different in color but should be significantly less obvious. This is the magic moment—you’re literally canceling out the bruise’s color before covering it with foundation.
Full Coverage Foundation Techniques
Once your color corrector has done its job, it’s time to apply full-coverage foundation. This is what truly makes the hickey disappear from view. The key is choosing the right product and applying it correctly.
Selecting the Right Foundation
For hickey coverage, you need a full-coverage, long-wearing foundation. Look for products labeled as “full coverage” or “high coverage.” Liquid foundations, cream foundations, and foundation sticks all work well, depending on your preference and skin type. Match the foundation to your skin tone as closely as possible—this is crucial because any mismatch will be more noticeable than the hickey itself.
If you don’t have a full-coverage foundation at home, many drugstores and beauty retailers carry affordable options. Brands like This Old House’s beauty section and specialty beauty retailers stock excellent options from budget-friendly to premium brands.
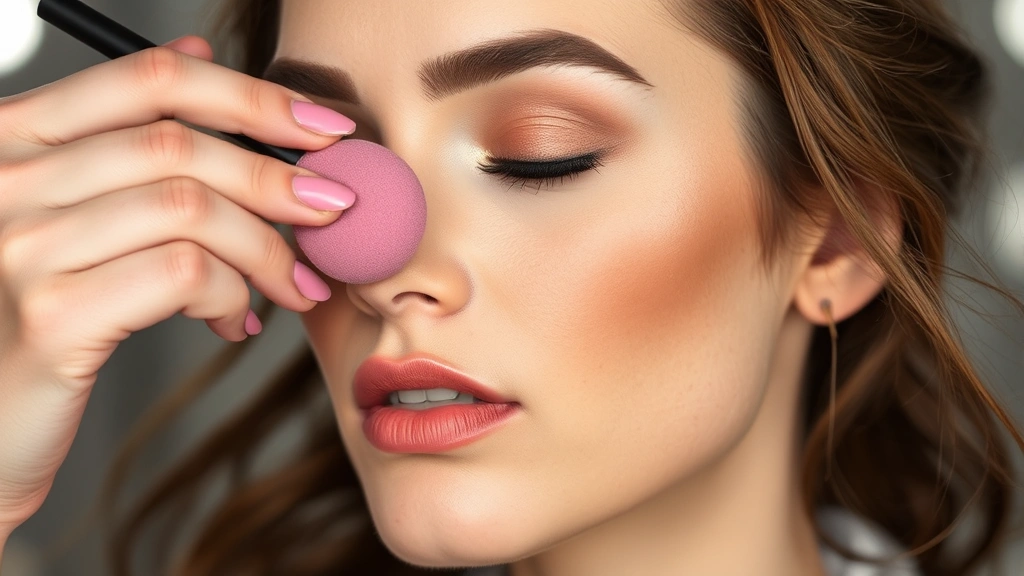
Application Method for Maximum Coverage
Use a damp beauty sponge or a dense, flat-topped brush for application. These tools help you press the foundation into the skin rather than just spreading it on the surface, which creates much better coverage. Start by applying foundation directly to the hickey and the surrounding area (about an inch around it). Use a patting or stippling motion—press the product in rather than buffing it out.
Build coverage gradually. Apply a thin layer, let it set for 10-15 seconds, then add another layer if needed. Multiple thin layers look more natural and last longer than one thick layer. With a hickey, you may need 2-3 layers of foundation to achieve complete coverage.
After covering the hickey completely, blend the edges of your foundation into the surrounding skin so there’s no visible line. Feather the foundation outward using a sponge or brush with minimal product, creating a gradual transition from full coverage to your natural skin.
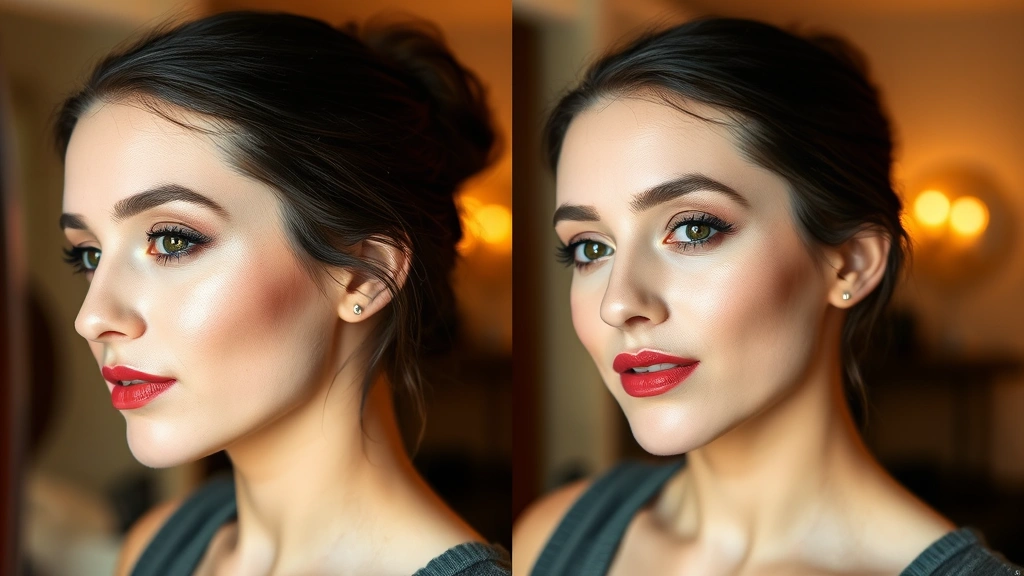
Blending and Setting Your Makeup
Proper blending and setting are what transform your coverage from obvious makeup to seamless, natural-looking skin. This final stage is just as important as the previous steps.
Seamless Blending Technique
Use a clean, damp beauty sponge to gently blend the edges where your foundation meets your natural skin. The sponge should be slightly damp but not wet—squeeze out excess water before using. With light pressing motions, blend the perimeter of your coverage area until there’s no visible demarcation line. This creates the illusion that the coverage is actually your skin, not makeup.
Pay special attention to the neck and chest area, as these transition zones are where people most often notice makeup. The blending should be so smooth that someone looking at you wouldn’t suspect you’re wearing foundation at all.
Setting Your Makeup for Longevity
Setting spray and powder are essential for making your hickey coverage last throughout the day. A good setting powder mattifies the area and locks everything in place. Use a fluffy brush to apply translucent or skin-toned powder with light, pressing motions over the foundation. Don’t use too much powder, as it can look cakey and actually draw attention to the area.
After powder, apply a setting spray. This is like the final step in any meticulous preparation process—it ensures everything stays put. Hold the setting spray 8-10 inches from your face and apply in an X and T pattern to ensure even coverage. Wait for it to dry (usually 30-60 seconds) before touching your neck.
A good setting spray can extend your coverage by several hours. Products with long-wear formulas are particularly effective for hickey coverage, as they resist sweat, humidity, and friction from clothing.
Quick Fixes for Emergencies
Sometimes you don’t have time for the full multi-step process. Here are faster methods for emergency situations.
The 5-Minute Method
If you’re in a rush, skip the color corrector and go straight to full-coverage foundation. Apply it directly to the hickey using a damp sponge with multiple thin layers. Set with powder and setting spray. This sacrifices some of the perfection of the color-correction method but still provides solid coverage in minimal time.
The Spot Coverage Method
For smaller hickeys, you can get away with spot coverage rather than covering your entire neck. Apply your full-coverage foundation only to the hickey itself and a small area around it. Blend the edges carefully so the transition is unnoticeable. This uses less product and takes less time while still effectively hiding the mark.
Strategic Styling Solutions
Don’t underestimate the power of clothing and accessories to minimize a hickey’s visibility. High-neck shirts, turtlenecks, scarves, and collared jackets can cover hickeys on the neck and chest. Hair styling can also help—if your hickey is on your neck, wearing your hair down can provide additional coverage. These methods work well in combination with light makeup coverage for maximum effectiveness.
Alternative Covering Methods
Beyond traditional makeup, several other approaches can help hide a hickey effectively.
Concealer-Only Method
If you don’t have full-coverage foundation, a high-quality full-coverage concealer can work in a pinch. Choose a concealer one shade lighter than your skin tone, as the lighter color helps neutralize the bruise. Apply it directly to the hickey and blend outward. You may need to apply 3-4 layers for adequate coverage, and you’ll definitely need to set it with powder and setting spray to make it last.
Tattoo Cover-Up Products
Professional tattoo cover-up makeup is specifically formulated for heavy coverage and long wear. Brands that specialize in these products often work exceptionally well for hickeys because they’re designed to cover permanent pigmentation. These products tend to be more expensive but offer superior coverage and longevity compared to standard makeup.
Waterproof Makeup Products
Waterproof formulas are significantly more durable than regular makeup. While waterproof products can be harder to remove at the end of the day, they’re ideal when you need your hickey coverage to survive sweating, humidity, or physical activity. Look for waterproof versions of foundation, concealer, and setting spray.
Combination Approach
Many people find that combining methods works best. For example, you might wear a light scarf or high-neck shirt for primary coverage, apply light concealer as a backup, and use setting spray to ensure nothing shifts. This layered approach provides security—if one method fails slightly, others compensate.
Healing While Covering
While you’re covering your hickey with makeup, you can simultaneously speed up healing. Apply ice to the hickey for 10-15 minutes several times daily during the first 24-48 hours to reduce swelling and discoloration. After the first two days, switch to heat to increase blood flow and promote healing. Taking vitamin C supplements or applying vitamin C serum may help your body reabsorb the blood more quickly. These healing methods won’t replace your makeup coverage, but they work alongside it to help the hickey fade faster.
Avoid further trauma to the area—don’t massage it, scratch it, or apply excessive pressure. The gentler you are with the hickey, the faster it will heal, and the sooner you’ll be free from needing coverage.
FAQ
How long does hickey coverage makeup last?
With proper application and setting, your coverage can last 8-12 hours. Waterproof products and professional setting sprays extend this to 12-16 hours. Throughout the day, you may notice slight fading or smudging, especially in areas that experience friction from clothing or movement. Carry a compact mirror and touch-up products for mid-day maintenance if needed.
Can I use regular concealer instead of color corrector?
While regular concealer can provide some coverage, color correctors are significantly more effective because they neutralize the hickey’s discoloration before you apply foundation. If you don’t have a color corrector, you can substitute with concealer, but you’ll need to apply more layers and may not achieve complete coverage. A color corrector is worth the investment if you find yourself needing hickey coverage regularly.
What if my foundation doesn’t match my skin tone exactly?
A slight mismatch is better than incomplete coverage, but ideally, you should match as closely as possible. If you can’t find an exact match, blend two foundation shades together to create a custom match. You can also mix foundation with moisturizer or primer to adjust the shade slightly. Always test foundation matches in natural light before purchasing or applying to your hickey.
Is it safe to apply makeup directly to a fresh hickey?
Yes, applying makeup to a fresh hickey is safe as long as you’re gentle. Avoid scrubbing, rubbing, or applying excessive pressure. Use patting and pressing motions instead. If the hickey is extremely tender or painful to touch, wait 24-48 hours before applying makeup, as the bruise will be less sensitive then. The skin isn’t broken in a hickey, so makeup application won’t cause harm or slow healing.
Can I prevent hickeys from appearing dark?
You can minimize a hickey’s appearance immediately after it forms by applying ice. Ice reduces swelling and can limit how dark the bruise becomes. Apply ice for 10-15 minutes within the first few hours of the hickey forming. You can also take ibuprofen, which reduces inflammation. However, once a hickey has fully formed and darkened, these methods won’t reverse the color—you’ll need to rely on the makeup techniques in this guide.
What’s the best setting spray for hickey coverage?
Look for setting sprays labeled as “long-wear,” “waterproof,” or “sweat-resistant.” Urban Decay All Nighter, MAC Fix+, and NYX setting sprays are popular professional choices. Budget-friendly options from drugstore brands also work well. The key is choosing a setting spray designed for longevity rather than just finishing. Apply it as the final step after powder for maximum effectiveness.
How do I remove hickey coverage makeup at the end of the day?
Use a gentle makeup remover or cleansing oil to dissolve the foundation, concealer, and other products. Avoid scrubbing the hickey area, as it’s still bruised and sensitive. A gentle cleansing balm or micellar water works well. Follow up with your regular facial cleanser and moisturizer. Proper removal at night allows your skin to breathe and heal while you sleep.
Will covering a hickey with makeup slow down its healing?
No, makeup doesn’t significantly impact healing speed. The hickey will fade at the same rate whether you cover it with makeup or not. What matters for healing is what you do beyond makeup—applying ice initially, using heat after 48 hours, and taking vitamin C supplements can all support faster healing. Just ensure you remove your makeup gently at night to keep the area clean.
Related Posts
Remove Activation Lock: Expert Tips & Tricks
Remove Section Break in Word: Expert Tips