
Clean Records Properly? Expert Tips Inside
How to Clean Records Properly: Expert Tips Inside
Vinyl records are treasured possessions for music enthusiasts, collectors, and casual listeners alike. Whether you’ve inherited a stack of classic albums or recently invested in new vinyl, knowing how to clean records properly is essential for preserving sound quality and extending their lifespan. Dust, dirt, and grime accumulate on record surfaces over time, causing pops, crackles, and degraded audio that can ruin your listening experience.
Proper record cleaning isn’t complicated, but it does require the right approach and tools. This comprehensive guide walks you through professional cleaning techniques used by collectors and audiophiles worldwide. From understanding why cleaning matters to mastering advanced cleaning methods, you’ll learn everything needed to keep your vinyl collection in pristine condition.
Why Cleaning Records Matters
Understanding the importance of record cleaning helps you appreciate the effort invested in proper maintenance. Vinyl records consist of grooves that hold audio information encoded as microscopic variations in the surface. When dust and debris settle into these grooves, your stylus (needle) must travel over contaminated surfaces, causing audible defects.
Dirty records produce several problems: increased surface noise, reduced treble response, accelerated stylus wear, and potential groove damage. A contaminated stylus can also transfer particles to clean records, spreading the problem throughout your collection. Professional cleaning can restore records to near-original condition, recovering detail and clarity that seemed lost forever.
Regular maintenance prevents problems before they start. Establishing a cleaning routine protects your investment and ensures consistent playback quality. Whether you’re maintaining a small personal collection or curating a serious audiophile library, cleanliness directly impacts enjoyment and longevity.
Essential Tools and Supplies
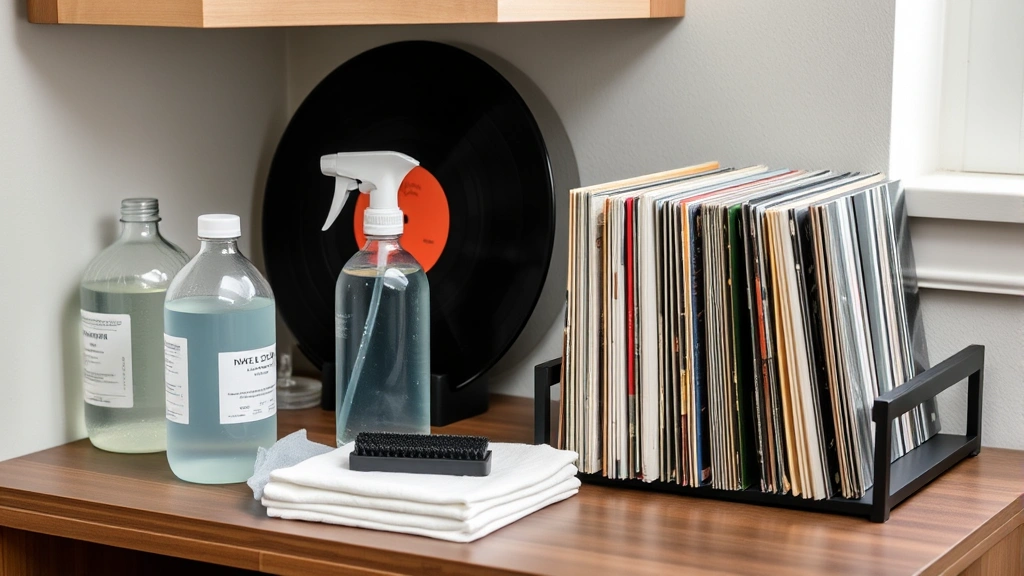
Before beginning any cleaning project, gather the right equipment. Quality tools make the process easier and more effective, preventing accidental damage to your records.
Basic Cleaning Kit Essentials:
- Record brush or cleaning pad – Microfiber or carbon fiber designs work best; avoid cheap synthetic brushes that scratch surfaces
- Cleaning solution – Purpose-made record cleaner or distilled water mixed with isopropyl alcohol (90% distilled water, 10% isopropyl alcohol)
- Soft cotton cloths – Lint-free materials prevent fibers from embedding in grooves
- Distilled water – Essential for rinsing; tap water contains minerals that leave residue
- Stylus cleaner – Specialized brush or gel designed for needle maintenance
- Drying rack or stand – Allows records to dry vertically without warping
- Record sleeve protectors – Archival-quality sleeves prevent future contamination
Consider investing in a record cleaning machine if you maintain a large collection. These devices automate wet cleaning and provide professional-grade results. Manual machines range from budget-friendly to premium models with advanced features.
Basic Record Cleaning Method
Start with the simplest approach before progressing to wet cleaning. This dry method works well for records with light dust and everyday contamination.
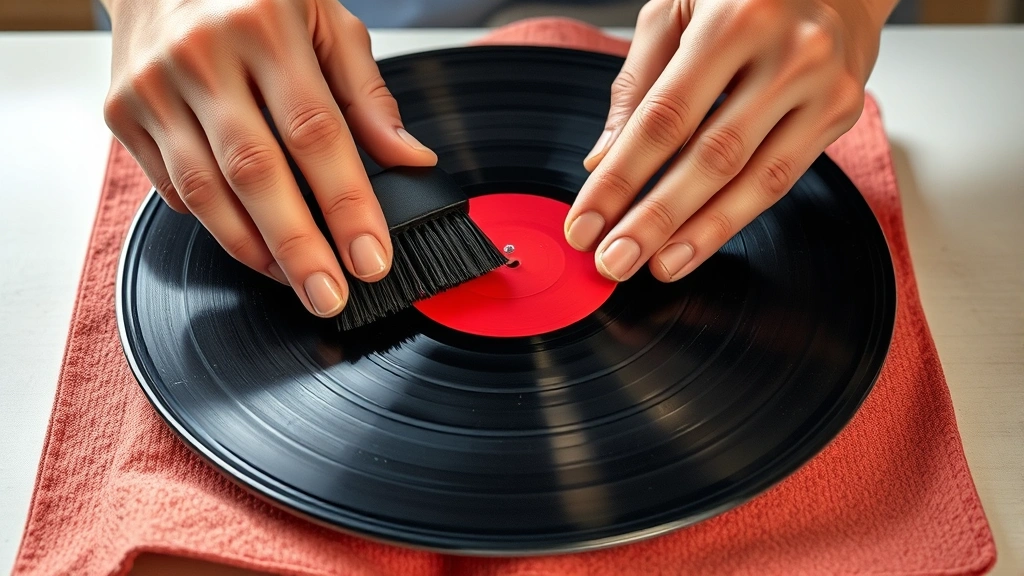
Step-by-Step Dry Cleaning:
- Inspect the record – Hold it up to light and examine both sides for visible dust and debris
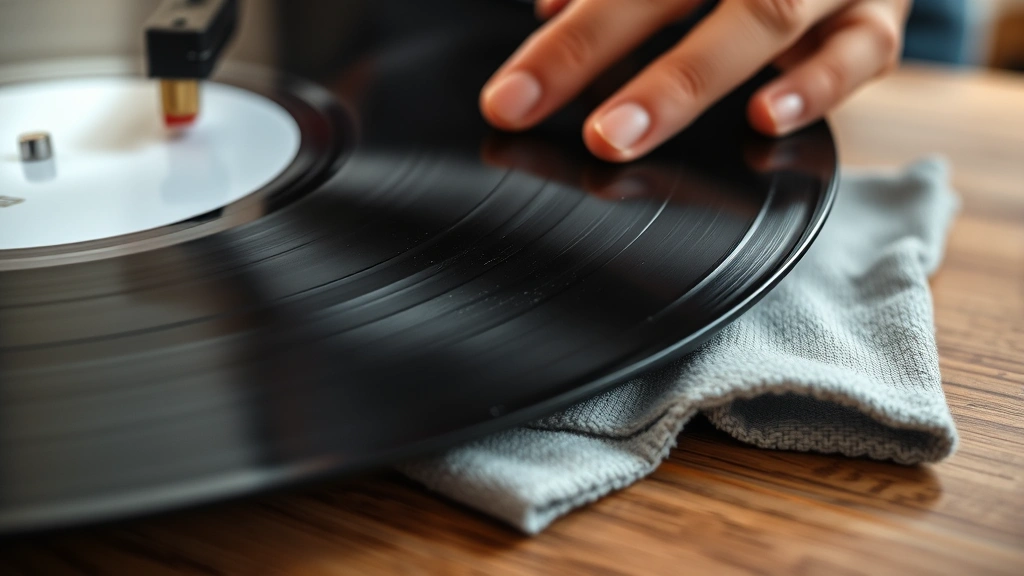
- Use proper handling – Always hold records by edges and center hole; oils from skin damage grooves
- Apply the brush – Using a carbon fiber or microfiber brush, gently stroke from center toward the outer edge in straight lines, following the groove direction
- Work systematically – Cover the entire record surface with overlapping strokes; don’t use circular motions that work particles deeper into grooves
- Flip and repeat – Clean the B-side with the same technique
- Inspect results – Check under light to confirm dust removal; repeat if necessary
- Store properly – Place cleaned records in archival sleeves immediately
This method removes surface dust but doesn’t address embedded contamination or sticky residues. For records with visible grime or those inherited from storage, proceed to wet cleaning methods.
Wet Cleaning Techniques
Wet cleaning removes stubborn debris, oxidation, and residues that dry methods can’t address. Professional results require patience and attention to detail.
DIY Wet Cleaning Solution Recipe:
Mix distilled water with isopropyl alcohol in a 9:1 ratio. This formula dissolves contaminants without leaving residue. Some collectors add a single drop of non-ionic dish soap for enhanced cleaning, though this requires thorough rinsing. Always use distilled water—tap water minerals create new problems.
Two-Bucket Wet Cleaning Method:
- Prepare workspace – Set up near a sink with two bowls: one for cleaning solution, one for distilled water rinse
- Apply solution – Dampen a soft cloth with cleaning solution and gently wipe the record surface in straight lines from center outward
- Work methodically – Don’t oversaturate; the cloth should be damp, not dripping
- Flip and clean – Repeat the process on side B
- Rinse thoroughly – Using a fresh cloth dampened with distilled water only, rinse away cleaning solution residue
- Final rinse – Repeat rinsing with a clean cloth until no soap smell remains
- Dry completely – Stand the record vertically on a drying rack for 24 hours; never use heat or direct sunlight
For seriously contaminated records, repeat the wet cleaning process multiple times. Each cycle removes additional debris until the record is restored.
Advanced Cleaning: Ultrasonic Method
Ultrasonic record cleaners use high-frequency vibrations to dislodge particles from grooves. These machines provide professional results without manual labor. While expensive, serious collectors consider them essential equipment. This Old House’s vinyl cleaning guide recommends ultrasonic machines for collections exceeding 100 records.
Storage and Maintenance Tips
Cleaning is only half the battle; proper storage prevents future contamination. Environmental factors significantly impact record longevity.
Optimal Storage Conditions:
- Temperature – Maintain 60-70°F; avoid fluctuations that cause warping and adhesive degradation
- Humidity – Keep between 30-50% relative humidity; excessive moisture promotes mold and mildew
- Light exposure – Store in darkness; UV radiation degrades vinyl and artwork
- Vertical positioning – Stand records upright like books; stacking causes warping and groove damage
- Quality sleeves – Use archival-quality inner and outer sleeves; cheap sleeves contain acids that damage vinyl
- Dust covers – Protect turntables and records with covers when not in use
Handling practices prevent contamination requiring cleaning. Always wash hands before touching records, avoid eating or drinking near your collection, and teach family members proper techniques. These simple habits significantly reduce cleaning frequency.
Regular stylus cleaning deserves special attention. A dirty stylus transfers particles to every record it plays, creating a perpetual contamination cycle. Clean your stylus weekly using a specialized brush or gel designed for this purpose. This preventative maintenance protects your entire collection simultaneously.
Common Mistakes to Avoid
Even well-intentioned collectors accidentally damage records through improper cleaning. Understanding what not to do protects your investment.
Critical Mistakes:
- Using tap water – Minerals leave residue worse than original contamination; always use distilled water
- Applying excessive pressure – Scrubbing hard doesn’t clean better and damages grooves; use gentle, consistent strokes
- Circular motions – Working around the record forces particles into grooves; always stroke radially from center outward
- Cheap brushes – Synthetic brushes scratch surfaces; invest in carbon fiber or quality microfiber
- Wet storage – Storing damp records promotes mold and warping; ensure complete dryness before shelving
- Heat drying – Hair dryers and sunlight cause warping and adhesive damage; air dry only
- Neglecting sleeves – Old paper sleeves contain acids; upgrading to archival sleeves prevents future contamination
- Ignoring stylus maintenance – A dirty needle contaminates every record; clean styluses weekly
If you’ve made mistakes with your collection, don’t despair. Even severely contaminated records often respond to patient, repeated wet cleaning. Professional record cleaning services exist if DIY methods prove insufficient, though costs can exceed record values for rare albums.
For routine maintenance questions, consult Family Handyman’s detailed vinyl care guide or similar authoritative sources. Building your knowledge prevents costly errors.
FAQ
Can I use regular cleaning products on records?
No. Household cleaners contain chemicals that damage vinyl and leave residues. Stick to purpose-made record cleaners or the distilled water and isopropyl alcohol solution described above. Avoid soap, vinegar, alcohol-based window cleaners, and any product not specifically formulated for vinyl.
How often should I clean my records?
Clean records before first play and every 6-12 months with regular use. Records stored in clean conditions require less frequent cleaning than those in dusty environments. Visibly contaminated records need immediate attention. Establish a cleaning schedule similar to other household maintenance routines.
Will cleaning remove all surface noise?
Cleaning significantly reduces pops and crackles caused by dust and debris, but some surface noise is inherent to vinyl. Records manufactured decades ago may have pre-existing noise. Cleaning restores the original condition but can’t improve beyond how the record sounded when new. Severely scratched records won’t benefit from cleaning alone.
Can I use a record cleaning machine for all records?
Most records benefit from machine cleaning, but extremely delicate or valuable records warrant manual care. Antique 78 RPM records and rare pressings may justify professional cleaning services. Check manufacturer recommendations for specific models. For standard LP collections, quality machines provide consistent, professional results.
What’s the difference between dry and wet cleaning?
Dry cleaning removes surface dust through brushing alone. Wet cleaning uses solutions to dissolve and rinse away stubborn contamination, oxidation, and residues. Dry methods work for light maintenance; wet cleaning is necessary for heavily contaminated records or serious restoration projects. Many collectors combine both techniques for optimal results.
Should I clean new records?
Yes. Manufacturing processes leave residue, and records accumulate dust during storage and shipping. A gentle cleaning before first play removes factory contaminants and improves sound quality. This initial cleaning is less aggressive than restoration work on old records.
How do I know if a record is clean enough?
Hold the record at an angle under bright light. Dust particles appear as visible specks on the surface. If you see nothing under magnification and the record plays without excessive noise, it’s adequately clean. Some collectors obsess over perfection; functional cleanliness is often sufficient for enjoyment.
Can I clean records while they’re in sleeves?
No. Remove records from sleeves before cleaning. Clean sleeves separately if needed using appropriate methods for paper and cardboard. Always use fresh sleeves or archival protectors after cleaning; old sleeves contaminate cleaned records immediately.
Related Posts

Superscript in Google Docs: Expert Tips

Strikethrough in Excel: Easy Steps for Beginners
