
How to Clean Night Guard? Expert Tips Inside
How to Clean Night Guard: Expert Tips Inside
A night guard is an essential dental device that protects your teeth from grinding and clenching during sleep, a condition known as bruxism. However, like any item that spends hours in your mouth each night, your night guard accumulates bacteria, plaque, saliva buildup, and other debris that can compromise both its effectiveness and your oral health. Proper cleaning ensures your guard remains hygienic, transparent, and durable for years to come.
Many people neglect their night guard maintenance, not realizing that a dirty guard can lead to bad breath, gum irritation, tooth decay, and even fungal infections. The good news is that cleaning your night guard is straightforward and requires minimal time and inexpensive materials you likely already have at home. This comprehensive guide walks you through everything you need to know about keeping your night guard in pristine condition.
Why Cleaning Your Night Guard Matters
Your night guard sits directly against your teeth and gums for six to eight hours every night, making it a prime breeding ground for bacteria and microorganisms. When you don’t clean it properly, harmful bacteria multiply rapidly, creating an environment that can damage your oral health. A clean night guard prevents:
- Bacterial growth that causes infections and inflammation
- Plaque accumulation that leads to tooth decay and gum disease
- Unpleasant odors that make your guard smell and taste bad
- Discoloration that makes your guard appear yellow or stained
- Deterioration of the guard material, reducing its lifespan
- Oral thrush, a fungal infection that thrives in unclean environments
Additionally, a well-maintained night guard is more comfortable to wear, more transparent for better visibility, and more effective at protecting your teeth from grinding damage. Regular cleaning is truly an investment in both your dental health and the longevity of your device.
Daily Cleaning Methods
The foundation of night guard care is establishing a daily cleaning routine immediately after you remove the guard each morning. This is when bacteria and debris are most active and easiest to remove.
Rinse with Warm Water
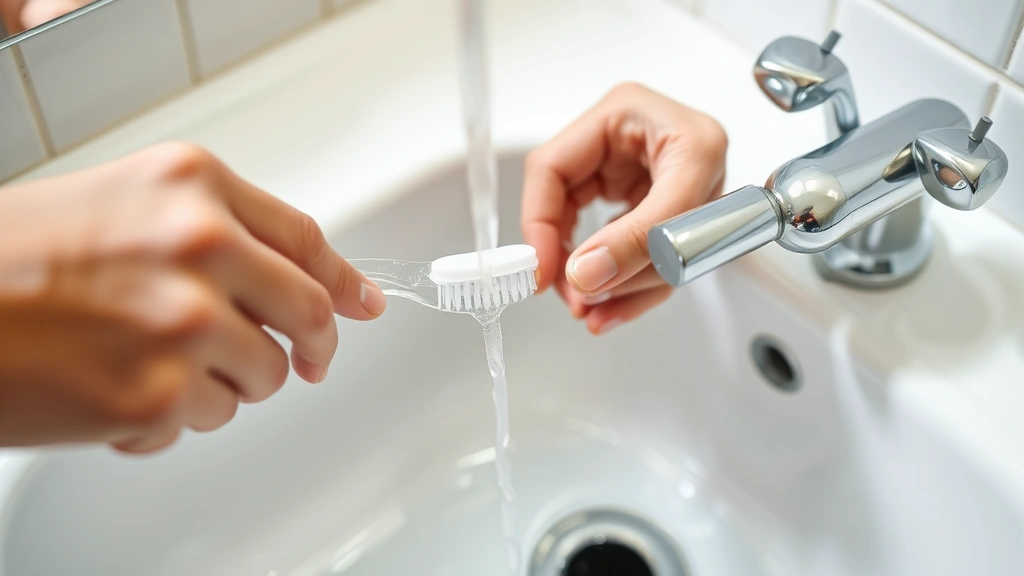
Your first step each morning should be rinsing your night guard under warm running water. Hold it gently in your hand and let lukewarm water (not hot, which can warp the material) flow over both the inside and outside surfaces. Use your fingers to gently rub away any visible debris or dried saliva. This simple rinse removes loose particles and prepares the guard for more thorough cleaning.
Brush with a Soft Toothbrush
Using a dedicated soft-bristled toothbrush (not the same one you use for your teeth, to avoid cross-contamination), gently brush all surfaces of your night guard. Use small circular motions and pay special attention to the areas that contact your teeth and gums directly. A soft brush is crucial because hard bristles can scratch and damage the acrylic or plastic material. Brush for about two minutes, ensuring you reach crevices and the inner surfaces.
Use Mild Soap or Denture Cleaner
While brushing, you can use a tiny amount of mild dish soap or a specialized denture cleaner. Denture cleaners are particularly effective because they’re formulated for similar materials and won’t damage your guard. Apply a small drop to your soft toothbrush and continue brushing. Rinse thoroughly under warm water until all soap residue is gone, as leftover soap can taste unpleasant when you wear the guard the next night.
This daily routine takes only three to five minutes but makes an enormous difference in preventing buildup. If you’re interested in maintaining cleanliness across all your personal items, you might also explore how to clean a keyboard or other frequently-used devices that require similar gentle care.
Weekly Deep Cleaning Techniques
Once or twice per week, dedicate time to a deeper cleaning that removes stubborn buildup your daily routine might miss. These methods are more thorough and help maintain transparency and hygiene.
Vinegar and Baking Soda Paste
Create a natural cleaning paste by mixing equal parts white vinegar and baking soda until you achieve a spreadable consistency. This combination is mildly abrasive enough to remove stubborn stains without damaging your guard. Apply the paste generously to all surfaces of your night guard using your soft toothbrush. Let it sit for five to ten minutes, allowing the acidity of vinegar and the mild abrasiveness of baking soda to work on buildup. Scrub gently for two minutes, then rinse thoroughly under warm water. This method is particularly effective for yellowing or discolored guards.
Hydrogen Peroxide Soak
Hydrogen peroxide is a natural disinfectant that kills bacteria without harsh chemicals. Fill a small cup with 3% hydrogen peroxide (the standard drugstore variety) and submerge your night guard completely. Let it soak for 15 to 20 minutes. The peroxide will fizz and bubble as it breaks down organic matter and bacterial colonies. After soaking, use your soft toothbrush to gently brush away any loosened debris, then rinse thoroughly with warm water. This method is excellent for disinfection and maintaining a fresh-smelling guard.
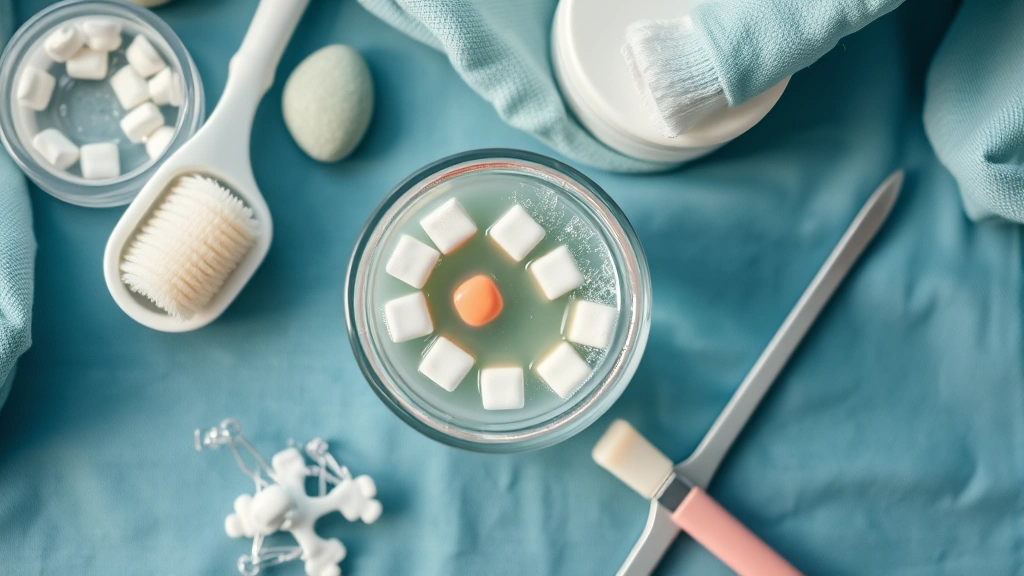
Denture Tablet Cleaning
Denture cleaning tablets like Polident or Efferdent are formulated to clean delicate oral appliances safely. Drop your night guard into a glass of water, add one denture tablet, and let it soak for the time specified on the package (usually 15 to 30 minutes). The tablet dissolves and creates a gentle cleaning solution that removes stains, bacteria, and odors. After soaking, rinse your guard thoroughly and brush lightly with your soft toothbrush. This method is convenient and highly effective, especially if you travel frequently.
Ultrasonic Cleaning
For those willing to invest in specialized equipment, an ultrasonic cleaner provides professional-grade results. These devices use high-frequency sound waves to create tiny bubbles that dislodge debris and bacteria from even the smallest crevices. Fill the ultrasonic cleaner with water and a small amount of denture cleaning solution, place your night guard inside, and run it for the recommended time (usually 5 to 10 minutes). This method is particularly effective for guards with intricate designs or hard-to-reach areas. While not necessary for everyone, ultrasonic cleaners are affordable and last for years.
Monthly Soaking Solutions
In addition to daily and weekly cleaning, a monthly deep soak provides comprehensive disinfection and helps restore your guard’s appearance and functionality.
Chlorhexidine Soak
Chlorhexidine is an antimicrobial agent often recommended by dentists for oral appliances. Mix a 0.12% chlorhexidine solution (available at most drugstores or online) according to package directions and submerge your night guard overnight or for at least four hours. This powerful disinfectant eliminates bacteria, fungi, and viruses that daily cleaning might miss. Rinse extremely thoroughly afterward, as chlorhexidine residue can stain your teeth if not completely removed.
Vinegar Soak
For a natural monthly deep clean, soak your night guard in equal parts white vinegar and water for several hours or overnight. The acetic acid in vinegar is antimicrobial and helps dissolve mineral deposits and stubborn stains. After soaking, brush gently with your soft toothbrush and rinse thoroughly. Your guard may smell slightly of vinegar initially, but this dissipates quickly once you rinse and air dry it.
Castile Soap Solution
Castile soap is a plant-based, hypoallergenic cleanser that’s gentle on delicate materials. Mix a few drops of liquid castile soap in warm water and soak your night guard for 30 minutes to an hour. This method is ideal if you have sensitive gums or allergies to commercial cleaning products. After soaking, rinse completely and dry with a clean, lint-free cloth.
Much like maintaining other personal items such as learning how to clean a leather couch, establishing a monthly deep-cleaning schedule for your night guard ensures long-term durability and hygiene.
What to Avoid
Understanding what NOT to do is equally important as knowing proper cleaning techniques. Many people accidentally damage their night guards through well-intentioned but harmful practices.
Never Use Hot Water
Hot water can warp, distort, and permanently damage your night guard’s shape and fit. Always use lukewarm or room-temperature water. If you’ve accidentally exposed your guard to hot water and it no longer fits properly, contact your dentist immediately, as you may need a replacement.
Avoid Abrasive Scrubbers
Hard-bristled toothbrushes, scouring pads, and abrasive materials scratch and damage the acrylic or plastic surface of your guard. These scratches create microscopic crevices where bacteria hide and multiply. Always use soft-bristled brushes specifically designed for delicate items.
Don’t Use Harsh Chemicals
Bleach, alcohol-based mouthwash, strong acids, and commercial whitening products can damage your guard’s material and cause discoloration. Stick to dentist-approved solutions, mild soaps, and natural options like vinegar and baking soda.
Never Put It in the Dishwasher
The high heat and aggressive water jets in dishwashers will warp and damage your night guard beyond repair. Hand washing is the only safe cleaning method.
Avoid Leaving It Dry
Extended periods without moisture can cause your guard to become brittle and crack. Always store it in a moist environment, such as a container with water or a wet cloth, when not wearing it.
Don’t Forget About Your Cleaning Tools
Your soft toothbrush and storage container also need regular cleaning. Rinse your toothbrush thoroughly after each use and allow it to air dry completely. Similar principles apply to cleaning other frequently-used items—if you want to maintain all your personal devices, you might explore how to clean a computer monitor or other electronics with care.
Storage and Maintenance Tips
Proper storage between uses is as important as active cleaning. Your night guard deserves a clean, safe environment when you’re not wearing it.
Invest in a Proper Storage Case
Your dentist likely provided a case designed specifically for night guards. This case protects your guard from physical damage, keeps it clean, and allows it to air dry properly. If you’ve lost your original case, purchase a replacement designed for oral appliances. Avoid storing your guard in plastic bags or containers without ventilation, as moisture buildup can promote fungal growth.
Ensure Complete Drying
Before storing your guard, allow it to dry completely. Place it on a clean, lint-free cloth or in an open container where air can circulate. Storing a wet guard creates an environment where bacteria and fungi thrive. Give it at least 30 minutes to an hour of air drying time each morning after cleaning.
Keep It Away from Pets and Children
Night guards can look like chew toys to curious pets or small children. Store your guard in a secure location, preferably in a labeled case that’s clearly marked as not for consumption. A damaged or contaminated guard requires replacement and potential emergency dental visits.
Maintain Consistent Temperature
Store your night guard in a cool, dry place away from direct sunlight, heat sources, and extreme temperature fluctuations. Exposure to heat can warp the material, while prolonged sun exposure can cause yellowing and brittleness.
Schedule Professional Cleaning
Consider having your dentist professionally clean your night guard annually or semi-annually. Professional ultrasonic cleaning and inspection ensure your guard remains in optimal condition and allow your dentist to check for wear or damage you might have missed.
Signs Your Guard Needs Replacement
Even with excellent care, night guards eventually wear out and require replacement. Recognizing these signs helps you maintain optimal protection for your teeth.
Visible Cracks or Chips
Small cracks or chips compromise your guard’s structural integrity and protective function. Once cracks appear, they typically spread rapidly. If you notice any damage, contact your dentist about replacement options.
Persistent Odor
If your guard smells bad despite thorough cleaning, it may have developed internal bacterial or fungal colonies that cleaning alone can’t eliminate. A persistent odor often indicates it’s time for a new guard.
Significant Yellowing or Discoloration
While some discoloration is normal with age, extensive yellowing that doesn’t respond to cleaning may indicate material degradation. Additionally, discolored guards can be aesthetically concerning if you ever need to wear them in public situations.
Poor Fit or Looseness
If your guard no longer fits snugly or feels loose when you wear it, the material has likely warped or shrunk. A poor-fitting guard won’t protect your teeth effectively and may cause gum irritation.
Thickness Reduction
If your guard feels thinner or more flexible than when you first received it, the material is degrading. Thinner guards provide less protection and are more prone to breaking.
Visible Buildup That Won’t Clean
Stubborn stains or buildup that resists all your cleaning efforts may indicate permanent staining or internal material changes. At this point, replacement is often the best option.
Most night guards last between three to five years with proper care, though some may last longer. Your dentist can assess whether your guard is still functional during your regular checkups. Much like knowing when to replace other items in your home, understanding your night guard’s lifespan helps you maintain optimal oral health. If you’re interested in learning about maintaining other personal items, you might explore how to remove scratches from glasses, which requires similar careful attention to detail.
FAQ
How often should I clean my night guard?
Clean your night guard daily with warm water and a soft toothbrush immediately after removing it each morning. Perform deep cleaning weekly using vinegar and baking soda, hydrogen peroxide, or denture tablets. Schedule monthly soaking sessions for comprehensive disinfection.
Can I use toothpaste to clean my night guard?
Regular toothpaste is generally safe for cleaning night guards, though it can be abrasive if used with a hard brush. Use only a small amount with a soft-bristled brush. Mild dish soap or denture cleaners are often better choices as they’re specifically formulated for oral appliances.
What’s the best solution for soaking a night guard?
Denture cleaning tablets are convenient and effective for regular soaking. For natural options, try equal parts white vinegar and water. Hydrogen peroxide is excellent for disinfection, while 3% solution is safe and readily available. Choose based on your preference and any sensitivities you have.
Is it safe to use vinegar on my night guard?
Yes, white vinegar is safe and effective for cleaning night guards. The acetic acid naturally disinfects and removes stains without damaging the material. Always dilute vinegar with equal parts water for soaking, and rinse thoroughly afterward.
Can I sleep with a wet night guard?
No, you should never wear a wet night guard. Moisture creates an ideal environment for bacterial and fungal growth. Always ensure your guard is completely dry before inserting it. Allow at least 30 minutes of air drying time after cleaning.
What should I do if my night guard smells bad?
First, perform a deep cleaning using hydrogen peroxide or a denture tablet soak. If the smell persists after thorough cleaning, soak your guard in a chlorhexidine solution or consult your dentist. A persistent odor may indicate it’s time for replacement.
How do I know if my night guard fits properly?
Your night guard should feel snug against your teeth without causing discomfort or slipping. It should require slight suction to remove and shouldn’t move when you gently try to move it with your tongue. If it feels loose or uncomfortable, contact your dentist for adjustment or replacement.
Can I use mouthwash to clean my night guard?
Alcohol-based mouthwash can damage your night guard’s material and should be avoided. If you want to use mouthwash, choose alcohol-free varieties and use only a small amount diluted in water. Dentist-approved denture cleaners are safer alternatives.
What’s the difference between a night guard and a retainer?
Night guards protect teeth from grinding damage and are typically thicker and more durable. Retainers maintain teeth position after orthodontic treatment. While cleaning methods are similar, night guards often require more frequent deep cleaning due to their nighttime use and exposure to saliva buildup.
How much does a replacement night guard cost?
Custom night guards from dentists typically cost between $200 and $600, depending on materials and complexity. Over-the-counter options range from $20 to $100 but are less durable and effective. Proper care of your current guard extends its lifespan and delays replacement costs.
Related Posts

Superscript in Google Docs: Expert Tips

Strikethrough in Excel: Easy Steps for Beginners
