

Checking Tire Tread? Expert Tips Included
How to Check Tire Tread: Expert Tips for Safe Driving
Your tires are literally where the rubber meets the road, and tire tread is one of the most critical safety factors on your vehicle. Worn tire tread reduces your grip on the pavement, especially in wet or slippery conditions, which can lead to hydroplaning, longer stopping distances, and loss of vehicle control. Learning how to check tire tread is an essential skill that every vehicle owner should master, and it takes just a few minutes to perform.
Regular tire tread inspection is part of responsible vehicle maintenance. Unlike checking your tire pressure or engine oil levels, tread depth measurement doesn’t require special knowledge—just a few simple tools and the right technique. In this comprehensive guide, we’ll walk you through multiple methods to check your tire tread depth, explain what the measurements mean, and help you understand when it’s time to replace your tires.

Why Tire Tread Matters for Vehicle Safety
Tire tread consists of the grooves and sipes (small cuts) molded into the rubber surface of your tires. These patterns serve a critical purpose: they channel water away from the tire surface, allowing your tires to maintain contact with the road. When tread wears down, your tires lose their ability to evacuate water, which dramatically increases the risk of hydroplaning—a dangerous condition where your vehicle loses traction entirely.
Beyond wet weather performance, adequate tire tread affects your vehicle’s handling, braking distance, and overall safety in various driving conditions. The National Highway Traffic Safety Administration (NHTSA) has established standards for minimum tire tread depth, and many states have legal requirements regarding when tires must be replaced. Worn tires aren’t just a safety hazard; they can also result in failed vehicle inspections and potential fines.
Tire tread depth is measured in 32nds of an inch. A new tire typically has between 10/32 and 12/32 of an inch of tread depth. Most states require replacement at 2/32 of an inch, though safety experts recommend replacing tires at 4/32 of an inch for better wet-weather performance. The difference between 2/32 and 4/32 might seem small, but it can significantly impact your stopping distance on wet roads.
The Penny Test Method: Quick and Easy
The penny test is perhaps the most popular method for checking tire tread because it requires nothing more than a penny—a tool virtually everyone has on hand. This simple test provides a quick way to determine if your tires have reached the legal minimum tread depth of 2/32 of an inch.
How to perform the penny test:
- Locate a groove in the tire tread (avoid the wear bars or ribs in the center of the tire)
- Take a penny and hold it with Lincoln’s head facing downward
- Insert the penny into the tread groove
- If the top of Lincoln’s head is covered by the tread, you still have adequate tread depth
- If you can see the top of Lincoln’s head, your tread depth is below 2/32 inches and it’s time to replace your tires
The penny test works because of Lincoln’s specific position on the coin. The distance from the bottom of the penny to the top of Lincoln’s head equals approximately 2/32 of an inch, which is why this method is so effective for a quick safety check. However, it’s important to understand that the penny test only tells you if you’ve reached the minimum legal limit—not the recommended safety limit.
One limitation of the penny test is that it doesn’t account for uneven tread wear, which can occur on one side of the tire or in a pattern across multiple tires. To get a complete picture of your tire condition, perform the penny test on multiple spots around each tire, including the outer edges, center, and inner edges. If some areas pass while others fail, you have uneven wear that may indicate alignment issues or other suspension problems.
The Quarter Test Method: Advanced Safety Check
While the penny test checks for the legal minimum, the quarter test checks for the recommended safety threshold of 4/32 of an inch. This method uses a quarter instead of a penny, and it’s preferred by many safety experts and automotive professionals who prioritize accident prevention over bare-minimum compliance.
How to perform the quarter test:
- Select a quarter and hold it with George Washington’s head facing downward
- Insert the quarter into multiple tread grooves across the tire
- If the top of Washington’s head is covered by the tread, your tires are still at an acceptable safety level
- If you can see the top of Washington’s head, your tread depth has fallen below 4/32 inches and replacement is recommended
The quarter test is more conservative than the penny test because the distance from the bottom of a quarter to the top of Washington’s head is approximately 4/32 of an inch. This extra margin of safety is particularly important if you frequently drive in wet conditions, on highways at high speeds, or in areas with unpredictable weather.
Many tire professionals and safety organizations recommend using the quarter test as your primary check method. The slight additional cost of replacing tires a bit earlier than the legal minimum is well worth the enhanced safety, especially considering that wet-weather braking distance increases significantly below the 4/32 mark. Test multiple tires and multiple spots on each tire to ensure you’re getting an accurate assessment of your overall tire condition.
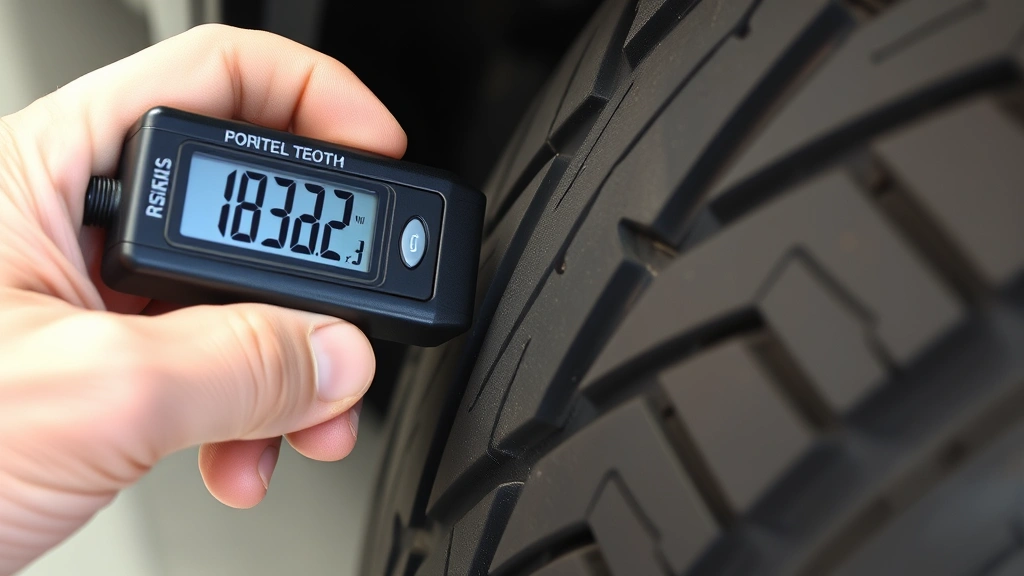
Using a Tread Depth Gauge for Precise Measurement
For the most accurate measurement of tire tread depth, a dedicated tread depth gauge is your best tool. These inexpensive devices—typically costing between $5 and $25—provide precise readings in 32nds of an inch, eliminating any guesswork from the penny or quarter methods.
Types of tread depth gauges:
- Digital gauges: Display tread depth on an LCD screen with precision to 1/32 of an inch
- Dial gauges: Use a rotating dial to indicate tread depth measurement
- Stick gauges: Feature a sliding ruler that shows tread depth when pressed into the tire
How to use a tread depth gauge:
- Place the gauge into a tread groove, perpendicular to the tire surface
- Press down gently until the gauge contacts the bottom of the groove
- Read the measurement displayed on the gauge
- Record the reading and repeat at multiple locations on each tire
- Check the outer edge, center, and inner edge of the tire to identify uneven wear patterns
Digital tread depth gauges are particularly useful because they provide immediate, easy-to-read measurements that remove any interpretation issues. Some advanced gauges can store multiple readings and display averages, helping you track tire wear over time. This data is invaluable for identifying trends and planning tire replacement before a sudden failure occurs.
When using any gauge, always test multiple locations on each tire. Tire wear isn’t always uniform, and you need to understand the complete wear pattern to make informed decisions about replacement. If you notice that one area of the tire is significantly more worn than others, this often indicates alignment problems that should be addressed by a professional mechanic.
Visual Inspection Techniques Beyond Measurements
While numeric measurements are important, visual inspection can reveal other tire problems that numbers alone won’t show. A comprehensive tire inspection involves looking for signs of damage, unusual wear patterns, and other warning signs that your tires need attention.
What to look for during visual inspection:
- Wear bars: Most tires have built-in wear indicators—small rubber bars between the treads that become visible as the tire wears. When these bars are level with the surrounding tread, replacement is overdue
- Cracks or cuts: Look for any visible damage to the tire sidewall or tread area that might indicate punctures or deterioration
- Bulges or blisters: These indicate internal tire damage and require immediate replacement
- Uneven wear patterns: Scalloping (dips in the outer edge), center wear, or one-sided wear all indicate alignment or suspension issues
- Discoloration or fading: Extreme fading or discoloration can indicate sun damage or age-related deterioration
- Debris or embedded objects: Small rocks, nails, or other foreign objects embedded in the tread should be noted
The wear bars mentioned above are one of the easiest visual indicators to monitor. As your tire wears, these small rubber bridges become increasingly visible. When they’re flush with the surrounding tread surface, you’ve reached the 2/32-inch minimum and replacement is legally required in most jurisdictions. Many drivers use the wear bars as a reminder to perform more detailed tread checks using the penny or quarter methods.
When to Replace Your Tires: Timing Guidelines
Understanding when to replace your tires involves more than just tread depth measurements. Several factors should influence your replacement decision, including driving conditions, climate, vehicle type, and your personal safety preferences.
Primary replacement indicators:
- Tread depth below 2/32 of an inch (legal minimum in most states)
- Tread depth below 4/32 of an inch in wet climates or for frequent highway driving
- Visible wear bars that are level with the tread surface
- Visible damage such as cuts, bulges, or sidewall deterioration
- Uneven wear patterns indicating alignment or suspension problems
- Age of tires (consider replacement after 6-10 years, even if tread depth is adequate)
Age is an often-overlooked factor in tire replacement. Even if your tires have adequate tread depth, the rubber compound deteriorates over time due to exposure to UV light, heat, and ozone. Most tire manufacturers recommend replacing tires between 6 and 10 years old, regardless of tread condition. You can find the tire’s age by looking at the DOT code on the sidewall—the last four digits indicate the week and year of manufacture.
Climate and driving habits significantly impact how quickly your tires wear. Aggressive driving, frequent hard braking, and high-speed driving all accelerate tread wear. Similarly, extreme heat, cold, and road salt can degrade tire quality faster. If you drive in harsh conditions, plan to replace tires more frequently than the average driver. Proper tire rotation—typically every 5,000 to 7,000 miles—helps ensure even wear and extends tire life.
When you do need new tires, consult the Tire Rack or visit Family Handyman for recommendations on quality options that fit your budget and driving needs. Your vehicle’s manual specifies the correct tire size and load rating required for your specific model.
Tire Maintenance Best Practices
Checking tire tread is just one component of comprehensive tire maintenance. To maximize tire life and ensure safe driving, implement these best practices into your regular vehicle maintenance routine.
Regular maintenance tasks:
- Check tire pressure monthly: Proper inflation is crucial for tire longevity and fuel efficiency. Underinflated tires wear faster and can overheat, while overinflated tires wear in the center. Learn more about checking tire pressure correctly
- Rotate tires every 5,000-7,000 miles: This ensures even wear across all four tires and extends overall tire life
- Maintain proper wheel alignment: Misalignment causes uneven wear and can be detected through the visual inspection methods described above
- Balance tires: Unbalanced tires cause vibration and accelerated wear; have them balanced when installing new tires
- Inspect tires monthly: Make checking tire tread part of your monthly vehicle inspection routine
- Avoid overloading your vehicle: Excess weight increases tire stress and accelerates wear
As part of your overall vehicle maintenance routine, tire inspection should be performed alongside other checks like car battery condition and engine oil levels. Creating a comprehensive maintenance schedule ensures you stay on top of all critical vehicle systems.
Tire storage is also important if you have seasonal tires or store tires for extended periods. Store tires in a cool, dry location away from direct sunlight and ozone sources like electric motors or welding equipment. Proper storage prevents premature aging and degradation of the rubber compound, helping your tires maintain their integrity when needed.
Consider keeping a tire pressure gauge and tread depth gauge in your vehicle at all times. These tools are inexpensive and taking a few minutes monthly to check your tires can prevent dangerous situations and extend tire life. Many drivers find that regular monitoring helps them catch problems early before they become serious safety issues.
Frequently Asked Questions About Tire Tread
What is the legal minimum tire tread depth?
The legal minimum tire tread depth in most U.S. states is 2/32 of an inch. However, many safety experts and organizations recommend replacing tires at 4/32 of an inch for better wet-weather performance and shorter braking distances. Check your state’s specific regulations, as some states have different requirements.
How often should I check my tire tread?
You should check your tire tread at least once a month and before long trips. If you frequently drive in challenging conditions—such as heavy rain, snow, or off-road terrain—check your tread more frequently. Regular checks help you catch wear early and plan tire replacement before a failure occurs.
Can I use the penny test on all tire types?
The penny test works on most standard passenger vehicle tires, but it may not be as reliable on specialty tires like all-terrain or mud-terrain tires that have deeper grooves. For these tires, a tread depth gauge provides more accurate measurements. Always verify measurements using multiple methods for important safety decisions.
Why do my tires wear unevenly?
Uneven tire wear typically indicates alignment problems, suspension issues, improper inflation, or aggressive driving habits. If you notice scalloping (dips in the outer edges), center wear, or one-sided wear, have your vehicle’s alignment checked by a professional mechanic. Regular tire rotation can help mask some uneven wear but won’t solve the underlying problem.
How long do tires typically last?
Tire lifespan depends on driving habits, climate, road conditions, and maintenance. Most tires last between 25,000 and 50,000 miles, though some premium tires may last longer. Regardless of tread depth, replace tires after 6-10 years due to rubber degradation. Check the DOT code on your tire’s sidewall to determine its age.
Should I replace all four tires at once?
For best performance and safety, replace all four tires at the same time. If this isn’t possible, replace at least two tires on the same axle (front or rear). Mixing new and worn tires can cause handling issues and increase accident risk. Some insurance companies may not cover accidents involving mismatched tires.
What does the wear bar on a tire indicate?
Wear bars are small rubber ridges between the tire treads that manufacturers install as visual indicators of tire wear. When the wear bars become level with the surrounding tread, your tire has worn to approximately 2/32 of an inch—the legal minimum. This is a clear sign that replacement is overdue.
Can I repair a tire with low tread depth?
Once tread depth falls below 2/32 of an inch, tires cannot be safely repaired. Even if a puncture is repairable, the tire should be replaced due to low tread depth. Driving on tires with minimal tread is dangerous, especially in wet conditions, and may violate traffic laws.
Related Posts

Superscript in Google Docs: Expert Tips

Strikethrough in Excel: Easy Steps for Beginners
