

Can You Paint Laminate? Tips from Experts
Can You Paint Laminate? Tips from Experts
Laminate surfaces are durable and budget-friendly, but they can look dated or worn over time. Many homeowners wonder if painting laminate is a viable solution to refresh cabinets, countertops, or furniture without the expense of replacement. The short answer is yes—you absolutely can paint laminate, but success depends on proper preparation and the right materials. Unlike painting drywall or wood, laminate presents unique challenges because its glossy, non-porous surface resists paint adhesion. However, with expert techniques and quality products, you can achieve professional results that last for years.
This comprehensive guide walks you through everything you need to know about painting laminate surfaces, from preparation steps to finishing touches. Whether you’re tackling kitchen cabinets, bathroom vanities, or furniture, these proven methods will help you transform your space affordably and effectively.
Why Laminate Requires Special Preparation
Laminate is a manufactured material consisting of multiple layers of paper or fabric bonded with resin and topped with a decorative printed layer and protective coating. This construction makes it incredibly durable for everyday use, but it also creates a slick, non-porous surface that paint struggles to grip. Standard paint simply beads up and slides off laminate without proper preparation.
The key issue is adhesion. Paint bonds to porous surfaces through absorption, but laminate’s smooth finish offers nothing for paint to grab onto. Additionally, laminate’s protective topcoat is specifically designed to repel moisture and stains—two things paint needs to cure properly. This is why rushing through preparation is the primary reason laminate painting projects fail. Skipping sanding or primer application almost guarantees peeling, chipping, and flaking within weeks.
Understanding this fundamental incompatibility helps explain why each preparation step matters. You’re not just cleaning; you’re mechanically breaking down the surface to create texture for paint adhesion. You’re also using specialized primers designed to bridge the gap between glossy laminate and finish paint.
Tools and Materials You’ll Need
Before starting your project, gather these essential supplies:
- Sandpaper: 120-grit, 150-grit, and 220-grit varieties for progressive sanding
- Sanding block or orbital sander: Makes sanding faster and more uniform
- TSP (trisodium phosphate) or degreaser: Removes built-up grime and oils
- Bonding primer: Specifically formulated for glossy surfaces (look for "bonding" or "adhesion" primers)
- Quality paint: Semi-gloss or satin finish acrylic latex or oil-based paint
- Paint brushes and rollers: High-quality synthetic brushes and microfiber rollers
- Painter’s tape: Protects edges and adjacent surfaces
- Drop cloths: Plastic or canvas to protect floors
- Tack cloth: Removes dust after sanding
- Safety equipment: Dust mask, safety glasses, gloves
- Caulk and caulking gun: For sealing gaps if needed
- Topcoat or polyurethane: Optional but recommended for high-traffic areas
Investing in quality materials—especially bonding primer—is crucial. Cheap primer won’t provide adequate adhesion, and your paint job will fail regardless of how well you prepared the surface. Consider this an investment in durability rather than an expense.
Step-by-Step Preparation Process
Preparation typically consumes 60-70% of your project time, but this investment directly determines success. Rush this phase and you’ll regret it.
Step 1: Clean Thoroughly
Start by removing all items from your work surface. Wipe down the entire laminate surface with a damp cloth to remove loose dust and debris. For heavily soiled surfaces, mix TSP or a degreaser with warm water according to package directions. Scrub the surface with a soft brush or cloth, paying special attention to corners, seams, and textured areas where grease and grime accumulate. Rinse thoroughly with clean water and allow to dry completely—at least 24 hours—before proceeding.
Step 2: Sand the Surface
Sanding is where the magic happens. Start with 120-grit sandpaper to break down the laminate’s protective topcoat and create texture. Sand in circular motions, applying moderate pressure. You’re not trying to remove material; you’re creating micro-scratches that paint can grip. Sand the entire surface, including edges and any textured areas. This step typically takes 30-60 minutes depending on surface size.
Progress to 150-grit sandpaper and repeat the process to refine the surface further. Finally, use 220-grit sandpaper for a final light sanding that smooths any roughness from the previous grits while maintaining the necessary texture. The goal is a matte, slightly rough finish—not shiny, but not excessively coarse.
For large flat surfaces, an orbital sander dramatically speeds this process and produces more consistent results. However, for edges, corners, and detailed areas, hand sanding with a sanding block gives you better control.
Step 3: Remove Dust
After sanding, your surface will be covered in fine dust. Vacuum thoroughly with a brush attachment, then wipe down with a tack cloth—a sticky cloth specifically designed to capture fine particles. This step is often overlooked but is absolutely critical. Any dust left on the surface will create bumps under your paint, ruining the finish. Wipe the entire surface multiple times with a clean tack cloth until no dust transfers to the cloth.
Step 4: Fill Gaps and Seams
If your laminate has gaps, seams, or damaged edges, fill these now before priming. Use paintable caulk to seal any gaps between laminate sections or where laminate meets other materials. Apply caulk smoothly with a caulking gun, then wet your finger and smooth the caulk flush with the surface. Allow to dry according to package directions before sanding lightly with 220-grit sandpaper.
Priming Laminate Surfaces
Primer is absolutely non-negotiable for laminate painting projects. Standard primers won’t work—you need a bonding primer specifically formulated for glossy, non-porous surfaces.
Choosing the Right Primer
Look for primers labeled as "bonding," "adhesion," or "universal" primers. Products like Zinsser Bulls Eye 1-2-3 or Kilz Adhesion Primer are specifically engineered for challenging surfaces like laminate, tile, and glossy finishes. These primers contain special resins and additives that chemically bond to slick surfaces, creating a foundation that finish paint can adhere to. The extra cost of a quality bonding primer is negligible compared to the cost of redoing an entire project.
Application Process
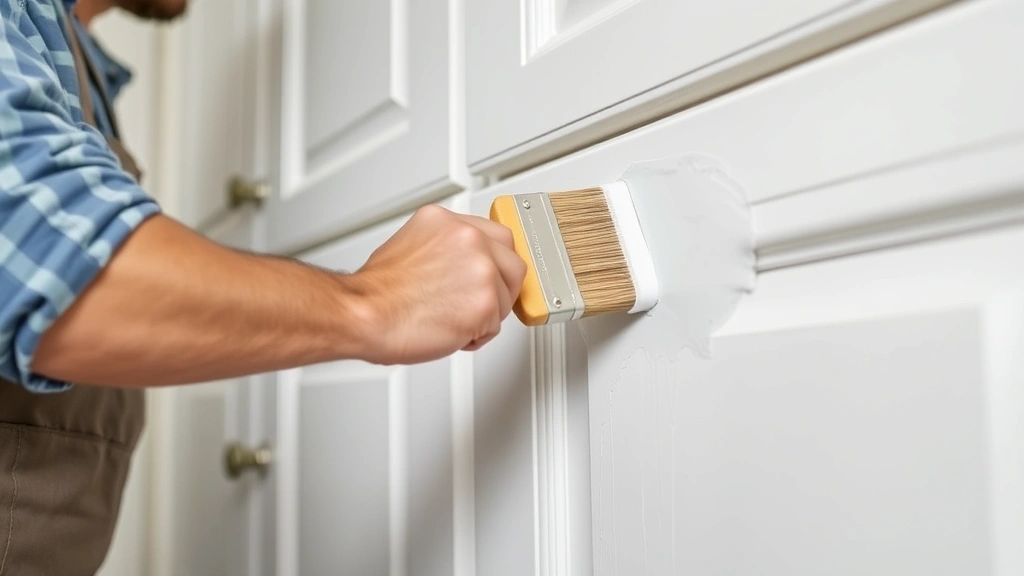
Apply primer with a high-quality synthetic brush or microfiber roller. Use smooth, even strokes and maintain a wet edge to avoid lap marks. Apply thin, even coats rather than one thick coat—thin coats dry faster and provide better adhesion. Most bonding primers require 1-2 coats for adequate coverage. Check the specific product’s recommendations, as drying times vary.
Typically, bonding primers dry to the touch in 1-3 hours but may require 24 hours before applying finish paint. Don’t rush this step. Applying finish paint over tacky primer will result in a poor finish and adhesion problems. After the primer dries, lightly sand with 220-grit sandpaper and wipe with a tack cloth before applying paint.
Painting Techniques for Best Results
With proper preparation and priming complete, painting becomes straightforward. Quality technique ensures a smooth, professional-looking finish.
Choosing Paint Type
For laminate, semi-gloss or satin finish acrylic latex paint works well for most applications. Semi-gloss provides better durability and washability for kitchens and bathrooms, while satin offers a softer appearance. Oil-based paints provide excellent durability but require more ventilation and special cleanup procedures. Water-based acrylic latex is more convenient and environmentally friendly, with adequate durability for most residential applications.
Select paint specifically formulated for cabinets or trim if available—these contain additives that improve adhesion and durability compared to standard wall paint. Cabinet paint is thicker and levels better, producing a smoother finish with fewer brush marks.
Application Technique
Apply paint in thin, even coats using long, smooth strokes. Work in one direction, maintaining a wet edge to avoid visible lap marks. Use a high-quality synthetic brush for detail work and a microfiber roller for large flat surfaces. Microfiber rollers produce an exceptionally smooth finish with minimal texture.
Apply 2-3 thin coats rather than fewer thick coats. Thin coats dry faster, adhere better, and produce a smoother finish. Allow proper drying time between coats—typically 4-8 hours for acrylic latex, longer for oil-based paints. Check the specific product instructions, as different formulations have different drying times.
Work in optimal conditions: temperatures between 50-85°F and humidity below 85%. Paint dries slowly in cold, humid conditions and too quickly in hot conditions, both of which compromise finish quality. Ensure adequate ventilation to prevent fume buildup and to help paint dry evenly.
Drying and Curing Times
Understanding the difference between drying and curing is critical. Drying is when paint feels dry to the touch, while curing is when it reaches full hardness and durability.
Most acrylic latex paints dry to the touch in 1-4 hours but require 24 hours before you can apply a second coat. However, full cure typically takes 7-14 days. During this curing period, avoid heavy use, washing, or placing items on painted surfaces. The paint may feel hard but isn’t fully hardened throughout its thickness.
Oil-based paints cure more slowly, sometimes requiring 2-3 weeks for full hardness. Plan your project accordingly, and if possible, avoid using painted surfaces for at least one week after final coat application.
Sealing and Protecting Your Work
For high-traffic areas like kitchen cabinets or bathroom vanities, applying a protective topcoat dramatically extends paint durability. Clear polyurethane, polycrylic, or specialty cabinet topcoats protect against moisture, UV damage, and physical wear.
Apply topcoat 24 hours after final paint coat dries. Use the same application technique as paint: thin, even coats with a quality brush or roller. Most topcoats require 2 coats for adequate protection. Allow proper drying time between coats and before using the surface.
For maximum protection in kitchens and bathrooms, consider water-based polyurethane, which provides excellent moisture resistance without the strong odor of oil-based polyurethane. Matte, satin, or semi-gloss finishes are available depending on desired appearance.
Proper maintenance extends the life of your painted laminate. Wipe spills immediately, use coasters under cups and glasses, and avoid abrasive cleaners. Clean with mild soap and water, and avoid excessive moisture exposure. With proper care, your painted laminate should remain beautiful for 5-10 years or longer.
FAQ
Can you paint laminate without sanding?
Technically possible but not recommended. Without sanding, paint lacks adequate adhesion and will peel or chip within weeks. Sanding is the critical step that enables paint to grip the glossy surface. The small time investment in sanding prevents far larger problems later.
What’s the best primer for laminate?
Bonding primers specifically formulated for glossy surfaces are essential. Products like Zinsser Bulls Eye 1-2-3 or Kilz Adhesion Primer are engineered for this purpose. Avoid standard primers, as they won’t provide adequate adhesion to laminate surfaces.
How long does painted laminate last?
With proper preparation, quality materials, and maintenance, painted laminate typically lasts 5-10 years. High-traffic areas may require touch-ups sooner. A protective topcoat significantly extends durability, especially in kitchens and bathrooms where moisture exposure is higher.
Can you paint laminate countertops?
Yes, but countertops require extra durability due to constant use and moisture exposure. Follow all preparation steps carefully, use a bonding primer, apply quality cabinet paint, and seal with a protective topcoat. Consider whether replacement might be more cost-effective for heavily used countertops.
What if painted laminate starts peeling?
Peeling indicates inadequate surface preparation or primer application. Sand off peeling paint, re-prime the area, and repaint. To prevent recurrence, ensure thorough initial sanding and use a quality bonding primer. If peeling persists, laminate replacement may be more practical than repeated repairs.
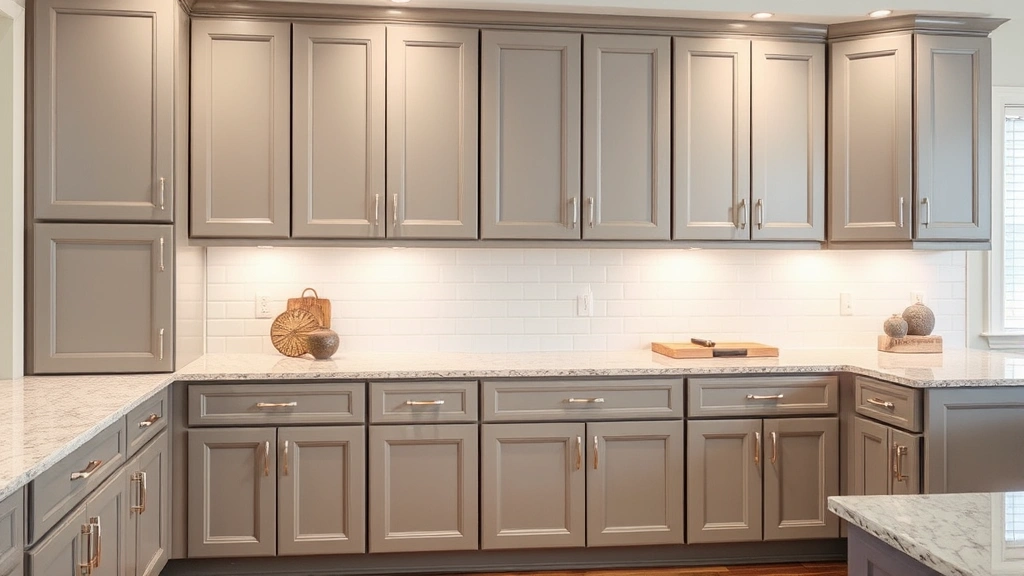
Can you paint laminate cabinets?
Absolutely. Kitchen and bathroom cabinets are ideal candidates for painting. Follow all preparation steps, use cabinet-specific paint, and apply a protective topcoat for durability. Cabinet painting is far more affordable than replacement and dramatically refreshes a kitchen’s appearance. For detailed guidance, check our installation guide for additional cabinet refinishing tips.
Is it better to paint or replace laminate?
Painting is significantly more affordable than replacement, typically costing 20-30% of replacement expenses. However, if laminate is severely damaged, cracked, or lifting, replacement may be more practical. For cosmetic updates or color changes, painting is an excellent choice that delivers impressive results.
Related Posts

Superscript in Google Docs: Expert Tips

Strikethrough in Excel: Easy Steps for Beginners
