
Stop Screen Recording on Mac? Easy Steps Here!
How to Stop Screen Recording on Mac: Easy Steps Here!
Screen recording on Mac is a powerful feature built into macOS that allows you to capture video of your screen for tutorials, presentations, or documentation purposes. However, if you’ve started a screen recording and need to stop it, or if you want to disable this feature entirely, the process is straightforward and takes only a few seconds. Whether you’re using the latest macOS Sonoma or an older version, we’ll walk you through every method to stop screen recording on your Mac.
Many Mac users don’t realize how simple it is to control screen recording, and some are unaware of all the options available to them. This guide will cover everything from stopping an active recording to managing permissions and preventing accidental recordings. By the end, you’ll be confident in your ability to manage screen recording on your Mac like a pro.

Understanding Mac Screen Recording Basics
Before diving into how to stop screen recording, it’s helpful to understand what screen recording is and how it works on your Mac. Screen recording is a built-in feature that comes with every modern Mac computer, integrated directly into the operating system. Apple introduced this feature to make it easy for users to create video tutorials, document issues for tech support, or record presentations without needing third-party software.
The screen recording feature on Mac is accessed through the Screenshot application, which also handles still image captures. This unified approach means you can quickly switch between taking screenshots and recording video without launching different programs. The feature works across all applications and can capture your entire screen, a specific window, or a selected portion of your display.
Understanding where these controls are located is the first step toward managing screen recording effectively. Most Mac users access screen recording through the Command + Shift + 5 keyboard shortcut, which opens a floating toolbar with various capture options. This toolbar is context-sensitive and adapts based on what you’re doing on your Mac.
How to Stop an Active Screen Recording
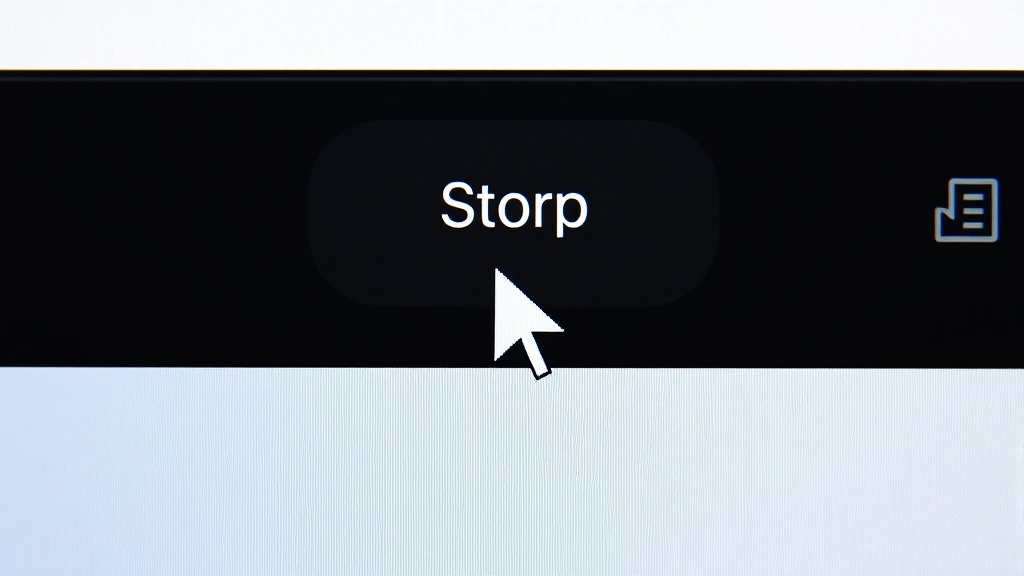
If you have an active screen recording running and need to stop it immediately, there are several quick methods to accomplish this task. The fastest way is to look for the recording indicator in your menu bar at the top of your screen. When a screen recording is active, a red dot or circle appears in the menu bar, accompanied by the text “Recording” in newer macOS versions.
Method 1: Using the Menu Bar Indicator
The simplest way to stop recording is to click directly on the recording indicator in your menu bar. This red dot is impossible to miss when an active recording is running. Click on it once, and a menu will appear giving you the option to “Stop Recording.” This method works on all recent versions of macOS and is the quickest way to end a recording session.
Method 2: Using the Keyboard Shortcut
If you prefer keyboard shortcuts, you can press Command + Shift + 5 again while a recording is active. This will bring up the screenshot toolbar, which now displays a “Stop” button instead of the usual capture options. Click the Stop button to end your recording immediately. This method is particularly useful if you’re using a Mac laptop and want to keep your hands on the keyboard.
Method 3: Press Command + Control + Escape
Another keyboard shortcut that works across many macOS applications is Command + Control + Escape. While this shortcut is typically used to force quit applications, it can also stop an active screen recording if the recording process becomes unresponsive. However, this should only be used as a last resort if the other methods aren’t working.
Accessing Screen Recording Controls
To effectively manage screen recording on your Mac, you need to know where all the controls are located. The primary way to access screen recording is through the built-in Screenshot application, which Apple has continuously improved over the years. Learning to navigate these controls will help you avoid accidental recordings and ensure you capture exactly what you need.
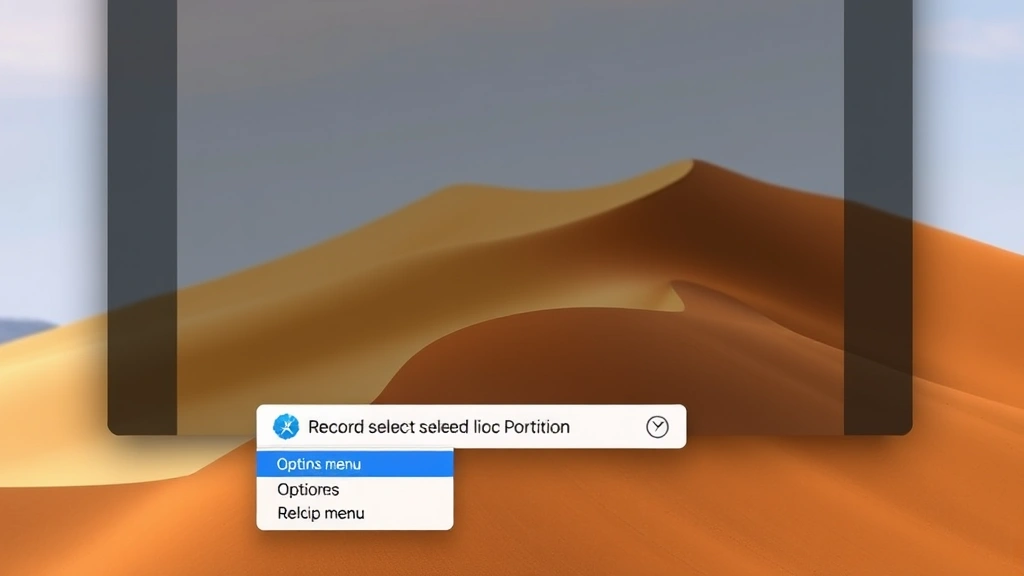
When you press Command + Shift + 5, a floating toolbar appears at the bottom of your screen. This toolbar contains several options: a button to capture the entire screen, a button to capture a selected window, and a button to capture a selected portion of the screen. On the right side of this toolbar, you’ll find additional options including the “Record Entire Screen” and “Record Selected Portion” buttons.
Customizing Your Recording Options
Before you start recording, you should familiarize yourself with the options menu. Click the “Options” button on the far right of the toolbar to access settings like where your recordings will be saved, whether to show a floating thumbnail after capture, and whether to automatically save or copy to clipboard. These settings help you control what happens after you stop recording, ensuring your files are organized and accessible.
The options menu also allows you to set a timer for automatic recording termination. This is particularly useful if you want to ensure a recording doesn’t run indefinitely. You can set the timer to stop recording after a specific duration, which provides an additional layer of control over your screen recording sessions.
Managing Screen Recording Permissions
macOS includes privacy controls that determine which applications can record your screen. Understanding and managing these permissions is crucial for both security and functionality. When an application requests screen recording permission, macOS displays a prompt asking you to approve or deny the request. Your choices are remembered, and you can modify them at any time through System Settings.
To access screen recording permissions, open System Settings on your Mac and navigate to Privacy & Security. Look for “Screen Recording” in the list of privacy options. Here, you’ll see all applications that have requested screen recording permission, along with toggle switches to enable or disable access for each app.
Reviewing Permitted Applications
It’s a good practice to regularly review which applications have screen recording permission. Some applications you install might request this permission even if they don’t strictly need it. By reviewing your list and disabling permission for apps that don’t require screen recording functionality, you can maintain better control over what’s happening on your Mac. This is especially important for security-conscious users who want to prevent unauthorized screen capture.
If an application frequently crashes or behaves unexpectedly during screen recording, removing its screen recording permission and reinstalling it can sometimes resolve the issue. This forces the application to re-request permission and can reset any corrupted permission settings that might be causing problems.
Disable Screen Recording Entirely
While screen recording is a useful feature, some users may want to disable it entirely for security or organizational reasons. If you manage a shared Mac or want to prevent accidental recordings, disabling screen recording is possible through several methods. The approach you choose depends on how completely you want to restrict the feature.
Removing Screen Recording Permission from All Apps
The most straightforward way to effectively disable screen recording is to remove permission from all applications. Go to System Settings > Privacy & Security > Screen Recording and toggle off the switches next to every application listed. This prevents any app from recording your screen, though the built-in screenshot application will still function for still images.
Using Parental Controls
If you’re managing a Mac for another user, you can use Parental Controls to restrict screen recording access. This is particularly useful for parents who want to prevent children from recording their screen activities. Open System Settings, navigate to General, and select “Parental Controls.” Create or select a managed account, then configure the restrictions as needed.
Removing the Screenshot Application
For maximum restriction, advanced users can remove the screenshot application from their Mac. However, this is not recommended for most users as it requires using the Terminal and could potentially cause issues with other system functions. If you want to pursue this option, consult Apple’s official support documentation for guidance.
Troubleshooting Screen Recording Issues
Sometimes, stopping a screen recording isn’t as straightforward as it should be. If you’re experiencing issues with screen recording on your Mac, there are several troubleshooting steps you can take to resolve common problems. Understanding these solutions will help you get your Mac working properly again.
Recording Won’t Stop
If your screen recording won’t stop using the normal methods, first try clicking the menu bar indicator again. Sometimes the interface needs a moment to respond. If that doesn’t work, try the Command + Shift + 5 shortcut and click the Stop button. If neither method works, you may need to restart your Mac to force stop the recording process.
Before restarting, try opening Activity Monitor (Applications > Utilities > Activity Monitor) and searching for “ScreenFloatingPanel” or “screencaptureui.” If you find these processes running, select them and click the “X” button to force quit them. This often stops a stuck recording without requiring a full restart.
Can’t Find the Stop Button
If you can’t locate the stop button when trying to stop recording, make sure you’re looking at the correct toolbar. When a recording is active, pressing Command + Shift + 5 brings up a different toolbar than when no recording is active. The active recording toolbar should display a prominent “Stop” button on the left side.
If the toolbar isn’t appearing at all, try restarting the Finder or logging out and back into your Mac. Sometimes the user interface needs to refresh to display the recording controls properly. You can also try pressing Escape to dismiss any open windows and then press Command + Shift + 5 again.
Audio Recording Issues
When you stop a screen recording, you might notice that audio wasn’t captured even though you expected it to be. This is because screen recording on Mac doesn’t automatically capture system audio or microphone input. To record audio along with your screen, you need to enable the “Microphone Audio” option before you start recording. Click on “Options” in the toolbar and select your preferred audio source.
If you forgot to enable audio before recording, you’ll need to re-record that section. However, there are third-party applications available on the Mac App Store that offer more advanced recording options, including system audio capture.
Related to managing your digital workspace, you might also want to learn about how to stop getting spam emails to keep your Mac environment clean and organized. Additionally, understanding how to remove formatting in Word can help you prepare documents for sharing alongside your screen recordings.
Frequently Asked Questions
Where is my screen recording saved?
By default, screen recordings are saved to your Desktop. However, you can change this location by opening the Screenshot application toolbar and clicking “Options,” then selecting a different save location from the dropdown menu. You can also choose to save recordings to Documents, Downloads, or any other folder on your Mac.
Can I stop recording if my Mac is frozen?
If your Mac is completely frozen and unresponsive, you may need to force restart your computer. Press and hold the power button for about 10 seconds until your Mac shuts down. This will forcibly stop any active screen recording. Note that unsaved work will be lost, so use this method only as a last resort.
Does stopping screen recording delete the file?
No, stopping a screen recording does not delete the file. Once you stop recording, the video file is saved to your chosen location (typically the Desktop) and remains there until you manually delete it. You can view, share, or edit the recording as needed.
Can other people see when I’m screen recording?
Yes, when you’re recording, a red recording indicator appears in your menu bar that’s visible to anyone looking at your screen. If you’re screen sharing during a video call, other participants will also see this indicator. There’s no way to hide the recording indicator while actively recording.
Why won’t my Mac let me stop recording?
This usually indicates a system glitch. Try the following steps in order: click the menu bar indicator, use Command + Shift + 5 and click Stop, force quit the screencaptureui process through Activity Monitor, or restart your Mac. If the issue persists, check that you’re running the latest macOS version by going to System Settings > General > Software Update.
Is it possible to record without the menu bar indicator showing?
No, macOS always displays a recording indicator when screen recording is active. This is a privacy and security feature built into macOS to ensure users are aware when their screen is being captured. This indicator cannot be disabled or hidden.
Can I record just one application window?
Yes, when you press Command + Shift + 5, you’ll see a “Record Selected Window” option. Click on it and then click on the window you want to record. This will record only that specific window instead of your entire screen, which is useful for creating focused tutorials or documentation.
Related Posts

Superscript in Google Docs: Expert Tips

Strikethrough in Excel: Easy Steps for Beginners
