

Merging Excel Cells: Pro Tips & Tricks
Merging Excel Cells: Pro Tips & Tricks for Perfect Spreadsheet Formatting
Excel cell merging is one of the most powerful formatting tools available to spreadsheet users, yet many people struggle with the process or don’t fully understand its capabilities. Whether you’re creating professional reports, organizing data, or building complex spreadsheets, knowing how to merge 2 cells in Excel and beyond can dramatically improve your worksheet’s appearance and functionality. This comprehensive guide will walk you through every method, best practice, and advanced technique you need to master cell merging like a pro.
Cell merging combines two or more adjacent cells into a single larger cell, which is particularly useful for creating titles, headers, and organized data layouts. However, merging isn’t just about aesthetics—it’s a strategic tool that can help you structure information more effectively, create better visual hierarchies, and make your spreadsheets easier to navigate. In this guide, we’ll explore multiple approaches to merging cells, discuss when merging is appropriate, and reveal professional tips that will elevate your Excel skills to the next level.
Understanding Cell Merging Basics
Before diving into the technical steps of how to merge cells in Excel, it’s essential to understand what cell merging actually does and why you might want to use it. When you merge cells, you’re combining multiple cells into one larger cell. The merged cell takes on the address of the upper-left cell in your selection, and any data from other cells in the merge range is typically discarded (Excel will warn you about this).
Cell merging is particularly valuable for creating professional-looking spreadsheets. Common use cases include creating centered titles across multiple columns, building complex headers, organizing data by category, and improving visual clarity in reports. However, it’s important to note that merged cells can sometimes complicate data analysis, sorting, and formula creation, so strategic use is essential.
The fundamental principle behind merging is simple: select the cells you want to combine, then apply the merge command. Excel offers multiple ways to accomplish this, each with its own advantages depending on your specific needs and workflow preferences. Understanding each method will help you choose the most efficient approach for any situation.
Method 1: Using the Merge & Center Button
The quickest and most intuitive way to merge cells in Excel is using the Merge & Center button on the Home ribbon. This method is perfect for beginners and remains the most commonly used approach among Excel users.
Step-by-step process:
- Open your Excel spreadsheet and locate the cells you want to merge. For example, if you want to create a title spanning columns A through D in row 1, you’ll start here.
- Click on the first cell (A1) and drag to select all cells you want to merge. You can also click the first cell, hold Shift, and click the last cell to select the range.
- Look at the Home tab in the ribbon at the top of your screen. Find the “Merge & Center” button—it typically shows a small grid icon with cells combining.
- Click the dropdown arrow next to the Merge & Center button to see additional merge options including “Merge Across” and “Merge Cells.”
- Select your preferred merge option. “Merge & Center” centers content both horizontally and vertically, while “Merge Across” merges cells in each row separately.
- Excel will merge your selected cells. If any cells contain data other than the first one, you’ll see a warning message asking what you want to do with the additional content.
This method is ideal when you want to create centered headers or titles. The automatic centering saves you an extra formatting step and creates a polished appearance instantly. Many users prefer this approach because it’s visible on the ribbon and requires minimal navigation.
Method 2: Merge Cells via Format Menu
For users who prefer menu-driven approaches or need access to more detailed merge options, the Format menu provides comprehensive merging controls. This method is particularly useful when you want to merge cells without automatic centering or need to access advanced formatting options simultaneously.
Detailed steps:
- Select the range of cells you want to merge by clicking the first cell and dragging to the last cell in your desired range.
- Go to the Home tab and click the “Format” button in the ribbon. This opens a dropdown menu with various formatting options.
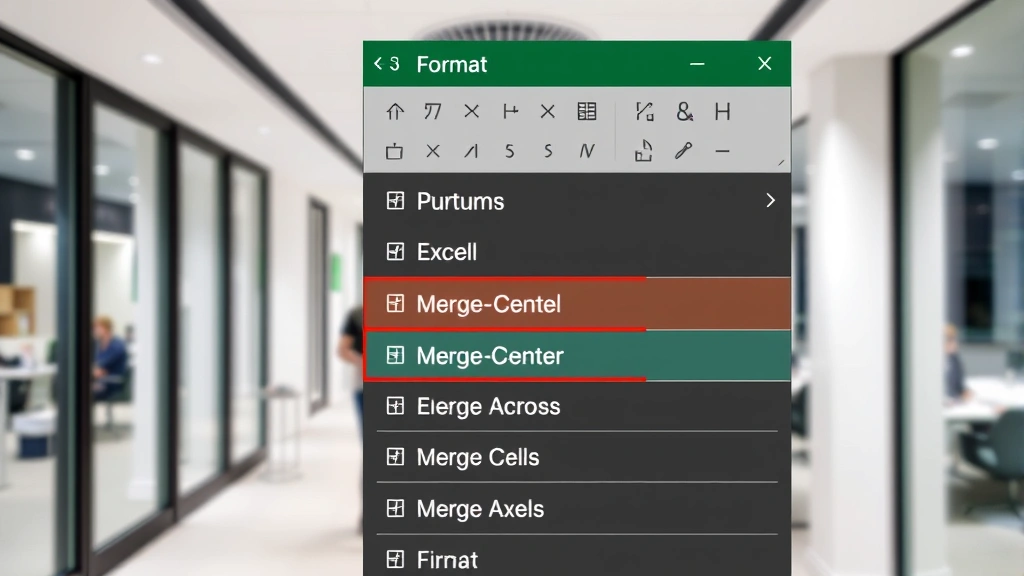
- Look for the “Merge Cells” option in the dropdown menu. Click on it to see submenu options including “Merge & Center,” “Merge Across,” “Merge Cells,” and “Unmerge Cells.”
- Choose your preferred merge type based on your formatting needs.
- If you selected cells with multiple data values, Excel displays a dialog confirming that only the content from the upper-left cell will be retained. Click OK to proceed.
- Your cells are now merged. You can adjust text alignment, font size, and other formatting properties as needed using the standard formatting toolbar.
This approach provides more explicit control and is excellent when you’re already working within the Format menu for other cell modifications. It’s also the preferred method for users who work with keyboard navigation or accessibility tools, as the menu structure is more predictable than relying on ribbon buttons.
Method 3: Keyboard Shortcuts for Quick Merging
Power users and those who prefer keyboard navigation will appreciate using keyboard shortcuts to merge cells quickly. While Excel doesn’t have a single dedicated keyboard shortcut for merging, you can create custom shortcuts or use Alt key combinations to access merge functions rapidly.
Using Alt key combinations:
- Press Alt + H to activate the Home tab
- Press M to access the Merge & Center dropdown
- Press C for Merge & Center, A for Merge Across, or M for Merge Cells
For frequent Excel users, creating a custom keyboard shortcut can dramatically speed up your workflow. You can assign a shortcut through Excel’s Options menu: go to File → Options → Customize Ribbon → Keyboard Shortcuts. This approach is perfect if you merge cells regularly and want to minimize mouse usage.
Additionally, many advanced Excel users employ macros to automate merging tasks, especially when working with large spreadsheets that require consistent formatting across multiple sections. Creating a simple macro that merges selected cells can save significant time on repetitive projects.
Advanced Merging Techniques
Beyond basic cell merging, Excel offers sophisticated techniques for creating complex spreadsheet layouts and managing merged cells in professional environments. These advanced methods are essential for anyone building complex reports or working with large teams on shared spreadsheets.
Merging across multiple rows and columns:
You can merge cells in various patterns to create sophisticated layouts. For example, you might merge cells A1:D3 to create a large title area, then merge different ranges below for section headers. This flexibility allows you to design spreadsheets with clear visual hierarchies that guide users through your data logically.
When merging across multiple rows and columns, remember that Excel retains only the data from the upper-left cell. Plan your cell selection carefully to avoid losing important information. If you have data in multiple cells that you need to preserve, copy that data to a separate location before merging.
Conditional merging with formulas:
While Excel doesn’t allow formulas to directly control merging (merged cells and formulas can sometimes conflict), you can use merged cells strategically within formula-heavy spreadsheets. For example, you might merge cells for category headers while keeping data cells unmerged for calculation purposes.
A helpful tip: use merged cells for labels and static information, and keep cells that contain formulas or will be sorted/filtered unmerged. This combination provides the best of both worlds—professional appearance with functional flexibility. Check out our guide on FixWiseHub’s how-to guides and tutorials for more advanced Excel techniques.
Merging cells in templates:
When creating Excel templates for team use, merged cells help establish a consistent visual structure that users will recognize and follow. Design your template with merged cells for headers, titles, and section breaks, then leave data entry areas unmerged. This approach ensures that anyone using your template maintains consistent formatting while still being able to manipulate and analyze the underlying data.
Unmerging Cells: Reversing the Process
Sometimes you need to reverse a merge operation, either because you made a mistake or because your spreadsheet requirements have changed. Fortunately, unmerging cells is just as straightforward as merging them.
To unmerge cells:
- Click on the merged cell you want to unmerge. You only need to select the merged cell itself, not a range.
- Go to the Home tab and click the Merge & Center dropdown button.
- Select “Unmerge Cells” from the menu. Alternatively, you can use Format → Merge Cells → Unmerge Cells.
- Excel instantly separates the merged cell back into individual cells. The content that was in the merged cell appears in the upper-left cell of the former merge range, while other cells become empty.
One important consideration: unmerging doesn’t restore data that was lost during the original merge operation. If you merged cells that contained data in multiple locations, only the upper-left cell’s content will be preserved. This is why it’s crucial to back up your spreadsheet or plan carefully before merging cells containing important information.
You can unmerge multiple merged cells at once by selecting all of them together, then applying the Unmerge Cells command. This batch operation is particularly useful when reorganizing large spreadsheets or converting formatted templates into data-entry sheets.
Best Practices and Common Mistakes
Mastering cell merging isn’t just about knowing how to do it—it’s about knowing when and how to do it effectively. Professional spreadsheet designers follow specific best practices to ensure their merged cells enhance rather than hinder functionality.
Best practice guidelines:
- Merge strategically for headers and titles: Use merged cells for spreadsheet titles, section headers, and category labels. These are visual elements that benefit from merging without compromising data functionality.
- Avoid merging data cells: Don’t merge cells that contain actual data values, especially if those cells will be referenced in formulas, sorted, or filtered. This can cause calculation errors and sorting problems.
- Maintain alignment consistency: When you merge cells for headers, center the text both horizontally and vertically for a professional appearance. Use the Merge & Center button rather than manually centering text in unmerged cells.
- Document merge locations: In complex spreadsheets, make a note of where merged cells exist. This helps other users (and future you) understand the spreadsheet structure and avoid accidentally referencing merged cells in formulas.
- Test formulas before merging: If you’re working with a spreadsheet containing formulas, establish all your calculations first, then add merged cells for formatting afterward. This prevents formula conflicts.
Common mistakes to avoid:
- Merging cells containing multiple data values: This results in data loss. Always ensure only one cell in your merge range contains important data.
- Merging cells used in sorting or filtering: Merged cells can interfere with Excel’s sort and filter functions. Keep data ranges unmerged if you plan to manipulate them.
- Creating complex merge patterns: While possible, overly complex merged cell patterns can confuse users and make the spreadsheet difficult to navigate. Keep your merge structure simple and logical.
- Forgetting to unmerge before sharing: If you’re sharing a spreadsheet template, consider whether merged cells will confuse other users or limit their ability to modify the sheet.
- Merging cells in pivot tables or data ranges: These special Excel features work best with unmerged cells. Avoid merging in areas dedicated to data analysis.
Troubleshooting Merge Issues
Even experienced Excel users encounter occasional issues with merged cells. Understanding common problems and their solutions will help you resolve issues quickly and maintain spreadsheet integrity.
Merged cells not appearing centered:
If you’ve merged cells but the text doesn’t appear centered, check your text alignment settings. Click the merged cell and use the alignment buttons on the Home tab to center both horizontally and vertically. Sometimes the Merge & Center button doesn’t apply vertical centering—you may need to adjust this separately using Format → Cells → Alignment.
Formula errors referencing merged cells:
If a formula returns an error when referencing a merged cell, remember that a merged cell is referenced by its upper-left address only. For example, if you merge cells A1:D1, the cell reference is A1, not A1:D1. Update your formula to reference only the upper-left cell of the merge range.
Merged cells interfering with sorting or filtering:
If your data won’t sort or filter properly, check whether merged cells exist in your data range. Remove merges from data areas and apply them only to headers or labels outside your data range. This restores full functionality to Excel’s sorting and filtering features.
Printing issues with merged cells:
Merged cells can sometimes cause unexpected page breaks or alignment issues when printing. Test your print preview (File → Print Preview) to see how merged cells will appear on paper. Adjust cell heights and widths as needed, and consider whether merged cells are necessary in areas that will be printed.
Merged cells causing file compatibility issues:
If you’re saving your spreadsheet in an older Excel format or sharing with users of different software, extensive merged cells might cause compatibility problems. When sharing files widely, minimize merged cell usage or test the file in the target application before distribution.
Frequently Asked Questions
Can I merge cells with different formatting?
Yes, you can merge cells with different formatting. When you merge, Excel retains the formatting of the upper-left cell and applies it to the entire merged cell. If you want to preserve specific formatting from other cells, apply your desired formatting after merging.
What happens to formulas in merged cells?
If you merge cells containing formulas, Excel keeps the formula from the upper-left cell and discards others. If you need to preserve multiple formulas, don’t merge those cells. Instead, merge only cells containing labels or static information.
Can I merge cells in Excel Online?
Yes, Excel Online supports cell merging. The process is similar to desktop Excel: select your cells and use the Merge & Center button in the Home tab. However, some advanced merge options may be limited compared to desktop Excel.
How do I merge cells without losing data?
Before merging, ensure only the upper-left cell in your selection contains the data you want to keep. If multiple cells contain important information, copy that data elsewhere first, then merge the cells. You can paste the preserved data back after merging if needed.
Can merged cells be used in VLOOKUP functions?
Merged cells can complicate lookup functions. While you can reference a merged cell in a formula, using merged cells in lookup tables (the array you’re searching) is not recommended. Keep lookup tables unmerged for reliable function performance.
Is there a way to automatically merge cells based on duplicate values?
Excel doesn’t have a built-in automatic merge based on duplicates, but you can use conditional formatting to highlight duplicates, then manually merge cells as needed. For advanced automation, consider using VBA macros to merge cells based on specific criteria.
How do I merge cells in a specific pattern across my spreadsheet?
Select each group of cells you want to merge individually, then apply the merge command. Repeat this process for each section. Alternatively, if you perform the same merge pattern repeatedly, create a macro that applies your standard merge layout to any selected range.
Related Posts

Superscript in Google Docs: Expert Tips

Strikethrough in Excel: Easy Steps for Beginners
