

Make Bubbles at Home: Expert Tips & Tricks
Make Bubbles at Home: Expert Tips & Tricks
Creating bubbles at home is one of the most delightful and affordable activities you can enjoy with family and friends. Whether you’re entertaining children, setting up for a special event, or simply looking for a fun outdoor activity, learning how to make bubbles opens up endless possibilities for creative play and relaxation. The beauty of bubble-making lies in its simplicity—you likely already have most of the ingredients needed in your kitchen right now.
Beyond the basic bubble solution, there are countless variations, techniques, and tricks that can elevate your bubble-making experience from ordinary to extraordinary. From giant bubbles that tower over your head to iridescent bubble clouds that drift through your yard, mastering the art of bubble creation is easier than you might think. This comprehensive guide will walk you through everything you need to know about making bubbles at home, including proven recipes, professional tips, and creative variations that will impress anyone watching.
Basic Bubble Solution Recipe
The foundation of successful bubble-making starts with understanding the essential components of bubble solution. The most reliable and cost-effective recipe uses just three ingredients: dish soap, water, and a small amount of sugar or corn syrup. This classic combination has been tested by countless families and remains the gold standard for bubble enthusiasts.
Simple Bubble Solution (Makes 2 cups):
- 1 cup water
- 2 tablespoons dish soap (Dawn or similar brand works best)
- 1 tablespoon sugar or light corn syrup
- 1 teaspoon baking powder (optional, for extra durability)
To prepare this solution, start by pouring room-temperature water into a container. Add your dish soap slowly, stirring gently to combine without creating excessive foam. The sugar or corn syrup acts as a stabilizer, making bubbles last longer and preventing them from popping immediately. Mix thoroughly but carefully—vigorous stirring introduces too much air and can reduce bubble quality.
The reason this recipe works so well relates to basic chemistry. Dish soap contains surfactants that reduce the surface tension of water, allowing thin films to form and trap air. Sugar increases the solution’s viscosity, which strengthens the bubble wall and extends bubble lifespan. Many professionals recommend letting your solution sit for several hours or overnight before using it—this allows the ingredients to fully integrate and improves performance significantly.
If you’re working on a budget or want the most environmentally friendly option, plain dish soap and water will still create bubbles. However, adding the sugar component truly makes a noticeable difference in bubble duration and success rate. You can experiment with different dish soap brands; while Dawn is popular, many store-brand alternatives work equally well and cost considerably less.
Essential Tools and Equipment
While you can create bubbles using just your fingers dipped in solution, having the right tools dramatically improves your results. The type of wand or tool you use directly impacts bubble size, shape, and quantity. Understanding your options helps you choose the best equipment for your specific bubble-making goals.
Bubble Wands and Frames:
- Traditional circular wands: The most common option, perfect for beginners and standard bubble production
- Square or geometric frames: Create cubic or shaped bubbles for unique visual effects
- Bubble guns: Motorized devices that produce continuous streams of small bubbles with minimal effort
- Wand sets: Multiple sizes in one package, allowing you to experiment with different bubble dimensions
- Homemade wands: Bent wire, pipe cleaners, or plastic straws secured together with string
For those interested in DIY home projects, creating your own bubble wands is surprisingly simple and cost-effective. You can fashion wands from chenille stems, wooden dowels wrapped with string, or even plastic bottle rings. The key is ensuring your wand material is smooth and won’t tear the bubble film.
Beyond wands, having a shallow dish or container for your bubble solution is essential. Wide, shallow containers work better than deep ones because they allow you to easily dip your wand while minimizing drips and waste. Many people repurpose old cake pans, pie dishes, or plastic storage containers for this purpose.
Advanced Bubble Recipes
Once you’ve mastered the basic recipe, exploring advanced formulas opens up new possibilities for bubble size, longevity, and visual appeal. Professional bubble performers use sophisticated recipes that produce bubbles capable of lasting several minutes and reaching enormous sizes.
Long-Lasting Bubble Solution:
- 1 gallon distilled water
- 1 cup dish soap
- ½ cup corn syrup
- 1 tablespoon baking powder
- 2 tablespoons glycerin
This recipe produces bubbles with significantly extended lifespans. The glycerin is crucial—it’s a humectant that attracts moisture from the air, preventing the bubble film from drying out too quickly. Distilled water works better than tap water because it lacks minerals that can interfere with bubble formation. This solution requires 24 hours of settling time before use for optimal results.
Giant Bubble Solution:
- 6 cups water
- 1 cup dish soap
- ½ cup corn syrup
- 1 tablespoon baking powder
- 3 tablespoons glycerin
- 1 tablespoon borax powder (dissolved in small amount of hot water first)
The borax addition significantly strengthens bubble films, allowing them to expand to impressive sizes without breaking. This solution is specifically formulated for creating those jaw-dropping giant bubbles that seem almost impossible. Many professional bubble artists swear by formulas containing borax for their superior performance.
Iridescent Bubble Solution:
- 2 cups water
- ¼ cup dish soap
- 2 tablespoons corn syrup
- Few drops of food coloring (optional)
- 1 tablespoon glycerin
While bubbles are naturally iridescent due to light refraction, this formula enhances color vibrancy. The reduced soap-to-water ratio creates thinner films that produce more pronounced rainbow effects. This solution works beautifully for photography and creates visually stunning bubble displays.
Techniques for Perfect Bubbles
Creating beautiful bubbles involves more than just having good solution—technique matters tremendously. Professional bubble makers have refined specific methods that consistently produce superior results. Learning these techniques will dramatically improve your bubble-making success rate.
The Dipping Technique:
Proper dipping is foundational to bubble success. Submerge your wand completely in the solution, ensuring the entire frame is coated with a thin film. Withdraw the wand slowly and steadily—rapid removal can create weak films prone to immediate popping. Hold the wand at approximately eye level and blow gently and consistently through the frame. The key is a steady, controlled breath rather than a sudden puff.
Temperature significantly affects bubble performance. Warm air from your breath helps, but extremely hot conditions can cause bubbles to pop faster. Conversely, cool, humid conditions are ideal for bubble longevity. If you’re making bubbles outdoors, early morning or late afternoon typically offers the best atmospheric conditions.
Wind Considerations:
Gentle wind actually helps bubbles drift and prevents them from falling straight down. However, strong winds can pop bubbles or push them away too quickly. Sheltered areas like gardens or patios provide ideal bubble-making environments. If you’re indoors, avoid direct fan airflow, which can prematurely burst your creations.
Bubble Wand Movement:
Don’t remain stationary while making bubbles. Gentle walking backward while blowing creates a stream of bubbles that drift naturally. This technique, used by professional bubble performers, produces more bubbles with less effort. The slight motion helps separate bubbles from the wand film without popping them.
Many bubble enthusiasts compare the experience to other creative home activities, much like learning how to make a latte at home or how to make an over-easy egg—it requires practice and attention to detail, but once you understand the fundamentals, success becomes consistent.
Creating Giant Bubbles
Giant bubbles represent the pinnacle of bubble-making achievement. These impressive spheres can reach sizes of several feet in diameter, creating memorable moments for anyone fortunate enough to witness them. Creating giants requires specific tools, solutions, and techniques.
Giant Bubble Wand Construction:
Professional giant bubble wands typically feature large square or rectangular frames made from PVC pipe, rope, or sturdy wire. The frame size directly determines maximum bubble size—a 3-foot square frame can theoretically produce a 3-foot diameter bubble. The wand handle should be long enough to keep you at safe distance from the bubble as you create it.
To make a DIY giant wand, you’ll need:
- PVC pipe or wooden dowels (6-8 feet long)
- Rope or strong string
- Connectors or joints to form your frame shape
- A handle made from additional pipe or wood
Assemble your frame into your desired shape—squares work best for beginners. Use rope strung across the frame to create multiple film surfaces. The rope should be loosely strung to allow the bubble film to form properly.
Giant Bubble Technique:
Creating giant bubbles requires patience and the right environmental conditions. You’ll need calm air, high humidity, and your advanced bubble solution. Dip your entire frame into a large container of solution, ensuring complete coating. Withdraw slowly and move backward steadily while gently blowing or allowing air to naturally flow through the frame.
The bubble will expand gradually as you move. Resist the urge to blow hard—gentle, consistent air flow works far better. Many professionals use their body movement rather than breath to create the necessary air flow. As the bubble forms, you can continue walking backward, and the bubble will continue expanding until conditions change or the film ruptures.
Troubleshooting Common Problems
Even experienced bubble makers encounter challenges. Understanding common problems and their solutions helps you maintain consistent success rates. Family Handyman offers excellent troubleshooting guides for various home projects, and similar problem-solving approaches apply to bubble-making.
Bubbles Pop Immediately:
This typically indicates insufficient stabilizers in your solution. Add more corn syrup or glycerin to strengthen the bubble film. Alternatively, your solution may be too old—make fresh batches regularly. Temperature extremes can also cause immediate popping; try working in milder conditions or adjusting your solution composition.
Bubbles Won’t Form at All:
Check your dish soap concentration—you may need more soap. Ensure you’re using actual dish soap rather than hand soap, which lacks proper surfactants. Hard tap water sometimes interferes with bubble formation; try distilled water instead. Allow your solution adequate settling time before use.
Bubbles Form But Remain Small:
This usually means your wand is too small or your blowing technique is too forceful. Use a larger frame and practice gentler, more controlled breathing. Ensure your solution has adequate corn syrup or glycerin for viscosity. Weather conditions matter—high humidity helps bubbles expand more easily.
Solution Gets Cloudy or Separates:
This is normal over time and doesn’t necessarily indicate a problem. Simply stir gently to recombine. However, if you notice persistent cloudiness or foul odors, discard the solution and prepare a fresh batch. Cloudy solution sometimes still works fine, though visual appeal may be compromised.
Bubbles Drift Away Too Quickly:
This suggests high wind or very dry air conditions. Seek sheltered locations or work during calmer times. Adding more glycerin helps bubbles resist popping from wind stress. Humid conditions naturally help bubbles persist longer.
If you’re interested in other creative home projects, you might explore how to make coffee without a coffee maker or how to clean a coffee maker for maintaining your equipment properly.
FAQ
What’s the best dish soap for making bubbles?
Dawn dish soap is widely considered the gold standard due to its superior surfactant composition. However, most major brand dish soaps work well. Avoid antibacterial or moisturizing formulas, as these can interfere with bubble formation. Store brands typically work just as effectively as name brands while costing less.
Can I make bubbles without corn syrup?
Yes, though results won’t be as impressive. Sugar dissolves in water and works as a substitute, though corn syrup is preferable because it’s already liquid and mixes more easily. Honey also works but can make solutions sticky. For basic bubble-making, even sugar or corn syrup is optional—though highly recommended for extended bubble lifespan.
How long does homemade bubble solution last?
Properly stored bubble solution remains viable for several weeks. Keep it in sealed containers away from direct sunlight and extreme temperatures. Over time, solution effectiveness gradually diminishes as ingredients separate or degrade. For best results, use fresh solution within two weeks of preparation.
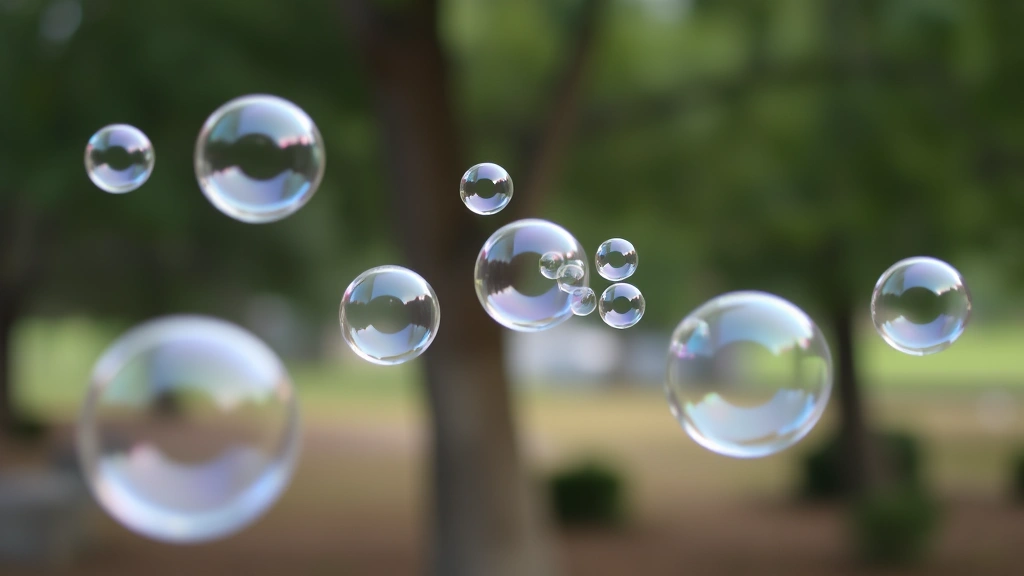
Why do bubbles form rainbows?
Bubble films are incredibly thin—often just a few micrometers thick. Light waves reflect off both the inner and outer surfaces of this thin film, causing interference patterns. This interference creates the rainbow colors you see. Different film thicknesses produce different colors, which is why colors shift as the bubble film gradually thins before popping.
Is it safe to add food coloring to bubble solution?
Yes, food coloring is completely safe and adds visual interest to your bubbles. However, food coloring alone won’t significantly change bubble color since the solution is mostly water. For more dramatic color effects, consider using bubble solution with slight food coloring tints combined with natural rainbow effects.
What’s the world record for largest bubble?
Professional bubble artists have created bubbles exceeding 50 feet in diameter using specialized equipment and formulations. These record-breaking attempts typically occur in controlled environments with ideal atmospheric conditions. For home bubble-making, realistic giant bubbles usually range from 2-10 feet in diameter.
Can children safely play with homemade bubble solution?
Yes, homemade bubble solution made from dish soap, water, and sugar is completely safe for children. However, they shouldn’t ingest it—while non-toxic, it will cause stomach upset. Supervise young children during bubble-making activities. If solution gets in eyes, rinse thoroughly with water. All ingredients are food-grade or commonly used household items.
Does temperature affect bubble performance?
Absolutely. Warm air helps bubbles form and expand, but excessively hot conditions cause them to pop faster. Cool, humid conditions are ideal for bubble longevity. Early morning or late evening typically provides optimal bubble-making weather. Indoor bubble-making works best in rooms without air conditioning or heating vents creating air currents.
What’s the difference between bubble solution and bubble bath?
Bubble bath products contain different chemical formulations designed to create foam in bathwater rather than stable bubble films. Bubble bath won’t create quality bubbles for wand-blowing because it lacks proper surfactant ratios and stabilizers. Always use dedicated bubble solution recipes for best results.
Can I reuse bubble solution from commercial bubble bottles?
Yes, you can reuse commercial bubble solution, though it gradually loses effectiveness. Many people refill commercial bottles with homemade solution, which is more economical. Commercial solutions sometimes contain additives that make them work slightly better than basic homemade recipes, but homemade versions cost a fraction of the price.
Related Posts

Superscript in Google Docs: Expert Tips

Strikethrough in Excel: Easy Steps for Beginners
