
Grill Corn in Foil: Expert Tips for Juicy Results
Grill Corn in Foil: Expert Tips for Juicy Results
Grilling corn on the cob in foil is one of the easiest and most rewarding ways to prepare this summer favorite. When you wrap corn in foil before grilling, you create a steaming environment that locks in moisture, intensifies natural sweetness, and produces kernels that burst with flavor. Whether you’re hosting a backyard barbecue or preparing a simple weeknight dinner, this method delivers consistently delicious results without the hassle of dealing with burnt husks or dry kernels.
The beauty of foil-wrapped corn lies in its simplicity and versatility. You can customize each ear with different seasonings, butter combinations, and toppings before sealing them up. This approach also prevents the kernels from drying out on the grill grates and makes cleanup remarkably straightforward. In this comprehensive guide, we’ll walk you through everything you need to know about grilling corn in foil, from preparation and seasoning to timing and troubleshooting.
Why Foil-Wrapped Corn Works Best
When you wrap corn in aluminum foil before grilling, you’re creating a miniature steam chamber that provides several significant advantages over traditional grilling methods. The foil traps heat and moisture around the corn, cooking it evenly while preserving the natural juices that make each bite tender and succulent. Unlike direct grilling, where kernels can char or become tough, foil packets create a gentle, consistent cooking environment.
The foil method also protects corn from direct flame exposure, which means you don’t have to worry about hot spots or uneven cooking. This is particularly beneficial when you’re grilling multiple ears at once, as they all cook at the same rate regardless of their position on the grill grates. Additionally, foil packets allow you to customize each ear individually, making it perfect for families with different taste preferences. One person might want garlic and herbs, while another prefers simple butter and salt.
Another major advantage is the convenience factor. When you’re planning your outdoor space and considering grill setup, foil packets require minimal cleanup compared to other methods. The foil catches all drips and seasonings, and you can simply dispose of it afterward. This makes entertaining guests much less stressful and gives you more time to enjoy your gathering rather than scrubbing the grill afterward.
Selecting and Preparing Your Corn
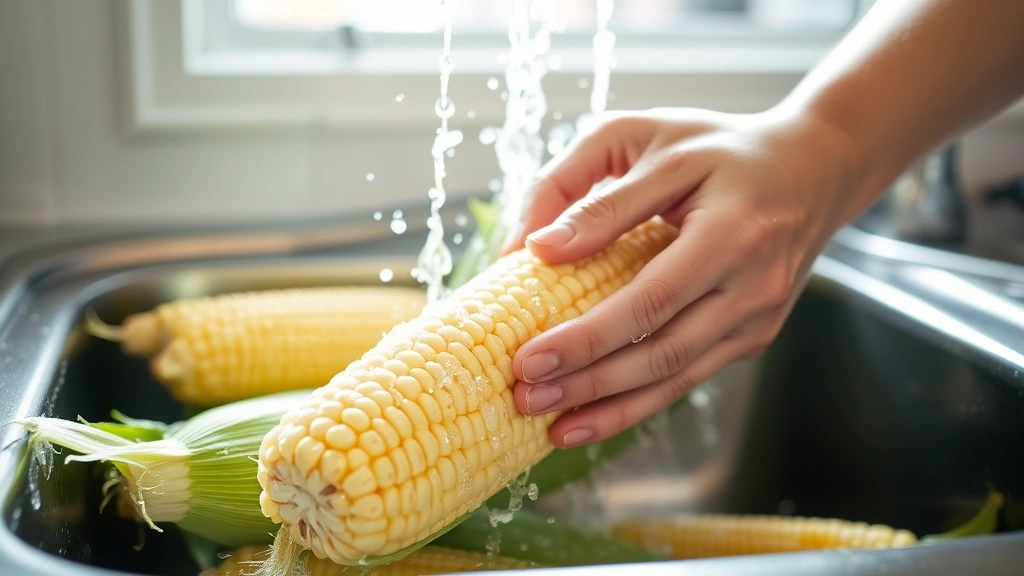
The quality of your final dish depends heavily on choosing fresh, high-quality corn. Look for ears with bright green husks that feel firm when you gently squeeze them. The silk should be brown and slightly moist, not dry or blackened. Fresh corn has a sweet aroma—if you can smell it, that’s a good sign. Avoid ears with dried-out husks, brown spots, or soft areas, as these indicate the corn is past its prime.
When shopping at farmers’ markets or grocery stores, select corn that was harvested recently. Corn begins losing its sweetness immediately after picking, so same-day or next-day purchases will taste noticeably better than corn that’s been sitting around for several days. If possible, buy corn the morning of your grilling day for maximum flavor and texture.
Preparation is straightforward but important. Start by husking the corn completely—remove all the green outer layers and the silky threads. Rinse each ear under cool running water while gently rubbing with your fingers to remove any remaining silk strands. Pat the corn dry with paper towels. This step is crucial because moisture on the surface can interfere with seasoning adhesion and foil sealing. If you prefer, you can use a soft brush to remove stubborn silk pieces more effectively than your hands alone.
Check each ear for damaged kernels or soft spots. If you find minor imperfections, you can cut away that section with a sharp knife before wrapping. Inspect the corn length—most standard ears are 7 to 9 inches long. If you have particularly large ears, you might need to adjust foil size accordingly or break them in half to fit your grill space better.
Building Your Foil Packets
Proper foil packet construction ensures your corn cooks evenly and seasonings stay contained. You’ll need heavy-duty aluminum foil—regular foil tears too easily and won’t provide adequate protection. Cut a piece of foil approximately 12 to 14 inches long for each ear of corn. This length gives you enough material to wrap completely around the ear with an overlap for secure sealing.
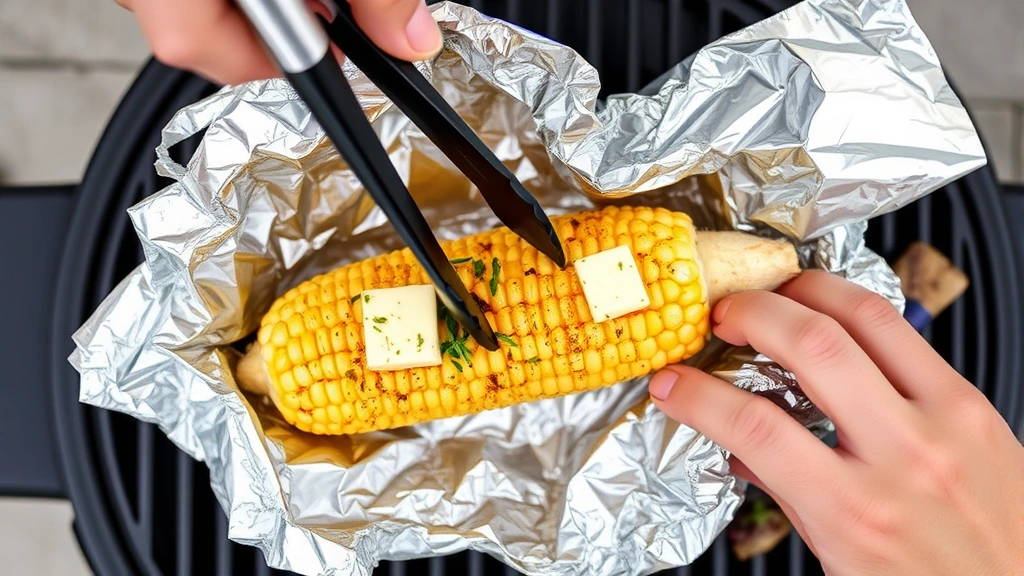
Place the foil shiny-side up on a clean work surface. Position the corn ear horizontally across the center of the foil. If you’re adding butter or other toppings, place them directly on the corn before wrapping. Pull the long edges of the foil up and over the corn, folding them together at the top. Crease the seam firmly to lock in heat. Then fold the short ends of the foil toward the center, creasing them tightly as well. You want a seal that’s tight enough to prevent steam from escaping but not so tight that you tear the foil.
A useful technique is to create a boat-shaped packet rather than a fully enclosed envelope. Fold the sides up slightly but leave the top partially open so you can easily add seasonings. Then fold the ends and seal the top last. This method makes it easier to apply butter and herbs without fumbling with a sealed packet.
For multiple ears, you can assemble all packets before heading to the grill, which streamlines the cooking process. Stack them carefully in a container or on a tray, making sure they don’t press against each other and break the seals. If you’re preparing ahead of time, you can refrigerate foil packets for up to 4 hours before grilling.
Seasoning and Flavor Combinations
The versatility of foil-wrapped corn truly shines when you explore different seasoning combinations. The simplest approach—butter, salt, and pepper—is classic for a reason. Use about one tablespoon of softened butter per ear, spreading it across the kernels before wrapping. Add a pinch of sea salt and freshly ground black pepper, then seal and grill.
For herb lovers, create a compound butter by mixing softened butter with fresh herbs like cilantro, parsley, chives, or dill. Finely chop about one tablespoon of fresh herbs and blend them with two tablespoons of butter, then divide the mixture among your corn ears. This approach infuses the corn with aromatic flavors that complement the natural sweetness.
Mexican-style grilled corn requires cotija cheese, lime juice, and chili powder. Brush each ear with mayonnaise (which creates a creamy base), sprinkle with chili powder and cumin, then add crumbled cotija cheese and a squeeze of fresh lime juice. Wrap and grill for a corn experience that tastes like street food from Mexico City.
Garlic lovers should try minced fresh garlic mixed into softened butter, along with red pepper flakes for a subtle kick. The garlic mellows as it cooks, becoming sweet and nutty rather than harsh. Garlic powder works in a pinch, but fresh garlic delivers superior flavor.
Asian-inspired seasoning combines soy sauce, sesame oil, and a touch of ginger. Brush the corn with a mixture of two tablespoons soy sauce, one tablespoon sesame oil, and one teaspoon minced fresh ginger. Sprinkle with sesame seeds before wrapping for extra texture and visual appeal.
Don’t overlook simple additions like grated Parmesan cheese, hot sauce, Old Bay seasoning, or everything bagel seasoning. The foil packet traps all these flavors, allowing them to meld with the corn’s natural sweetness. Experiment with combinations based on what you enjoy and what pairs well with your main courses.
Grilling Time and Temperature
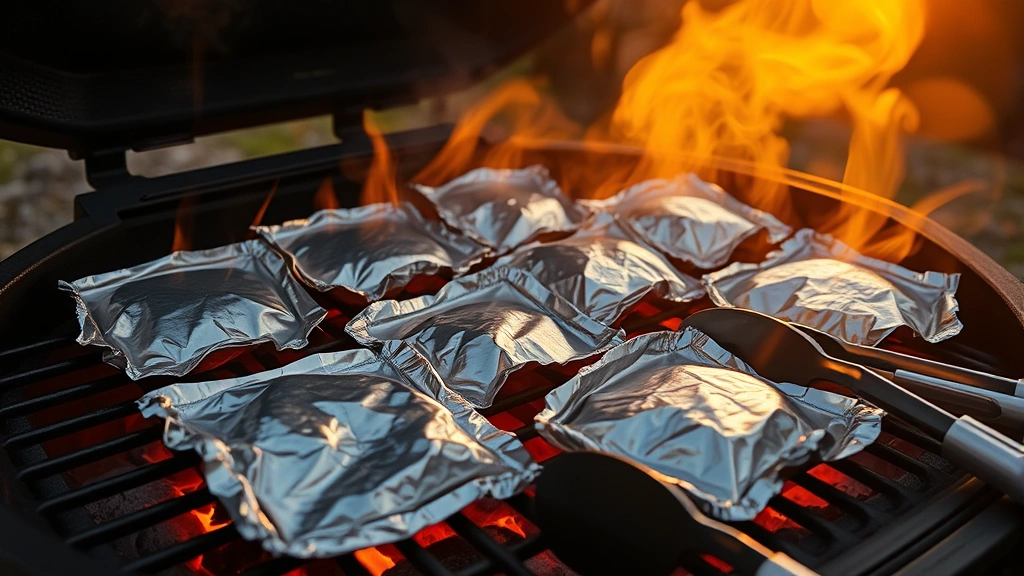
Temperature control is essential for achieving perfectly cooked corn without burning the foil or creating raw spots. Preheat your grill to medium-high heat, around 400 to 450 degrees Fahrenheit. This temperature range allows the corn to steam gently inside its foil packet while the exterior develops slight char marks that add depth of flavor.
If you’re using a gas grill, preheat it for at least 10 to 15 minutes with the lid closed. For charcoal grills, wait until your coals are covered with a fine white ash and the temperature stabilizes. Use an instant-read thermometer to verify your grill’s temperature if you’re unsure.
Cooking time typically ranges from 15 to 20 minutes, depending on corn size, grill temperature, and how densely you’ve packed the foil. Smaller ears might be done in 12 to 15 minutes, while particularly large ears could take up to 25 minutes. The foil packets will feel hot to the touch when done—use tongs to carefully rotate them midway through cooking to ensure even heat distribution.
One method to test for doneness is to carefully open one corner of a foil packet slightly and insert a fork into a kernel. It should pierce easily with mild resistance, indicating the corn has cooked through but remains tender. Close the foil immediately to prevent steam loss, and return to the grill if needed.
Different grill types may require slight adjustments. On a gas grill, you can use direct heat for the entire cooking time. On a charcoal grill, you might benefit from moving packets to a slightly cooler zone halfway through if your coals are particularly hot, then moving them back for the final minutes to develop flavor.
Cooking Techniques for Perfect Results
Mastering a few key techniques will elevate your foil-wrapped corn from good to exceptional. First, consider the placement strategy. Position your foil packets directly on the grill grates rather than on a grill mat or elevated surface. Direct contact with the grates allows heat to cook the bottom of the packets effectively. Arrange them in a single layer with space between each packet for air circulation.
Rotating your packets is crucial for even cooking. Use long tongs to carefully flip each packet halfway through the cooking time. This ensures both sides receive equal heat exposure. When flipping, be gentle to avoid tearing the foil, but don’t worry if you accidentally create a small tear—the corn will still cook properly.
For enhanced flavor development, consider opening the foil packets during the final two minutes of cooking. Carefully fold back the foil (watch for escaping steam!) to expose the kernels to direct heat. This technique creates light charring on the kernels, adding a slightly smoky, caramelized flavor that complements the buttery, steamed interior. This works best if you’ve used a grill thermometer to ensure accurate timing—you want just enough time for surface color to develop without drying out the corn.
Another advanced technique involves adding a touch of liquid to your foil packets. A tablespoon of chicken or vegetable broth, white wine, or even beer can enhance moisture and add subtle flavor complexity. Pour it over the corn before sealing, and the steaming environment intensifies its effect.
If you’re grilling alongside other items, plan your timing carefully. Corn typically takes 15 to 20 minutes, so coordinate with your main proteins. For example, if you’re grilling steaks that need a 10-minute rest before serving, put the corn on about 5 minutes after the steaks come off the grill. This way, everything finishes at approximately the same time.
Troubleshooting Common Issues
Even experienced grillers encounter occasional problems. If your corn turns out tough or chewy, you likely cooked it too long or at too high a temperature. Next time, reduce cooking time by 2 to 3 minutes or lower your grill temperature by 25 degrees. Remember that corn continues cooking slightly after you remove it from heat, so it’s better to undercook slightly than overcook.
Conversely, if your corn seems undercooked or the kernels are still slightly firm, increase cooking time by 3 to 5 minutes. The foil might not have sealed properly, allowing steam to escape. Check your sealing technique and ensure the foil isn’t torn.
If the butter or seasonings seem to burn or turn dark brown, your grill temperature is too high. Lower it to 375 to 400 degrees and increase cooking time slightly. Alternatively, add your seasonings after the first 10 minutes of cooking rather than before, so they don’t have as much time to char.
Foil tearing during cooking is frustrating but manageable. If you notice a tear, carefully wrap additional foil around the damaged area while the corn is still on the grill. The corn will continue cooking normally. To prevent this issue, always use heavy-duty foil and avoid sharp folds that create stress points.
If some ears cook faster than others, it usually indicates uneven grill heat. Next time, position slower-cooking ears in the hotter zones and move faster-cooking ears to cooler spots. Using a grill thermometer helps identify hot and cool zones before you start cooking.
For those setting up their first outdoor grilling space and needing guidance, remember that practice and attention to detail improve results significantly. Keep notes about cooking times and temperatures for your specific grill, as every grill has unique characteristics.
FAQ
Can I prepare foil packets the night before grilling?
Yes, you can prepare foil packets up to 24 hours in advance. After assembling and seasoning, wrap each packet tightly in plastic wrap and refrigerate. Remove them 15 to 20 minutes before grilling to allow them to come closer to room temperature, which helps ensure even cooking. Cold corn straight from the refrigerator might require an extra 3 to 5 minutes of cooking time.
What’s the difference between using heavy-duty foil and regular foil?
Heavy-duty foil is thicker and more durable, making it less likely to tear during handling and cooking. Regular foil tears easily when you’re trying to fold it around corn and can develop holes that allow steam to escape. For foil-wrapped corn, heavy-duty foil is worth the small extra cost because it provides better results and less frustration.
Can I use parchment paper instead of foil?
Parchment paper isn’t recommended for direct grill cooking, as it can char or burn at high temperatures. Foil is specifically designed to withstand grill heat. However, you could use a grill-safe cooking bag if you prefer an alternative, though foil remains the traditional and most reliable choice.
How do I know when corn is perfectly done?
Perfectly cooked corn has kernels that are tender but still have a slight firmness when bitten—they should never be mushy. The kernels should be bright yellow or the variety’s natural color. The inside of the foil packet will smell sweet and aromatic. If you’re uncertain, err on the side of slightly less cooking rather than overdoing it.
Can I grill corn without removing the husks?
Yes, many people grill corn in the husks, soaking them first to prevent burning. However, the foil method offers more control over seasoning and moisture, plus easier handling. If you prefer husked corn, soak the husks in water for 30 minutes before grilling, then wrap the whole ear (husk and all) in foil for added protection.
What external resources can help me master grill cooking?
For comprehensive grilling guidance, This Old House offers detailed tutorials on outdoor cooking techniques. Family Handyman provides practical grill maintenance and cooking advice. Major retailers like Lowe’s and Home Depot offer grill buying guides and seasonal cooking tips. Additionally, your local building codes may include grill placement and safety regulations worth reviewing before installing permanent outdoor cooking areas.
Is foil-wrapped corn suitable for camping or outdoor events?
Absolutely! The foil method is ideal for camping and outdoor gatherings because it requires minimal equipment and allows for batch cooking. You can prepare multiple packets ahead of time, transport them in a cooler, and cook them over a campfire or portable grill. The individual packets also make portion control and customization easy for groups with different preferences.
Related Posts

Superscript in Google Docs: Expert Tips

Strikethrough in Excel: Easy Steps for Beginners
