
Eliminate Pantry Moths: Pro Tips and Tricks
Eliminate Pantry Moths: Pro Tips and Tricks
Discovering pantry moths in your kitchen cabinets is frustrating and unsettling. These small but persistent pests can contaminate your food supply and multiply rapidly if left unchecked. Whether you’re dealing with Indian meal moths or Mediterranean flour moths, the good news is that eliminating them requires a systematic approach combining inspection, removal, and prevention.
Pantry moths thrive in dry goods like flour, cereal, pasta, nuts, and dried fruits. They enter your home through infested products from the store or from nearby outdoor sources. Once established, a single moth can lay hundreds of eggs, creating an infestation within weeks. The key to successful elimination is understanding their lifecycle and implementing comprehensive control strategies.
This guide walks you through professional-grade techniques used by pest management experts to identify, eliminate, and prevent pantry moths from returning. You’ll learn practical steps you can take immediately, along with long-term prevention strategies to keep your pantry pest-free.
Identifying Pantry Moths and Signs of Infestation
Before you can effectively tackle a pantry moth problem, you need to confirm what you’re dealing with. Pantry moths are small insects, typically 1/2 to 3/4 inch in length, with distinctive characteristics that set them apart from other household pests.
The most common species is the Indian meal moth, which has a two-toned wing pattern: the front half of the wings is tan or buff-colored, while the rear half is darker brown or reddish. Adult moths are nocturnal and become most active in the evening. You might spot them flying around your kitchen lights or resting on pantry shelves.
Look for these telltale signs of infestation:
- Adult moths flying around your kitchen, particularly near lights
- Webbing inside food containers or on shelves—this silky material is a major red flag
- Clumped or stuck together dry goods, indicating larvae activity
- Small holes in food packaging or containers
- Tiny dark droppings (frass) in affected foods
- Cocoons or pupae in corners of cabinets or pantry edges
If you notice any of these signs, act quickly. The longer you wait, the larger the infestation becomes. Start by isolating affected products in sealed bags outside your kitchen.
Immediate Steps to Eliminate Active Infestations
Once you’ve confirmed a pantry moth infestation, your first priority is removing the source of the problem. This means identifying and discarding all contaminated food products.
Step 1: Locate All Infested Items
Systematically remove every item from your pantry and cabinets. Inspect each package carefully, looking for webbing, holes, or visible larvae. Don’t assume only open packages are affected—moths can chew through sealed packaging. Pay special attention to:
- Flour and flour-based products
- Cereal and grain products
- Nuts and seeds
- Dried fruits and vegetables
- Pasta and rice
- Pet food (especially birdseed)
- Spices and dried herbs
Step 2: Discard Contaminated Food
Any product showing visible signs of infestation should be sealed in a plastic bag and thrown away immediately. Don’t leave these items in your regular trash can, as moths can escape and re-infest your home. Double-bag contaminated items and place them in an outdoor trash bin or dumpster.
If you’re unsure whether a product is infested, err on the side of caution and discard it. The cost of replacing a few items is minimal compared to dealing with a prolonged infestation.
Step 3: Freeze Borderline Items
For products you want to keep but suspect might be slightly contaminated, freezing can eliminate larvae and eggs. Place items in airtight containers and freeze at 0°F for at least 7-10 days. This temperature kills all life stages of pantry moths. After freezing, store items in sealed containers to prevent re-infestation.
Deep Cleaning Your Pantry and Kitchen
After removing infested foods, thorough cleaning is essential. Pantry moth larvae can hide in tiny crevices, and their droppings can trigger contamination even after the adults are gone. This step is critical for complete elimination.
Cleaning Protocol:
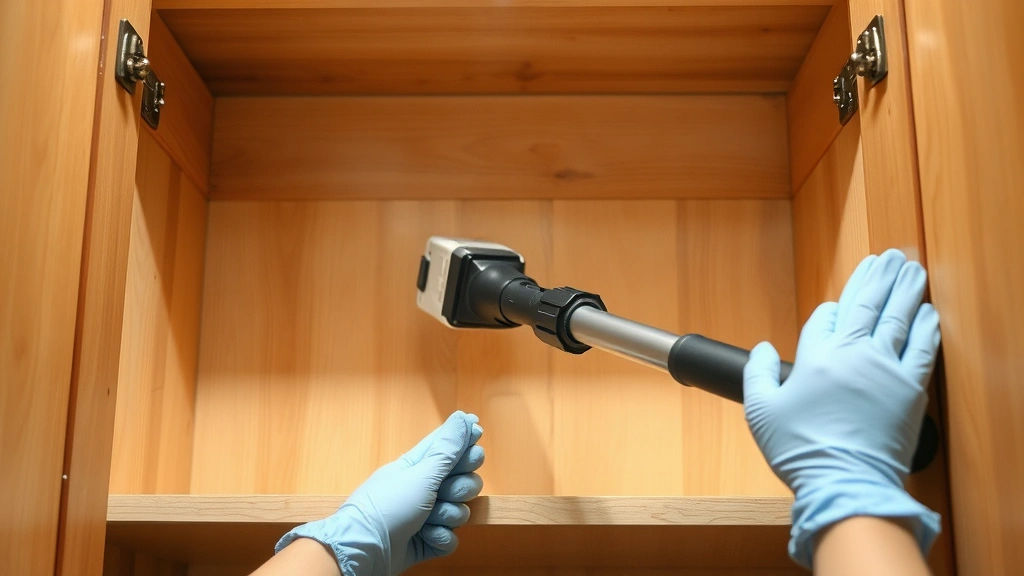
- Empty everything from your pantry, cabinets, and drawers where dry goods are stored
- Vacuum thoroughly all surfaces, paying special attention to corners, crevices, and shelf edges where larvae hide. Use a crevice attachment to reach tight spaces
- Wipe down all surfaces with a damp cloth and mild soap solution, then dry completely. Pantry moths prefer moisture-free environments, so ensure everything is dry
- Clean shelf liners or replace them entirely
- Inspect and clean light fixtures inside cabinets, as moths are attracted to light
- Don’t forget overlooked areas like under appliances, behind the stove, and inside the hood vent
For a comprehensive approach to maintaining a clean kitchen environment, check out our guide on how to clean a dishwasher, which covers similar deep-cleaning principles.
Use Food-Grade Diatomaceous Earth
After cleaning, many professionals recommend applying food-grade diatomaceous earth (DE) to pantry shelves. This natural powder is harmless to humans and pets but deadly to insects. Spread a thin layer on shelves, in corners, and along baseboards. DE works by damaging the exoskeleton of insects that come into contact with it.
Leave DE in place for at least two weeks, then vacuum it up completely before restocking your pantry. Some people reapply it periodically as a preventive measure.
Storage Solutions and Prevention Methods
Once your pantry is clean and moth-free, preventing future infestations depends entirely on proper storage. This is where most homeowners make mistakes, allowing new infestations to take hold.
Invest in Airtight Containers
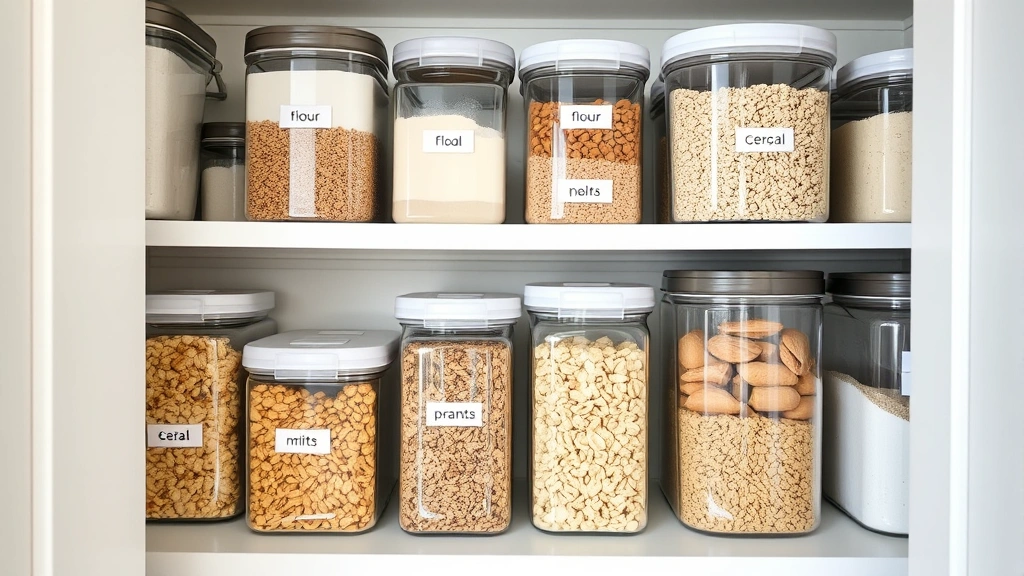
The single most effective prevention method is storing all dry goods in airtight containers. Pantry moths cannot penetrate sealed plastic or glass containers. When shopping for containers, look for:
- Heavy-duty plastic containers with snap-lock or twist-lock lids
- Glass containers with silicone gasket seals for premium protection
- Containers sized appropriately for your typical quantities to minimize empty space
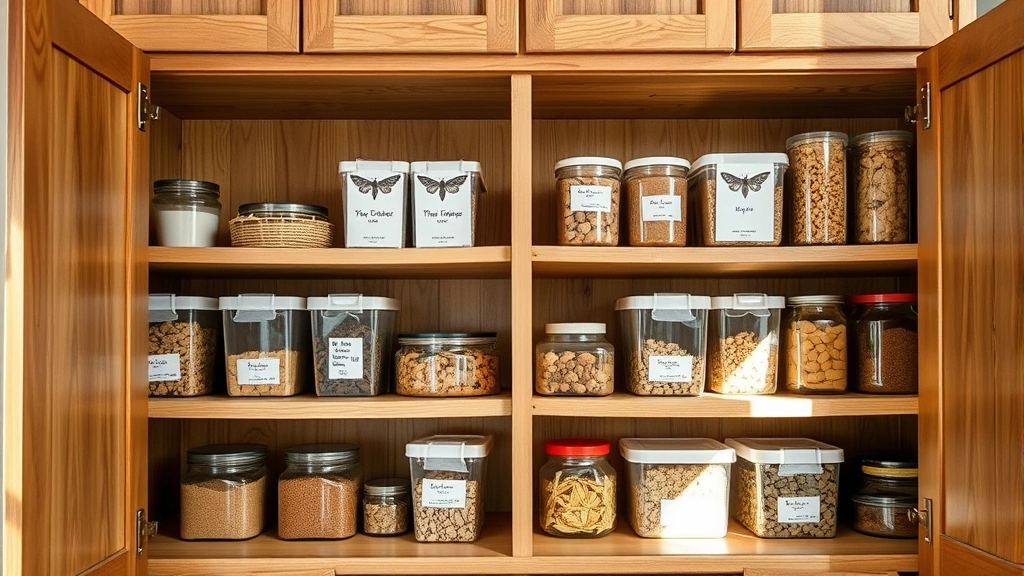
- Clear containers so you can monitor contents for pests and know when supplies are running low
Transfer products immediately upon bringing them home from the store. Don’t wait until an infestation develops to make the switch. Even unopened packages can harbor moth eggs, so transferring to airtight containers is your best defense.
Inspect All Incoming Products
Before bringing any dry goods into your home, inspect packages for small holes or signs of damage. Pantry moths often hitchhike into homes through infested products purchased from stores. Check packaging under good lighting and feel for soft spots or movement inside packages.
Consider buying from stores with high product turnover to reduce the likelihood of purchasing already-infested items. Avoid bulk bins where cross-contamination is more likely.
Organize Your Pantry Strategically
Organization plays a role in pest prevention. Keep your pantry well-lit and uncluttered. Remove unnecessary boxes and packaging that can harbor moths. Use the FIFO method (First In, First Out) to rotate stock and use older items before newer ones. This prevents forgotten items from sitting long enough for an infestation to develop unnoticed.
Store pet food, birdseed, and other animal products separately from human food. These items are frequent sources of pantry moth infestations. Keep them in sealed containers and store them in a separate area if possible.
Natural and Chemical Control Options
In addition to cleaning and storage improvements, you can use various control methods to eliminate remaining moths and prevent new infestations.
Pheromone Traps
Pheromone traps are the most effective non-chemical control method. These traps use synthetic female moth pheromones to attract male moths, where they become stuck on a sticky surface. Benefits include:
- Non-toxic to humans and pets
- Help you monitor infestation levels
- Reduce moth populations by preventing mating
- Can be used indefinitely as a preventive measure
Place traps in your pantry, near kitchen lights, and in other areas where you’ve spotted moths. Check them weekly and replace when full of insects. Continue using traps for at least 4-6 weeks after you’ve stopped seeing moths to ensure the infestation is completely eliminated.
Bay Leaves and Herbs
Some natural deterrents can help prevent infestations, though they’re not as effective as other methods. Bay leaves, dried rosemary, and lavender have mild repellent properties. Place small sachets of these herbs in your pantry or directly in storage containers. While not a complete solution, they complement other prevention strategies.
Chemical Control Options
If your infestation is severe or other methods aren’t working, consider professional-grade treatments. This Old House’s pest control guide provides detailed information on chemical options.
Pyrethrin-based sprays are effective for eliminating adult moths but won’t kill eggs or larvae. Always follow label instructions carefully and ensure products are food-safe if spraying near food storage areas. For severe infestations, hiring a professional pest control service may be your best option.
Learn more about managing similar household pests by reading our comprehensive guide on how to get rid of gnats in the house quickly, which covers integrated pest management principles applicable to various household insects.
Long-Term Maintenance and Monitoring
Eliminating pantry moths isn’t a one-time event—it requires ongoing vigilance and maintenance to prevent recurrence.
Establish a Monitoring Schedule
Check your pantry weekly for signs of moths or infestation. Look for:
- Adult moths flying around
- Webbing in containers or on shelves
- Unexplained holes in packaging
- Clumping or discoloration in dry goods
Catch infestations early by maintaining this regular inspection routine. Early detection means easier elimination before populations explode.
Maintain Cleanliness Standards
Continue vacuuming your pantry monthly and wiping shelves quarterly. Don’t let crumbs or spilled dry goods accumulate. These remnants provide food sources for developing larvae. Keep your pantry as clean as you’d keep other kitchen areas.
Rotate Stock Properly
Use older items before newer ones and don’t over-purchase items you don’t use regularly. Pantry moths thrive on neglected, forgotten items sitting in the back of shelves. By rotating stock and using products within reasonable timeframes, you eliminate the ideal conditions for infestations.
Review Storage Practices
Periodically audit your storage containers to ensure lids seal properly. Over time, seals can degrade or containers can crack, compromising their effectiveness. Replace damaged containers immediately. This preventive investment pays dividends in pest prevention.
Seasonal Vigilance
Pantry moths are year-round pests, but populations often increase in warmer months when they reproduce more rapidly. Increase your monitoring frequency during spring and summer. Consider applying food-grade diatomaceous earth seasonally as an extra precaution.
For additional home maintenance tips that contribute to overall household pest prevention, explore our FixWiseHub blog with comprehensive how-to guides and tips.
FAQ
How long does it take to get rid of pantry moths?
Complete elimination typically takes 4-6 weeks with proper treatment. The pantry moth lifecycle is about 6-8 weeks, so you need to monitor for at least that long to ensure all life stages are eliminated. Some infestations may take longer depending on severity and how quickly you implement control measures.
Can pantry moths fly and spread to other rooms?
Yes, adult pantry moths can fly and will venture beyond the pantry, especially to lights in other rooms. This is why using pheromone traps throughout your kitchen and dining areas is important. However, the infestation source remains in your pantry, so focus your primary efforts there.
Are pantry moths dangerous to eat?
While not directly harmful if accidentally ingested, pantry moths and their larvae can contaminate food with bacteria and their droppings (frass). More importantly, their presence indicates food quality issues. Any food showing signs of moth activity should be discarded to ensure food safety.
Will freezing kill all pantry moth life stages?
Freezing at 0°F for 7-10 days kills eggs, larvae, pupae, and adults. This is an effective method for salvaging borderline items. However, ensure items are in airtight containers before freezing and after thawing to prevent re-infestation.
What’s the difference between pantry moths and clothing moths?
Pantry moths feed on dry goods, while clothing moths feed on natural fibers like wool and silk. They’re different species with different control methods. Pantry moths are typically larger and have distinctive wing patterns. Clothing moths are smaller and more uniform in color.
Should I hire a professional pest control service?
For minor infestations caught early, DIY methods are usually effective. However, if infestations persist despite your efforts or if you have a severe infestation affecting multiple areas, professional pest control is worth considering. Check Family Handyman’s pantry moth guide for additional professional perspectives.
Can I prevent pantry moths without buying new containers?
While airtight containers are most effective, you can use alternatives like clip-lock bags, rubber-banded plastic bags, or even glass jars with tight-fitting lids. The key is creating a seal that moths cannot penetrate. However, investing in proper storage containers is the most reliable long-term solution.
How often should I replace pheromone traps?
Replace traps when they become full of insects or every 4-6 weeks, whichever comes first. Some traps can be replaced with just the sticky insert while keeping the same trap frame. Continue using traps for at least a month after you stop seeing moths to confirm the infestation is eliminated.
Related Posts

Superscript in Google Docs: Expert Tips

Strikethrough in Excel: Easy Steps for Beginners
