
Clean Your Earrings Safely: Expert Tips Inside
Clean Your Earrings Safely: Expert Tips Inside
Your earrings are more than just accessories—they’re investments that deserve proper care and maintenance. Whether you own delicate gold studs, sterling silver hoops, or gemstone-adorned pieces, learning how to clean earrings safely ensures they maintain their sparkle and longevity for years to come. Over time, earrings accumulate dirt, body oils, soap residue, and environmental debris that dull their appearance and can potentially cause skin irritation or infection if left uncleaned.
This comprehensive guide walks you through professional-grade cleaning techniques that work for virtually every earring material and style. From everyday maintenance to deep-cleaning methods, you’ll discover exactly what supplies you need, step-by-step instructions for different materials, and expert tips to prevent damage. Whether you’re preparing your favorite pair for a special occasion or maintaining a collection, these safe cleaning practices will help you keep your earrings looking brand new.
Why Regular Earring Cleaning Matters
Understanding the importance of earring hygiene goes beyond aesthetics. When you wear earrings daily, especially studs or hoops that sit close to your skin, they come into contact with sweat, natural skin oils, hair products, perfume, and dust. This buildup not only makes your earrings look dull and lackluster but can also create an environment where bacteria thrive. For pierced ears, dirty earrings can lead to infections, inflammation, or complications with the piercing itself.
Regular cleaning prevents tarnishing on silver and other reactive metals, maintains the brilliance of gemstones, and extends the lifespan of your entire collection. A simple five-minute cleaning session once a week can make an enormous difference in how your earrings look and how safely you can wear them. Additionally, if you’re someone who shares earrings with friends or family members, proper sanitation becomes even more critical to prevent the transmission of bacteria or fungi.
The good news is that how to clean earrings is straightforward and doesn’t require expensive professional services for routine maintenance. Most household items work beautifully for basic cleaning, and you can reserve professional cleaning for special pieces or when you need deep restoration work.
Essential Supplies for Earring Cleaning
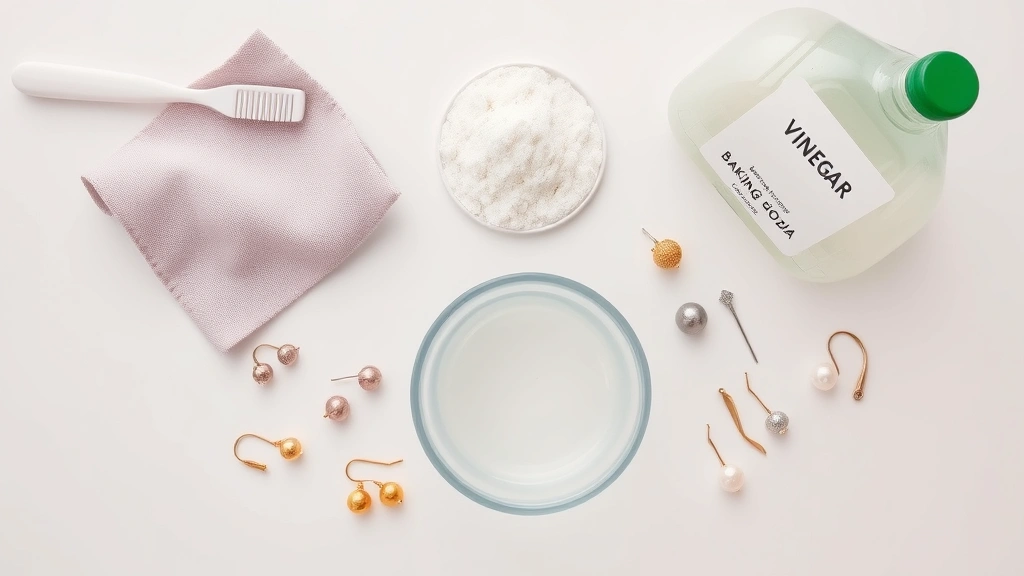
Before you start cleaning, gather these basic supplies from your home or a local retailer:
- Soft-bristled toothbrush: A clean, unused toothbrush is ideal for gently scrubbing earrings without scratching them. Avoid hard-bristled brushes that can damage delicate surfaces.
- Mild dish soap: Choose a gentle, fragrance-free dish soap without harsh chemicals. This is your primary cleaning agent for most earring types.
- Warm water: Lukewarm water helps dissolve oils and debris without shocking delicate materials like pearls or certain gemstones.
- Soft, lint-free cloth: Microfiber cloths or soft cotton cloths prevent scratching and lint transfer. Avoid paper towels, which can be abrasive.
- Baking soda: For stubborn tarnish on silver earrings, baking soda creates a gentle paste that works wonders.
- White vinegar: Similar to how to clean a coffee maker with vinegar, this natural cleaner works on many earring materials.
- Rubbing alcohol: Essential for sterilization and drying, though use cautiously on certain gemstones.
- Small bowls: Use separate containers for different cleaning solutions to avoid cross-contamination.
- Pipe cleaners or dental floss: These help clean intricate designs and areas between prongs where dirt hides.
If you wear earrings frequently, consider investing in a professional earring cleaning solution from jewelry retailers like Jewelry.com or beauty supply stores. These formulated solutions are specifically designed for various metals and stones.
How to Clean Gold Earrings
Gold earrings, whether solid gold, gold-plated, or gold-filled, require gentle handling to maintain their finish and prevent damage. Follow these steps for safe, effective cleaning:
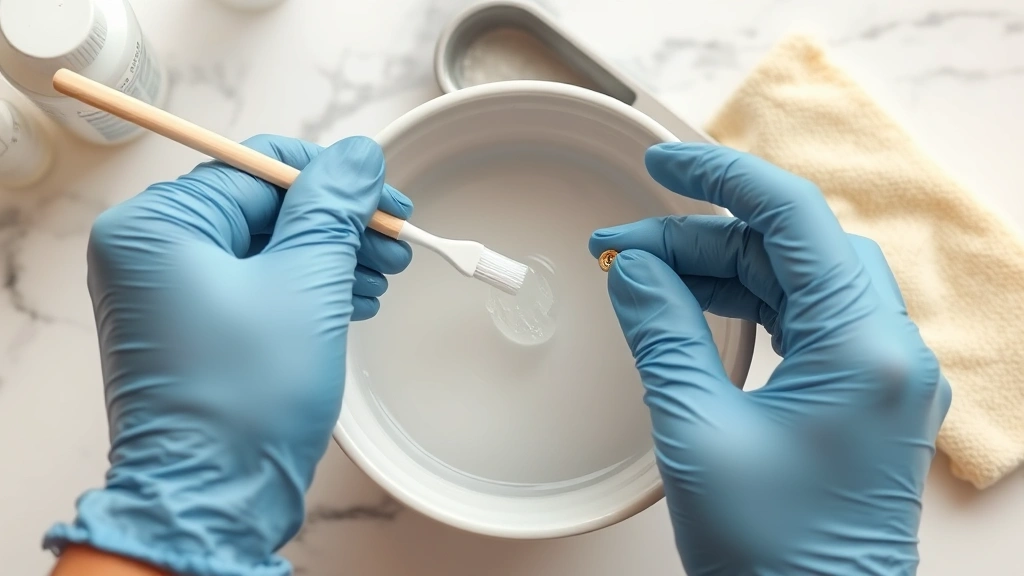
- Create a cleaning solution: Mix a few drops of mild dish soap in a small bowl of warm water. Stir gently to combine.
- Soak the earrings: Place your gold earrings in the solution and let them soak for 5-10 minutes. This softens buildup and makes scrubbing easier.
- Scrub gently: Using your soft-bristled toothbrush, gently brush around the earring, paying special attention to the backing and post. Use small circular motions rather than aggressive scrubbing.
- Clean crevices: For earrings with intricate designs, use a pipe cleaner to reach between prongs, gemstone settings, and decorative elements.
- Rinse thoroughly: Hold the earrings under running lukewarm water, letting the soap wash away completely. Incomplete rinsing leaves residue that dulls the finish.
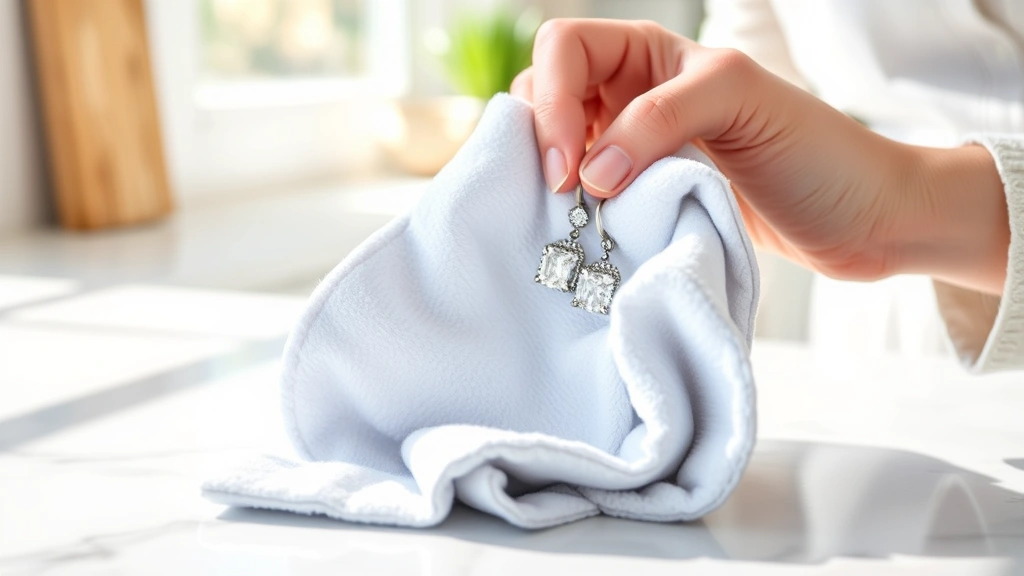
- Dry immediately: Pat dry with a soft, lint-free cloth. Never air-dry, as water spots can form.
- Polish for shine: Use a microfiber polishing cloth to buff the earrings and restore their natural brilliance.
For gold-plated earrings, avoid excessive scrubbing, as the plating can wear away. If your gold earrings have lost their shine despite regular cleaning, they may benefit from professional replating or restoration.
Cleaning Silver Earrings Safely
Silver tarnishes naturally over time due to a chemical reaction with sulfur compounds in the air. Fortunately, tarnish is easy to remove with the right approach. This cleaning method is similar in principle to how to clean a coffee maker—using simple household ingredients for effective results.
Method 1: Baking Soda Paste (For Tarnish)
- Mix baking soda with a small amount of water to create a thick paste.
- Apply the paste directly to tarnished areas of your silver earrings.
- Gently rub with a soft cloth or soft toothbrush in circular motions.
- Rinse thoroughly under running water.
- Dry immediately with a soft cloth to prevent water spots.
Method 2: Vinegar Soak (For General Cleaning)
- Pour white vinegar into a small glass bowl.
- Place silver earrings in the vinegar and let them soak for 5-10 minutes.
- Remove and gently scrub with a soft toothbrush.
- Rinse under cool running water.
- Dry thoroughly with a lint-free cloth.
Method 3: Soap and Water (For Regular Maintenance)
- Mix mild dish soap with warm water in a bowl.
- Soak earrings for 5 minutes.
- Scrub gently with a soft toothbrush, especially around posts and backings.
- Rinse completely under running water.
- Pat dry immediately with a soft cloth.
After cleaning silver earrings, store them in a cool, dry place away from humid environments. Consider using anti-tarnish strips or pouches to slow oxidation and maintain their appearance longer between cleanings.
Caring for Gemstone and Pearl Earrings
Gemstone and pearl earrings require extra caution because many stones are porous, delicate, or sensitive to chemicals and temperature changes. Before cleaning any gemstone earring, research the specific stone’s properties or consult a jeweler.
Pearl Earrings:
Pearls are among the most delicate gemstones. They’re sensitive to acids, harsh chemicals, and prolonged moisture exposure. Clean pearl earrings using only lukewarm water and the gentlest dish soap. Soak for just 2-3 minutes, then wipe with a soft, damp cloth. Never soak pearls for extended periods or scrub with a toothbrush, as this can damage their delicate nacre (outer layer). Dry immediately and store in a soft pouch away from other jewelry that might scratch them.
Diamond and Hard Stone Earrings:
Diamonds, sapphires, rubies, and other hard gemstones tolerate more vigorous cleaning. Use the standard soap and water method, soaking for 10-15 minutes. You can gently scrub around the stone settings with a soft toothbrush, and use rubbing alcohol to disinfect and dry the metal components. However, avoid ultrasonic cleaners for antique settings or heat-treated stones, as the vibrations or temperature changes might cause damage.
Emerald and Soft Stone Earrings:
Emeralds, opals, turquoise, and other softer or porous stones need gentle care. Use only lukewarm water and mild soap, soaking for no more than 5 minutes. Never use vinegar, baking soda, or alcohol on these stones. Dry immediately and avoid exposing them to direct sunlight for extended periods, as this can cause fading or drying.
Sterilizing Earrings and Piercing Posts
Sterilization is especially important if you share earrings, if someone has had a recent piercing, or if you’ve noticed any signs of infection. Proper disinfection kills bacteria and prevents complications.
Rubbing Alcohol Method:
- After washing your earrings with soap and water, pat them dry.
- Dampen a clean cloth with 70% rubbing alcohol.
- Wipe down the entire earring, including the post and backing.
- Let air dry completely on a clean surface.
- Repeat once more for extra assurance.
Boiling Method (For Metal Earrings Only):
- Bring a small pot of water to a rolling boil.
- Place metal earrings (without stones or sensitive materials) in the boiling water for 5-10 minutes.
- Use tweezers to remove them carefully.
- Place on a clean cloth and let cool completely before handling.
- Dry thoroughly with a clean cloth.
Important Caution: Never boil earrings with gemstones, pearls, or glued components, as extreme heat can damage these materials. Stick to the alcohol method for delicate pieces.
After sterilizing, store earrings in a clean container and avoid touching the posts or backs before wearing them again. This prevents recontamination and maintains the sterilization benefits.
Preventing Damage During Cleaning
While cleaning your earrings, it’s easy to accidentally cause damage if you’re not careful. Follow these prevention tips to keep your jewelry safe:
- Never use hot water: Extreme temperature changes can crack gemstones or loosen settings. Lukewarm water is always the safest choice.
- Avoid harsh chemicals: Bleach, ammonia, and acetone can damage metals and stones. Stick to mild dish soap and natural alternatives like vinegar and baking soda.
- Don’t scrub aggressively: Gentle, circular motions are far more effective than harsh scrubbing. Let the cleaning solution do most of the work.
- Keep stones and metals separate: If possible, clean metal components separately from gemstones using different solutions appropriate to each material.
- Check for loose settings: Before cleaning, inspect your earrings for loose prongs, cracks, or damage. If you notice issues, have them professionally repaired before cleaning.
- Never use abrasive materials: Avoid steel wool, scouring pads, or abrasive cloths. These scratch and damage even precious metals.
- Be cautious with ultrasonic cleaners: While professional ultrasonic cleaners work well for sturdy pieces, they can damage delicate settings, pearls, or heat-treated stones. Check with a jeweler before using one.
- Store properly after cleaning: Keep cleaned earrings in a soft pouch or jewelry box to prevent dust accumulation and protect them from damage.
If you’re unsure about cleaning a valuable or antique piece, consult a professional jeweler. The small cost of professional cleaning is worth the peace of mind and protection of your investment. Many jewelers offer free or low-cost cleaning services, making professional maintenance accessible for everyone.
FAQ
How often should I clean my earrings?
For daily-wear earrings, aim to clean them once a week. If you wear them sporadically or in a dry climate, every two weeks is sufficient. After wearing earrings during sweaty activities or in humid conditions, clean them within a day or two to prevent bacterial growth and tarnishing.
Can I use commercial jewelry cleaners on all earring types?
Most commercial jewelry cleaners work on gold, silver, and diamond earrings, but always check the product label. Many commercial solutions are too harsh for pearls, emeralds, opals, and other delicate or porous stones. When in doubt, test the cleaner on a less valuable piece first or consult the product instructions.
What should I do if my earrings have a foul smell?
A bad smell indicates bacterial or fungal growth, often from accumulated moisture and debris in the piercing post area. Soak the earrings in rubbing alcohol for 10 minutes, then scrub the post thoroughly with a soft toothbrush. If the smell persists or you experience ear pain or discharge, remove the earrings and see a healthcare provider, as you may have an infection.
Are there any materials I should never clean at home?
Avoid home cleaning for very old antique pieces, those with intricate repairs, or those set with extremely delicate or rare gemstones. Pieces with glued-in stones or those made with vintage materials benefit from professional restoration. When in doubt, consult a professional jeweler before attempting home cleaning.
How do I remove stuck earring backs?
If an earring back is stuck, soak the entire earring in warm soapy water for 10 minutes to soften any debris. Gently attempt to twist and pull the back off. If it remains stuck, don’t force it—this can damage the post. Instead, apply a tiny amount of lubricant like mineral oil around the base and try again. If still stuck, take it to a jeweler.
Can I use toothpaste to clean earrings?
While toothpaste contains mild abrasives that can remove some tarnish, it’s not ideal for earrings. Most toothpastes are too abrasive and can scratch precious metals. The fluoride and other additives can also leave residue. Baking soda paste or commercial jewelry cleaners are safer, more effective alternatives.
How should I clean earrings with intricate designs?
For detailed filigree, ornate settings, or earrings with lots of crevices, soak them longer in soapy water to soften debris. Use a pipe cleaner, soft toothbrush, or old soft toothbrush to gently work into crevices. Dental floss can also help reach tight spaces. Be patient and gentle—rushing risks bending delicate components.
Is it safe to share earrings?
Sharing earrings increases the risk of transmitting bacteria, fungi, and viruses. If you must share, sterilize earrings thoroughly using the rubbing alcohol or boiling method before sharing. It’s safest to maintain separate collections, especially if anyone has a history of ear infections or sensitive skin.
What’s the best way to dry earrings after cleaning?
Always pat dry immediately with a soft, lint-free cloth rather than air-drying. Air-drying allows water to sit on the metal and gemstones, potentially causing water spots, tarnishing, or mineral deposits. Microfiber cloths are ideal because they absorb moisture without leaving lint behind.
Can I clean my earrings while I’m wearing them?
While you can do quick touch-ups with a soft cloth while wearing earrings, it’s better to remove them for thorough cleaning. This allows you to clean the posts and backs thoroughly, sterilize properly, and ensure water doesn’t drip on your clothes or face. Plus, removing them reduces the risk of accidentally pulling on your earlobes during scrubbing.
Related Posts

Superscript in Google Docs: Expert Tips

Strikethrough in Excel: Easy Steps for Beginners
