
Check Your Car’s Oil: Expert Tips Inside
Check Your Car’s Oil: Expert Tips Inside
Regular oil checks are one of the most fundamental maintenance tasks you can perform on your vehicle. Whether you drive a sedan, SUV, or truck, understanding how to check your car’s oil is essential for engine longevity and performance. Many car owners neglect this simple procedure, not realizing that dirty or low oil levels can lead to expensive engine damage, reduced fuel efficiency, and potential breakdowns on the road. This comprehensive guide walks you through everything you need to know about checking your oil like a pro.
Oil serves as the lifeblood of your engine, lubricating moving parts, reducing friction, and helping dissipate heat. Over time, oil becomes contaminated with dirt, debris, and byproducts of combustion, which is why regular checks and changes are crucial. By learning to check your oil yourself, you’ll save money on service visits and catch potential problems before they become serious issues. Let’s dive into the expert tips and techniques that will make this task simple and straightforward.
Why Regular Oil Checks Matter
Checking your oil regularly is a preventive maintenance habit that pays dividends. Your engine’s oil breaks down over time due to heat, oxidation, and contamination. Modern engines can consume oil gradually, and without regular checks, you might not notice the level dropping until damage occurs. This Old House emphasizes that vehicle maintenance should never be overlooked, and oil checks are the cornerstone of responsible car ownership.
Engine oil serves multiple critical functions: it lubricates moving parts to reduce wear, cools engine components, cleans internal surfaces by suspending contaminants, and protects against rust and corrosion. When oil levels fall too low, these functions deteriorate rapidly. Low oil can cause metal-to-metal contact, generating extreme heat that warps engine components and leads to catastrophic failure. A simple five-minute oil check could prevent thousands of dollars in repairs.
Most manufacturers recommend checking your oil at least once a month, and more frequently if your vehicle is older or you drive in severe conditions. Severe driving includes towing, frequent short trips, dusty environments, or extreme temperatures. If you notice any warning lights on your dashboard or smell burning oil, an immediate check is warranted.
Tools and Materials You’ll Need
The beauty of checking your oil is that you need very few tools. Unlike more complex car repairs, this task requires minimal equipment and investment. Here’s what you’ll need:
- Dipstick: Your vehicle comes with a built-in dipstick, so no purchase necessary. However, if yours is damaged or missing, replacement dipsticks are inexpensive.
- Paper towels or lint-free cloth: These wipe the dipstick clean between readings. Lint-free materials are preferred because lint can be mistaken for debris.
- Oil (optional): Keep the correct grade of oil on hand in case you need to top off. Check your owner’s manual for the specific type.
- Funnel (optional): If you’re adding oil, a funnel prevents spills and mess.
- Jack and jack stands (if needed): Some vehicles have engines positioned high enough that you can check oil without lifting the car, but others may require elevation for access.
Before you begin, gather these items and ensure your vehicle is parked on level ground. This is crucial because oil readings on an incline will be inaccurate. If you need help with other maintenance tasks, our guide on how to restart computer covers digital diagnostics, but for mechanical work like this, physical accuracy is paramount.
Step-by-Step Guide to Checking Oil
Now that you’re prepared, let’s walk through the process systematically. Following these steps will ensure an accurate reading and proper technique.
Step 1: Park on Level Ground
Find a flat, level surface and park your vehicle. Turn off the engine and allow it to cool for at least five minutes. This waiting period is essential because hot oil expands, which will give you a false high reading. If the engine is warm but not hot, that’s acceptable, but cold oil readings are ideal for accuracy.
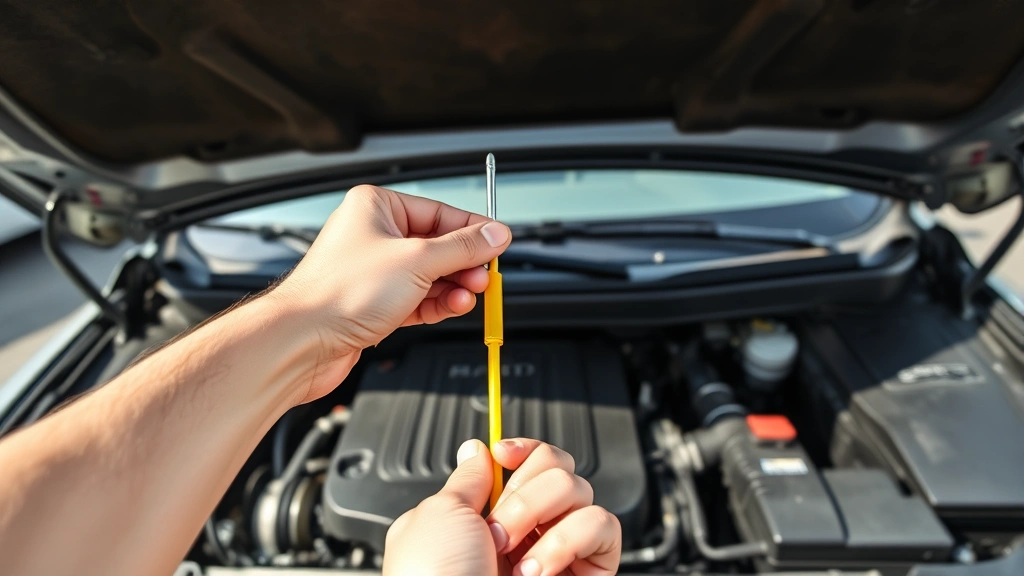
Step 2: Open the Hood
Pop your hood and locate the dipstick. In most vehicles, it’s a long stick with a yellow or orange handle. Consult your owner’s manual if you’re unsure of its location. The dipstick is typically situated near the engine’s front or sides and usually has a distinctive handle for easy identification.
Step 3: Remove and Wipe the Dipstick
Grasp the dipstick handle firmly and pull it straight out. You’ll likely see oil on the stick, which is normal. Wipe the entire length of the dipstick with your paper towel or lint-free cloth. This removes the old oil coating and prepares the stick for an accurate new reading. Make sure you wipe thoroughly, removing all residual oil.
Step 4: Reinsert and Remove Again
Push the dipstick back into its tube until it seats fully. You should feel slight resistance when it reaches the bottom. Now pull it out again slowly and carefully. This second removal gives you a fresh oil coating for an accurate measurement.
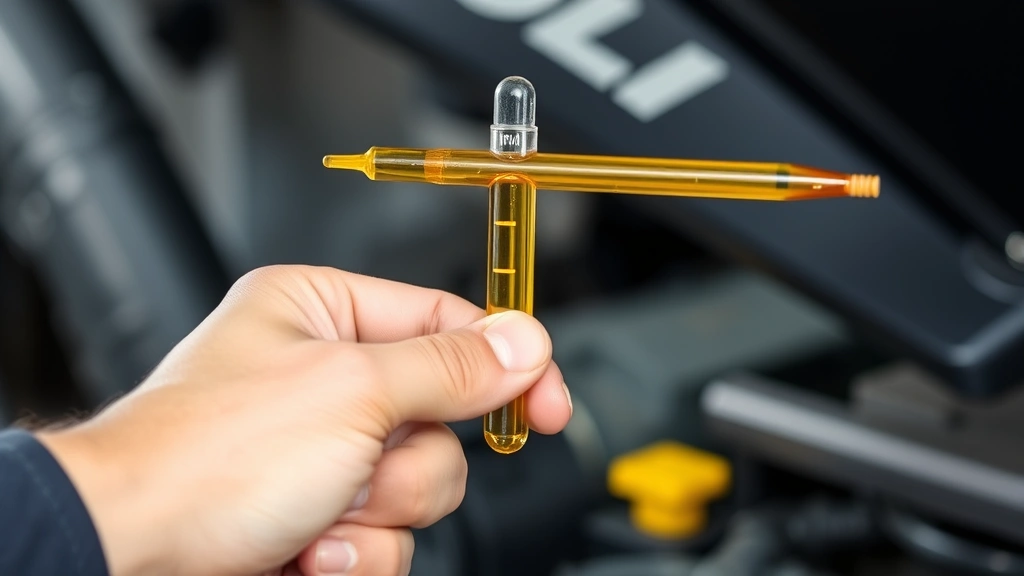
Step 5: Read the Level
Hold the dipstick horizontally at eye level and observe where the oil reaches on the stick. Most dipsticks have two marks: a minimum line and a maximum line. The oil level should be between these marks, ideally closer to the maximum. If it’s below the minimum, you need to add oil immediately. If it’s above the maximum, you have excess oil that should be professionally drained.
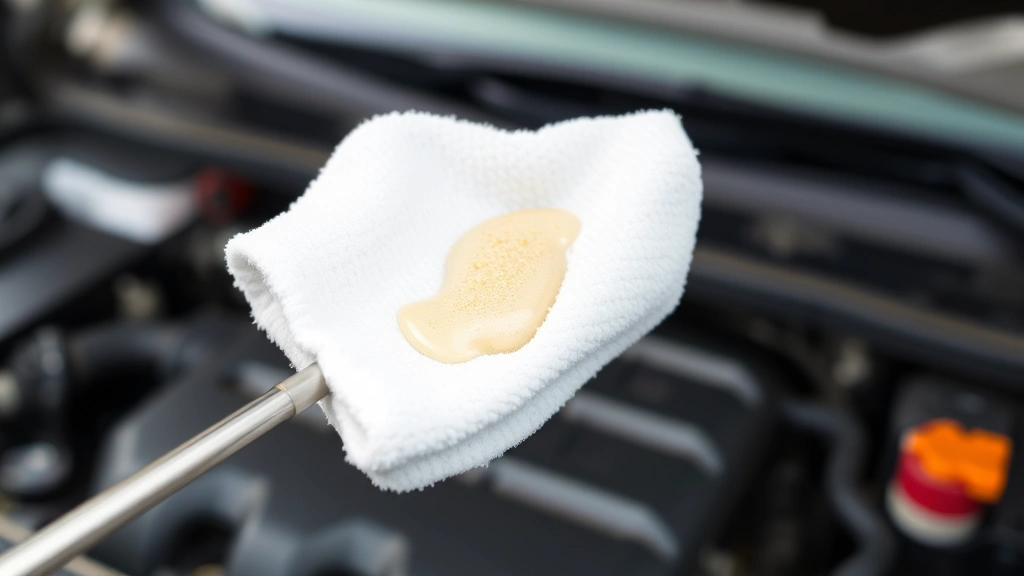
Step 6: Assess Oil Condition
While reading the level, also observe the oil’s color and clarity. Fresh oil is amber or light brown. Dark brown or black oil indicates it’s time for a change. If the oil appears gritty, cloudy, or has a metallic sheen, these are signs of contamination and degradation.
Step 7: Add Oil if Needed
If the level is low, locate your vehicle’s oil fill cap, usually on top of the engine. Unscrew it and insert your funnel. Add the recommended oil grade in small amounts, checking the level with the dipstick after each addition. This prevents overfilling. Never exceed the maximum line.
Step 8: Replace the Dipstick and Cap
Once the level is correct, reinsert the dipstick fully and replace the oil fill cap, tightening it securely. Close your hood and you’re finished.
Understanding Oil Levels and Condition
Interpreting what you find when checking your oil is just as important as performing the check itself. Oil level and condition tell you much about your engine’s health.
Oil Level Interpretation
The space between minimum and maximum marks represents about one quart of oil in most vehicles. Running consistently at the minimum level is acceptable but not ideal. The maximum level provides a safety margin and ensures optimal lubrication. If you’re frequently adding oil between changes, your vehicle may have an oil leak or be burning oil, which requires professional diagnosis.
Oil Color Guide
Fresh oil appears light amber or honey-colored. After a few hundred miles, it naturally darkens as it circulates through the engine and picks up byproducts. This darkening alone doesn’t mean the oil is bad. However, if your oil becomes very dark or black within just a few hundred miles, it may indicate engine problems like excessive combustion byproducts or coolant contamination. Black oil after normal use (3,000-5,000 miles with conventional oil or 7,500-10,000 miles with synthetic) simply means it’s time for a change.
Unusual Conditions
If your oil appears milky or has a coffee-with-cream appearance, coolant may be leaking into the oil. This is a serious issue requiring immediate professional attention. Gritty or sandy-feeling oil indicates dirt contamination, suggesting a failing air filter or other seal problems. A strong fuel smell mixed with the oil suggests fuel is leaking into the crankcase, another problem requiring professional diagnosis.
Common Mistakes to Avoid
Even experienced car owners sometimes make errors when checking oil. Being aware of these pitfalls helps you avoid them.
Mistake 1: Checking Oil on an Incline
Oil naturally pools toward the lowest point in the pan. If your vehicle isn’t level, the reading will be inaccurate. Always find a flat surface before checking.
Mistake 2: Checking Immediately After Driving
Hot oil expands significantly. Checking right after driving gives a false high reading. Wait at least five minutes, or better yet, check in the morning before driving.
Mistake 3: Not Wiping the Dipstick Thoroughly
Old oil coating on the stick interferes with accurate readings. Wipe completely before reinserting. Some people make multiple insertions and readings, which is acceptable and actually recommended for maximum accuracy.
Mistake 4: Overfilling the Engine
Too much oil is as problematic as too little. Excess oil creates pressure that can blow out seals and gaskets. Always stay within the minimum and maximum marks.
Mistake 5: Ignoring Warning Signs
If you notice the oil pressure warning light illuminated, don’t ignore it. Check your oil immediately. Continuing to drive with insufficient oil can cause irreversible engine damage.
Mistake 6: Using the Wrong Oil Grade
Always use the oil grade specified in your owner’s manual. Using thicker or thinner oil than recommended can affect engine performance and longevity. If you need guidance on maintenance topics, check our FixWiseHub Blog for additional resources.
Oil Types and Recommendations
Understanding different oil types helps you make informed choices for your vehicle.
Conventional Oil
Traditional mineral oil refined from crude petroleum. It’s the most affordable option and suitable for older vehicles and normal driving conditions. Conventional oil typically requires changes every 3,000-5,000 miles.
Synthetic Oil
Engineered from chemical compounds, synthetic oil lasts significantly longer than conventional. It maintains viscosity better in extreme temperatures, provides superior engine protection, and typically lasts 7,500-10,000 miles or longer between changes. Synthetic costs more upfront but offers better long-term value.
Synthetic Blend
A mixture of conventional and synthetic oils, offering a middle ground in price and performance. Synthetic blends last longer than pure conventional oil (usually 5,000-7,500 miles) and cost less than full synthetic.
Your owner’s manual specifies the correct oil viscosity grade for your engine, typically expressed as something like 5W-30 or 10W-40. The first number (with the W for winter) indicates cold-temperature flow, while the second indicates hot-temperature viscosity. Family Handyman recommends always consulting manufacturer specifications to ensure optimal engine performance and warranty compliance.
When to Change Your Oil
Knowing when to change your oil is crucial for engine health. Modern vehicles have computers that monitor oil condition and alert you when changes are needed.
Mileage-Based Changes
Traditional wisdom suggests changes every 3,000 miles, but modern engines and oils have extended this interval. Most manufacturers recommend 5,000-7,500 miles for conventional oil and 7,500-10,000 miles for synthetic. Some newer vehicles with synthetic oil can go 15,000 miles between changes. Always follow your manufacturer’s recommendation in your owner’s manual.
Time-Based Changes
Even if you don’t drive much, oil degrades over time. If you drive fewer than 10,000 miles annually, change your oil at least once per year. Sitting oil oxidizes and loses effectiveness.
Condition-Based Changes
Some modern vehicles use oil condition monitoring systems that analyze oil properties and alert you when a change is needed. These systems are more accurate than fixed schedules and optimize change intervals based on actual driving conditions.
Severe Driving Conditions
If you frequently tow, drive in dusty conditions, make short trips, or drive in extreme temperatures, change your oil more frequently. These conditions accelerate oil degradation. Consult your owner’s manual for severe driving recommendations, which often suggest changes every 3,000-5,000 miles regardless of oil type.
If you’re looking to understand more about preventive maintenance, our guide on how to check for viruses on iPhone covers digital device maintenance, but for your vehicle, mechanical maintenance follows similar preventive principles.
Frequently Asked Questions
How often should I check my oil?
Most manufacturers recommend checking oil at least monthly. If your vehicle is older or you drive in severe conditions, check every two weeks. Checking is quick and free, so erring on the side of caution is wise.
Can I check my oil when the engine is hot?
Technically yes, but it’s not ideal. Hot oil expands and gives falsely high readings. If you must check hot oil, understand that the reading will be higher than when cold. For accuracy, always check when the engine is cold or has cooled for at least five minutes.
What does it mean if my oil smells like fuel?
This indicates fuel is leaking into the crankcase, possibly due to a faulty fuel injector or leaking fuel line. This is a serious issue requiring professional diagnosis and repair immediately.
Is it normal for my car to burn oil?
Some oil consumption is normal, especially in older vehicles or high-performance engines. However, if you’re adding more than a quart between oil changes, have it professionally inspected. Excessive oil burning can indicate worn piston rings or valve seals.
Can I use a different oil grade than recommended?
Using a different grade than specified can affect engine performance, fuel economy, and longevity. Always use the grade in your owner’s manual. Using thicker oil than recommended can strain the starter and reduce fuel economy. Thinner oil may not provide adequate protection.
What’s the difference between oil level and oil pressure?
Oil level refers to the quantity of oil in the pan, checked with the dipstick. Oil pressure is the force at which oil circulates through the engine, monitored by your oil pressure gauge or warning light. Low oil level causes low oil pressure, but oil pressure problems can exist even with adequate oil level.
Should I check my oil before or after driving?
Check before driving or at least five minutes after the engine cools. Checking immediately after driving gives inaccurate high readings because hot oil expands. Morning checks before driving provide the most accurate measurements.
What should I do if my oil is overfilled?
If you accidentally overfill, the excess oil must be drained. Overfilled engines experience excessive pressure that can damage seals and gaskets. You can use a turkey baster or oil extractor to remove excess oil, or have a professional drain it. Don’t drive the vehicle until the level is corrected.
How do I know if I need an oil change?
Follow your owner’s manual for mileage or time intervals. Additionally, if your oil appears very dark or black, smells burnt, or your vehicle has a service light illuminated, it’s time for a change. Some vehicles have oil condition monitoring systems that alert you automatically.
Can synthetic and conventional oils be mixed?
Mixing is not ideal but won’t harm your engine in an emergency. However, mixing reduces the synthetic oil’s benefits. If you do mix, plan to change the oil sooner rather than later. For optimal performance, use the same type consistently.
Related Posts

Superscript in Google Docs: Expert Tips

Strikethrough in Excel: Easy Steps for Beginners
