
How to Sharpen a Chainsaw? Pro Tips Included
How to Sharpen a Chainsaw: Pro Tips Included
A dull chainsaw is not only frustrating to use—it’s dangerous. When your chainsaw pulls to one side, produces fine sawdust instead of chips, or requires excessive pressure to cut, it’s time to sharpen the chain. Regular maintenance keeps your saw performing safely and efficiently, whether you’re tackling DIY projects or professional forestry work. Learning how to sharpen a chainsaw properly will extend your equipment’s lifespan and save you money on replacements.
Sharpening a chainsaw chain involves filing the individual teeth to restore their cutting edges and maintaining proper angles and depths. While it might seem intimidating at first, this is a skill any chainsaw owner can master with the right tools and knowledge. This comprehensive guide walks you through the process step-by-step, covering everything from identifying a dull chain to using professional-grade filing techniques.
Signs Your Chainsaw Chain Needs Sharpening
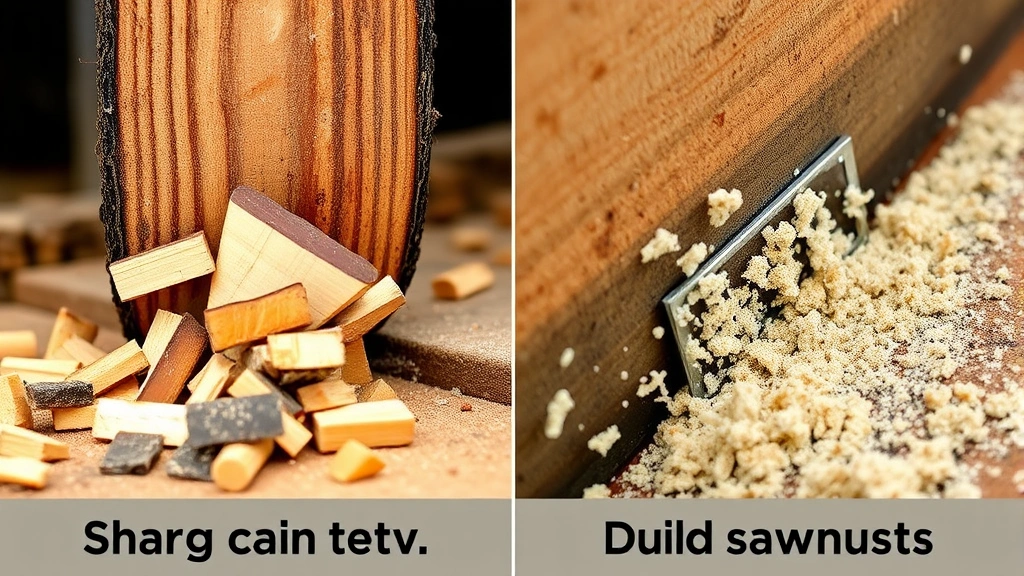
Recognizing when your chainsaw needs sharpening is the first step toward proper maintenance. A dull chain exhibits several telltale signs that alert you to take action before performance deteriorates further. The most obvious indicator is when your saw produces fine sawdust rather than chunky wood chips—this happens because dull teeth are tearing and grinding wood instead of cleanly cutting it.
Another common sign is pulling to one side during cutting. This occurs when some teeth are sharper than others, causing uneven cutting pressure. You might also notice the saw requires significantly more downward pressure to make progress, which increases fatigue and safety risks. If your chainsaw bounces or chatters during operation, or if it stalls frequently, dullness could be the culprit. A well-maintained saw should cut smoothly and almost pull itself through the wood when properly sharpened.
Pay attention to the quality of your cuts too. Smooth, straight cuts indicate a sharp chain, while crooked or rough cuts suggest dulling. Additionally, if you haven’t sharpened your chain after several hours of use, it’s likely time regardless of how it performs. Most professionals recommend sharpening every 5-8 hours of cutting for regular users.
Tools You’ll Need
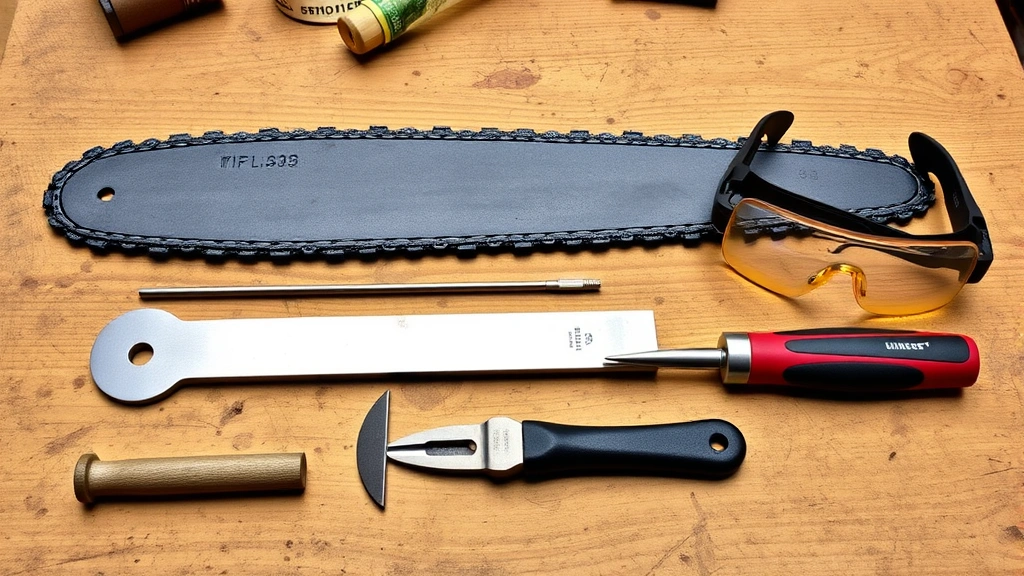
Before starting the sharpening process, gather the necessary tools. Having everything ready ensures a smooth, efficient job and prevents frustration mid-project. Here’s what you’ll need:
- Round file (also called a circular file)—must match your chain’s size, typically ranging from 3/16 inch to 7/32 inch depending on your saw model
- File handle or holder—helps maintain proper filing angles and control
- Flat file—used for adjusting depth gauges
- Depth gauge tool—ensures proper height of depth gauges relative to tooth tips
- Chainsaw vise or clamp—secures the bar and chain during sharpening
- Spark plug socket—removes the spark plug to prevent accidental starting
- Measuring tool—verifies file diameter and angles
- Marking pen—helps track which teeth you’ve filed
- Safety glasses—protects your eyes from metal shavings
You can purchase individual tools or invest in a complete chainsaw sharpening kit, which bundles most items together at a reasonable price. Many hardware stores stock these kits, and they’re available from online retailers specializing in power tools and outdoor equipment.
Step-by-Step Sharpening Process
Now that you have your tools ready, let’s walk through the actual sharpening procedure. Follow these steps carefully to achieve professional results.
Step 1: Prepare Your Chainsaw Start by disconnecting the spark plug wire to ensure the chainsaw cannot accidentally start. Place the saw on a flat, stable surface with good lighting. Secure the chainsaw bar in a vise or clamp, positioning it so you can comfortably access the chain from above. The chain should be tight enough not to move during filing but loose enough to rotate manually.
Step 2: Determine Your File Size Consult your chainsaw’s manual to identify the correct file diameter for your chain. The file size directly corresponds to your chain’s pitch (distance between rivets). Using the wrong size file will produce improper tooth angles and poor cutting performance. Mark your starting tooth with a pen to ensure you sharpen each tooth and don’t miss any.
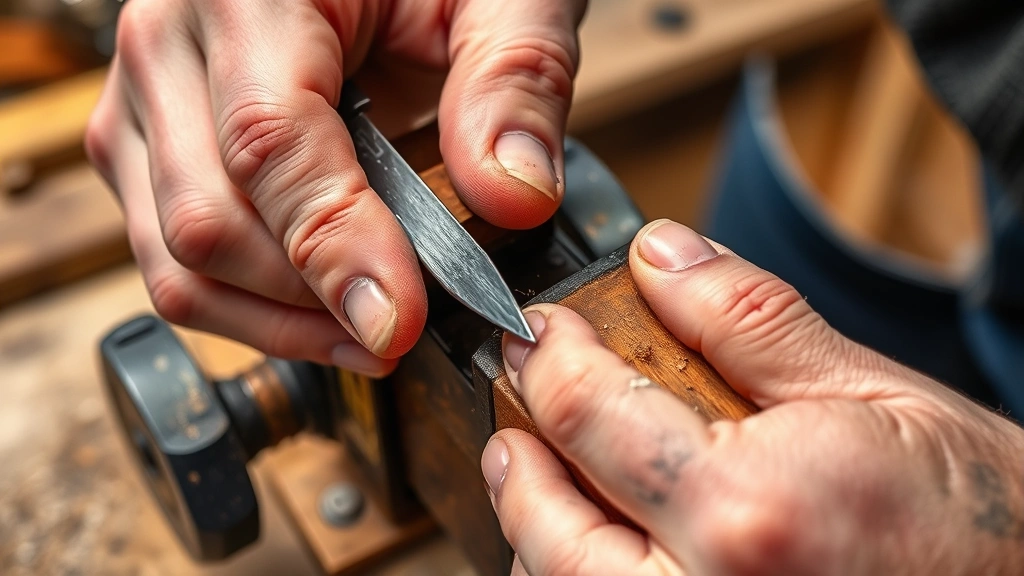
Step 3: File the First Tooth Position the round file in the tooth’s gullet (the valley between teeth). The file should sit at approximately 25-35 degrees to the chainsaw bar—most chains use 30 degrees as the standard angle. Hold the file handle with both hands and use smooth, forward strokes, lifting the file away on the return stroke. This ensures you cut only on the forward motion, preserving the file’s sharpness.
Apply consistent pressure without forcing the file. Generally, 3-5 strokes per tooth is sufficient for routine sharpening; severely dull chains may need 6-8 strokes. You’ll know you’ve filed enough when a small bright spot appears on the tooth’s tip, indicating you’ve removed enough dull material to expose fresh metal.
Step 4: Progress Around the Chain After sharpening the first tooth, rotate the chain so the next tooth faces you. Many people sharpen every other tooth in one direction first, then rotate and sharpen the remaining teeth in the opposite direction. This method ensures consistency and prevents skipping teeth accidentally.
Step 5: Maintain Consistent Pressure and Angle As you work through the chain, maintain the same filing angle and pressure on each tooth. Inconsistency is the primary reason why sharpened chains still don’t perform optimally. If your hand gets tired, take a break rather than pushing through with diminishing technique.
Filing Angles and Techniques
The angle at which you file each tooth dramatically affects cutting performance. Understanding proper angles helps you achieve professional-quality results comparable to commercial sharpening services.
Tooth Angle (Hook Angle) Most chainsaw chains require a 25-35 degree angle, with 30 degrees being the standard. This is the angle between the file and the chainsaw bar. You can use angle guides that attach to the file to maintain consistency, or reference marks on the bar itself. Some modern sharpening tools include built-in angle guides that remove guesswork entirely.
Top Plate Angle The top plate of each tooth should be filed at approximately 50-60 degrees to the chainsaw bar. This angle creates the sharp cutting edge that slices through wood. Filing too steeply or too shallowly compromises cutting efficiency and durability.
Side Plate Angle The side plate—the outer edge of each tooth—should form roughly 50-60 degrees to the bar as well. This angle works in conjunction with the top plate to create the cutting geometry. Consistency here is critical for balanced cutting without pulling.
Pro Tip for Angle Consistency Many experienced chainsaw users mark their file handle or use a file guide with angle indicators. Some professional-grade tools include laser guides that project the correct angle directly onto the chain. While these are more expensive, they virtually eliminate angle-related errors, especially for beginners.
Depth Gauge Adjustment
Depth gauges (also called rakers) are the small bumps in front of each cutting tooth. These gauges control how much wood the tooth removes with each pass. If depth gauges are too high, the chain won’t cut aggressively enough; if too low, the chain catches and pulls dangerously.
Measuring Depth Gauges Use a depth gauge tool (a simple template that fits over the tooth and gauge). The gauge should sit just below the top of the cutting tooth—typically 0.025 to 0.035 inches depending on your chain type. Consult your chainsaw manual for exact specifications.
Filing Depth Gauges If a gauge sits too high, use a flat file to carefully reduce its height. Position the flat file across the gauge and cutting tooth, filing with light pressure until the gauge meets the template. Work slowly and carefully—removing too much material is difficult to correct.
When to Adjust Gauges You don’t need to adjust depth gauges every sharpening. Typically, adjust them every third or fourth sharpening, or whenever you notice the chain isn’t cutting as aggressively as expected. Excessive adjustment dulls your flat file quickly, so minimize depth gauge work when possible.
Professional Sharpening vs DIY
While learning to sharpen your own chainsaw offers convenience and cost savings, professional sharpening services have distinct advantages worth considering. Understanding the trade-offs helps you decide which approach suits your situation best.
DIY Sharpening Advantages Sharpening at home saves money—professional services typically cost $15-30 per chain, while DIY tools represent a one-time investment. You gain immediate convenience; there’s no waiting for service or driving to a shop. Learning this skill builds self-sufficiency and deeper understanding of your equipment. For frequent users, DIY sharpening quickly pays for itself.
Professional Sharpening Advantages Professional services use specialized equipment like electric grinders and precise angle guides that often produce superior results, especially for complex chain types. Professionals sharpen consistently and quickly, handling multiple chains in less time than DIY takes. If you’re unsure about your technique or own multiple saws, professional sharpening provides peace of mind. Professional services also handle depth gauge adjustments and inspect chains for damage you might miss.
Hybrid Approach Many chainsaw owners sharpen chains themselves for routine maintenance between professional sharpenings. This extends the time between professional services and maintains acceptable performance. Having a professional sharpen your chain once yearly ensures it receives expert attention and inspection.
Maintenance Tips Between Sharpenings
Proper maintenance between sharpenings extends chain life and keeps your saw performing optimally. Small habits prevent premature dulling and safety issues.
Avoid Dirt and Rocks Dirt and rocks are the primary cause of premature chain dulling. Before cutting, brush debris from wood surfaces when possible. Avoid cutting near the ground where dirt accumulates. If you hit a rock accidentally, stop immediately and inspect the chain—even minor impacts can dull teeth or cause damage.
Use Proper Fuel and Oil High-quality two-stroke fuel and bar oil keep your chainsaw running smoothly and reduce stress on the chain. Poor-quality oil causes excessive friction and heat, which dulls teeth faster. Use the oil viscosity specified in your manual—typically SAE 30 or 40 for warm weather, lighter oils for cold climates.
Maintain Chain Tension A properly tensioned chain reduces strain on teeth and maintains optimal cutting geometry. The chain should pull away slightly from the bar but snap back when released. Check tension before each use, especially when the chain is cold. Loose chains slip and don’t cut efficiently; tight chains cause excessive wear and potential breakage.
Regular Inspection Before each use, visually inspect your chain for damage, bent links, or missing teeth. Even minor damage worsens quickly during operation. Replace damaged chains rather than attempting repairs—the cost of a new chain is minimal compared to potential safety hazards or equipment damage.
Proper Storage Store your chainsaw with fresh fuel or drain the tank before extended storage. Keep the chain clean and lightly oiled during storage to prevent rust. Store the saw in a dry location away from moisture and extreme temperatures.
FAQ
How often should I sharpen my chainsaw chain?
Sharpen your chainsaw every 5-8 hours of cutting for regular users. Professional loggers may sharpen daily. Pay attention to cutting performance rather than strict schedules—sharpen whenever you notice pulling, excessive sawdust, or reduced cutting efficiency. For occasional users cutting once monthly, sharpening twice yearly is typically sufficient.
Can I sharpen a chainsaw chain without a vise?
While a vise is highly recommended for safety and consistency, you can sharpen without one in a pinch. Clamp the bar securely to a sturdy workbench or have someone hold it steady. However, this method is less safe and more difficult to maintain proper angles. Invest in a chainsaw vise—they’re inexpensive and dramatically improve the experience.
What’s the difference between round file sizes?
Round files come in diameters from 3/16 inch to 7/32 inch, corresponding to different chain pitches. Using the wrong size produces improper tooth angles and poor cutting. Always consult your manual for the correct size. Using a file that’s too small won’t sharpen effectively; too large and you’ll over-file teeth.
How do I know if my chain is beyond sharpening?
If your chain has missing teeth, large cracks, bent links, or damaged rivets, it’s beyond economical sharpening. Replace the chain rather than attempting repairs. Chains are relatively inexpensive compared to the risk of failure during operation. Most chains last several years with proper maintenance and periodic sharpening.
Can I use an electric grinder to sharpen my chainsaw?
Yes, electric grinders can sharpen chainsaw chains effectively, though they require more skill than hand filing to avoid over-sharpening or altering tooth geometry. Bench grinders are popular for professional work but risk removing too much material quickly. Hand filing offers better control for most DIY users. If you choose to use a grinder, start slowly and practice on an old chain.
Why does my chain pull to one side after sharpening?
Side-pulling indicates uneven sharpening—some teeth are sharper than others. File any sharp teeth down to match the dullest teeth, ensuring all teeth are equally sharp. This may require additional passes with the file. Alternatively, depth gauges on one side may be higher than the other, causing uneven cutting pressure. Adjust depth gauges to match specifications.
Related Posts

Superscript in Google Docs: Expert Tips

Strikethrough in Excel: Easy Steps for Beginners
