
How to Sew a Button? Easy DIY Guide
Learning how to sew a button is one of the most fundamental and practical skills you can master. Whether a button has fallen off your favorite shirt, jacket, or coat, knowing how to reattach it properly can save you money and extend the life of your clothing. This essential mending skill takes only a few minutes to learn and requires minimal supplies that you likely already have at home.
A loose or missing button doesn’t mean your garment is ruined. With basic sewing knowledge and the right technique, you can restore your clothing to perfect condition. This guide will walk you through every step of the button-sewing process, from gathering materials to tying off your thread securely. By the end, you’ll have the confidence to tackle any button repair that comes your way.
Materials You’ll Need
Before you begin, gather the following supplies to ensure a smooth button-sewing experience. Having everything prepared will make the process faster and more enjoyable. Most of these items are inexpensive and worth keeping in a basic home repair kit.
- Thread: Choose a color that matches your garment as closely as possible. You can use all-purpose polyester or cotton thread. If matching is difficult, neutral colors like black, white, or gray work well on most fabrics.
- Needle: Select a needle size appropriate for your fabric weight. A size 70/10 or 80/12 needle works well for most button repairs. Ensure your needle eye is large enough to accommodate your thread comfortably.
- Button: You may be reattaching the original button or replacing it with a new one. Keep spare buttons from new garments in a designated sewing box for future repairs.
- Scissors: Use sharp fabric scissors or thread snips to cut your thread cleanly. Dull scissors can fray thread and make your work messier.
- Thimble (optional): A thimble protects your finger when pushing the needle through fabric, especially helpful for thicker materials or if you’re sewing multiple buttons.
- Toothpick or matchstick (optional): This tool helps create proper spacing between your thread and button, making removal easier in the future.
If you’re new to home maintenance projects, understanding basic home improvement techniques can help you approach repairs with confidence. Just like learning to troubleshoot common household problems, button sewing is a skill that pays dividends over time.
Types of Buttons and Threading Methods
Different buttons require slightly different sewing approaches. Understanding the button type you’re working with ensures proper attachment and longevity. The two main categories are shank buttons and hole buttons, each with unique characteristics.
Hole buttons are the most common type you’ll encounter. These buttons have two or four holes drilled through them. Two-hole buttons are typically found on shirts, blouses, and lighter garments. Four-hole buttons offer more surface area for thread and are common on dress shirts, blazers, and heavier clothing. The multiple holes distribute stress more evenly, making them more durable.
When sewing hole buttons, you can use two different threading patterns. The parallel method involves running thread through the two holes (or pairs of holes) in a straight line, creating parallel rows of thread. This method is quick and works well for casual clothing. The cross method
Shank buttons have a hollow stem or loop on the back instead of holes through the front. These buttons are common on coats, jackets, and formal wear. Shank buttons naturally create space between the button and fabric, which prevents stress on the thread and allows thicker fabrics to sit properly. Sewing shank buttons is straightforward since you simply pass your needle up through the shank and back down repeatedly.
External resources like This Old House offer additional guidance on various home maintenance tasks. For more detailed sewing tips, Family Handyman provides excellent instructional content.
Step-by-Step Sewing Instructions
Now that you understand the basics, let’s walk through the complete process of sewing a button. Follow these steps carefully for a professional-looking repair that will last for years.
Step 1: Prepare Your Thread and Needle
Cut approximately 18-24 inches of thread from your spool. This length is enough to complete most button repairs without running out, but not so long that it becomes difficult to manage. Thread your needle by inserting the thread through the eye. If you’re having difficulty, try moistening the thread tip slightly or using a needle threader.
Once threaded, tie a knot at one end of the thread by making a small loop, passing the thread through it, and pulling tight. Some sewers prefer a double knot for added security. This knot will anchor your thread on the underside of the fabric.
Step 2: Position Your Button
Place your button on the spot where it should attach. If you’re reattaching an original button, the old holes or stitching marks will guide you. For new buttons on fresh garments, ensure alignment with other buttons in the same row. Position the button so it sits flat against the fabric without puckering or pulling.
Step 3: Begin Stitching (Two-Hole Buttons)
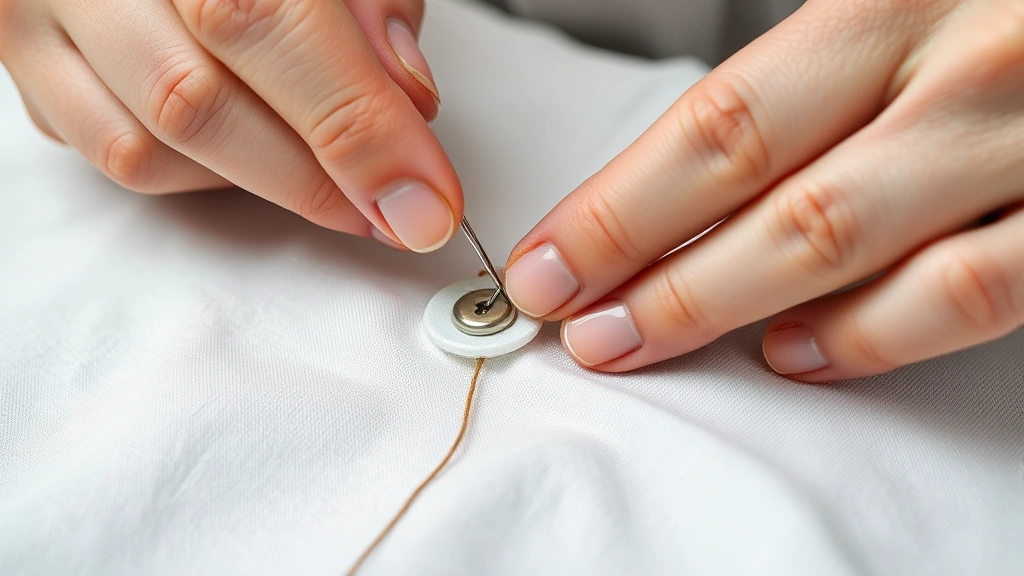
Starting from underneath the fabric, push your needle up through one of the button holes. Pull the thread until the knot catches on the underside of the fabric. Now push the needle back down through the other hole, pulling the thread taut but not so tight that it distorts the fabric.
Bring your needle back up through the first hole and repeat this process 4-6 times, depending on the button size and fabric weight. Heavier fabrics and larger buttons benefit from more passes. Each pass reinforces the attachment and distributes stress across multiple thread strands.
Step 4: Begin Stitching (Four-Hole Buttons)
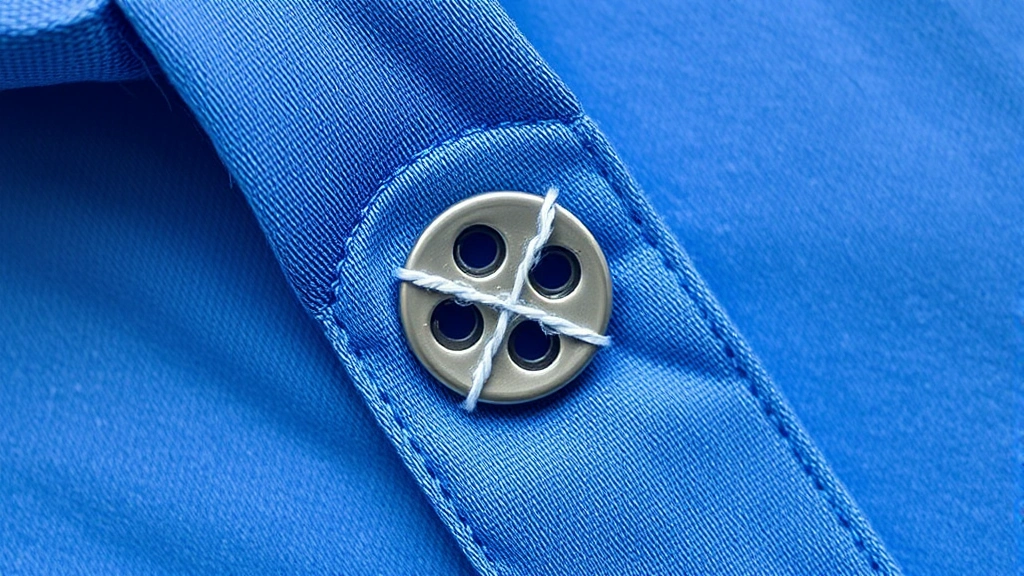
For the cross method with four-hole buttons, start by pushing your needle up through one corner hole. Pull down through the opposite diagonal hole. Repeat this diagonal pattern 4-6 times to create an X. Then switch to the remaining two holes, creating a second X perpendicular to the first. This distribution pattern is significantly stronger than parallel stitching.
If you prefer the parallel method, simply sew through one pair of holes multiple times, then switch to the other pair. This method is faster but slightly less secure than the cross method.
Step 5: Secure Shank Button Attachment
For shank buttons, pass your needle up through the shank opening and back down through the fabric beside the shank. Repeat this motion 6-8 times to build up thread under the button. The shank naturally creates proper spacing, so you don’t need to worry about thread tension affecting button function.
Step 6: Finish Your Stitching
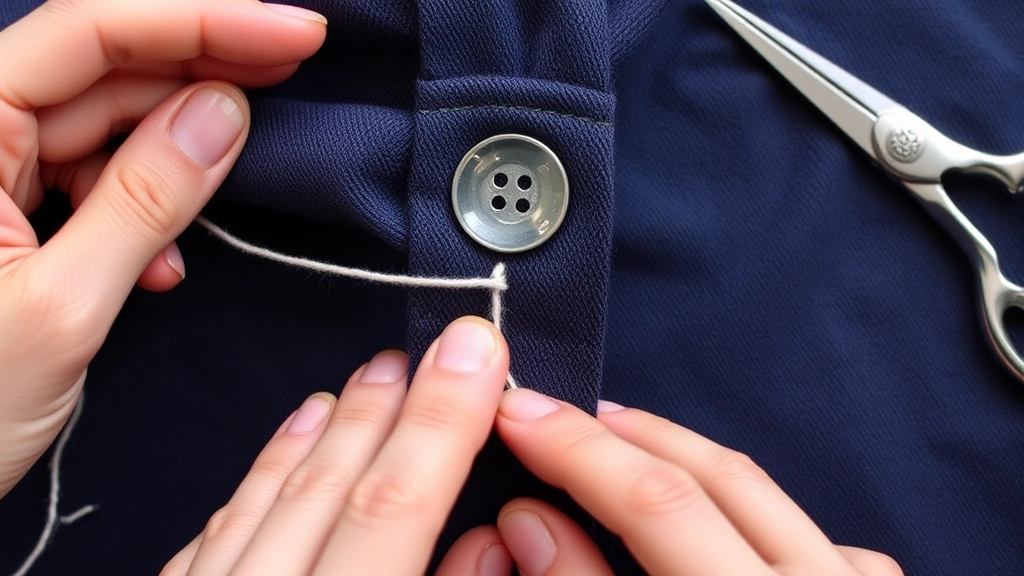
After completing your desired number of passes, bring your needle to the underside of the fabric. Make several small stitches in the same spot, creating a secure knot. Don’t cut the thread yet. Instead, weave your needle through these stitches to create a wrapped thread effect that won’t unravel easily.
Make at least three passes through the stitch bundle, then cut your thread close to the fabric. The wrapped stitches will hold everything in place securely.
Reinforcing Your Button Attachment
For buttons that bear heavy stress or are on frequently-worn garments, adding reinforcement ensures maximum durability. A reinforcement button is a small, flat button sewn underneath the main button, creating a stronger anchor point for the thread.
To use a reinforcement button, position it on the underside of the fabric directly behind where your main button will sit. When sewing your main button, pass your needle through the main button holes and the reinforcement button holes simultaneously. This distributes the stress across both buttons and significantly increases durability.
The reinforcement button doesn’t need to match your main button since it’s hidden from view. In fact, small flat buttons work better for this purpose than decorative buttons. Many home improvement retailers and fabric stores sell mixed button assortments perfect for this use.
Another reinforcement technique involves creating a thread shank, which is the space between the button and fabric. Using a toothpick or matchstick positioned between the button and fabric while sewing creates this shank automatically. Simply place the toothpick across the button holes before you start sewing. After completing your stitching, remove the toothpick and wrap the thread around the thread shank several times before tying off. This technique prevents the button from being pulled too tightly against the fabric, reducing stress on the thread.
Common Mistakes to Avoid
Even with good intentions, several common errors can compromise your button repair. Learning what to avoid will help you achieve professional results every time.
- Using mismatched thread: While invisible repairs aren’t always possible, thread that closely matches your garment looks far more professional than contrasting colors. Spend time finding the best match at your local fabric store.
- Sewing too tightly: Pulling thread too hard can pucker the fabric and stress the button attachment. Keep tension moderate and consistent throughout your stitching.
- Making too few passes: Buttons that are sewn with insufficient thread passes will fail quickly, especially on frequently-worn items. Always complete at least 4-6 passes depending on button and fabric type.
- Neglecting the knot: A poorly tied knot at the start or end of your stitching will cause your entire repair to unravel. Take time to tie secure knots using the double-knot method.
- Ignoring fabric damage: If the fabric around the button hole is torn or damaged, the button will fail regardless of how well you sew it. Repair fabric damage before attaching your button.
- Using the wrong needle size: A needle too small for your thread creates friction and can break the thread. A needle too large will create visible holes in delicate fabrics.
Maintaining Buttons on Your Clothes
Preventing button failure is easier than repairing it. Regular maintenance keeps your buttons secure and extends the life of your favorite garments. These preventative measures require minimal time but deliver significant benefits.
Check buttons regularly, especially on frequently-worn items like coats and cardigans. Give each button a gentle tug to ensure it’s secure. If you notice any loose buttons, tighten them immediately before they fall off completely. A button that’s just starting to loosen requires only a few additional stitches to secure.
When washing garments with buttons, button them completely and place the item in a mesh laundry bag. This reduces agitation and stress on the buttons. Turn items inside-out before washing to provide additional protection. If buttons are particularly delicate or decorative, hand-washing is preferable to machine washing.
Store garments with heavy or stress-prone buttons carefully. Avoid hanging coats with buttons in crowded closets where they might catch or get bumped. For long-term storage, button jackets and coats completely and wrap them in acid-free tissue paper.
Keep a small sewing kit handy with basic supplies including thread in neutral colors, needles, scissors, and spare buttons. Having supplies readily available makes quick repairs possible before minor issues become major problems. Just as you might keep basic tools for maintaining household appliances, a sewing kit is an essential home maintenance tool.
If you’re interested in expanding your home maintenance skills beyond button sewing, learning about other household repairs and maintenance will serve you well. Many basic skills follow similar principles of preparation, attention to detail, and proper technique.
FAQ
How long does a properly sewn button last?
A button sewn correctly with adequate thread passes typically lasts several years of regular wear. The lifespan depends on how frequently the garment is worn and washed. Buttons on coats worn seasonally may last a decade or more, while buttons on frequently-washed shirts might need replacement every 2-3 years. Using reinforcement buttons or thread shanks significantly extends durability.
Can I use different colored thread if I can’t find a perfect match?
While finding a close match is ideal, using slightly different thread is acceptable for casual clothing. For visible repairs on formal wear or delicate fabrics, invest time in finding the best match possible. Some sewers intentionally use contrasting thread colors for decorative effects on casual items like jeans or canvas bags.
What should I do if the fabric around the button hole is torn?
Torn fabric requires repair before button attachment. For small tears, apply interfacing or a patch to the underside of the fabric to reinforce the area. For larger tears, you may need to relocate the button slightly or have the garment professionally repaired. Never sew a button through torn fabric, as it will fail immediately.
Is hand sewing better than using a sewing machine for buttons?
Hand sewing is recommended for most button repairs because it provides better control and allows you to feel the fabric tension. Machine sewing can work for very simple, sturdy buttons on heavy fabrics, but the precision of hand sewing produces superior results. Machine-sewn buttons also risk damaging delicate fabrics.
How do I sew a button on thick fabrics like denim or canvas?
Thick fabrics require slightly different techniques. Use a needle appropriate for heavy fabrics, make more passes (8-10 instead of 4-6), and consider using a thimble to protect your finger. A reinforcement button is highly recommended for thick fabrics. Ensure your thread knots are extra secure since thicker fabrics create more stress on stitching.
Can I reuse a button that fell off?
Yes, absolutely. If the button itself is undamaged, it can be sewn back on immediately. Inspect it for cracks, chips, or sharp edges before reattaching. Clean off any old thread or fabric debris. Sometimes buttons fall off because the original stitching was inadequate, so ensure you make sufficient passes when reattaching.
What’s the best way to store spare buttons?
Keep spare buttons in a small container with a label identifying which garment they match. Store the container in a cool, dry place away from moisture and sunlight. Many people save extra buttons that come with new garments and store them together with their sewing supplies for future repairs.
Related Posts

Superscript in Google Docs: Expert Tips

Strikethrough in Excel: Easy Steps for Beginners
