

Install Garbage Disposal? Expert Tips Included
How to Replace a Garbage Disposal: Expert Tips Included
A garbage disposal is one of the most convenient kitchen appliances, but when it stops working, the frustration sets in quickly. Whether your unit is leaking, making unusual noises, or simply refusing to turn on, knowing how to replace a garbage disposal can save you hundreds in professional installation fees. This comprehensive guide walks you through the entire process, from disconnecting your old unit to installing and testing your new one.
Replacing a garbage disposal is a moderately challenging DIY project that most homeowners with basic plumbing knowledge can tackle in 1-2 hours. You’ll need some essential tools, careful attention to safety, and patience to navigate the tight space under your sink. By following this step-by-step approach, you’ll have a fully functional garbage disposal ready to handle your kitchen waste responsibly.
Tools and Materials You’ll Need
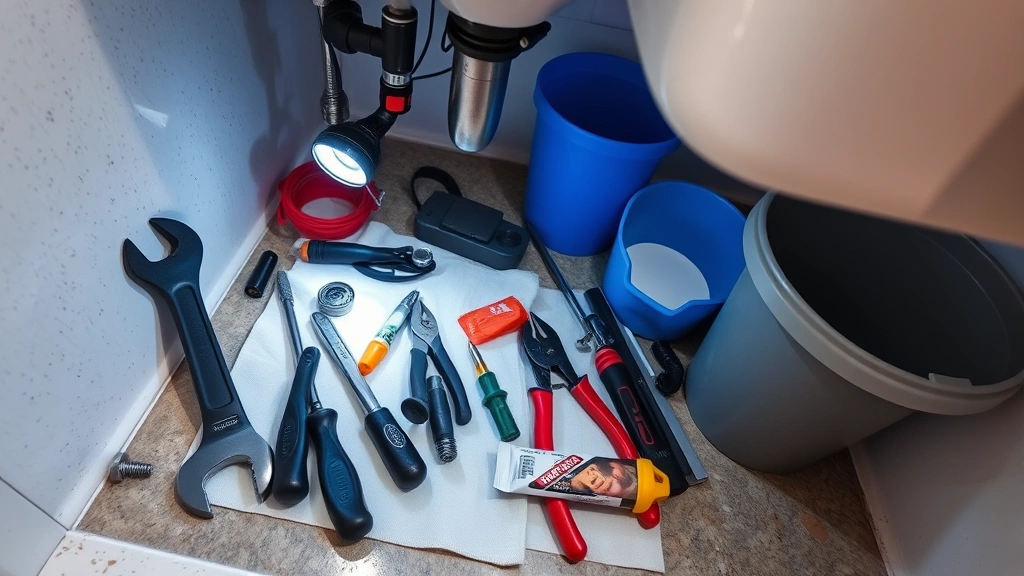
Before you begin any work, gather everything you need. Having the right tools prevents frustration and ensures a smooth installation process. Most of these items are standard household tools, though you may need to purchase a few specialty items.
Essential tools include:
- Adjustable wrench (8-10 inch)
- Screwdrivers (both Phillips and flathead)
- Flashlight or headlamp for under-sink visibility
- Bucket or large container for water drainage
- Plumber’s putty for sealing
- Slip-joint pliers
- Teflon tape for threaded connections
- Wire strippers (if doing electrical connections)
- Voltage tester for safety verification
Materials to have on hand:
- Your new garbage disposal unit (check compatibility with your sink)
- Plumber’s putty or silicone sealant
- Rubber washers and gaskets (usually included with new unit)
- Mounting ring and bolts (typically included)
- Electrical outlet or hardwired connection supplies
- Paper towels and rags for cleanup
Check your new garbage disposal’s manual before starting—different brands may have slightly different installation procedures. Some units come with pre-installed mounting assemblies, while others require manual assembly. Understanding your specific model prevents costly mistakes.
Safety Precautions Before Starting
Safety is paramount when working with electrical appliances and plumbing fixtures. Never skip these critical safety steps, as they protect you from electrical shock, cuts, and water damage.
Electrical safety:
- Turn off power at the circuit breaker for your garbage disposal
- Use a voltage tester to confirm power is completely off
- Never work on live electrical connections
- If your disposal is hardwired, consider hiring a licensed electrician for reconnection
- Keep all electrical work away from standing water
Physical safety:
- Disconnect the disposal completely before any work begins
- Never put hands down the drain or into the disposal chamber
- Wear safety glasses to protect against debris and splashing water
- Use a headlamp or flashlight—don’t work in darkness under the sink
- Have someone nearby in case you need assistance
Water management:
- Place a bucket underneath before disconnecting any plumbing
- Water trapped in pipes will spill out—be prepared
- Turn off the water supply to your sink if you’re working on the drain system
- Have towels ready for immediate cleanup
Removing Your Old Garbage Disposal
Proper removal of your old unit is the foundation for successful installation. Take your time during this phase—rushing leads to spills, stripped bolts, and frustration.
Step 1: Disconnect the power
If your disposal is plugged into an outlet under the sink, unplug it immediately. If it’s hardwired into your home’s electrical system, turn off the circuit breaker and verify power is off using a voltage tester. This step is non-negotiable for your safety.
Step 2: Disconnect the drain lines
Place your bucket underneath the pipes. Using your adjustable wrench or slip-joint pliers, loosen the connection between the disposal unit and the drain pipe. You may need to support the disposal with one hand while loosening with the other. Once loosened, carefully disconnect the drain line and let any remaining water drain into your bucket. If your disposal connects to a dishwasher, disconnect that hose as well by loosening the hose clamp.
Step 3: Remove the mounting assembly
Most disposals are held in place by a mounting ring with three bolts. Locate these bolts around the sink flange opening. Using your adjustable wrench, turn the bolts counterclockwise to loosen them evenly. Don’t remove one bolt completely before loosening the others—work in a rotating pattern to prevent the unit from tilting. Once all three bolts are loose enough, carefully lower the disposal unit while supporting it with both hands. This prevents it from falling and damaging your plumbing or causing injury.
Step 4: Remove the sink flange
Once the disposal is free, you may want to remove the entire sink flange assembly (the ring that sits in your sink drain) to clean it thoroughly. Use plumber’s putty or a scraper to remove old, hardened putty around the flange. This creates a clean surface for your new unit’s installation.
Preparing the Sink Flange
A properly prepared sink flange ensures your new disposal won’t leak and will function reliably. This step is often overlooked but critically important for long-term performance.
Cleaning the flange:
Remove all old plumber’s putty, caulk, and debris from the sink opening and flange. Use a plastic scraper to avoid scratching stainless steel sinks—if you’re concerned about maintaining your sink’s appearance, check our guide on how to remove rust from stainless steel for additional care tips. Wipe the area thoroughly with a damp cloth and dry completely. Any remaining moisture or debris will compromise your seal.
Applying new putty:
Roll fresh plumber’s putty between your hands to create a rope-like cord about 1/4 inch in diameter and long enough to go around your sink opening. Press this putty firmly around the underside of the flange rim where it meets the sink. This creates a waterproof seal that prevents water from seeping into the space between the flange and sink.
Positioning the flange:
Press the flange firmly down into the sink opening, ensuring it sits flat and level. The flange should be centered in the drain hole with equal overhang on all sides. Any tilting or misalignment will cause leaks and installation problems for your new disposal.
Installing the New Unit
Installation of your new garbage disposal follows a logical sequence that ensures proper alignment and secure mounting. Take your time—rushing this phase causes leaks and electrical problems.
Step 1: Assemble the mounting ring
Most new disposals come with a mounting ring assembly consisting of a support ring, rubber gasket, and bolts. Consult your unit’s manual for the specific assembly sequence. Typically, you’ll slide the rubber gasket over the sink flange, followed by the mounting ring. The rubber gasket creates a watertight seal between the flange and mounting ring.
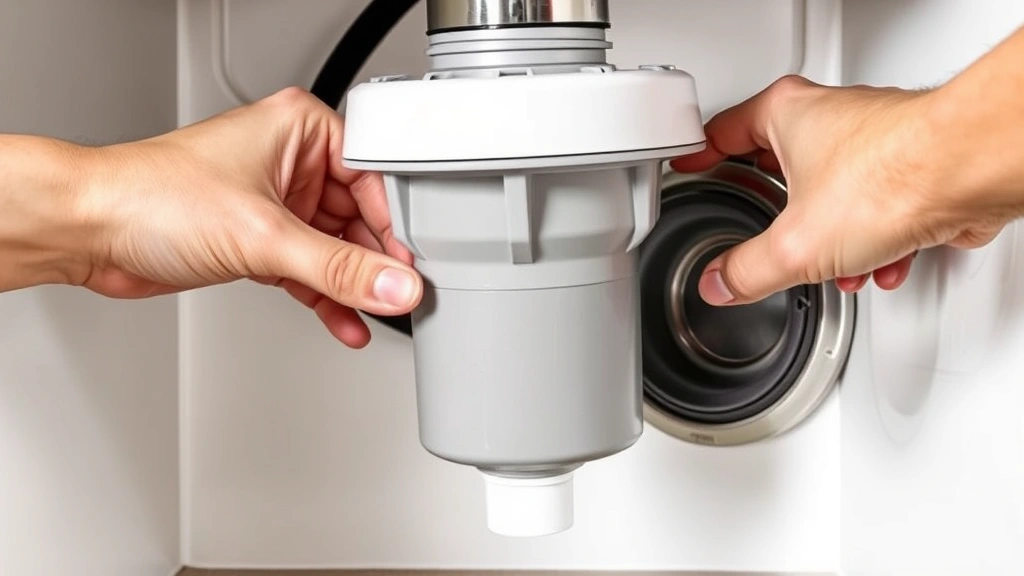
Step 2: Install the disposal unit
Carefully lift your new disposal unit and align it with the mounting ring beneath the sink. This is where a helper becomes invaluable—one person can hold the disposal while the other guides the mounting bolts. Slide the disposal’s mounting collar over the sink flange’s bolts. The unit should hang slightly loose at this point.
Step 3: Secure the mounting bolts
Insert the three mounting bolts through the disposal’s mounting collar and tighten them evenly. Work in a triangular pattern—tighten one bolt, then the one opposite to it, then the third. This ensures even pressure and prevents the unit from tilting. Don’t overtighten; hand-tight plus a quarter turn is usually sufficient. Over-tightening can crack the mounting collar or strip the threads.
Step 4: Verify alignment
Once mounted, gently rotate the disposal to ensure it moves freely without binding. If it catches or seems misaligned, loosen the bolts slightly and adjust the position before re-tightening.
Reconnecting Plumbing and Electrical
Proper reconnection of your plumbing and electrical systems is essential for safe, leak-free operation. This is where precision matters most.
Plumbing reconnection:
Reconnect the drain line from your disposal to your home’s drain system. If your old disposal had a dishwasher connection, reconnect that hose as well, securing it with the hose clamp. Use Teflon tape on threaded connections to prevent leaks. Hand-tighten all connections, then use your wrench to snug them an additional quarter turn. Over-tightening can crack fittings or strip threads. Run water through the sink to check for leaks before moving to electrical work.
Electrical reconnection:
If your disposal plugs into an outlet, simply plug it in once all plumbing is complete. If your unit is hardwired, you’ll need to connect the electrical wires. Strip about 1/2 inch of insulation from each wire using your wire strippers. Connect matching wires (black to black, white to white, green or bare to ground) using wire connectors. Twist each pair together firmly before screwing on the wire connector. Wrap the connections with electrical tape for extra security. If you’re uncomfortable with electrical work, hire a licensed electrician—the cost is minimal compared to potential safety hazards.
Before turning on power, ensure all connections are tight and no exposed wires are visible. Use your voltage tester to confirm the circuit is still off before making electrical connections.
Testing Your New Disposal
Thorough testing ensures your new disposal operates safely and correctly before you rely on it daily. This final phase catches problems before they become expensive repairs.
Pre-operation checks:
- Verify all bolts are tight by gently attempting to wiggle the disposal unit
- Check that all drain connections are secure and not dripping
- Confirm all electrical connections are complete and properly insulated
- Ensure the reset button on the disposal’s bottom is not tripped (it pops out if the motor overloads)
Initial startup:
Turn on the water to a moderate flow—not full blast. Press the disposal’s switch briefly; it should start with a humming sound. Let it run for 10-15 seconds while water flows, then turn it off. Listen for any unusual grinding, squealing, or rattling sounds that might indicate improper installation or internal damage.
Leak inspection:
While the disposal is running, look underneath for any water leaks at the drain connections or mounting area. Small drips at threaded connections can often be tightened slightly. If leaks persist after tightening, you may need to disconnect and reseal that connection.
Functional testing:
Once you’re confident there are no leaks, test the disposal with small amounts of food waste. Start with soft materials like banana peels or lettuce. Never put bones, fibrous vegetables, or hard objects down a new disposal until you’re certain it’s working properly. Grind the waste, listen for normal operation, and confirm water drains properly.
Run the disposal for a full cycle with the water on, then turn it off and allow the water to drain completely. The disposal should stop running immediately when switched off—any delayed stopping indicates potential mechanical problems.
FAQ
How long does it take to replace a garbage disposal?
Most replacements take 1-2 hours for someone with moderate DIY experience. Complications like stuck bolts, corrosion, or difficult plumbing access can extend this timeline. Plan for extra time if this is your first time—rushing leads to mistakes.
Can I replace a garbage disposal myself, or do I need a plumber?
Yes, you can absolutely replace it yourself if you’re comfortable with basic plumbing and electrical work. However, if your unit is hardwired rather than plug-in, or if you encounter unfamiliar plumbing configurations, hiring a professional is wise. The cost of a plumber’s visit is often less than the cost of fixing mistakes.
What size garbage disposal do I need?
Most residential disposals range from 1/3 to 1 horsepower. For a household of 4-5 people, a 3/4 horsepower unit is standard and handles most food waste effectively. Check your old unit’s specifications or consult your disposal’s manual for sizing guidance.
Do I need to turn off the water supply before starting?
Not necessarily for the initial disconnection, but it’s wise to turn off the water supply if you’ll be working on the drain system for extended periods. Always have a bucket ready to catch trapped water in the pipes.
Why is my new disposal leaking?
Leaks typically occur at three points: the sink flange seal, the drain connection, or the dishwasher connection. Tighten connections first. If leaking continues, disconnect and reseal that connection using Teflon tape and plumber’s putty. If the flange seal leaks, you may need to remove and reseal it with fresh plumber’s putty.
Can I install a garbage disposal in any sink?
Most modern sinks can accommodate a disposal, but you need adequate space under the sink for the unit and electrical outlet access. Single-basin sinks work best; double-basin configurations require careful planning. Measure your under-sink space before purchasing a disposal.
What should I never put down a garbage disposal?
Avoid bones, shells, fibrous vegetables (celery, corn husks), grease, pasta, rice, and hard objects like pits or seeds. These items jam the mechanism or cause clogs. Dispose of them in your regular trash instead. For more information on maintaining your kitchen’s cleanliness, check our guide on how to clean stainless steel pans.
Is it normal for a new disposal to sound loud?
New disposals often sound louder than expected, especially during the first few uses. However, grinding should be a consistent sound without squealing, rattling, or grinding metal sounds. Unusual noises may indicate installation problems or internal damage.
Related Posts

Superscript in Google Docs: Expert Tips

Strikethrough in Excel: Easy Steps for Beginners
