
Measure Replacement Windows: Expert Tips Inside
How to Measure for Replacement Windows: Expert Tips Inside
Replacing windows is one of the most impactful home improvement projects you can undertake. Whether you’re upgrading for energy efficiency, aesthetic appeal, or to fix damaged frames, getting accurate measurements is absolutely critical to the success of your project. Incorrect measurements can result in windows that don’t fit properly, leading to drafts, water leaks, installation delays, and costly mistakes that could have been easily prevented.
This comprehensive guide will walk you through the entire process of measuring for replacement windows like a professional. We’ll cover the tools you’ll need, the step-by-step measurement techniques, common mistakes to avoid, and insider tips that will save you time and money. By the end of this article, you’ll have the confidence and knowledge to measure your windows accurately and prepare yourself for a smooth installation process.
Essential Tools and Materials You’ll Need
Before you begin measuring your windows, gather the right tools. Having everything prepared will make the process faster, more accurate, and significantly less frustrating. You don’t need expensive equipment—most of these items are common household tools that you may already own.
The most important tool is a quality measuring tape, preferably 25 feet or longer with a wide blade that won’t collapse easily. A metal measuring tape is more durable and accurate than fabric alternatives. You’ll also want a level to check if your window frames are plumb and square, which is essential for identifying potential installation issues. A pencil or pen for marking and noting measurements is obvious but often overlooked. Consider using a mechanical pencil for precise marks.
A notebook or measurement sheet is invaluable for recording your data. Many window manufacturers provide downloadable measurement sheets that guide you through the process. A digital camera or smartphone can be helpful for photographing windows and creating visual records of your measurements. Finally, consider getting a laser measuring tool if you’re measuring multiple windows—these are increasingly affordable and provide excellent accuracy, plus they’re easier to use than traditional tape measures when measuring alone.
Understanding Window Terminology and Types
Before you start measuring, it’s crucial to understand the terminology and different window configurations you might encounter. This knowledge will help you communicate accurately with window manufacturers and installers, ensuring you order the correct products.
Rough opening is the opening in your wall structure where the window will be installed. Frame dimensions refer to the outer measurements of the window frame itself. Glass dimensions or lite size are the measurements of the actual glass panes. Sash is the movable part of the window that holds the glass. Understanding these terms prevents confusion and ensures you’re measuring the right components.
Common window styles include single-hung windows (one sash moves), double-hung windows (both sashes move), casement windows (hinged on the side), sliding windows (horizontal movement), and picture windows (stationary). Each type may have slightly different measurement requirements. Additionally, you might encounter transom windows (above doors), awning windows (hinged at top), or bay windows (protruding structures). The This Old House window installation guide provides excellent visual references for these different styles.
Step-by-Step Measurement Process
Now let’s dive into the detailed measurement process. Follow these steps carefully for each window you’re replacing.
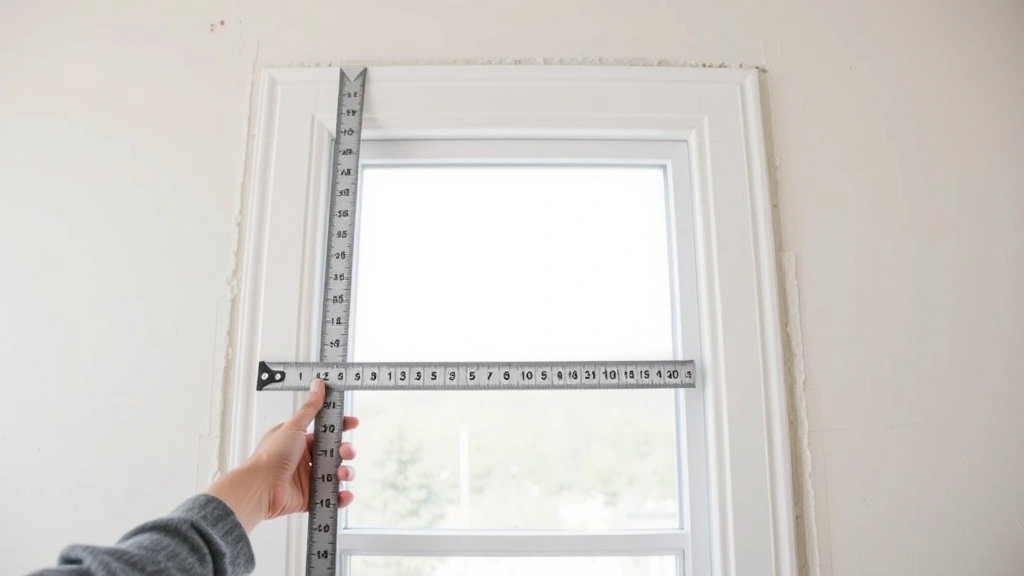
Step 1: Measure the Width
Start by measuring the width of the window opening. You’ll take three measurements: one at the top, one in the middle, and one at the bottom of the opening. Place your measuring tape horizontally across the window frame and record all three measurements. Use the smallest measurement as your width. This accounts for any irregularities in your wall. Measure from the inside surface of the left frame to the inside surface of the right frame, not including any trim or caulking.
Step 2: Measure the Height
Similar to width, measure the height at three points: left side, center, and right side. Record all three measurements and use the smallest measurement as your height. This vertical measurement goes from the inside bottom of the frame to the inside top of the frame. Again, exclude any trim or weatherstripping from your measurements.
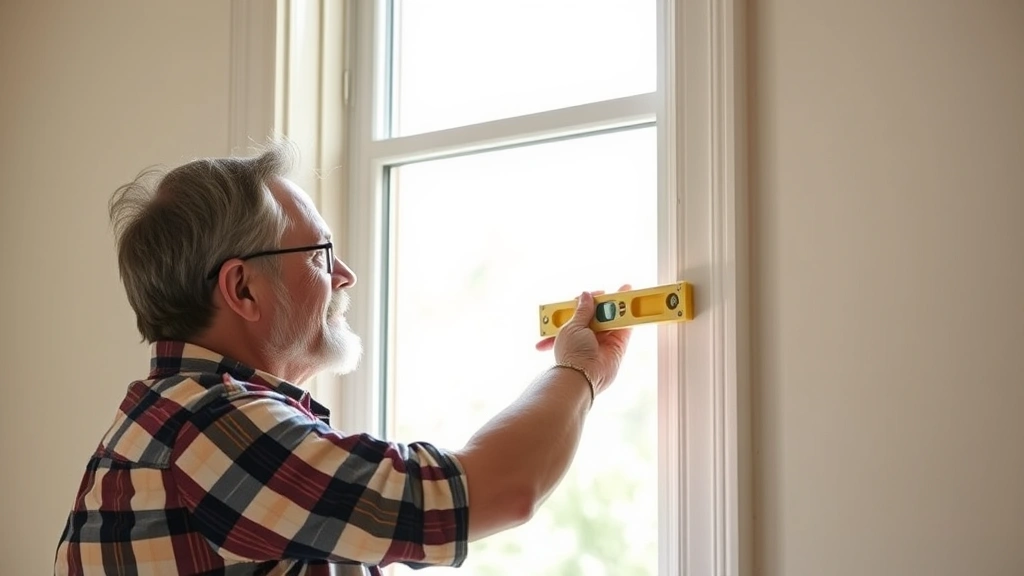
Step 3: Check for Plumb and Square
Use your level to check if the frame is plumb (vertically straight) and square (corners at 90 degrees). Place the level vertically against the left side of the frame, then the right side. Check horizontally at the top and bottom. Note any deviations. If your opening isn’t square, you may need custom-sized windows or professional shimming during installation. This is crucial information to share with your installer.
Step 4: Measure the Depth
Measure how deep your window frame sits in the wall. This measurement goes from the inside edge of the frame to the outer edge of the wall exterior. This depth measurement is essential for selecting the correct window style and ensuring proper installation. Some windows are designed for shallow openings, while others require more depth.
Step 5: Note Obstructions and Special Features
Document any obstacles around the window, such as pipes, electrical outlets, or architectural features. Measure the distance from the window to these obstructions. Also note the presence of window grilles, muntins (decorative dividers), or special glass treatments that need to be replicated in your replacement windows.
Measuring Different Window Styles
Different window types have specific measurement considerations that go beyond basic width and height.
Double-Hung and Single-Hung Windows
For these traditional windows, measure the frame opening as described above. Additionally, measure the individual sash dimensions if you’re replacing just the sashes rather than the entire frame. Note the meeting rail position (where the two sashes meet when closed) and measure how much the sashes overlap. This information helps ensure smooth operation of your replacement windows.
Casement Windows
Casement windows require measurements of the frame opening plus the depth from the frame to any nearby walls or obstacles. Since these windows swing outward, you need to ensure adequate clearance. Measure the distance from the window to any walls, fences, or architectural features that might interfere with the window opening. This is a critical safety and functionality measurement.
Sliding Windows
For sliding windows, measure the frame opening as usual. Additionally, measure the depth of the sill (the horizontal piece at the bottom) and note the track condition. If you’re replacing sliding windows, the track depth affects which replacement windows will fit properly.
Bay and Bow Windows
These multi-window units require measuring each individual window section separately, plus the overall width and height of the entire unit. Measure the angles where the sections meet if they’re not at 90 degrees. These measurements are more complex, and many homeowners prefer to have professionals handle bay window measurements. The Family Handyman window measurement guide has excellent diagrams for bay window measurements.

Common Measurement Mistakes to Avoid
Learning from others’ mistakes can save you significant time and money. Here are the most common measurement errors homeowners make.
Measuring Only Once
This is the biggest mistake. Always take multiple measurements (at least three) at different points. Window openings are rarely perfectly square or plumb, and using only one measurement can result in windows that don’t fit. Your smallest measurement is your safest choice.
Including Trim in Your Measurements
Interior trim, exterior casing, and weatherstripping should never be included in your measurements. Measure only the actual frame opening. If you include trim, your replacement windows will be too large and won’t fit properly. Be very careful to measure from the interior edges of the frame itself.
Forgetting to Check for Square
Out-of-square openings are common, especially in older homes. If you don’t identify this during measurement, your new windows might have gaps or operational issues. Use a level and diagonal measurements to verify square corners.
Not Accounting for Installation Requirements
Different window styles and manufacturers have different installation requirements. Some need specific clearances, others require particular mounting methods. Not understanding these requirements can lead to ordering windows that don’t work for your situation. Always check manufacturer specifications before finalizing your measurements.
Measuring from the Outside
Always measure from the inside of your home. Outside measurements can be inaccurate due to siding thickness and exterior features. Interior measurements are more reliable and what window manufacturers expect.
Ignoring Moisture or Damage Issues
While measuring, note any signs of water damage, rot, or mold around the window frame. This information is crucial for your installer to know before beginning work. Damaged frames might need repair before new windows can be properly installed.
Recording and Organizing Your Measurements
How you document your measurements is just as important as taking them accurately. Good organization prevents confusion and makes the ordering process smoother.
Create a measurement sheet for each window that includes: window location (kitchen, master bedroom, etc.), width measurements (top, middle, bottom), height measurements (left, middle, right), depth measurement, plumb and square notes, any obstructions, window style, and special features. Include photographs of each window from both inside and outside. These photos serve as references if you have questions later.
Number your windows consistently. You might use labels like Front-1, Front-2, Back-1, etc., or simply number them 1-10. Whatever system you choose, use it consistently throughout your documentation. This prevents confusion when ordering and during installation.
Create a summary table listing all windows with their key measurements. This overview helps you spot any measurement inconsistencies. For instance, if all your bedroom windows should be similar sizes but one measurement seems off, you can double-check before ordering.
Consider using a spreadsheet to organize your data. This makes it easy to sort, search, and share information with window manufacturers or contractors. Many window companies provide digital measurement forms you can fill out and submit directly.
Working with Professional Installers
While DIY measuring is possible, many homeowners choose to have professionals handle this critical task. Understanding how professionals approach measurement can improve your own efforts or help you communicate better with contractors.
Professional installers often use laser measuring tools and specialized measurement software that accounts for regional building codes and specific manufacturer requirements. They have experience identifying potential issues that DIYers might miss, such as structural problems, inadequate framing, or installation complications.
If you’re having professionals measure your windows, provide them with your own measurements as a starting point. This helps them understand your window situation and ensures they don’t overlook any windows. Professional measurements typically include detailed notes about frame condition, structural issues, and any special installation requirements.
When working with window manufacturers, don’t hesitate to ask questions about measurement procedures. Most reputable manufacturers, available through Lowe’s and similar retailers, provide excellent measurement guides and customer support. Some even offer free in-home measurement consultations.
The National Association of Certified Home Inspectors maintains resources about proper window measurement and installation standards that can guide your process.
Building codes vary by location, and your measurements must comply with local regulations. Some areas require minimum window sizes for bedrooms (emergency egress), specific installation methods, or energy efficiency standards. Familiarize yourself with your local building code requirements before ordering windows. Your local building department can provide this information, or you can consult with professional installers who know these requirements.
FAQ
What’s the difference between rough opening and frame size?
The rough opening is the hole in your wall structure where the window will be installed. Frame size is the outer dimension of the window itself. Replacement windows are typically 1/2 inch smaller than the rough opening to allow for installation and adjustments. Always measure your rough opening, not the frame size you want.
Should I measure replacement windows the same way as new construction windows?
Not exactly. Replacement windows are designed to fit into existing openings, so you measure the existing frame opening. New construction windows are measured for new rough openings in the wall structure. The measurement process differs significantly, so confirm which type you’re installing before measuring.
How accurate do my measurements need to be?
Measurements should be accurate to within 1/8 inch. Using your smallest measurement (of the three you take) provides a safety margin. Some window manufacturers allow up to 1/2 inch variance, but tighter tolerances are always safer. When in doubt, round down rather than up.
What if my window opening isn’t square?
Out-of-square openings are common. Document the diagonal measurements and note which corners are off. Your installer can use shims to adjust the window during installation. This is why communicating any out-of-square measurements to your contractor is essential. Visit our FixWiseHub Blog for more home improvement guidance on handling structural irregularities.
Can I order windows before having them professionally measured?
It’s risky. While DIY measurements can be accurate, many window companies recommend professional measurement before finalizing orders. The cost of professional measurement is minimal compared to the cost of ordering incorrect windows. Some retailers offer free measurement services, so take advantage of these.
What if I measure wrong and order the wrong size?
Contact the window company immediately. Many have return policies for incorrectly ordered windows, though you may face restocking fees. This is another reason to double-check your measurements before ordering. Prevention is much easier than dealing with returns and reorders.
Do I need to measure interior and exterior separately?
No. Measure from the inside of your home using the interior frame edges. This is the standard method and what window manufacturers expect. Exterior measurements can be inaccurate due to siding and are unnecessary for replacement window ordering.
Related Posts

Superscript in Google Docs: Expert Tips

Strikethrough in Excel: Easy Steps for Beginners
