
Creamed Corn Recipe: Easy Homemade Guide
Creamed Corn Recipe: Easy Homemade Guide
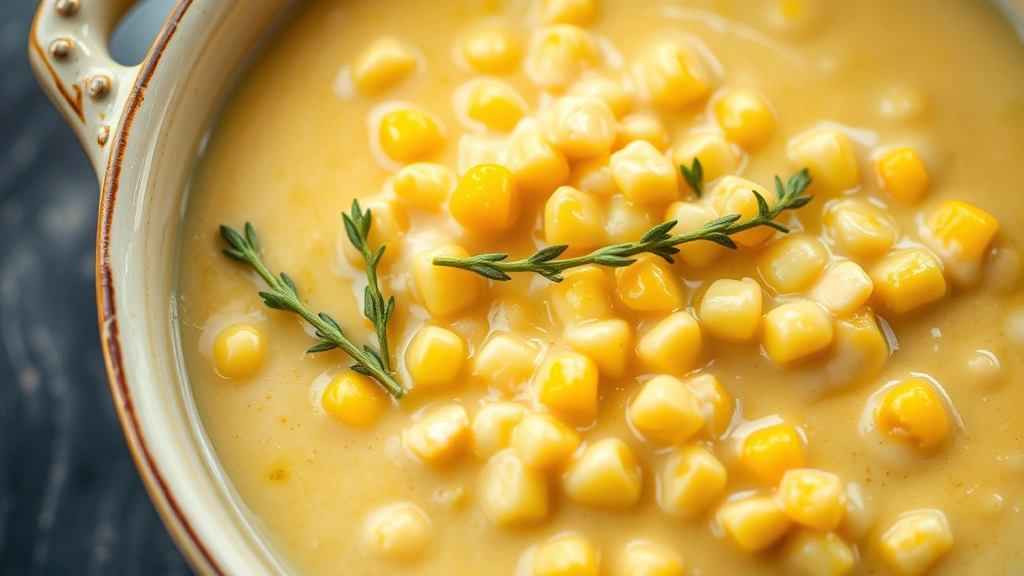
Creamed corn is a classic comfort food that transforms simple fresh corn into a rich, velvety side dish perfect for any meal. Whether you’re preparing a holiday feast or a weeknight dinner, learning how to make creamed corn at home gives you complete control over ingredients and flavors. This homemade version tastes infinitely better than canned alternatives and requires only basic pantry staples and minimal cooking skills.
The beauty of homemade creamed corn lies in its versatility and simplicity. You can prepare it in under 20 minutes using either fresh corn kernels or frozen varieties, making it accessible year-round. The creamy sauce comes together with butter, cream, and seasonings—no complicated techniques required. Once you master this fundamental recipe, you’ll discover endless variations to customize it for your family’s preferences.

What You’ll Need: Ingredients and Equipment
Before diving into cooking, gather your ingredients and tools. For the basic creamed corn recipe, you’ll need four cups of corn kernels, three tablespoons of butter, one small diced onion, two cloves minced garlic, one cup of heavy cream, half cup of whole milk, one teaspoon of salt, half teaspoon of black pepper, and a quarter teaspoon of cayenne pepper for subtle heat. Optional additions include fresh thyme, nutmeg, or sharp cheddar cheese for enhanced flavor profiles.
Equipment requirements are minimal and likely already in your kitchen. A medium saucepan serves as your primary cooking vessel, complemented by a wooden spoon or silicone spatula for stirring. You’ll want a cutting board and sharp knife for dicing the onion and mincing garlic. A measuring cup ensures accurate liquid ratios, while a colander helps drain frozen corn if needed. Having these items prepped before cooking streamlines the entire process, following the mise en place principle used by professional cooks.
Selecting Your Corn: Fresh vs. Frozen
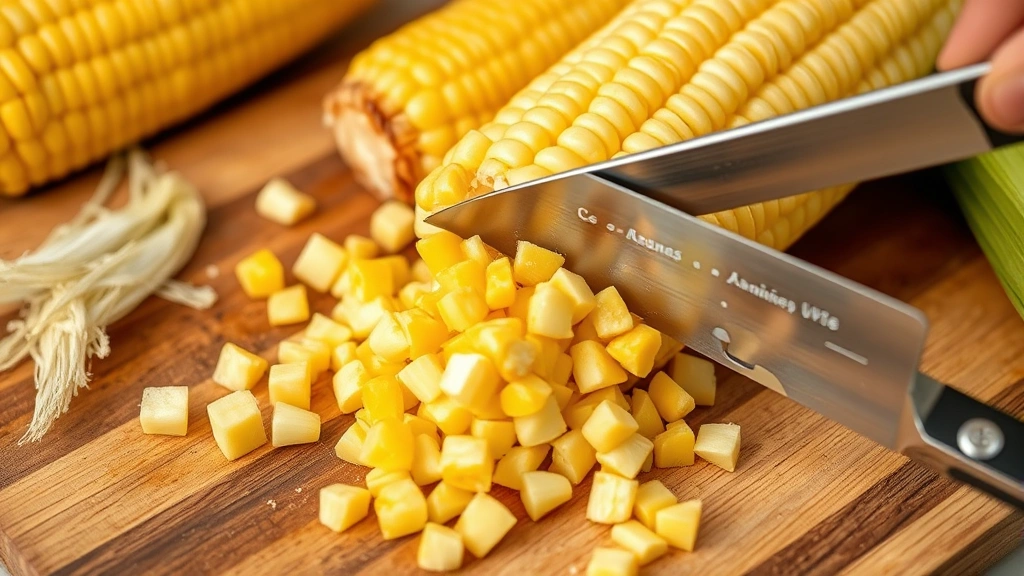
The choice between fresh and frozen corn significantly impacts your cooking experience and final results. Fresh corn, available during summer months at farmers markets and grocery stores, delivers superior flavor and texture. Look for ears with bright green husks and plump kernels that release milky liquid when pierced. To remove kernels from fresh cobs, hold the ear upright on a cutting board and run a sharp knife downward, rotating as you go. One large ear typically yields about one cup of kernels.
Frozen corn offers year-round convenience and actually retains more nutrients than fresh corn shipped long distances. Since frozen kernels are harvested at peak ripeness and immediately flash-frozen, they maintain excellent quality. Simply thaw frozen corn at room temperature for 10-15 minutes or add directly to your pan—no thawing necessary. Frozen corn works perfectly in creamed corn recipes and often costs less than seasonal fresh varieties. Both options produce delicious results, so choose based on availability and preference.
Canned corn is less ideal due to softer texture and added sodium, though it works in a pinch. If using canned, drain thoroughly and rinse under cold water to remove excess liquid and reduce salt content. The recipe proportions remain the same regardless of your corn source, making this dish remarkably adaptable to whatever you have available.
Step-by-Step Preparation Method
Proper preparation ensures smooth cooking and consistent results. Start by dicing your onion into small, uniform pieces—roughly quarter-inch cubes work best. Uniform size promotes even cooking and prevents some pieces from burning while others remain raw. Next, mince your garlic cloves finely; this increases surface area and distributes flavor throughout the dish more effectively than chunky pieces.
Measure your cream and milk into a small bowl or measuring cup before cooking begins. This simple step prevents scrambling mid-recipe when you need both hands managing the pan. If using fresh corn, remove kernels now and set aside. For frozen corn, measure out your four cups and allow partial thawing at room temperature. Having everything prepared before heat touches your pan exemplifies the smart cooking approach that prevents mistakes and ensures professional-quality results.
Consider using a well-organized cooking station similar to restaurant kitchens. Arrange ingredients in the order you’ll use them, keeping frequently-accessed items within arm’s reach. This setup reduces stress and prevents forgotten ingredients that ruin dishes.
Cooking Techniques for Perfect Results
Begin by melting butter in your medium saucepan over medium heat. Once melted and foaming slightly, add your diced onion. Stir frequently for three to four minutes until onion becomes translucent and softens. The onion releases natural sugars during this process, creating a sweet foundation for your creamed corn. Avoid high heat, which browns onions too quickly and creates bitter flavors you cannot remove.
Add minced garlic and cook for exactly one minute, stirring constantly. Garlic burns quickly and becomes acrid if overcooked, so timing matters here. The one-minute window allows garlic flavor to bloom without crossing into burnt territory. Your kitchen should smell wonderfully fragrant at this point—a sign you’re on track.
Pour in your corn kernels and stir well, coating everything in the butter mixture. Cook for two minutes, allowing corn to warm through and absorb the butter and garlic flavors. Now add your cream and milk mixture slowly, stirring constantly to prevent lumps from forming. Increase heat to medium-high and bring the mixture to a gentle simmer, stirring occasionally. This takes approximately five to eight minutes depending on your stove’s power.
Once simmering, reduce heat to low and add salt, black pepper, and cayenne pepper. Stir thoroughly and taste, adjusting seasonings as needed. Cook for an additional five minutes at low simmer, which allows flavors to meld and the sauce to thicken slightly. The corn releases natural starches that gently thicken the cream without requiring flour or cornstarch. If you prefer thicker creamed corn, simmer longer—if you want it thinner, add a splash more milk.
Flavor Variations and Enhancements
Once you master the basic recipe, explore variations that transform creamed corn into something uniquely yours. Cheese versions are immensely popular—stir in one cup of shredded sharp cheddar, gruyere, or smoked gouda during the final minutes of cooking. The residual heat melts cheese perfectly without making it grainy or separated. Cheese-based creamed corn pairs beautifully with roasted vegetables and grilled proteins.
For herb-infused variations, add fresh thyme, rosemary, or sage during cooking. Fresh herbs add brightness without the bitterness of dried varieties. A pinch of freshly grated nutmeg adds subtle warmth and complexity that elevates the dish beyond ordinary. Some cooks add a teaspoon of Dijon mustard or a splash of apple cider vinegar for subtle tang that balances richness.
Roasted red peppers, crispy bacon bits, fresh jalapeños, or caramelized shallots all make excellent additions. For a southwestern twist, incorporate cumin, smoked paprika, and diced poblanos. A touch of honey or maple syrup adds subtle sweetness that complements corn’s natural sugars. The key to successful variations involves adding ingredients at appropriate times—heartier items go in earlier for cooking, delicate herbs and fresh elements finish at the end.
Spicy creamed corn appeals to heat lovers—increase cayenne pepper or add hot sauce to taste. For a lighter version, substitute half-and-half or milk for heavy cream, reducing richness while maintaining creaminess. You might also explore homemade milk alternatives for dietary accommodations, though dairy cream works best for authentic texture and flavor.
Storage and Make-Ahead Tips
Creamed corn stores beautifully in the refrigerator for three to four days in an airtight container. The creamy sauce thickens slightly as it cools, which is perfectly normal. To reheat, transfer to a saucepan and warm over medium-low heat, stirring frequently and adding a splash of milk if the mixture seems too thick. Microwave reheating works in a pinch—use 50% power in one-minute intervals, stirring between each interval to ensure even heating.
For freezer storage, allow creamed corn to cool completely before transferring to freezer-safe containers, leaving half-inch headspace for expansion. Properly stored creamed corn freezes for up to three months. Thaw overnight in the refrigerator before reheating. Note that freezing slightly affects texture, making it slightly less creamy than fresh, but flavor remains excellent.
Make-ahead convenience is one of creamed corn’s greatest strengths. Prepare it completely the morning of your event and refrigerate until serving time. Simply reheat gently before plating. Many cooks prepare the recipe through the simmering stage, then finish cooking just before serving for maximum freshness. This flexibility makes creamed corn ideal for holiday meals when oven space is precious and stovetop real estate is limited.
Troubleshooting Common Issues
Lumpy texture: This results from adding cold cream mixture too quickly to hot butter. Solution: Warm your cream and milk slightly before adding, and pour slowly while stirring constantly. If lumps already formed, strain the mixture through a fine-mesh sieve and return to the pan.
Too thin or watery: Insufficient simmering time prevents natural starches from thickening the sauce. Solution: Simmer longer over low heat, stirring occasionally. Alternatively, mix one tablespoon of cornstarch with two tablespoons of cold milk, then stir this slurry into your creamed corn and simmer for two minutes until thickened.
Too thick or pasty: Over-reduction or too much cornstarch thickener causes this issue. Solution: Whisk in additional milk or cream one tablespoon at a time until reaching desired consistency. Work slowly since liquid additions are easier than removing excess liquid.
Burnt flavor: High heat or long cooking times scorch the bottom of the pan. Solution: Always use medium or medium-low heat after the initial sautéing stage. Stir frequently and avoid leaving the pan unattended. Use a heavy-bottomed pan that distributes heat evenly.
Bland taste: Insufficient seasoning is the most common complaint. Solution: Taste and adjust salt and pepper generously. Remember that corn’s natural sweetness can mask seasoning, so be bold. Add acid in the form of lemon juice or vinegar to brighten flavors and balance richness.
Separated or broken sauce: This happens when cream boils vigorously or when ingredients are incompatible temperatures. Solution: Remove from heat immediately if you notice separation. Whisk in a tablespoon of cold milk to help emulsify the sauce back together. Return to low heat and stir gently until smooth.
FAQ
Can I make creamed corn without heavy cream?
Absolutely. Substitute half-and-half, whole milk, or evaporated milk for heavy cream. The result will be less rich but still delicious. For dairy-free versions, use coconut milk or cashew cream. The cooking method remains identical, though you may need to simmer slightly longer for adequate thickening since non-dairy options contain less fat.
How do I know when creamed corn is done cooking?
Creamed corn is done when the sauce coats the back of a spoon and corn kernels are heated through. The mixture should simmer gently for at least five minutes total to allow flavors to meld. If you prefer thicker consistency, continue simmering—if it reaches your desired thickness before five minutes, you can serve immediately, though longer cooking improves flavor development.
Can I use corn puree instead of whole kernels?
Yes, though the texture differs significantly. Blend half your corn kernels with cream until smooth, then combine with remaining whole kernels. This creates a chunkier texture than all-puree but creamier than all-whole kernels. Some prefer this hybrid approach for balanced texture and mouthfeel.
What’s the best way to serve creamed corn?
Serve creamed corn warm as a side dish alongside roasted chicken, grilled steak, baked salmon, or vegetarian mains. It pairs beautifully with mashed potatoes, roasted vegetables, and green salads. Creamed corn works equally well at casual family dinners and formal holiday tables. Transfer to a serving dish and garnish with fresh herbs, crispy bacon, or a sprinkle of paprika for visual appeal.
Is creamed corn healthy?
Creamed corn contains cream and butter, making it higher in calories and saturated fat than plain corn. However, corn itself provides fiber, vitamins, and minerals. For lighter versions, use half-and-half or milk instead of heavy cream, reduce butter, or incorporate vegetables. Portion control makes creamed corn a reasonable addition to balanced meals, especially when paired with protein and vegetables.
Can I double this recipe for large crowds?
Definitely. Simply multiply all ingredients by your desired factor. Cooking time increases slightly—monitor carefully and adjust heat as needed. Use a larger saucepan to prevent boiling over. Taste and adjust seasonings after cooking, as seasoning needs sometimes increase disproportionately in larger batches. Prepare in batches if your pan capacity is limited rather than overcrowding a single pan.
What’s the difference between creamed corn and corn chowder?
Creamed corn focuses on corn as the primary ingredient with minimal additions, resulting in a thick, corn-forward side dish. Corn chowder includes additional vegetables like potatoes, celery, and onions, plus more liquid, creating a soup-like consistency. Both share the creamy base but differ significantly in texture, consistency, and serving style. Check out related how-to guides for soup and chowder techniques.
Related Posts

Superscript in Google Docs: Expert Tips

Strikethrough in Excel: Easy Steps for Beginners
